CD player PONTIAC VIBE 2010 Owners Manual
[x] Cancel search | Manufacturer: PONTIAC, Model Year: 2010, Model line: VIBE, Model: PONTIAC VIBE 2010Pages: 318, PDF Size: 1.7 MB
Page 1 of 318

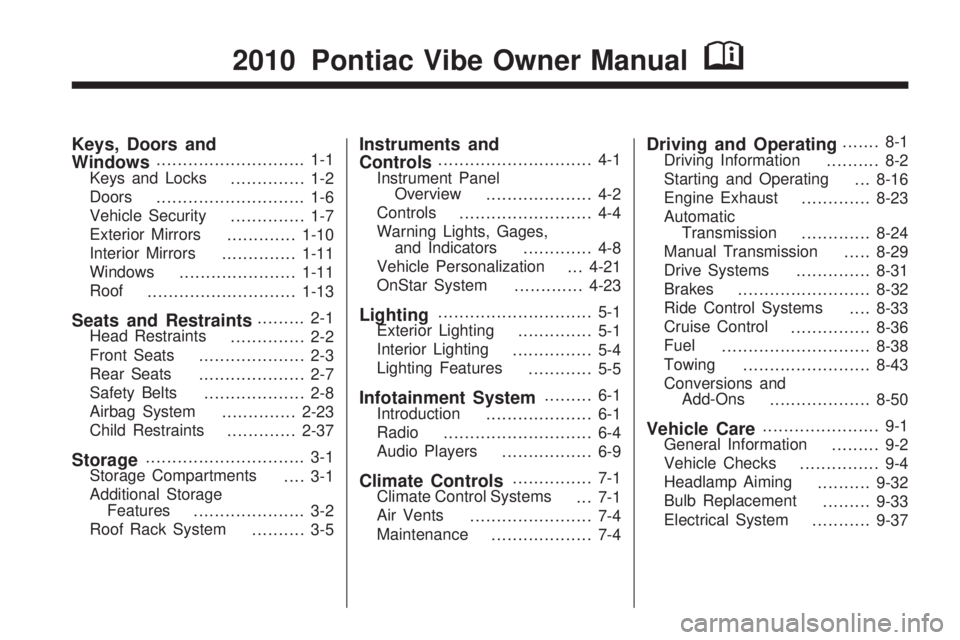
Keys, Doors and
Windows............................ 1-1
Keys and Locks .............. 1-2
Doors ............................ 1-6
Vehicle Security .............. 1-7
Exterior Mirrors .............1-10
Interior Mirrors ..............1-11
Windows ...................... 1-11
Roof ............................ 1-13
Seats and Restraints......... 2-1
Head Restraints .............. 2-2
Front Seats .................... 2-3
Rear Seats .................... 2-7
Safety Belts ................... 2-8
Airbag System ..............2-23
Child Restraints .............2-37
Storage.............................. 3-1
Storage Compartments .... 3-1
Additional Storage Features ..................... 3-2
Roof Rack System .......... 3-5
Instruments and
Controls............................. 4-1
Instrument Panel Overview .................... 4-2
Controls ......................... 4-4
Warning Lights, Gages, and Indicators ............. 4-8
Vehicle Personalization . . . 4-21
OnStar System .............4-23
Lighting............................. 5-1
Exterior Lighting .............. 5-1
Interior Lighting ............... 5-4
Lighting Features ............ 5-5
Infotainment System......... 6-1
Introduction .................... 6-1
Radio ............................ 6-4
Audio Players ................. 6-9
Climate Controls............... 7-1
Climate Control Systems ... 7-1
Air Vents ....................... 7-4
Maintenance ................... 7-4
Driving and Operating....... 8-1
Driving Information .......... 8-2
Starting and Operating . . . 8-16
Engine Exhaust .............8-23
Automatic Transmission .............8-24
Manual Transmission .....8-29
Drive Systems ..............8-31
Brakes ......................... 8-32
Ride Control Systems ....8-33
Cruise Control ...............8-36
Fuel ............................ 8-38
Towing ........................ 8-43
Conversions and Add-Ons ................... 8-50
Vehicle Care...................... 9-1
General Information ......... 9-2
Vehicle Checks ............... 9-4
Headlamp Aiming ..........9-32
Bulb Replacement .........9-33
Electrical System ...........9-37
2010 Pontiac Vibe Owner ManualM
Page 115 of 318

Infotainment
System
IntroductionIntroduction.........................
.6-1
Operation ............................
.6-2
RadioAM-FM Radio......................
.6-4
Satellite Radio .....................
.6-6
Radio Reception ..................
.6-8
Fixed Mast Antenna ..............
.6-8
Satellite Radio Antenna ..........6-9
Audio PlayersCD Player...........................
.6-9
MP3 .................................
.6-11
Auxiliary Devices ................
.6-14
Introduction
Read the following pages to
become familiar with the audio
system’s features.
{CAUTION
Taking your eyes off the road for
extended periods could cause a
crash resulting in injury or death
to you or others. Do not give
extended attention to
entertainment tasks while driving.
This system provides access to
many audio and non audio listings.
To minimize taking your eyes
off the road while driving, do the
following while the vehicle is parked:
•Become familiar with the
operation and controls of
the audio system.
•Set up the tone, speaker
adjustments, and preset radio
stations. For more information, see
Defensive
Driving on page 8-2.
Notice: Contact your dealer/
retailer before adding any
equipment.
Adding audio or communication
equipment could interfere with the
operation of the vehicle’s engine,
radio, or other systems, and could
damage them. Follow federal
rules covering mobile radio
and telephone equipment.
The vehicle has Retained Accessory
Power (RAP). With RAP, the audio
system can be played even after the
ignition is turned off. See Retained
Accessory Power (RAP) on
page 8-18 for more information.
Infotainment System 6-1
Page 123 of 318

Satellite Radio Antenna
For vehicles with XM™ Satellite
Radio Service, the antenna is
located on the roof of the vehicle.
Keep the antenna clear of
obstructions for clear radio
reception.
If the vehicle has a sunroof, the
performance of the XM system may
be affected if the sunroof is open.
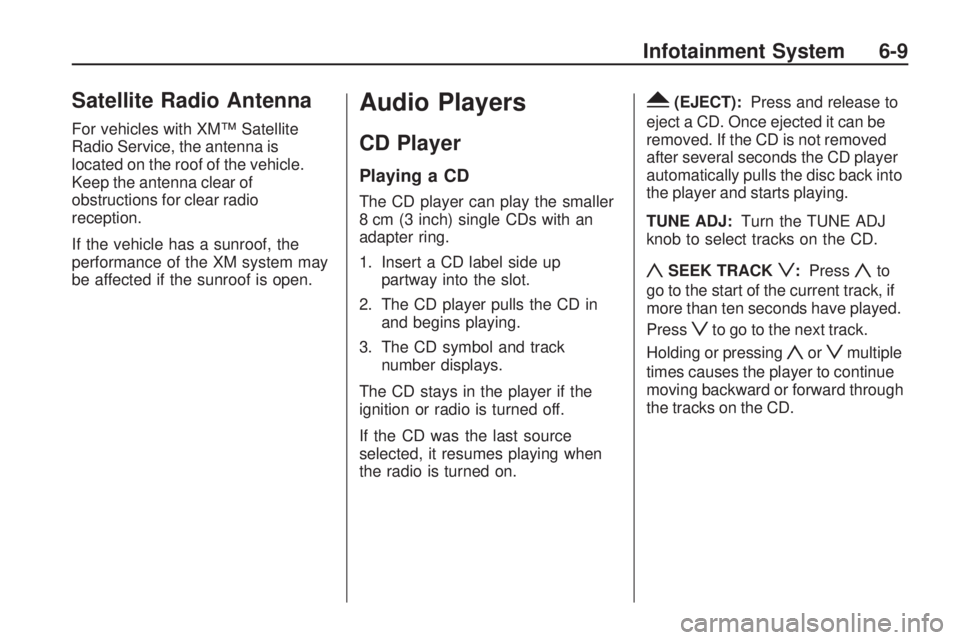
Audio Players
CD Player
Playing a CD
The CD player can play the smaller
8 cm (3 inch) single CDs with an
adapter ring.
1. Insert a CD label side uppartway into the slot.
2. The CD player pulls the CD in and begins playing.
3. The CD symbol and track number displays.
The CD stays in the player if the
ignition or radio is turned off.
If the CD was the last source
selected, it resumes playing when
the radio is turned on.
Y(EJECT): Press and release to
eject a CD. Once ejected it can be
removed. If the CD is not removed
after several seconds the CD player
automatically pulls the disc back into
the player and starts playing.
TUNE ADJ: Turn the TUNE ADJ
knob to select tracks on the CD.
ySEEK TRACKz: Pressyto
go to the start of the current track, if
more than ten seconds have played.
Press
zto go to the next track.
Holding or pressing
yorzmultiple
times causes the player to continue
moving backward or forward through
the tracks on the CD.
Infotainment System 6-9
Page 124 of 318

(FWD REV)(Fast Forward/
Fast Reverse): Press and hold
(
to advance playback quickly within a
track. Release to resume playing the
track. Press and hold
)to reverse
playback quickly within a track.
Release to resume playing the track.
BAND: Press to listen to the radio
when a CD is playing.
CD/AUX (CD/Auxiliary): Press to
play a CD when listening to the
radio.
Press the CD/AUX button again and
the system begins playing audio from
the connected portable audio player.
If a portable audio player is not
connected, “No Aux Input Device”
displays.
See “Using the Auxiliary Input Jack”
later in this section. INFO (Information):
Press to
switch the display between the track
number, elapsed time of the track,
and the time. When the ignition is off,
press this button to display the time.
EQ (Equalization): Press to select
an equalization setting while playing
a CD. See “EQ” listed previously for
more information. If an EQ setting is
selected for a CD, it is activated each
time a CD is played.
Care of CDs
The sound quality of the CD player
can be reduced because of:
•The CD-R quality.
•The method of recording
the CD-R.
•The quality of the music that has
been recorded on the CD-R.
•The way the CD-R has been
handled. Store CD-R(s) in their original cases
or other protective cases and away
from dust and direct sunlight. The
CD player scans the bottom surface
of the disc. If the surface of a CD
is damaged, such as cracked,
broken, or scratched, the CD may
not play properly or at all. Do not
touch the bottom side of a CD while
handling it; this could damage the
surface. Pick up CDs by grasping the
outer edges or the edge of the hole
and the outer edge.
To clean a CD, use a soft lint free
cloth, or dampen a clean soft
cloth in a mild neutral detergent
solution mixed with water. Wipe the
CD from the center to the edge.
6-10 Infotainment System
Page 125 of 318

Care of The CD Player
Use a marking pen to identify CDs,
do not add labels.
Do not use CD lens cleaners; they
could damage the CD player.
Notice:If a label is added to
a CD, or more than one CD is
inserted into the slot at a time,
or an attempt is made to play
scratched or damaged CDs, the
CD player could be damaged.
While using the CD player, use
only CDs in good condition
without any label, load one CD at a
time, and keep the CD player and
the loading slot free of foreign
materials, liquids, and debris.
If an error displays, see “CD
Messages” later in this section.
Playing an MP3 CD-R Disc
Radios with the MP3 feature
are capable of playing an MP3
CD-R disc. See MP3 on page 6-11
for more information.
CD Messages
If the CD ejects, it could be for one
of the following reasons:
•The CD player is very hot. When
the temperature returns to
normal, the CD should play.
•The road is very rough. When
the road becomes smoother,
the CD should play.
•The CD is dirty, scratched, wet,
or upside down.
•The air is very humid. If so, wait
about an hour and try again.
•The format of the CD might not
be compatible. See ‘‘Using an
MP3’’ later in this section.
•A problem may have occurred
while burning the CD.
•The label could be caught in the
CD player.
If any error occurs repeatedly or if
an error cannot be corrected, contact
your dealer/retailer. If the radio
displays an error message, write it
down and provide it to your dealer/
retailer when reporting the problem.
MP3
MP3 CD-R Disc
MP3 Format
The MP3 player will only play CD-R
discs. It can read and play a
maximum of:
•50 folders
•11 folders in depth
•50 playlists
•10 sessions
•255 files
All folders, playlists, sessions and
files over the maximum are ignored.
Record an MP3 disc:
•Onto a CD-R disc.
•Record playlists with
an .m3u or .wpl extension.
•Do not mix standard audio and
MP3 files on the same disc.
•Record the entire disc at once.
•Finalize the disc when recording
an MP3 disc with multiple
sessions.
Infotainment System 6-11
Page 127 of 318

Music Navigator
The music navigator feature lets
MP3 CDs play in order by artist or
album.
•The MP3 player scans the disc
to sort the files by artist and
album ID3 tag information.
•It can take several minutes to
scan the disc depending on
the number of MP3 files recorded
to the CD-R.
•The radio starts playing while the
disc is being scanned.
•After the scan is finished, the
disc starts playing.
Playing an MP3
The MP3 player can play the
smaller 3 inch (8 cm) single CDs
with an adapter ring.
1. Insert a CD label side uppartway into the slot.
2. The CD player pulls the CD in and begins playing. 3. The CD stays in the player if the
ignition or radio is turned off.
4. If the CD was the last source selected, it resumes playing
when the radio is turned on.
Y(EJECT): Press and release to
eject a CD. Once the disc is ejected
it can be removed. If the CD is not
removed after several seconds the
CD player automatically pulls the
disc back into the player and starts
playing.
ySEEK TRACKz: Press to
go to the start of the current track,
if more than ten seconds have
played. Press
zto go to the next
track. Holding or pressing
yorz
multiple times will cause the player
to continue moving backward or
forward through the tracks on
the CD.
(FWD REV)(Fast Forward/
Fast Reverse): Press and hold
(
to advance playback quickly within a
track. Release
(to resume playing
the track. Press and hold
)to
reverse playback quickly within a
track. Release
(to resume playing
the track.
BAND: Press to listen to the radio
when a CD is playing.
INFO (Information): Press when
an MP3 CD is loaded, then press
the button below the Song, Artist,
Album, or Folder label to view the
information.
CD/AUX (CD/Auxiliary): Press to
play a CD when listening to the radio.
Press the CD/AUX button again and
the system begins playing audio from
the connected portable audio player.
If a portable audio player is not
connected, “No Aux Input Device”
displays.
Infotainment System 6-13
Page 128 of 318

RDM (Random):Press the button
below the RDM label to hear
the tracks in random order.
S c(Previous Folder): Press
the button below to go to the
first track in the previous folder.
c T(Next Folder): Press
the button below to go to the first
track in the next folder.
h(Music Navigator): Press the
button below to play MP3 files in
order by artist or album.
SORT: Press the button below the
SORT label to change between
playback by artist or album while
using the Music Navigator.
BACK: Press the button below the
BACK label to return to the main
music navigator screen.
ST(Previous/Next): Press
the button below to go to the
next or previous artist or album
in alphabetical order while using
the Music Navigator.
Auxiliary Devices
The radio has an auxiliary input
jack located on the lower right side
of the faceplate. This is not an audio
output; do not plug the headphone
set into the front auxiliary input jack.
An external audio device such as an
iPod, laptop computer, MP3 player,
CD changer, etc. can be connected
to the auxiliary input jack for use as
another audio source.
To use a portable audio player,
connect a 3.5 mm (1/8 inch) cable
to the radio’s front auxiliary input
jack. When a device is connected,
press the radio CD/AUX button
to begin playing audio from
the device over the vehicle
speakers. PWR VOL (Power/Volume):
Turn
to adjust the volume. Additional
volume adjustments may have to be
made from the portable device if
the volume is too quiet or not loud.
BAND: Press to listen to the
radio when a portable audio device
is playing.
CD/AUX (CD/Auxiliary): Press to
play a CD when a portable audio
device is playing. Press again and
the system begins playing audio from
the connected portable audio player.
6-14 Infotainment System
Page 309 of 318

A
Accessories andModifications ...................... 9-3
Accessory Power .................8-18
Adding Equipment to the Airbag-Equipped Vehicle ....2-35
Add-On Electrical Equipment ....................... 8-50
Adjustments Seat, Front ........................ 2-4
Seat, Initial Drive ................ 2-3
Air Cleaner/Filter, Engine .......9-16
Air Filter, Passenger Compartment ..................... 7-4
Air Vents .............................. 7-4
Airbag System Check ............................. 2-36
How Does an Airbag Restrain? ..................... 2-28
Passenger Sensing System ........................ 2-29
What Makes an Airbag Inflate? ........................ 2-27Airbag System (cont.)
What Will You See Afteran Airbag Inflates? ........2-28
When Should an Airbag Inflate? ........................ 2-26
Where Are the Airbags? .....2-24
Airbags Adding Equipment to theVehicle ........................ 2-35
Passenger Status Indicator ....................... 4-13
Readiness Light ................4-12
Servicing Airbag-Equipped Vehicles ....................... 2-34
System Check ..................2-23
Alarm System Anti-Theft .......................... 1-7
All-Wheel Drive ............8-31, 9-29
All-Wheel-Drive Service Light ............................... 4-18
AM-FM Radio ........................ 6-4
Antenna Satellite Radio ................... 6-9
Antilock Brake System (ABS) ..................8-32
Warning Light ................... 4-17Anti-Theft
Alarm System .................... 1-7
Appearance Care Exterior ........................... 9-75
Interior ............................ 9-80
Ashtrays ...............................
4-8
Assistance Program, Roadside ......................... 12-6
Audio Players ........................ 6-9
CD ................................... 6-9
MP3 ............................... 6-11
Audio System Fixed Mast Antenna ............ 6-8
Audio Systems Radio Reception ................. 6-8
Automatic Headlamp System .............. 5-3
Automatic Transmission ............8-24, 8-27
Fluid ............................... 9-12
Manual Mode ................... 8-28
Auxiliary Devices ..................6-14
INDEX i-1
Page 310 of 318

B
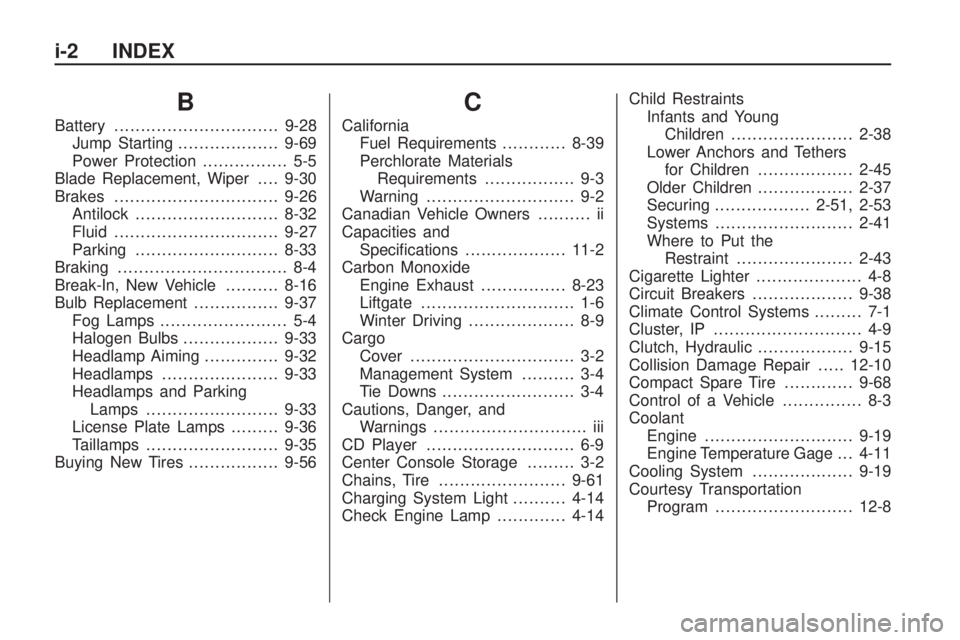
Battery............................... 9-28
Jump Starting ................... 9-69
Power Protection ................ 5-5
Blade Replacement, Wiper ....9-30
Brakes ............................... 9-26
Antilock ........................... 8-32
Fluid ............................... 9-27
Parking ........................... 8-33
Braking ................................ 8-4
Break-In, New Vehicle ..........8-16
Bulb Replacement ................9-37
Fog Lamps ........................ 5-4
Halogen Bulbs ..................9-33
Headlamp Aiming ..............9-32
Headlamps ...................... 9-33
Headlamps and Parking Lamps ......................... 9-33
License Plate Lamps .........9-36
Taillamps ......................... 9-35
Buying New Tires .................9-56
C
California
Fuel Requirements ............8-39
Perchlorate Materials Requirements ................. 9-3
Warning ............................ 9-2
Canadian Vehicle Owners .......... ii
Capacities and Specifications ................... 11-2
Carbon Monoxide Engine Exhaust ................8-23
Liftgate ............................. 1-6
Winter Driving .................... 8-9
Cargo Cover ............................... 3-2
Management System .......... 3-4
Tie Downs ......................... 3-4
Cautions, Danger, and Warnings ............................. iii
CD Player ............................ 6-9
Center Console Storage ......... 3-2
Chains, Tire ........................ 9-61
Charging System Light ..........4-14
Check Engine Lamp .............4-14Child Restraints
Infants and YoungChildren ....................... 2-38
Lower Anchors and Tethers for Children .................. 2-45
Older Children ..................2-37
Securing .................. 2-51, 2-53
Systems .......................... 2-41
Where to Put the Restraint ...................... 2-43
Cigarette Lighter .................... 4-8
Circuit Breakers ...................9-38
Climate Control Systems ......... 7-1
Cluster, IP ............................ 4-9
Clutch, Hydraulic ..................9-15
Collision Damage Repair .....12-10
Compact Spare Tire .............9-68
Control of a Vehicle ............... 8-3
Coolant Engine ............................ 9-19
Engine Temperature Gage . . . 4-11
Cooling System ...................9-19
Courtesy Transportation Program .......................... 12-8
i-2 INDEX