headlamp PONTIAC VIBE 2010 Owners Manual
[x] Cancel search | Manufacturer: PONTIAC, Model Year: 2010, Model line: VIBE, Model: PONTIAC VIBE 2010Pages: 318, PDF Size: 1.7 MB
Page 1 of 318
Keys, Doors and
Windows............................ 1-1
Keys and Locks .............. 1-2
Doors ............................ 1-6
Vehicle Security .............. 1-7
Exterior Mirrors .............1-10
Interior Mirrors ..............1-11
Windows ...................... 1-11
Roof ............................ 1-13
Seats and Restraints......... 2-1
Head Restraints .............. 2-2
Front Seats .................... 2-3
Rear Seats .................... 2-7
Safety Belts ................... 2-8
Airbag System ..............2-23
Child Restraints .............2-37
Storage.............................. 3-1
Storage Compartments .... 3-1
Additional Storage Features ..................... 3-2
Roof Rack System .......... 3-5
Instruments and
Controls............................. 4-1
Instrument Panel Overview .................... 4-2
Controls ......................... 4-4
Warning Lights, Gages, and Indicators ............. 4-8
Vehicle Personalization . . . 4-21
OnStar System .............4-23
Lighting............................. 5-1
Exterior Lighting .............. 5-1
Interior Lighting ............... 5-4
Lighting Features ............ 5-5
Infotainment System......... 6-1
Introduction .................... 6-1
Radio ............................ 6-4
Audio Players ................. 6-9
Climate Controls............... 7-1
Climate Control Systems ... 7-1
Air Vents ....................... 7-4
Maintenance ................... 7-4
Driving and Operating....... 8-1
Driving Information .......... 8-2
Starting and Operating . . . 8-16
Engine Exhaust .............8-23
Automatic Transmission .............8-24
Manual Transmission .....8-29
Drive Systems ..............8-31
Brakes ......................... 8-32
Ride Control Systems ....8-33
Cruise Control ...............8-36
Fuel ............................ 8-38
Towing ........................ 8-43
Conversions and Add-Ons ................... 8-50
Vehicle Care...................... 9-1
General Information ......... 9-2
Vehicle Checks ............... 9-4
Headlamp Aiming ..........9-32
Bulb Replacement .........9-33
Electrical System ...........9-37
2010 Pontiac Vibe Owner ManualM
Page 5 of 318
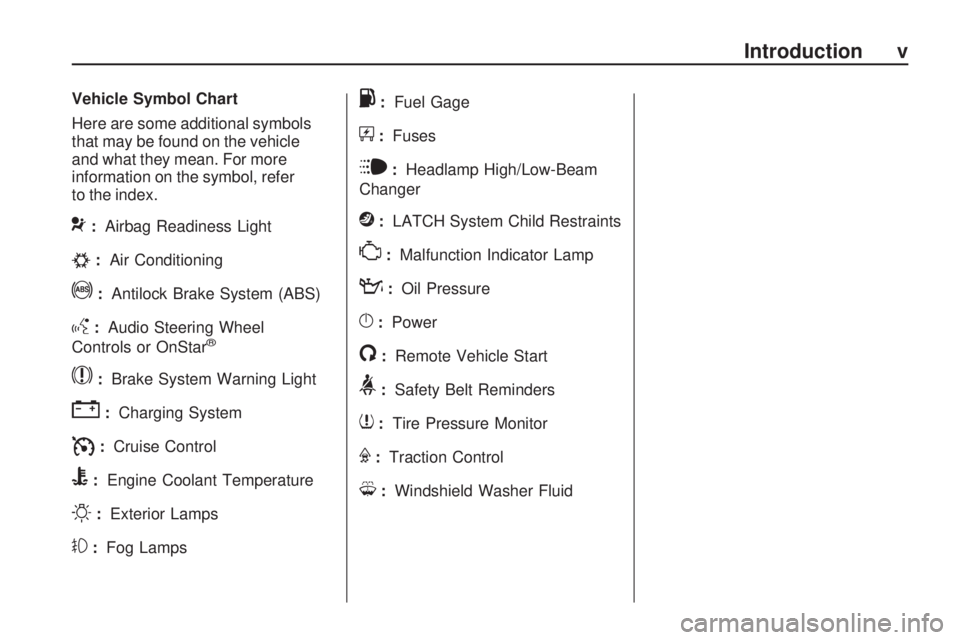
Vehicle Symbol Chart
Here are some additional symbols
that may be found on the vehicle
and what they mean. For more
information on the symbol, refer
to the index.
9:Airbag Readiness Light
#:Air Conditioning
!:Antilock Brake System (ABS)
g:Audio Steering Wheel
Controls or OnStar®
$: Brake System Warning Light
":Charging System
I:Cruise Control
B:Engine Coolant Temperature
O:Exterior Lamps
#:Fog Lamps
.:Fuel Gage
+:Fuses
i:Headlamp High/Low-Beam
Changer
j: LATCH System Child Restraints
*:Malfunction Indicator Lamp
::Oil Pressure
}:Power
/:Remote Vehicle Start
>:Safety Belt Reminders
7:Tire Pressure Monitor
F:Traction Control
M:Windshield Washer Fluid
Introduction v
Page 17 of 318
Interior Mirrors
Manual Rearview Mirror
Adjust the inside rearview mirror
to see clearly behind the vehicle.
Hold the mirror in the center to
move it up, down, and side to
side. The day/night lever lets you
adjust the mirror to avoid glare from
headlamps behind your vehicle.
Move the lever to the right for
nighttime use and back to the
center for daytime use.
Vehicles with OnStar have three
additional control buttons located at
the bottom of the mirror. See your
dealer/retailer for more information
on the system and how to subscribe
to OnStar. SeeOnStar
®System on
page 4-23 for more information on
the services OnStar provides.
Windows
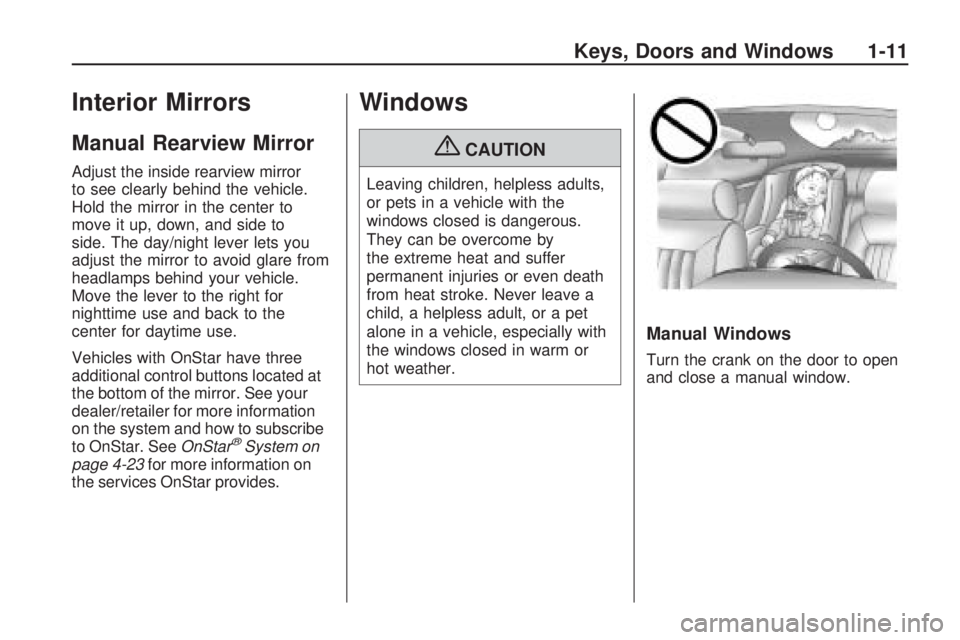
{CAUTION
Leaving children, helpless adults,
or pets in a vehicle with the
windows closed is dangerous.
They can be overcome by
the extreme heat and suffer
permanent injuries or even death
from heat stroke. Never leave a
child, a helpless adult, or a pet
alone in a vehicle, especially with
the windows closed in warm or
hot weather.
Manual Windows
Turn the crank on the door to open
and close a manual window.
Keys, Doors and Windows 1-11
Page 102 of 318
If the light comes on and stays on, it
means that oil is not flowing through
the engine properly. The vehicle
could be low on oil and might have
some other system problem.
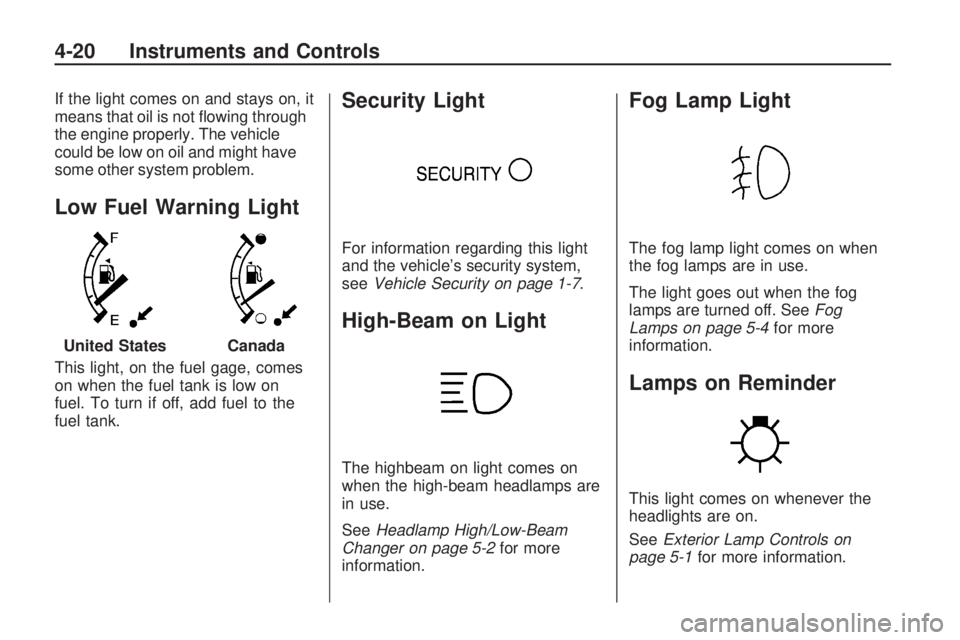
Low Fuel Warning Light
This light, on the fuel gage, comes
on when the fuel tank is low on
fuel. To turn if off, add fuel to the
fuel tank.
Security Light
For information regarding this light
and the vehicle’s security system,
seeVehicle Security on page 1-7 .
High-Beam on Light
The highbeam on light comes on
when the high-beam headlamps are
in use.
SeeHeadlamp High/Low-Beam
Changer on page 5-2 for more
information.
Fog Lamp Light
The fog lamp light comes on when
the fog lamps are in use.
The light goes out when the fog
lamps are turned off. See Fog
Lamps on page 5-4 for more
information.
Lamps on Reminder
This light comes on whenever the
headlights are on.
See Exterior Lamp Controls on
page 5-1 for more information.
United States
Canada
4-20 Instruments and Controls
Page 109 of 318
Lighting
Exterior LightingExterior Lamp Controls...........5-1
Headlamp High/Low-Beam Changer ............................
.5-2
Flash-to-Pass .......................
.5-2
Daytime Running Lamps (DRL) .....................
.5-2
Automatic Headlamp System .............................
.5-3
Hazard Warning Flashers .......5-3
Turn and Lane-Change Signals ..............................
.5-3
Fog Lamps ..........................
.5-4
Interior LightingInstrument Panel Illumination
Control ..............................
.5-4
Dome Lamps .......................
.5-4
Reading Lamps ....................
.5-5
Lighting FeaturesEntry Lighting ......................
.5-5
Battery Power Protection ........5-5
Exterior Lighting
Exterior Lamp Controls
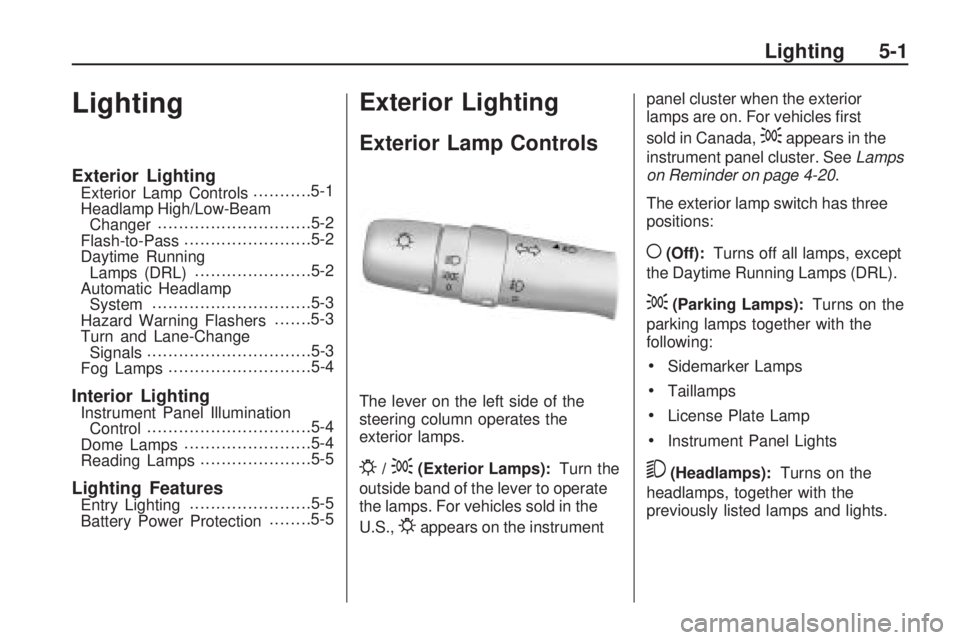
The lever on the left side of the
steering column operates the
exterior lamps.
P/;(Exterior Lamps):
Turn the
outside band of the lever to operate
the lamps. For vehicles sold in the
U.S.,
Pappears on the instrument panel cluster when the exterior
lamps are on. For vehicles first
sold in Canada,
;appears in the
instrument panel cluster. See Lamps
on Reminder on page 4-20 .
The exterior lamp switch has three
positions:
((Off): Turns off all lamps, except
the Daytime Running Lamps (DRL).
;(Parking Lamps): Turns on the
parking lamps together with the
following:
•Sidemarker Lamps
•Taillamps
•License Plate Lamp
•Instrument Panel Lights
5(Headlamps): Turns on the
headlamps, together with the
previously listed lamps and lights.
Lighting 5-1
Page 110 of 318
Headlamps on Reminder
A tone sounds when the ignition is
turned to LOCK/OFF, the driver door
is opened and the key is removed
from the ignition while the lamps
are on.
Headlamp High/
Low-Beam Changer
The headlamps must be on for this
feature to work.
Push the turn signal lever away
from you to turn the high beams on.
This instrument panel cluster
light
3comes on while the high
beam headlamps are on.
Pull the lever towards you to return
to low beams.
Flash-to-Pass
This feature is used to signal to the
vehicle ahead that you want to pass.
With the lever in the low-beam
position, pull the lever toward you to
momentarily switch to high-beams.
If the headlamps are on when the
lever is released, the high-beams
will return to low-beam.
Daytime Running
Lamps (DRL)
Daytime Running Lamps (DRL) can
make it easier for others to see the
front of your vehicle during the day.
Fully functional DRL are required
on all vehicles first sold in Canada. The DRL system makes the
headlamps come on at a reduced
brightness when the following
conditions are met:
•The ignition is on with the engine
running.
•The exterior lamps switch is off.
•The parking brake is released.
When the exterior lamp switch is
turned to the headlamp position, the
DRL go off and the headlamps come
on. The other lamps that come on
with the headlamps also come on.
The headlamps automatically switch
from DRL to the regular headlamps
depending on the darkness of
the surroundings. See Automatic
Headlamp System on page 5-3 .
DRL also comes on if only the
parking lamps are being used.
5-2 Lighting
Page 111 of 318
Automatic Headlamp
System
When it is dark enough outside,
the automatic headlamp system
turns on the low-beam headlamps
at the normal brightness along with
other lamps such as the taillamps,
sidemarker, parking lamps and
instrument panel lights. An indicator
light on the instrument panel comes
on when the headlamps are on.
SeeInstrument Cluster on page 4-9 .
If the vehicle is driven through a
parking garage, overcast weather,
or a tunnel, the automatic headlamp
system may turn on. There is a
delay before the lights turn on when
starting the car at night.
Do not cover the automatic light
sensor, located on the top left corner
of the instrument panel. If the sensor
is covered the headlamps will stay on
continuously.
Hazard Warning Flashers
|
(Hazard Warning Flasher):
Press this button located on the
instrument panel, to make the front
and rear turn signal lamps flash on
and off. This warns others that you
are having trouble.
Press
|again to turn the
flashers off.
Turn and Lane-Change
Signals
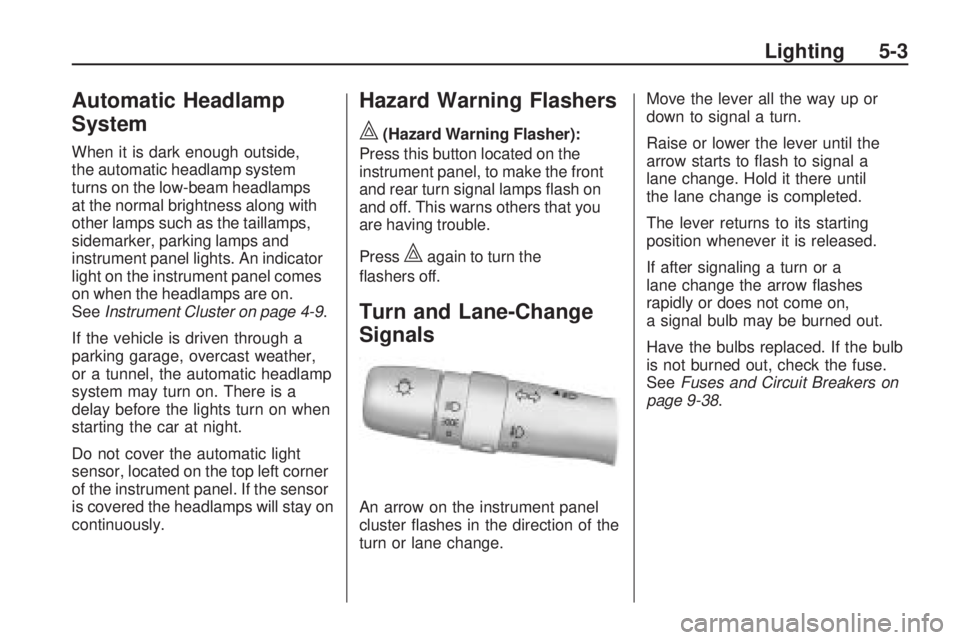
An arrow on the instrument panel
cluster flashes in the direction of the
turn or lane change. Move the lever all the way up or
down to signal a turn.
Raise or lower the lever until the
arrow starts to flash to signal a
lane change. Hold it there until
the lane change is completed.
The lever returns to its starting
position whenever it is released.
If after signaling a turn or a
lane change the arrow flashes
rapidly or does not come on,
a signal bulb may be burned out.
Have the bulbs replaced. If the bulb
is not burned out, check the fuse.
See
Fuses and Circuit Breakers on
page 9-38.
Lighting 5-3
Page 112 of 318

Fog Lamps
#
(Fog Lamps):For vehicles with
fog lamps, move the band on the turn
signal/multifunction lever to
#to turn
them on. The fog lamps only come
on when the headlamps are on
low beam.
Some localities have laws that
require the headlamps to be
on along with the fog lamps.
Interior Lighting
Instrument Panel
Illumination Control
Use the trip odometer knob located
on the right side of the instrument
panel cluster to adjust the instrument
panel brightness.
Turn the knob clockwise or
counterclockwise to brighten
or dim the instrument panel.
The brightness of the instrument
panel lights decreases when
the headlamps are on.
Dome Lamps
The interior lamps control is located
on the overhead lamp. To change
the interior lamps setting, slide
the switch to one of the following
positions:
OFF: Turns the lamp off.
ON: Keeps the lamp on all the time.
Door: Turns the lamp on when
any door or the liftgate is opened.
The lamp goes off when all the side
doors and the liftgate are closed.
If the lamp switch is in the door
position and a door is left open,
the lamps will go off automatically
after 20 minutes.
5-4 Lighting
Page 145 of 318
To save fuel, run the engine for only
short periods as needed to warm the
vehicle and then shut the engine off
and close the window most of the
way to save heat. Repeat this until
help arrives but only when you feel
really uncomfortable from the cold.
Moving about to keep warm also
helps.
If it takes some time for help to
arrive, now and then when you run
the engine, push the accelerator
pedal slightly so the engine runs
faster than the idle speed. This
keeps the battery charged to restart
the vehicle and to signal for help with
the headlamps. Do this as little as
possible to save fuel.If the Vehicle is Stuck
Slowly and cautiously spin the
wheels to free the vehicle when
stuck in sand, mud, ice, or snow.
{CAUTION
If you let your vehicle’s tires spin at
high speed, they can explode, and
you or others could be injured. The
vehicle can overheat, causing an
engine compartment fire or other
damage. Spin the wheels as little
as possible and avoid going above
55 km/h (35 mph) as shown on the
speedometer.
For information about using tire
chains on the vehicle, see Tire
Chains on page 9-61 .
Rocking the Vehicle to Get
it Out
Turn the steering wheel left and
right to clear the area around the
front wheels. Turn off any traction
system. Shift back and forth between
R (Reverse) and a forward gear,
or with a manual transmission,
between 1 (First) or 2 (Second) and
R (Reverse), spinning the wheels
as little as possible. To prevent
transmission wear, wait until the
wheels stop spinning before shifting
gears. Release the accelerator pedal
while shifting, and press lightly on
the accelerator pedal when the
transmission is in gear. Slowly
spinning the wheels in the forward
and reverse directions causes a
rocking motion that could free the
vehicle. If that does not get the
vehicle out after a few tries, it might
need to be towed out. If the vehicle
does need to be towed out, see
Towing the Vehicle on page 9-73 .
Driving and Operating 8-11
Page 185 of 318
Vehicle Care
General InformationGeneral Information..............
.9-2
California Proposition 65 Warning ........................
.9-2
California Perchlorate Materials Requirements ........9-3
Accessories and Modifications ......................
.9-3
Vehicle ChecksDoing Your Own
Service Work .....................
.9-4
Hood ..................................
.9-5
Engine Compartment Overview ...........................
.9-6
Engine Oil ...........................
.9-9
Automatic Transmission Fluid ...............................
.9-12
Manual Transmission Fluid . . . .9-14
Hydraulic Clutch .................
.9-15
Engine Air Cleaner/Filter .......9-16
Cooling System ..................
.9-19
Engine Coolant ..................
.9-19Engine Overheating
.............9-23
Power Steering Fluid ............9-24
Washer Fluid .....................
.9-24
Brakes ..............................
.9-26
Brake Fluid ........................
.9-27
Battery ..............................
.9-28
All-Wheel Drive ..................
.9-29
Starter Switch Check ............9-30
Wiper Blade Replacement .....9-30
Headlamp AimingHeadlamp Aiming...............
.9-32
Bulb ReplacementBulb Replacement ..............
.9-33
Halogen Bulbs ...................
.9-33
Headlamps and Parking Lamps .............................
.9-33
Taillamps ...........................
.9-35
License Plate Lamp .............9-36
Replacement Bulbs .............
.9-37
Electrical SystemElectrical System Overload . . . .9-37
Fuses and Circuit Breakers . . .9-38
Engine Compartment Fuse Block ..............................
.9-38
Instrument Panel Fuse Block ..............................
.9-41
Wheels and TiresTires.................................
.9-43
Tire Sidewall Labeling ..........9-44
Tire Designations ................
.9-46
Tire Terminology and Definitions ........................
.9-46
Tire Pressure .....................
.9-49
Tire Pressure Monitor System ............................
.9-50
Tire Pressure Monitor Operation .........................
.9-52
Tire Inspection ...................
.9-54
Tire Rotation ......................
.9-55
When It Is Time for New Tires ...............................
.9-56
Buying New Tires ...............
.9-56
Different Size Tires and Wheels ............................
.9-58
Uniform Tire Quality Grading ...........................
.9-58
Wheel Alignment and Tire Balance ...........................
.9-60
Wheel Replacement .............9-60
Tire Chains ........................
.9-61
If a Tire Goes Flat ..............
.9-62
Tire Changing ....................
.9-63
Compact Spare Tire .............9-68
Vehicle Care 9-1