steering PORSCHE 911 CARRERA 2006 5.G User Guide
[x] Cancel search | Manufacturer: PORSCHE, Model Year: 2006, Model line: 911 CARRERA, Model: PORSCHE 911 CARRERA 2006 5.GPages: 308, PDF Size: 3.69 MB
Page 46 of 308

46
Controls, Instruments fUsing accessories not approved by Porsche
can cause the weight sensing system to be im-
paired.
fDo not squeeze objects, such as the fire extin-
guisher, or first aid kit under the seat.
fOnly have seats removed and installed by an
authorized Porsche dealer so that weight sens-
ing components will not be damaged.
fGive your passenger all of the information in
this chapter.
Note
Airbag components (e.g. steering wheel, door lin-
ing, seats) may be disassembled only by an autho-
rized Porsche dealer.
When disposing of a used airbag unit, our safety
instructions must be followed. These instructions
can be obtained at any authorized Porsche dealer.
Function of the airbag systemThe front airbags are triggered during a frontal col-
lision of sufficient force and direction.
In the event of a side impact of corresponding
force, the side airbag on the impact side is
triggered.
The inflation process generates the amount of gas
required to fill the airbags at the necessary pres-
sure in fractions of a second.
Airbags protect the head and upper body, while si-
multaneously damping the motion of the driver
and passenger in the impact direction in the event
of a frontal impact or side impact.
Your vehicle is equipped with a crash sensing and
diagnostic module. This module will record the
use of the seat belt restraint system by the driver
and front passenger when the airbags and/or belt
tensioner work.Advanced Airbag
Your vehicle is equipped with a weight sensing sys-
tem for the passenger's seat in accordance with
U.S. Federal/Canadian Motor Vehicle Safety Stan-
dard 208.
Depending on the weight acting on the front pas-
senger's seat, the front passenger's airbag will au-
tomatically be switched on and off.
Depending on the angle and force of impact, the
front passenger's airbag which is activated will be
triggered during a collision.
Precondition for switching the front passenger's
airbag on and off, depending on weight:
– Vehicles equipped with key-operated airbag
deactivation device:
Switch position AUTO.
– Ignition key is inserted.
Page 69 of 308

Controls, Instruments
69
ABS Brake System
(Antilock Brake System)The ABS system represents a major contribution
to the enhancement of active safety in your vehi-
cle. This system prevents the wheels from locking
in a panic stop on almost all road surfaces. With the ABS system in your vehicle, the
following areas are enhanced:
Steering, vehicle remains steerable under all
braking forces when ABS is engaged.
Good directional control, no swerving caused
by locking of wheels under braking conditions.
Shorter stopping distance, stopping distances
are usually reduced because controlled braking is
maximized.
Prevention of wheel lock up, no brake- induced
sliding and thus no localized tire wear from emer-
gency braking.
The crucial advantage of the ABS system over a
conventional brake system is in the area of main-
taining directional control and maneuverability of
the car in emergency situations during normal driv-
ing, including panic braking in turns.
Warning!
The increased control that is provided should
not induce you to take greater risks with your
safety. The limits dictated by the laws of
physics cannot be overcome, even with ABS.
The risk of accidents due to inappropriate
speed cannot be reduced, even by the ABS.
The driver bears the responsibility for all
driving maneuvers.
fAdapt your driving style to the prevailing road
and weather conditions.
fObey all traffic laws.
Other vehicles not equipped with the ABS
system may not be able to maintain control,
especially on wet or poor road surfaces and
thus may be more likely to impact you from
behind.
fTo minimize that risk, use your ABS system to
increase your ability to maneuver to avoid dan-
gerous situations and not merely to try to stop in the shortest distance possible.
Page 72 of 308

72
Controls, Instruments
Porsche Stability Management
(PSM)PSM is an active control system for stabilization of
the vehicle during extreme driving manoeuvres.
The most recent version of PSM (only on vehicles
with four-wheel drive) improves the brake system
functionality.
Warning!
The increased control that is provided should
not induce you to take greater risks with your
safety. The limits dictated by the laws of
physics cannot be overcome, even with PSM.
The risk of accidents due to inappropriate
speed cannot be reduced, even by PSM.
The driver bears the responsibility for all
driving maneuvers.
fAdapt your driving style to the prevailing road
and weather conditions.
fObey all traffic laws. Advantages of PSM – Superior traction and lane-holding ability in all
driving situations – even on road surfaces with
varying friction.
– PSM actively stabilizes the vehicle during dy-
namic driving maneuvers (e.g. rapid steering
movements, during lane changes or on alter-
nating curves). – Improved braking stability in curves and on dif-
ferent or varying road surfaces.
– It improves the braking functions and shortens
the stopping distance if emergency braking is
needed (only vehicles with four-wheel drive).
Readiness for operationPSM is switched on automatically every time you
start the engine.FunctionSensors at the wheels, brakes, steering system
and engine continuously measure:
– Speed
– Steering angle
– Lateral acceleration
– Rate of turn about the vertical axis
– Brake pressure
PSM uses these values to determine the direction
of travel desired by the driver.
PSM intervenes and corrects the course if the
actual direction of motion deviates from the
desired course (steering-wheel position):
It brakes individual wheels as needed. In addition,
the engine power may be manipulated in order to
stabilize the vehicle.The events below inform the driver of PSM control
operations and warn him to adapt his driving style
to the road conditions:
– The multi-functional information light on the
instrument panel lights up.
– Hydraulic noises can be heard.
– The vehicle decelerates and steering-wheel
forces are altered as the PSM controls the
brakes.
– Reduced engine power.
– The brake pedal pulsates and its position is
changed during braking.
In order to achieve full vehicle deceleration,
foot pressure must be increased after begin-
ning of the brake pedal pulsing.
Page 78 of 308

78
Controls, Instruments
Operation, Instruments 1. Ignition lock/steering lock
2. Turn signals/high beam/headlight flasher stalk
3. Hands-free microphone for telephone
4. Horn
5. Wiper/washer stalk, rear window wiper
6. Button for seat heating, left
7. Interior temperature sensor/GPS antenna
8. Stopwatch
9. Emergency flasher switch
10.Central locking button, readiness display for
alarm system
11.Porsche Communication Management (PCM)12.Button for seat heating, right
13.Cupholder
14.Light switch
15.Operating lever for on-board computer
16.Locking lever for steering-wheel adjustment
17.Operating lever for automatic speed control
18.Operating panel for air conditioning
19 Buttons for rear spoiler,
Porsche Active Suspension Management
(PASM),
Sport mode, Porsche Stability Management
(PSM)
Page 80 of 308

80
Controls, Instruments
Ignition/Starter Switch with anti-
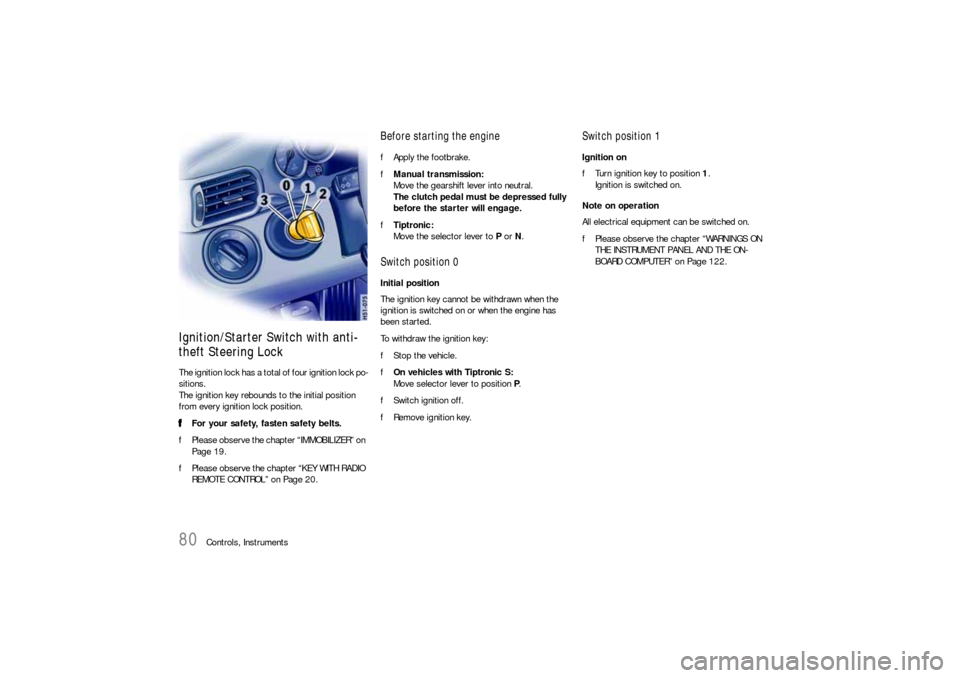
theft Steering LockThe ignition lock has a total of four ignition lock po-
sitions.
The ignition key rebounds to the initial position
from every ignition lock position.
fFor your safety, fasten safety belts.
fPlease observe the chapter “IMMOBILIZER” on
Page 19.
fPlease observe the chapter “KEY WITH RADIO
REMOTE CONTROL” on Page 20.
Before starting the enginefApply the footbrake.
fManual transmission:
Move the gearshift lever into neutral.
The clutch pedal must be depressed fully
before the starter will engage.
fTiptronic:
Move the selector lever to P or N.Switch position 0 Initial position
The ignition key cannot be withdrawn when the
ignition is switched on or when the engine has
been started.
To withdraw the ignition key:
fStop the vehicle.
fOn vehicles with Tiptronic S:
Move selector lever to position P.
fSwitch ignition off.
fRemove ignition key.
Switch position 1 Ignition on
fTurn ignition key to position 1.
Ignition is switched on.
Note on operation
All electrical equipment can be switched on.
fPlease observe the chapter “WARNINGS ON
THE INSTRUMENT PANEL AND THE ON-
BOARD COMPUTER” on Page 122.
Page 81 of 308

Controls, Instruments
81
Switch position 2Start engine
fTurn ignition key to ignition lock position 2.
fPlease observe the chapter “STARTING PRO-
CEDURES” on Page 82.Switch position 3Ignition off
fTurn ignition key to ignition lock position 3.
Locking the steering columnAutomatic locking
The steering column is automatically locked when
the ignition key is withdrawn from the ignition lock.
Warning!
Risk of an accident.
The steering wheel will lock and will cause
loss of steering.
fNever remove key from the ignition lock or turn
the key off while the vehicle is moving.
fAlways withdraw the ignition key when leav-ing the vehicle.Automatic unlocking
The steering column is automatically unlocked
when the ignition key is inserted into the ignition
lock.
Note
fTo avoid battery run-down, always remove the
ignition key from the ignition lock.
Please observe the chapter “BATTERY” on
Page 258.
Gong If you leave the key in the ignition/steering lock, a
gong will sound when the driver’s door is opened.
This is a reminder to remove the key.
Page 83 of 308

Controls, Instruments
83
Stopping Engine fTurn key back to position 3.
fDo not stop engine immediately after hard or
extended driving.
Keep engine running at increased idle for
about two minutes to prevent excessive heat
build-up before turning off engine.
fTo avoid battery run-down, always remove the
ignition key from the ignition lock.
fMake sure that when you leave the car, even
briefly, you have withdrawn the ignition key.
fEngage the steering lock by moving the steer-
ing wheel to the left or right.
Turn the steering wheel to the locking position
before you switch off the engine so that you
don’t have to exert yourself when locking or
unlocking the steering.
Warning!
Danger of injury. Hot engine compartment
components can burn skin on contact.
fBefore working on any part in the engine com-
partment, turn the engine off and let it cool down sufficiently.
Engine-compartment blower,
radiator fan The radiator and radiator fans are in the front of
the car.
The engine-compartment blower is mounted on
the engine compartment lid.
Warning!
Risk of injury.
After the engine is switched off, the engine-
compartment temperature is monitored for
approx. 30 minutes.
During this period, and depending on tem-
perature, the engine-compartment blower
may continue to run or start to run.
fCarry out work in these areas only with the en-
gine off, the ignition off, and exercise extreme
caution.
Risk of injury. The radiator fans in the front
end of the car may be operating or
unexpectedly start operating when the
engine is switched on.
fCarry out work in these areas only with the en-gine switched off.
Automatic garage door The ignition system in your Porsche may interfere
with your electronically operated garage door.
fTo check this, drive your Porsche close to the
garage door. Make sure not to interfere with
the operating range of the door.
fRun the engine at different speeds.
If the garage door opens or closes without you op-
erating the garage door unit in your car, contact
the dealer who installed the automatic garage
door to have the frequency and/or coding of the
garage door signal changed or modified.
Page 88 of 308

88
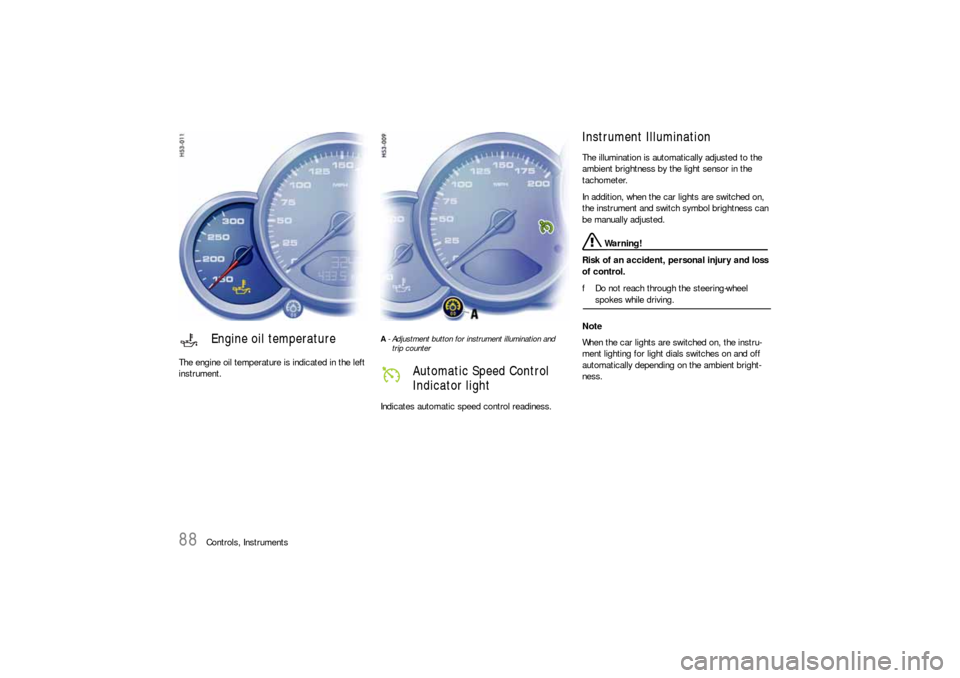
Controls, Instruments The engine oil temperature is indicated in the left
instrument.
A- Adjustment button for instrument illumination and
trip counter Indicates automatic speed control readiness.
Instrument Illumination The illumination is automatically adjusted to the
ambient brightness by the light sensor in the
tachometer.
In addition, when the car lights are switched on,
the instrument and switch symbol brightness can
be manually adjusted.
Warning!
Risk of an accident, personal injury and loss
of control.
fDo not reach through the steering-wheel spokes while driving.
Note
When the car lights are switched on, the instru-
ment lighting for light dials switches on and off
automatically depending on the ambient bright-
ness.
Engine oil temperature
Automatic Speed Control
Indicator light
Page 89 of 308

Controls, Instruments
89
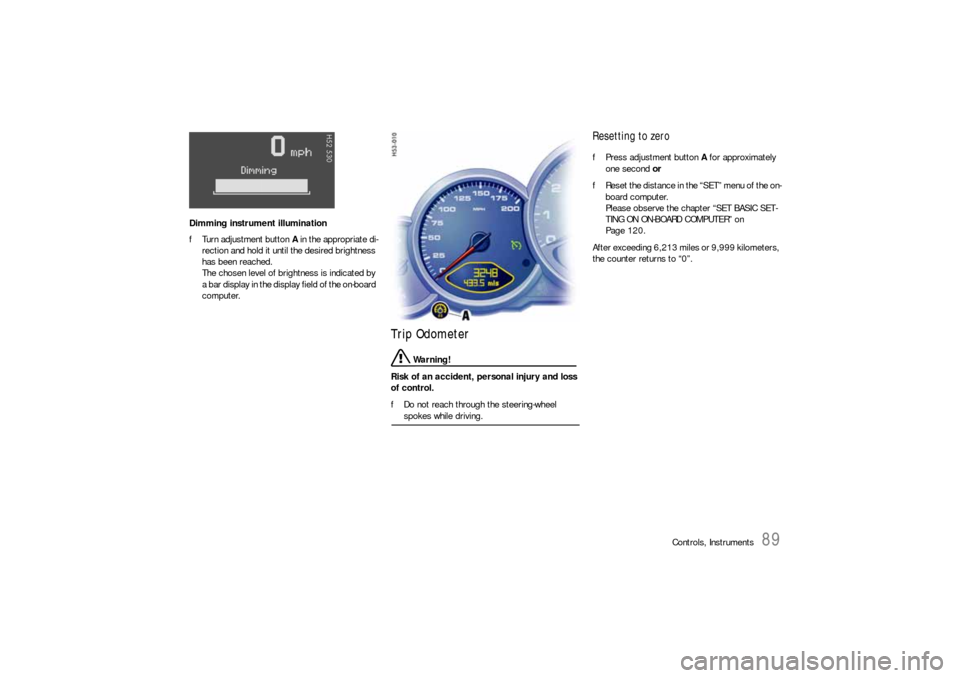
Dimming instrument illumination
fTurn adjustment button A in the appropriate di-
rection and hold it until the desired brightness
has been reached.
The chosen level of brightness is indicated by
a bar display in the display field of the on-board
computer.
Trip Odometer
Warning!
Risk of an accident, personal injury and loss
of control.
fDo not reach through the steering-wheel spokes while driving.
Resetting to zero fPress adjustment button A for approximately
one second or
fReset the distance in the “SET” menu of the on-
board computer.
Please observe the chapter “SET BASIC SET-
TING ON ON-BOARD COMPUTER” on
Page 120.
After exceeding 6,213 miles or 9,999 kilometers,
the counter returns to “0”.
Page 95 of 308

Controls, Instruments
95
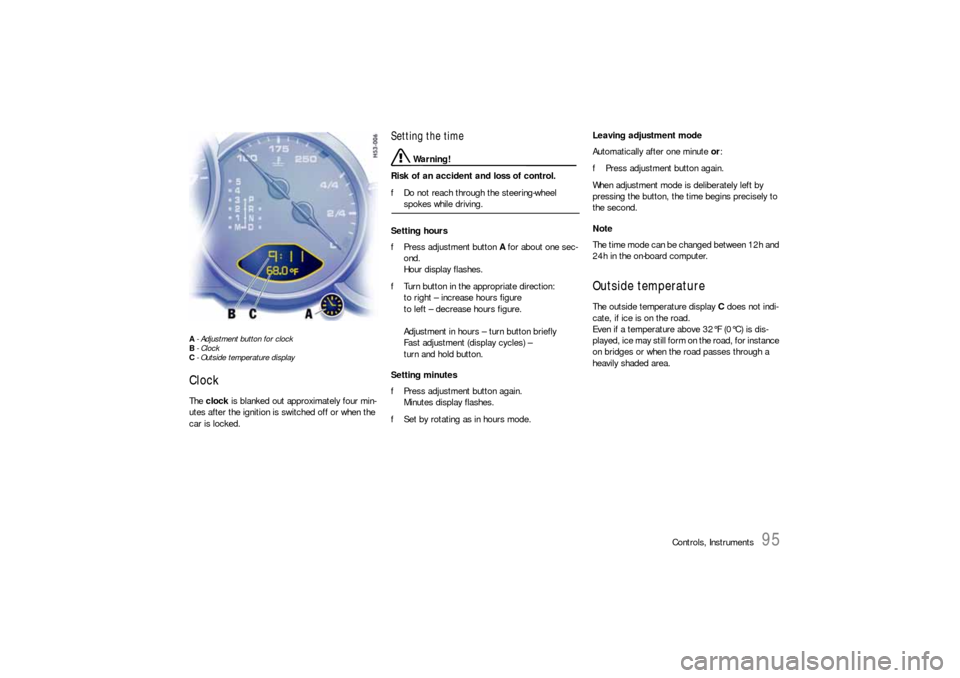
A- Adjustment button for clock
B- Clock
C- Outside temperature displayClock The clock is blanked out approximately four min-
utes after the ignition is switched off or when the
car is locked.
Setting the time
Warning!
Risk of an accident and loss of control.
fDo not reach through the steering-wheel spokes while driving.
Setting hours
fPress adjustment button A for about one sec-
ond.
Hour display flashes.
fTurn button in the appropriate direction:
to right – increase hours figure
to left – decrease hours figure.
Adjustment in hours – turn button briefly
Fast adjustment (display cycles) –
turn and hold button.
Setting minutes
fPress adjustment button again.
Minutes display flashes.
fSet by rotating as in hours mode. Leaving adjustment mode
Automatically after one minute or:
fPress adjustment button again.
When adjustment mode is deliberately left by
pressing the button, the time begins precisely to
the second.
Note
The time mode can be changed between 12h and
24h in the on-board computer.
Outside temperature The outside temperature display C does not indi-
cate, if ice is on the road.
Even if a temperature above 32°F (0°C) is dis-
played, ice may still form on the road, for instance
on bridges or when the road passes through a
heavily shaded area.