engine PORSCHE 911 CARRERA 2010 5.G Owner's Manual
[x] Cancel search | Manufacturer: PORSCHE, Model Year: 2010, Model line: 911 CARRERA, Model: PORSCHE 911 CARRERA 2010 5.GPages: 310, PDF Size: 3.39 MB
Page 65 of 310

Operation, Safety
63
Porsche Traction Management
(PTM)With PTM, the engine power is variably distributed
to the front and rear wheels.
Power distribution between the front and rear ax-
les is performed by a map-conrolled multiple-disc
clutch.
Distribution of the engine power also depends on
the difference in wheel speed between the two ax-
les.
The multiple-disc clutch always delivers sufficient
drive power to the front wheels to ensure optimum
propulsion even on an unfavorable road surface.
In combination with the Porsche Stability Manage-
ment (PSM), the PTM ensures optimum handling
and high driving stability.
Warning!
The increased control that is provided should
not induce you to take greater risks with your
safety. The limits dictated by the laws of phy-
sics cannot be overcome, even with PTM.
The risk of accidents due to inappropriate
speed cannot be reduced, even by PTM.
The driver bears the responsibility for all dri-
ving maneuvers.
fAdapt your driving style to the prevailing road
and weather conditions.
fObey all traffic laws.
Dynamometer testing procedure Some U.S. states and Canadian provinces con-
duct emissions inspection/maintenance testing in-
volving the use of two-wheel dynamometer.
A two-wheeled dynamometer is a treadmill type
device upon which a single axle of the car, the dri-
ving axle of the vehicle, rotates to simulate vehicle
operation on the road while the vehicle remains
stationary.
Your vehicle has a full-time four-wheel drive system
which cannot be disabled. Severe damage to the
powertrain can result if tested on a two-wheel dy-
namometer.
Warning!
Risk of severe powertrain damage and a pos-
sible unexpected movement of the vehicle.
fDo not test your vehicle on a two-wheel dyna-
mometer.
fAdvise the emission station of this warning be-fore testing the vehicle.
Brake testsBrake tests must be performed only on plate-type
test stands or roller test stands.
The ignition must be off.
The following limit values must not be exceeded
on roller test stands:
– Testing speed 5 mph (8 km/h)
– Test duration 20 seconds Handbrake tests Handbrake tests on the roller test stand must only
be carried out with the ignition switched off. Balancing wheels on the vehicle During finish balancing of the wheels, the vehicle
must be hoisted and all the wheels able to rotate
freely. Towing fPlease see the chapter “TOWING” on
Page 280.Wheels/TiresThe PTM control unit is adapted to the approved
tire sizes. The use of non-approved tire sizes may
lead to deviations in wheel speeds and it may influ-
ence handling or result in the PTM switching off.
Page 66 of 310

64
Operation, Safety
Sport ModeA sportier car set-up is obtained when Sport mode
is switched on. Interventions by the Porsche
control systems are intentionally shifted towards
greater agility and driving performance:
– PASM (Porsche Active Suspension Manage-
ment) is automatically changed to Sport mode,
resulting in a stiffer suspension setup.
– When Sport mode is active, the PDK transmis-
sion switches to a sporty gear-changing map
and shortens the gear shifting times. Gear
changes take place faster, but fuel consump-
tion is also increased.
PSM (Porsche Stability Management) control
gives a sportier road-feel to the vehicle. PSM
interventions take place later than in Normal
mode. The driver can maneuver the vehicle
with greater agility at its performance limits,
without having to dispense with the assistance
of PSM in emergency situations. This helps to
achieve optimal lap times, particularly on race
circuits with a dry road surface.
– The electronic accelerator pedal reacts
sooner, and the engine is more responsive to
throttle inputs. When Sport mode is switched
on, this function is activated only after the
driver has floored the accelerator pedal or
released it briefly.– The rpm limiter characteristic is “harder”, i.e.
the engine is immediately throttled when the
performance limits are reached (only in manual
selection mode for vehicles with PDK transmis-
sion).
fPlease observe the chapters on PSM, PASM
and PDK.
Switching Sport mode on and offSwitching Sport mode on and off simultaneously
activates and deactivates the Sport mode in
PA S M .
If PASM Sport mode was activated with the PASM
button, PASM remains active.
After the ignition is switched off, Sport mode is
automatically reset to Normal mode.
SPORT button
fPress SPORT button A in the center console.
When Sport mode is switched on, the light-
emitting diode in the SPORT button is lit.
A sporty gear-changing map is enabled and the
gear shifting times are shortened for the PDK
transmission.
A sporty driving style is recognized more quickly
and the gear-changing speeds are adapted to
driving performance.
Deceleration downshifts are commenced earlier.
Downshifts are made during slight decelerations,
even at higher engine speeds.
fPlease see the chapter “SPORT MODE
(“SPORT” AND “SPORT PLUS” MODES)” on
Page 172.
Page 68 of 310

66
Operation, Safety
Porsche Stability Management
(PSM)PSM is an active control system for stabilization of
the vehicle approaching the performance limits of
driving maneuvers.
Warning!
Risk of an accident, resulting in serious per-
sonal injury or death.
The increased control that is provided should
not induce you to take greater risks with your
safety. The limits dictated by the laws of
physics cannot be overcome, even with PSM.
The risk of accidents due to inappropriate
speed cannot be reduced, even by PSM.
The driver bears the responsibility for all
driving maneuvers.
fAdapt your driving style to the prevailing road
and weather conditions.
fObey all traffic laws.
Sensors at the wheels, brakes, steering system
and engine continuously measure:
–Speed
– Direction of travel (steering angle)
– Lateral acceleration
– Rate of turn about the vertical axis
– Longitudinal accelerationPSM uses these values to determine the direction
of travel indicated by the driver.
PSM intervenes and helps to correct the course if
the actual direction of motion deviates from the
chosen course (steering-wheel position):
It brakes individual wheels as needed. In addition,
the engine power may be manipulated in order to
stabilize the vehicle.
The events below inform the driver of PSM control
operations and warn him/her to adapt his/her
driving style to the road conditions:
– The multifunctional information light on the
instrument panel flashes.
– Hydraulic noises can be heard.
– The vehicle decelerates and steering-wheel
forces are altered as the PSM controls the
brakes.
– Reduced engine power.
– The brake pedal pulsates and its position is
changed during braking.
In order to achieve full vehicle deceleration,
foot pressure must be increased after the
brake pedal has begun vibrating.
Examples of PSM control operations– If the front wheels of the vehicle drift on a
bend, the rear wheel on the inside of the bend
is braked and the engine power is reduced if
necessary.
– If the rear of the vehicle swings out on a bend,
the front wheel on the outside of the bend is
braked.Additional braking functions– Pre-filling the brake system:
The brake system is prepared for possible
subsequent emergency braking if the acceler-
ator pedal is released suddenly and quickly.
The brake system is prefilled and the brake
pads are already applied gently to the brake
discs.
– Brake booster:
In the event of an emergency braking operation
where the pedal force is insufficient, a brake
booster provides the braking pressure neces-
sary for maximum deceleration at all 4 wheels.Advantages of PSM– Best possible traction and lane-holding ability
in all driving situations – even on road surfaces
with varying friction.
Page 69 of 310

Operation, Safety
67
– The system compensates for undesired lateral
vehicle reactions when the driver releases the
accelerator pedal or brakes when cornering.
This compensation functions up to the
maximum lateral acceleration.
– PSM actively stabilizes the vehicle as required
during dynamic driving maneuvers (e.g. rapid
steering movements, during lane changes or
on alternating bends).
– Improved braking stability on bends and on
different or varying road surfaces.
– It improves braking function and shortens
stopping distance in the event of emergency
braking.Readiness for operationPSM is switched on automatically every time you
start the engine.
PSM should always be switched on during
“normal” driving.
However, it may be advantageous to switch off
PSM temporarily in exceptional situations, for
example:
– On a loose surface or in deep snow,
– When “rocking” the vehicle free and
– When using snow chains.
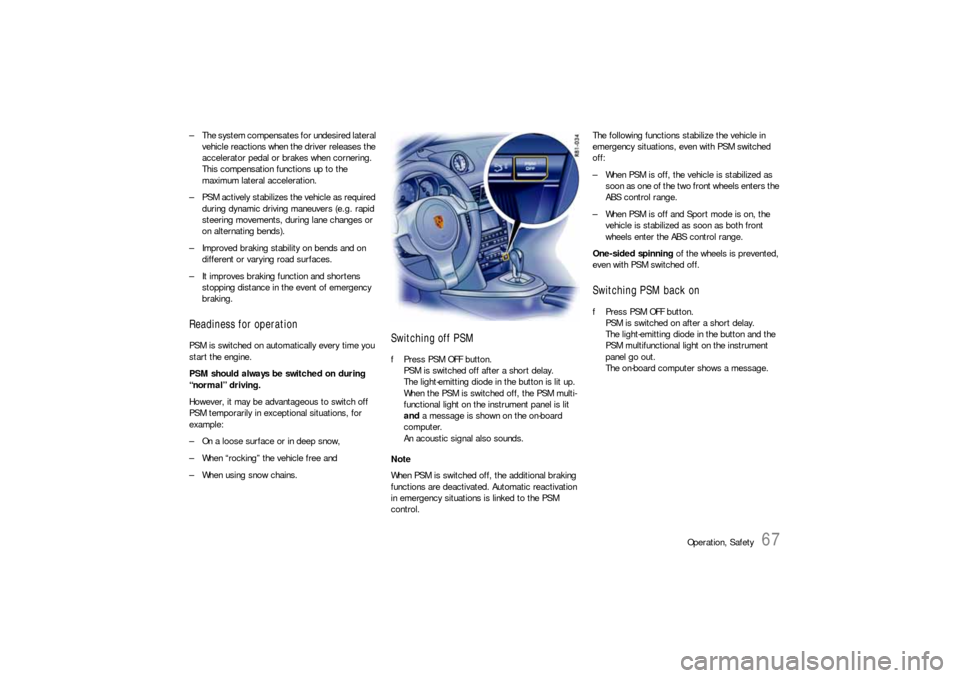
Switching off PSMfPress PSM OFF button.
PSM is switched off after a short delay.
The light-emitting diode in the button is lit up.
When the PSM is switched off, the PSM multi-
functional light on the instrument panel is lit
and a message is shown on the on-board
computer.
An acoustic signal also sounds.
Note
When PSM is switched off, the additional braking
functions are deactivated. Automatic reactivation
in emergency situations is linked to the PSM
control.The following functions stabilize the vehicle in
emergency situations, even with PSM switched
off:
– When PSM is off, the vehicle is stabilized as
soon as one of the two front wheels enters the
ABS control range.
– When PSM is off and Sport mode is on, the
vehicle is stabilized as soon as both front
wheels enter the ABS control range.
One-sided spinning of the wheels is prevented,
even with PSM switched off.
Switching PSM back onfPress PSM OFF button.
PSM is switched on after a short delay.
The light-emitting diode in the button and the
PSM multifunctional light on the instrument
panel go out.
The on-board computer shows a message.
Page 72 of 310

70
Operation, Safety
Automatic modeThe limits for automatic extension and retraction
of the spoiler depend on various circumstances
(e.g. driving speed, engine compartment temper-
ature).
If automatic control fails, a warning message is
displayed by the on-board computer.
Engine compartment temperature
under 122 °F/55 °C
Spoiler extends at 75 mph/120 km/h and
retracts at 37 mph/60 km/h.
Engine compartment temperature
over 140 °F/60 °C
Spoiler extends at 50 mph/80 km/h and retracts
at 19 mph/30 km/h.
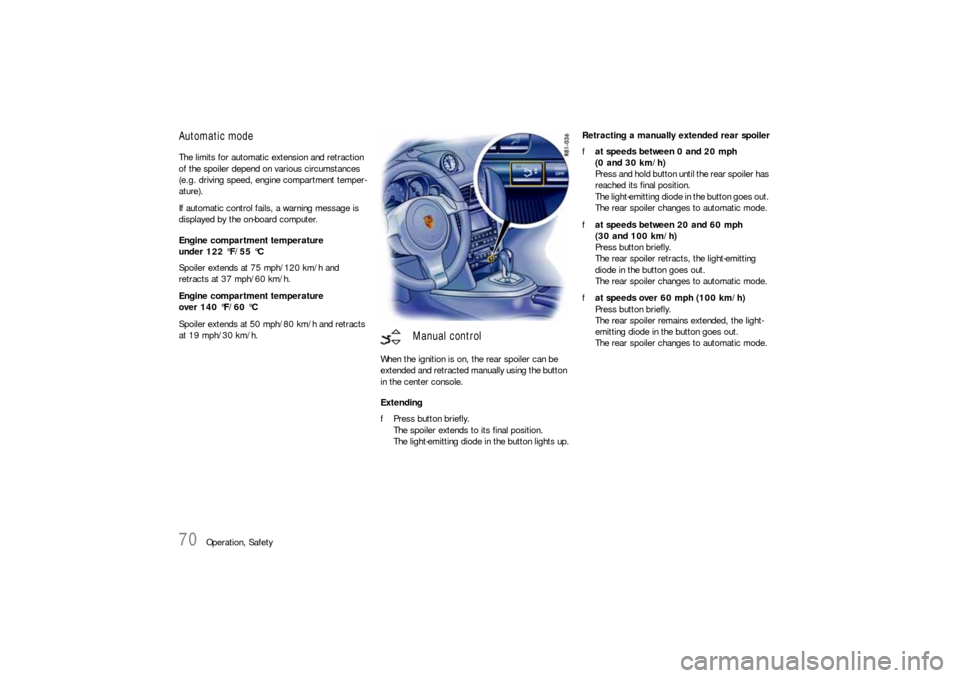
When the ignition is on, the rear spoiler can be
extended and retracted manually using the button
in the center console.
Extending
fPress button briefly.
The spoiler extends to its final position.
The light-emitting diode in the button lights up.Retracting a manually extended rear spoiler
fat speeds between 0 and 20 mph
(0 and 30 km/h)
Press and hold button until the rear spoiler has
reached its final position.
The light-emitting diode in the button goes out.
The rear spoiler changes to automatic mode.
fat speeds between 20 and 60 mph
(30 and 100 km/h)
Press button briefly.
The rear spoiler retracts, the light-emitting
diode in the button goes out.
The rear spoiler changes to automatic mode.
fat speeds over 60 mph (100 km/h)
Press button briefly.
The rear spoiler remains extended, the light-
emitting diode in the button goes out.
The rear spoiler changes to automatic mode.
Manual control
Page 76 of 310

74
Operation, Safety
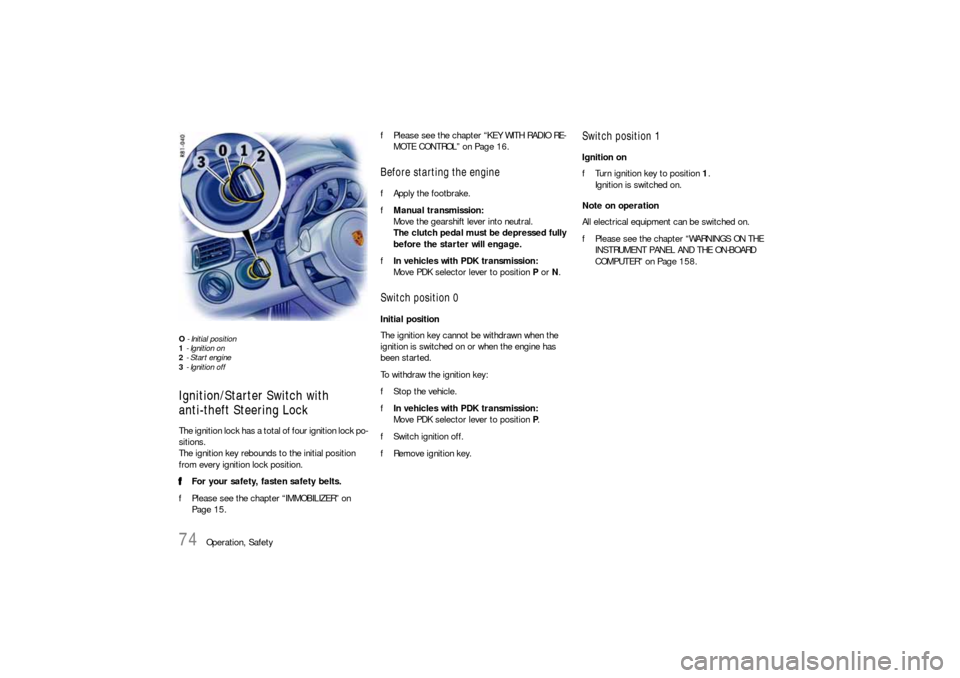
O - Initial position
1 - Ignition on
2 - Start engine
3 - Ignition offIgnition/Starter Switch with
anti-theft Steering LockThe ignition lock has a total of four ignition lock po-
sitions.
The ignition key rebounds to the initial position
from every ignition lock position.
fFor your safety, fasten safety belts.
fPlease see the chapter “IMMOBILIZER” on
Page 15.fPlease see the chapter “KEY WITH RADIO RE-
MOTE CONTROL” on Page 16.
Before starting the enginefApply the footbrake.
fManual transmission:
Move the gearshift lever into neutral.
The clutch pedal must be depressed fully
before the starter will engage.
fIn vehicles with PDK transmission:
Move PDK selector lever to position P or N.Switch position 0 Initial position
The ignition key cannot be withdrawn when the
ignition is switched on or when the engine has
been started.
To withdraw the ignition key:
fStop the vehicle.
fIn vehicles with PDK transmission:
Move PDK selector lever to position P.
fSwitch ignition off.
fRemove ignition key.
Switch position 1 Ignition on
fTurn ignition key to position 1.
Ignition is switched on.
Note on operation
All electrical equipment can be switched on.
fPlease see the chapter “WARNINGS ON THE
INSTRUMENT PANEL AND THE ON-BOARD
COMPUTER” on Page 158.
Page 77 of 310

Operation, Safety
75
Switch position 2Start engine
fTurn ignition key to ignition lock position 2.
fPlease see the chapter “STARTING PROCEDU-
RES” on Page 77.Switch position 3Ignition off
fTurn ignition key to ignition lock position 3.
Note on operation
The vehicle battery discharges if the ignition key is
left inserted.
If the vehicle battery is dead, the key can only be
pulled out of the ignition lock if the emergency
operation is performed:
fPlease see the chapter “EMERGENCY OPERA-
TION – PULLING OUT THE IGNITION KEY” on
Page 76.
Locking the steering columnAutomatic locking
The steering column is automatically locked when
the ignition key is withdrawn from the ignition lock.
Warning!
Risk of an accident, resulting in serious per-
sonal injury or death.
The steering wheel will lock and will cause
loss of steering.
fNever remove key from the ignition lock or turn
the key off while the vehicle is moving.
fAlways withdraw the ignition key when leaving the vehicle.Automatic unlocking
The steering column is unlocked when the vehicle
is unlocked with the radio remote control.
Note
fTo avoid discharging the battery, always re-
move the ignition key from the ignition lock.
Please see the chapter “BATTERY” on
Page 261.
Gong If you leave the key in the ignition/steering lock, a
gong will sound when the driver’s door is opened.
This is a reminder to remove the key.
Page 79 of 310

Operation, Safety
77
Starting Procedures fPlease see the chapter “IMMOBILIZER” on
Page 15.
fPlease see the chapter “EMISSION CONTROL
SYSTEM” on Page 218.
Warning!
Serious injury or death may result if you are
involved in a collision without having fas-
tened the safety belts.
fFasten safety belts before driving away. Before starting the engine fApply the footbrake.
fManual transmission:
Move the gearshift lever into neutral.
The clutch pedal must be depressed fully
before the starter will engage.
fIn vehicles with PDK transmission:
Move PDK selector lever to position P or N.
Temperature sensors on the engine automatically
provide the correct fuel/air mixture required for
starting.
Therefore, it is not necessary to depress the
accelerator pedal while starting a cold or a
warm engine.
Starting the enginefTurn ignition key to ignition lock position 2.
fAs soon as the engine starts, release the igni-
tion key.
The first operation of the starter is ended automat-
ically when the engine starts.
If the engine does not start, subsequent starter
operations will not be ended automatically.
If the engine fails to start after 10 or 15 seconds
of cranking:
fWait about 10 seconds before engaging the
starter again.
fWhen starting the engine, be ready to drive
immediately.
Drive vehicle at moderate speeds and avoid
engine speeds above 4,200 rpm during the
first 5 minutes.
fDo not let the engine idle to warm up.
Danger!
Engine exhaust fumes have many compo-
nents which you can smell. They also contain
carbon monoxide (CO), which is a colorless
and odorless gas.
Carbon monoxide can cause unconscious-
ness and even death if inhaled.
fNever start or let the engine run in an en-
closed, unventilated area.
It is not recommended to sit in your car for pro-longed periods with the engine on and the car
not moving.
An unattended vehicle with a running engine
is potentially hazardous.
If warning lights should come on to indicate
improper operation, they would go unno-
ticed.
fNever leave the engine idling unattended.
Danger of fire.
fDo not park or operate the vehicle in areas
where the hot exhaust system may come in
contact with dry grass, brush, fuel spill or oth-
er flammable material.
fIf your car catches on fire for any reason, call
the fire department.
Do not endanger your life by attempting to put
out the fire.
Risk of burn injury when standing near or
coming into contact with the exhaust pipe.
The exhaust pipe is hot when the vehicle is running
and remains hot for some time after the vehicle is
turned off.
fTo prevent injury, make a point of noting where
your vehicle’s exhaust pipe is, avoid placing
your legs near the exhaust pipe, and closely
supervise children around the vehicle when the
exhaust pipe could be hot.
A hot exhaust pipe can cause serious burns.
Page 80 of 310

78
Operation, Safety
Stopping Engine fTurn key back to position 3.
fDo not stop engine immediately after hard or
extended driving.
Keep engine running at increased idle for
about two minutes to prevent excessive heat
build-up before turning off engine.
fTo avoid discharging the battery, always re-
move the ignition key from the ignition lock.
fWhen leaving the car, always remove the igni-
tion key and apply the handbrake. Engage 1st
gear or reverse gear on vehicles with manual
transmission or move the selector lever to po-
sition P on vehicles with PDK transmission.
fEngage the steering lock by moving the steer-
ing wheel to the left or right.
Turn the steering wheel to the locking position
before you switch off the engine so that you
don’t have to exert yourself when locking or
unlocking the steering.
Warning!
Danger of injury. Hot engine compartment
components can burn skin on contact.
fBefore working on any part in the engine com-
partment, turn the engine off and let it cool down sufficiently.
Engine-compartment blower,
radiator fan The radiator and radiator fans are in the front of
the car.
The engine-compartment blower is mounted on
the engine compartment lid.
Warning!
Risk of injury.
After the engine is switched off, the engine-
compartment temperature is monitored for
approx. 30 minutes.
During this period, and depending on tem-
perature, the engine-compartment blower
may continue to run or start to run.
fCarry out work in these areas only with the en-
gine off, the ignition off, and exercise extreme
caution.
Risk of injury. The radiator fans in the front
end of the car may be operating or
unexpectedly start operating when the
engine is switched on.
fCarry out work in these areas only with the en-gine switched off.
Automatic garage door The ignition system in your Porsche may interfere
with your electronically operated garage door.
fTo check this, drive your Porsche close to the
garage door. Make sure not to interfere with
the operating range of the door.
fRun the engine at different speeds.
fIf the garage door opens or closes without you
operating the garage door unit in your car,
contact the dealer who installed the automatic
garage door to have the frequency and/or
coding of the garage door signal changed or
modified.
Page 81 of 310

Operation, Safety
79
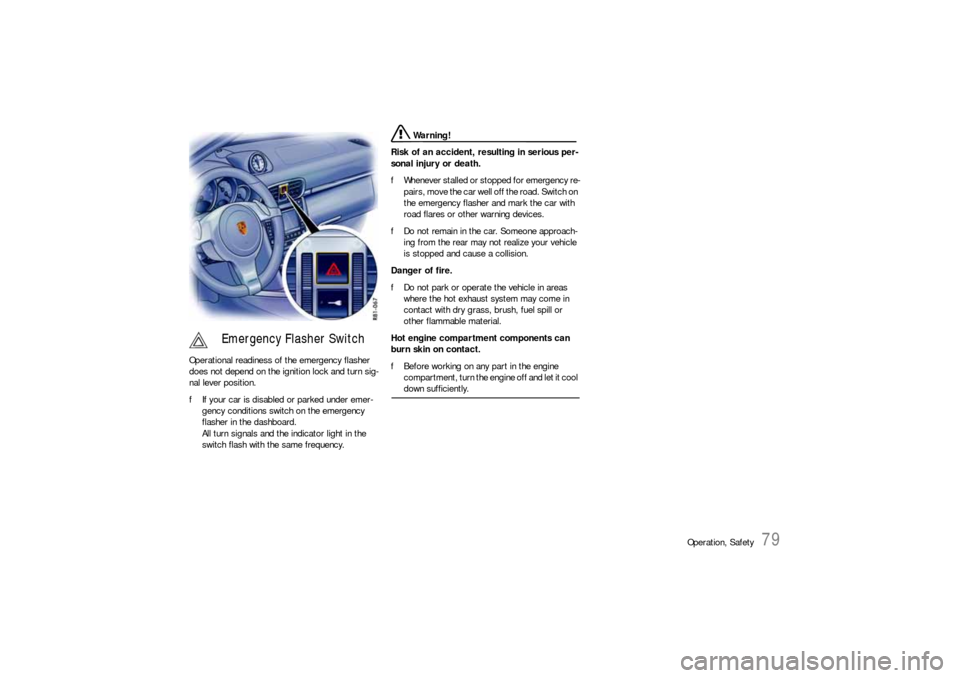
Operational readiness of the emergency flasher
does not depend on the ignition lock and turn sig-
nal lever position.
fIf your car is disabled or parked under emer-
gency conditions switch on the emergency
flasher in the dashboard.
All turn signals and the indicator light in the
switch flash with the same frequency.
Warning!
Risk of an accident, resulting in serious per-
sonal injury or death.
fWhenever stalled or stopped for emergency re-
pairs, move the car well off the road. Switch on
the emergency flasher and mark the car with
road flares or other warning devices.
fDo not remain in the car. Someone approach-
ing from the rear may not realize your vehicle
is stopped and cause a collision.
Danger of fire.
fDo not park or operate the vehicle in areas
where the hot exhaust system may come in
contact with dry grass, brush, fuel spill or
other flammable material.
Hot engine compartment components can
burn skin on contact.
fBefore working on any part in the engine
compartment, turn the engine off and let it cool down sufficiently.
Emergency Flasher Switch