change time PORSCHE 911 GT3 2004 5.G Owners Manual
[x] Cancel search | Manufacturer: PORSCHE, Model Year: 2004, Model line: 911 GT3, Model: PORSCHE 911 GT3 2004 5.GPages: 195, PDF Size: 16.94 MB
Page 4 of 195
Your carmay have allorsome ofthe components
described inthis manual.
Should youhave difficulty understanding anyof
the explanations offeatures orequipment
installed inyour vehicle, contactyourauthorized
Porsche dealer.He/She willbeglad toassist you.
Also check withyour dealer onother available op-
tions orequipment.
Throughout thisbooklet, leftisdesignated asthe
driver's sideofthe vehicle, andright asthe pas-
senger's sideofthe vehicle.
Text, illustrations andspecifications inthis manual
are based onthe information availableatthe time
of printing.
It has always beenPorsche's policytocontinuous-
ly improve itsproducts. Porsche,therefore, re-
serves theright tomake changes indesign and
specification, andtomake additions or
improvements inits product withoutincurring any
obligation toInstall themonproducts previously
manufactured.
We wish youmany milesofsafe andpleasurable
driving inyour Porsche.
j!\lmportant
For your ownprotection andlonger .service lifeof
your car,please heedalloperating instructions
and special warnings. Thesespecial warnings use
the safety alertsymbol, followed bythe words
Danger, Warning andCaution.
Thesespecial
warnings containimportant messages regarding
your safety and/or thepotential fordamage to
your Porsche. Ignoringthemcould result inseri-
ous mechanical failureoreven physical injury.
c>
Donot alter your Porsche. Anyalteration could
create dangerous conditionsordefeat safety
engineering featuresbuiltintoyour car.
c>
Donot misuseyour Porsche.Useitsafely, and
consistently Withthelaw, according tothe driv-
ing conditions, andtheinstructions inthis man-
ual.
Alteration ormisuse ofyour Porsche could
cause accidents andsevere orfatal personal
injuries.
Note
toowners
In Canada, thismanual isalso available inFrench.
To obtain acopy contact yourdealer orwrite to:
Note auxproprietaires
Au Canada onpeut seprocurer unexemplaire de
ce Manuel enfranaais auprasduconcessionaire
ou du:
Porsche CarsCanada, Ltd.
Automobiles PorscheCanada, LTEE
5045 Orbitor Drive
Building #11,Suite 302
Mississauga, Ontario
Canada L4W4Y4
Telephone numberforcustomer assistance:
1-800-PORSCHE /Option 3
Page 20 of 195
Keys
I>
Please observe thechapter "ALARM SYSTEM,
INFRARED PASSENGER COMPARTMENT MON-
ITORING" onPage 24.
I>
Please observe thechapter "CENTRAL LOCK-
ING" onPage 22.
Two main keysandonespare keyaresupplied
with your Porsche.
These keysoperate allthe locks onyour vehicle.
I>
Becareful withyour carkeys: donot part with
them except underexceptional circumstanc-
es.
I>
Toavoid battery run-down, alwaysremove the
ignition keyfrom theignition lock.
Replacement
keys
Replacement carkeys canbeobtained onlyfrom
your authorized Porschedealer,andthis can
sometimes bevery time-consuming.
You should therefore alwayskeepthespare key
on your person.
Keep itin asafe place (e.g.wallet), butunder no
circumstances inor on the vehicle.
The keycodes ofnew keys have tobe "reported"
to the carcontrol unitbyyour authorized Porsche
dealer.
The keygrip ofthe spare keycan beexchanged
for amain-key grip.
Disabling keycodes
If a key islost, thekey codes canbedisabled by
an authorized Porschedealer.
All the remaining carkeys arerequired forthis pur-
pose.
Disabling thecode ensures thatthecar can be
started
onlyusing authorized keys.
Note
I>
Please notethattheother lockscanstillbe
opened withthedisabled key.
Immobilizer
There isatransponder (anelectronic component)
in the key grip, containing astored code.
When theignition isswitched on,the ignition lock
checks thecode.
The immobilizer canbedeactivated andtheen-
gine started onlyusing anauthorized ignitionkey.
Note
If the ignition isleft onfor more thantwominutes
without starting theengine, theimmobilizer isre-
activated.
I>
Ifthis happens, theignition keymust beturned
back tothe "0"position beforetheengine can
be started.
The immobilizer isautomatically activatedwhen
the ignition keyiswithdrawn.
Security WheelBolts
I>
Ifwheels havetobe removed duringawork-
shop visit,donot forget tohand overthesock-
et for the security wheelboltsalong withthe
car key.
Controls,Instruments
19
Page 39 of 195
AirbagSystems
The Airbags incombination withthesafety belts
makes upasafety system whichoffers thedriver
and thepassenger thegreatest knownprotection
from injuries incase ofaccident.
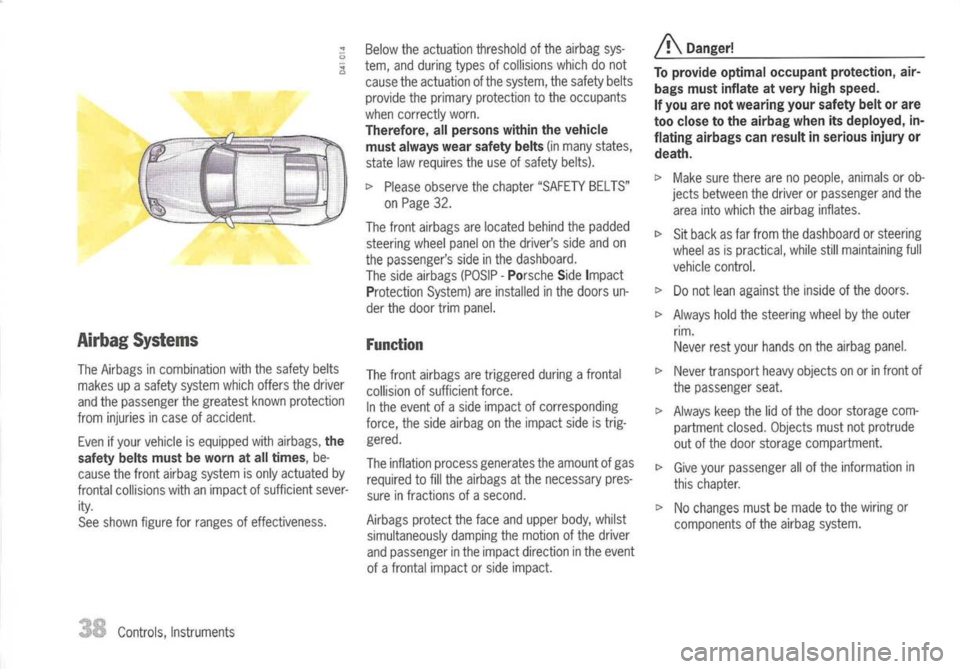
Even ifyour vehicle isequipped withairbags,
the
safety beltsmust beworn atall times,
be-
cause thefront airbag system isonly actuated by
frontal collisions withanimpact ofsufficient sever-
ity.
See shown figureforranges ofeffectiveness.
Controls, Instruments Below
theactuation threshold ofthe airbag sys-
tem, andduring typesofcollisions whichdonot
cause theactuation ofthe system, thesafety belts
provide theprimary protection tothe occupants
when correctly worn.
Therefore, allpersons withinthevehicle
must always wearsafety belts
(inmany states,
state lawrequires theuse ofsafety belts).
I>
Please observe thechapter "SAFETY BELTS"
on Page 32.
The front airbags arelocated behindthepadded
steering wheelpanelonthe driver's sideandon
the passenger's sideinthe dashboard.
The side airbags (POSIP-Porsche SideImpact
Protection System)areinstalled inthe doors un-
der the door trimpanel.
Function
The front airbags aretriggered duringafrontal
collision ofsufficient force.
In the event ofaside impact ofcorresponding
force, theside airbag onthe impact sideistrig-
gered.
The inflation process generates theamount ofgas
required tofill the airbags atthe necessary pres-
sure infractions ofasecond.
Airbags protecttheface andupper body,whilst
simultaneously dampingthemotion ofthe driver
and passenger inthe impact direction inthe event
of afrontal impact orside impact.
A
Danger!
To provide optimal occupant protection, air-
bags must inflate atvery highspeed.
If you arenotwearing yoursafety beltorare
too close tothe airbag whenitsdeployed, in-
flating airbags canresult inserious injuryor
death.
I>
Make surethere arenopeople, animals orob-
jects between thedriver orpassenger andthe
area intowhich theairbag inflates.
I>
Sitback asfar from thedashboard orsteering
wheel asispractical, whilestillmaintaining full
vehicle control.
I>
Donot lean against theinside ofthe doors.
I>
Always holdthesteering wheelbythe outer
rim. Never restyour hands onthe airbag panel.
I>
Never transport heavyobjects onorinfront of
the passenger seat.
I>
Always keepthelidofthe door storage com-
partment closed.Objects mustnotprotrude
out ofthe door storage compartment.
I>
Give your passenger allofthe information in
this chapter.
I>
Nochanges mustbemade tothe wiring or
components ofthe airbag system.
Page 65 of 195
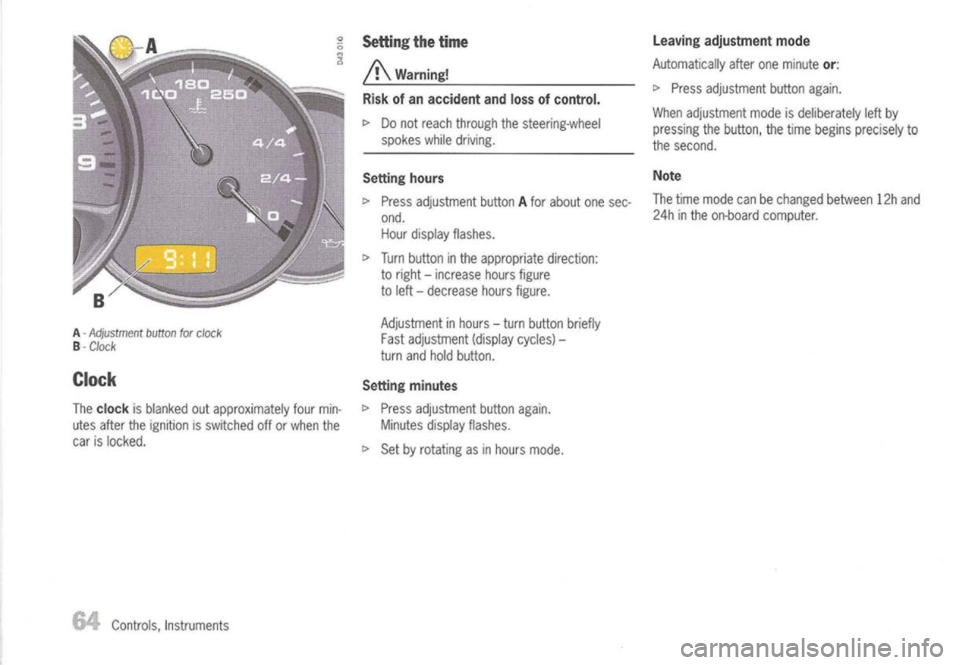
A-
Adjustment buttonforclock
B -
Clock
Clock
The
clock
isblanked outapproximately fourmin-
utes after theignition isswitched offorwhen the
car islocked.
Controls, Instruments
Setting
thetime
/!\
Warning!
Risk ofan accident andlossofcontrol.
c>
Donot reach through thesteering-wheel
spokes whiledriving.
Setting hours
c>
Press adjustment buttonAfor about onesec-
ond. Hour display flashes.
c>
Turn button inthe appropriate direction:
to right -increase hoursfigure
to left -decrease hoursfigure.
Adjustment inhours -turn button briefly
Fast adjustment (displaycycles)-
turn andhold button.
Setting minutes
c>
Press adjustment buttonagain.
Minutes displayflashes.
c>
Set byrotating asinhours mode.
Leaving
adjustment mode
Automatically afteroneminute
or:
c>
Press adjustment buttonagain.
When adjustment modeisdeliberately leftby
pressing thebutton, thetime begins precisely to
the second.
Note
The time mode canbechanged between12hand
24h inthe on-board computer.
Page 74 of 195
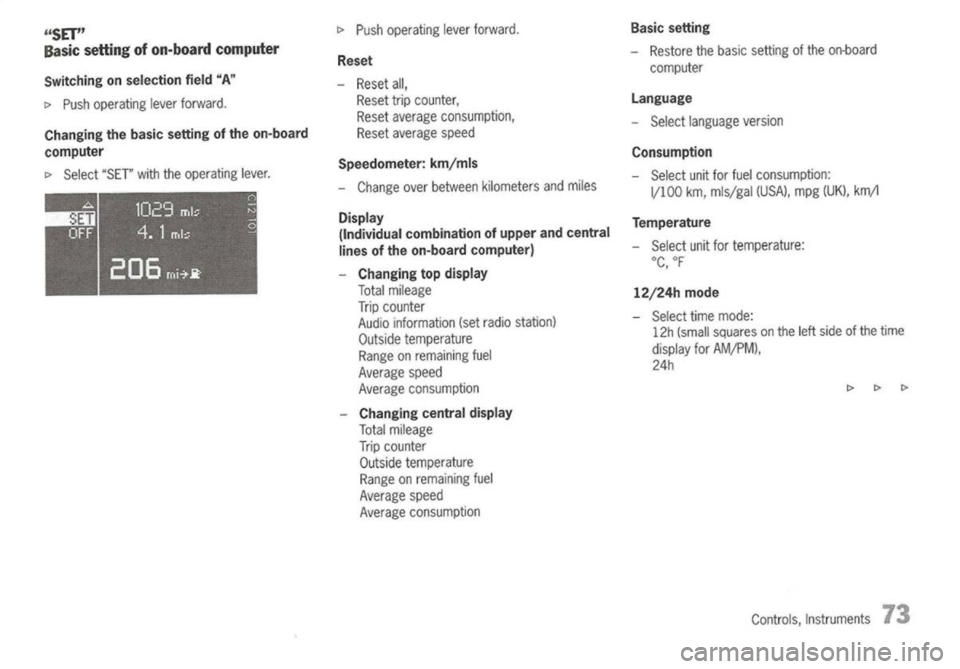
"SET"
Basic setting ofon-board computer
Switching onselection field"A"
!>
Push operating leverforward.
Changing thebasic setting ofthe on-board
computer
!>
Select "SET"withtheoperating lever.
!>
Push operating leverforward.
Reset
- Reset all,
Reset tripcounter,
Reset average consumption,
Reset average speed
Speedometer: kmjmls
- Change overbetween kilometers andmiles
Display (Individual combination ofupper andcentral
lines ofthe on-board computer)
- Changing topdisplay
Total mileage
Trip counter
Audio information (setradio station)
Outside temperature
Range onremaining fuel
Average speed
Average consumption
Changing centraldisplay
Total mileage
Trip counter
Outside temperature
Range onremaining fuel
Average speed
Average consumption
Basic
setting
- Restore thebasic setting ofthe on-board
computer
Language
- Select language version
Consumption
- Select unitforfuel consumption:
1/100 km,mis/gal (USA),mpg(UK), km/l
Temperature
- Select unitfortemperature:
°C,
of
12j24h
mode
- Select timemode:
12h (small squares onthe leftside ofthe time
display forAMjPM),
24h
Controls,Instruments
73
Page 75 of 195
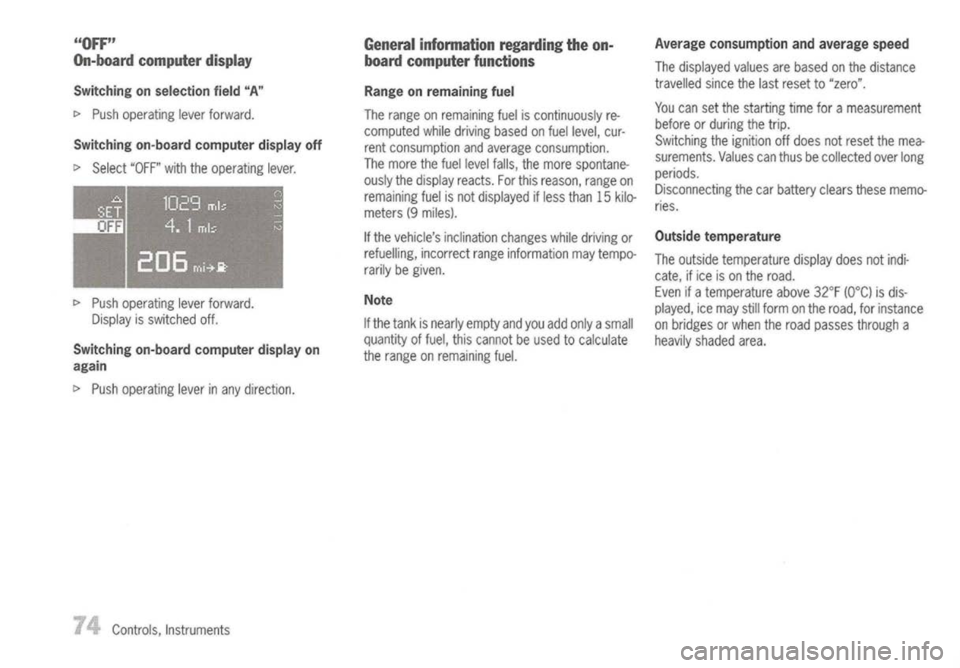
"OFF"
On-board computer display
Switching onselection field"A"
c>
Push operating leverforward.
Switching on-boardcomputer displayoff
c>
Select "OFF"withtheoperating lever.
c>
Push operating leverforward.
Display isswitched off.
Switching on-boardcomputer displayon
again
c>
Push operating leverinany direction.
Controls, Instruments
General
information regardingtheon-
board computer functions
Range onremaining fuel
The range onremaining fueliscontinuously re-
computed whiledriving basedonfuel level, cur-
rent consumption andaverage consumption.
The more thefuel level falls, themore spontane-
ously thedisplay reacts.Forthis reason, rangeon
remaining fuelisnot displayed ifless than 15kilo-
meters (9miles).
If
the vehicle's inclination changeswhiledriving or
refuelling, incorrectrangeinformation maytempo-
rarily begiven.
Note
If the tank isnearly empty andyou add only asmall
quantity offuel, thiscannot beused tocalculate
the range onremaining fuel.
Average
consumption andaverage speed
The displayed valuesarebased onthe distance
travelled sincethelast reset to"zero".
You can setthe starting timeforameasurement
before orduring thetrip.
Switching theignition offdoes notreset themea-
surements. Valuescanthus becollected overlong
periods.
Disconnecting thecarbattery clearsthesememo-
ries.
Outside temperature
The outside temperature displaydoesnotindi-
cate, ifice ison the road.
Even ifatemperature above32°F
(GoC)
isdis-
played, icemay stillform onthe road, forinstance
on bridges orwhen theroad passes through a
heavily shaded area.
Page 120 of 195
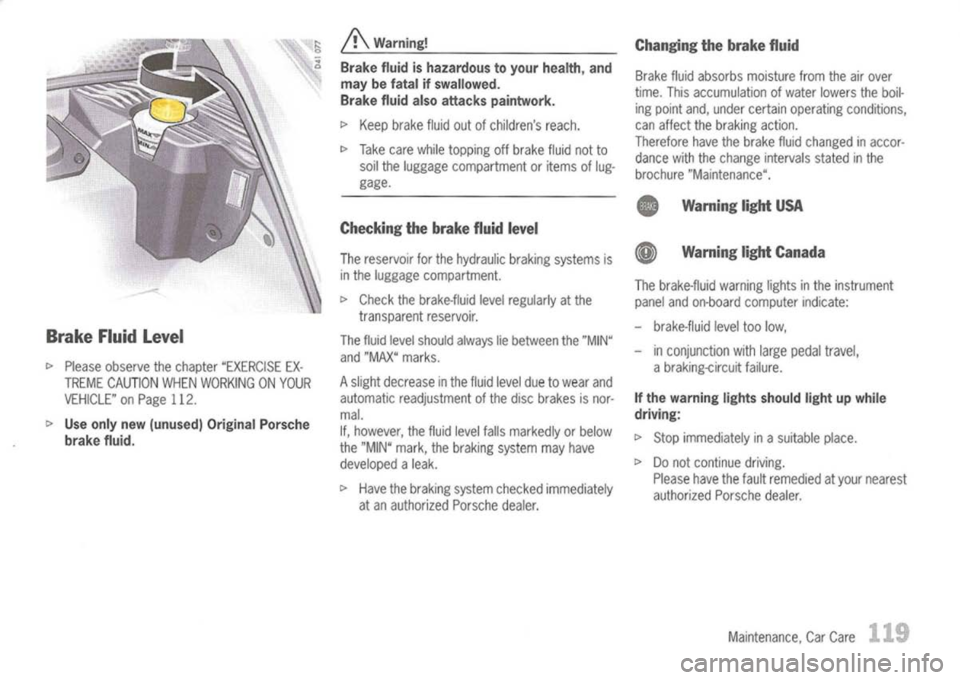
Brake Fluidlevel
I>
Please observe thechapter "EXERCISE EX-
TREME CAUTION WHENWORKING ONYOUR
VEHICLE" onPage 112.
I>
Use only new(unused) OriginalPorsche
brake fluid.
A
Warning!
Brake fluidishazardous toyour health, and
may befatal ifswallowed.
Brake fluidalsoattacks paintwork.
I>
Keep brake fluidoutofchildren's reach.
I>
Take carewhile topping offbrake fluidnotto
soil theluggage compartment oritems oflug-
gage .
Checking thebrake fluidlevel
The reservoir forthe hydraulic brakingsystems is
in the luggage compartment.
I>
Check thebrake·fluid levelregularly atthe
transparent reservoir.
The fluid level should always liebetween the"MIN"
and "MAX" marks.
A slight decrease inthe fluid level duetowear and
automatic readjustment ofthe disc brakes isnor-
mal.
If, however, thefluid level fallsmarkedly orbelow
the "MIN" mark, thebraking systemmayhave
developed aleak.
I>
Have thebraking systemchecked immediately
at an authorized Porschedealer. Changing
thebrake fluid
Brake fluidabsorbs moisture fromtheairover
time. Thisaccumulation ofwater lowers theboil-
ing point and,under certain operating conditions,
can affect thebraking action.
Therefore havethebrake fluidchanged inaccor-
dance withthechange intervals statedinthe
brochure "Maintenance".
• Warning lightUSA
G
Warning lightCanada
The brake-fluid warninglightsinthe instrument
panel andon-board computer indicate:
- brake-fluid leveltoolow,
- inconjunction withlarge pedal travel,
a braking-circuit failure.
If the warning lightsshould lightupwhile
driVing:
I>
Stop immediately inasuitable place.
I>
Donot continue driving.
Please havethefault remedied atyour nearest
authorized Porschedealer.
Maintenance, CarCare
19
Page 133 of 195
Doorlocks
t>
Toprevent thedoor locks fromfreezing during
the cold season, thelock cylinders shouldbe
covered duringawash.
t>
Should thelocks freeze, useanordinary de-
icer. Inmany cases, awell warmed keycan
help. Never useexcessive force.
Paint
t>
Never rubadusty carwith adry cloth since
dust particles areabrasive andcould dulland
damage thesurface finish.
The paintwork ofyour carisexposed toall types
of mechanical andchemical conditions, particular-
ly climatic onessuchasbright sunlight, rain,frost
and snow. Ultraviolet light,rapid changes intem-
perature, rain,snow, industrial dustandchemical
deposits constantly attackthepaint which isonly
able towithstand suchexposure inthe long term
if
itis given regular careandattention.
t>
Donot apply silicone polishes tothe windshield
or windows.
t>
Donot treat matt-painted componentswith
preservatives orpolishes asthis willspoil the
matte effect.
132
Maintenance, CarCare Preservation
The paint surface becomes dullover timedueto
weathering. Itis therefore necessary topreserve
the paint regularly.
This keeps thepaint shiny andelastic. Dirtispre-
vented fromadhering tothe paint surface andin-
dustrial dustisprevented frompenetrating the
paint.
Provided itis washed andtreated withpreserva-
tive regularly, thebrand newfinish ofyour carwill
be retained foryears tocome.
t>
Apply thePorsche paintpreservative afterthe
car wash andpolish itdry toobtain abright fin-
ish orsimply addaliquid preservative regularly
to the final rinse water.
Polishing Do not resort tousing Porsche polishuntilitbe-
comes evident thatthenormal preservatives no
longer produce thedesired finish.
Spots andstains
t>
Remove tarstains, grease, oilspots anddead
insects assoon aspossible withInsect Remov-
er. They cancause discoloration ifallowed to
remain onthe paintwork.
t>
Wash theaffected areaimmediately aftertreat-
ing it. Minor
paintdamage
t>
Have minor paintdamage, suchasscratches,
scores orchips caused byflying stones, re-
paired immediately byyour authorized
Porsche dealerbefore corrosion setsin.
However, ifthere arealready tracesofcorrosion,
they must firstberemoved carefullyandthorough-
ly. Coat thearea witharust-proofing primerand
finish offwith atop coat. Thepaint code andcolor
number arefound onthe vehicle's paintdataplate.
Page 146 of 195
Tiredamage, puncture
t>
Check tiresforimbedded material,cuts,punc-
tures, cracks andbulges (sidewall)before
driving off.
In case oftire damage, whereitis uncertain
whether thereisabreak inthe plywith allits con-
sequences ortire damage causedbythermal or
mechanical overloading duetoloss ofpressure or
any other priordamage, werecommend thatthe
tire bereplaced forsafety reasons.
If one faulty tireisreplaced itshould benoted that
the difference intread depth onone axle must not
exceed 30
%.
Handling inconsistencies mayresult.
t>
Perform avisual inspection ifnecessary.
Tire replacements
If in doubt, contact yourPorsche dealeror
Porsche Importer ofyour country.
Use only tiremakes andtypes tested byPorsche.
If you donot use aPorsche recommended
replacement tire,make surethatyou
purchase yournewtires from areputable
tire dealer andthat thedealer complies with
all manufacturers warningsforthose tires.
Only tires withthesame make andwith the
same specification code(e.g."NO", "Nl"... )
can bemounted. Before
mounting newtires, check withyour
Porsche dealeraboutthecurrent release
status.
Use tires with"ZR" quality standards.
There
are currently nostandards concerning tire
strength atspeeds above150mph (240 kmjh).
Tires should bereplaced noless than onone axle
at the time.
Only tires ofthe same makeandtype must be
used. Mixed tiresarenotpermissible.
Initially, newtires donot have theirfulltraction.
You should therefore driveatmoderate speeds
during thefirst 60-120 miles (100-200 km).
If new tires areinstalled onlyonone axle, anotice-
able change inhandling occursduetothe different
tread depth ofthe other tires.
This happens especially ifonly reartires arere-
placed. However, thiscondition disappears asthe
new tires arebroken in.
t>
Please adjustyourdriving styleaccordingly.
Installation ofnew tires should onlybedone bya
qualified tiretechnician.
Valves
Rubber valvestems mustbereplaced everytime
a tire isreplaced.
For metal valves, theinstallation andreplacement
instructions mustbeobserved.
Use only genuine Porsche metalvalves.
Parking atthe curb
/!\
Warning!
Hard impacts againstcurbs(ortraffic
islands) aredangerous andmay cause hid-
den tiredamage whichisnot noticeable until
later. Suchdamage canresult inaccidents
at high speeds causing severepersonal inju-
ry.
Depending onthe force ofimpact, theedge
of the rim can also bedamaged.
t>
Ifyou areindoubt, havethewheel checked by
an expert, particularly ifyou suspect damage
on the inside.
I>
Ifyou must driveoveracurb orother obstacle,
drive slowly andatan obtuse angle.Exercise
care when parking alongcurbs.
Practical Tips,Emergency Service
Page 153 of 195
Electrical System
In order toavoid damage andfaults inelectrical or
electronic systems,electrical accessories should
be installed atyour authorized Porschedealer.
~ Only useaccessories authorizedbyPorsche.
A
Warning!
Risk ofshort circuit andfire.
Replacing fusesorrelays withtheengine
running orthe ignition oncould cause elec-
trical shock.
~ Disconnected thebattery duringallwork on
the electrical system.
Please observe thechapter "BATTERY" on
Page 155.
Relays
Defective
relays
shouldbechanged onlybyan
authorized workshop.
Practical Tips,Emergency Service
Alann
system,
centrallocking
The status ofthe central locking andalarm system
is not changed bydisconnecting thebattery.
When thebattery isdisconnected, thealarm sys-
tem ceases tofunction.
Overload protection
If the central locking systemisoperated more
than tentimes within aminute, furtheroperation is
blocked for30seconds.
load
switch-off aftertwohours
or five days
If the ignition keyisremoved, loadswhich are
switched onorinstandby (e.g.power windows,
luggage compartment lighting,interiorlight,radio)
are automatically switchedoffafter approximately
2 hours.
If the vehicle isnot started orunlocked withthere-
mote control within
fivedays,
theremote control
standby function isswitched off(toprevent dis-
charging ofthe vehicle battery).
1. Inthis case, unlock thedriver's doorwiththe
key atthe door lock.
Leave thedoor closed inorder toprevent the
alarm system frombeing triggered.
2. Press button 1on the remote control.
The remote controlisnow activated again.