turn signal PORSCHE 911 TURBO 2014 6.G Owner's Manual
[x] Cancel search | Manufacturer: PORSCHE, Model Year: 2014, Model line: 911 TURBO, Model: PORSCHE 911 TURBO 2014 6.GPages: 300, PDF Size: 10.61 MB
Page 215 of 300
Parking 213
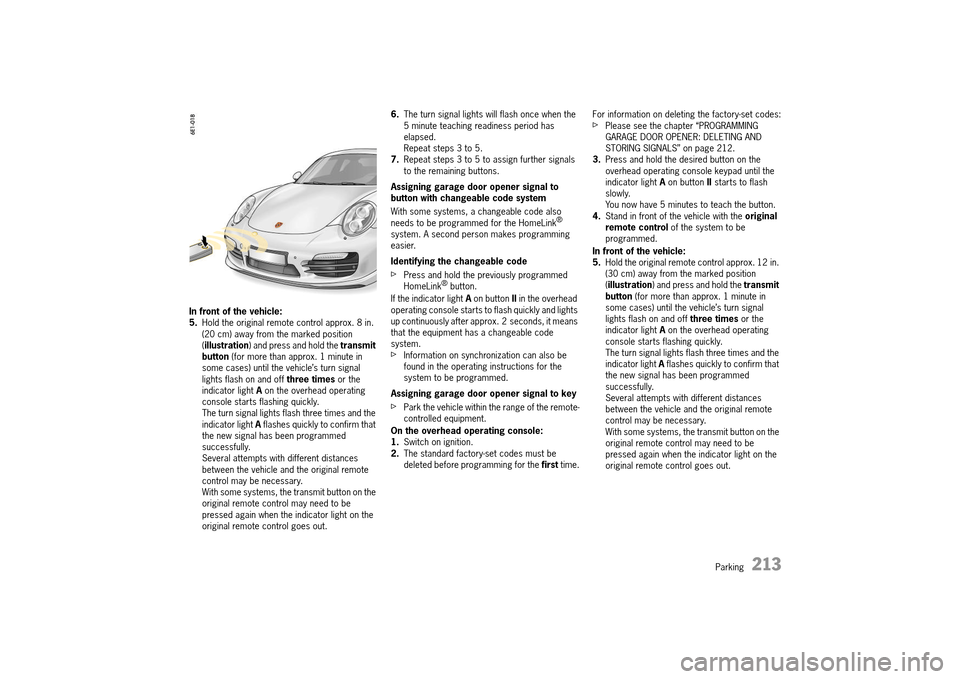
In front of the vehicle: 5. Hold the original remote control approx. 8 in. (20 cm) away from the marked position ( illustration) and press and hold the transmit button (for more than approx. 1 minute in some cases) until the vehicle’s turn signal lights flash on and off three times or the indicator light A on the overhead operating console starts flashing quickly.The turn signal lights flash three times and the indicator light A flashes quickly to confirm that the new signal has been programmed successfully.Several attempts with different distances between the vehicle and the original remote control may be necessary.With some systems, the transmit button on the original remote control may need to be pressed again when the indicator light on the original remote control goes out.
6. The turn signal lights will flash once when the 5 minute teaching readiness period has elapsed.Repeat steps 3 to 5.7. Repeat steps 3 to 5 to assign further signals to the remaining buttons.
Assigning garage door opener signal to button with changeable code system
With some systems, a changeable code also needs to be programmed for the HomeLink® system. A second person makes programming easier.
Identifying the changeable code
fPress and hold the previously programmed HomeLink® button.
If the indicator light A on button II in the overhead operating console starts to flash quickly and lights up continuously after approx. 2 seconds, it means that the equipment has a changeable code system.fInformation on synchronization can also be found in the operating instructions for the system to be programmed.
Assigning garage door opener signal to key
fPark the vehicle within the range of the remote- controlled equipment.
On the overhead operating console: 1. Switch on ignition. 2. The standard factory-set codes must be deleted before programming for the first time.
For information on deleting the factory-set codes:fPlease see the chapter “PROGRAMMING GARAGE DOOR OPENER: DELETING AND STORING SIGNALS” on page 212.3. Press and hold the desired button on the overhead operating console keypad until the indicator light A on button II starts to flash slowly.You now have 5 minutes to teach the button.4. Stand in front of the vehicle with the original remote control of the system to be programmed.
In front of the vehicle: 5. Hold the original remote control approx. 12 in. (30 cm) away from the marked position ( illustration) and press and hold the transmit button (for more than approx. 1 minute in some cases) until the vehicle’s turn signal lights flash on and off three times or the indicator light A on the overhead operating console starts flashing quickly.The turn signal lights flash three times and the indicator light A flashes quickly to confirm that the new signal has been programmed successfully.Several attempts with different distances between the vehicle and the original remote control may be necessary.With some systems, the transmit button on the original remote control may need to be pressed again when the indicator light on the original remote control goes out.
14_991_Turbo_21.book Seite 213 Mittwoch, 9. April 2014 2:19 14
Page 216 of 300
214 Parking
6.The turn signal lights will flash once when the 5 minute teaching readiness period has elapsed.Repeat steps 3 to 5.7. Repeat steps 3 to 5 to assign further signals to the remaining buttons. 8. Locate the programming button on the receiver of the equipment to be programmed, e.g. on the motor unit of the garage door opener.
Synchronizing the system
9. Activating the motor unit: Press the programming button on the receiver of the garage door opener.You then usually have approx. 30 seconds to initiate step 10 (a setting indicator is usually activated on the motor unit).10. Programming on the overhead operating console:Press the button you selected in step 3 three times on the overhead operating console keypad (you must press the button on the keypad several times to complete the setting process for some devices).11. Repeat steps 3 to 10 to assign signals to the other buttons.12. After completing programming on the overhead operating console, the system should recognize the HomeLink® signal and launch as soon as the memory button is pressed when the ignition is switched on.
Reprogramming an individual button on the keypad
A HomeLink® button can be individually reprogrammed without deleting the rest of the button assignments.
On the overhead operating console: 1. Switch on ignition. 2. Press and hold the button to be programmed on the overhead operating console keypad (approx. 20 seconds), until indicator light A on button II flashes slowly. You now have 5 minutes to teach the button.3. Stand in front of the vehicle with the original remote control of the system to be programmed.
In front of the vehicle: 4. Hold the original remote control approx. 12 in. (30 cm) away from the marked position ( illustration) and press and hold the transmit button (for more than approx. 1 minute in some cases) until the vehicle’s turn signal lights flash on and off three times or the indicator light A in the overhead operating console starts to flash quickly.The turn signal lights flash three times and the indicator light A flashes quickly to confirm that the new signal has been programmed successfully.Several attempts with different distances between the vehicle and the original remote control may be necessary.With some systems, the transmit button on the original remote control may need to be pressed again when the indicator light on the original remote control goes out.
5. The turn signal lights will flash once when the 5-minute teaching readiness period has elapsed.Repeat steps 1 to 4.6. Repeat steps 1 to 4 to assign further signals to the other buttons.
Information
fPlease consult an authorized Porsche dealer if you have not been able to successfully assign signals to the buttons even though you have carefully followed the instructions in this section and the operating instructions for the original remote control. Your authorized Porsche dealer has a list of all garage door opener signals that can be adapted.fMake sure that the battery in the remote control for the garage door opener is new. If the battery voltage is inadequate, faults may occur in signal transmission. The system in the vehicle then learns the wrong code, which will not be recognized reliably by the garage door opening mechanism.
14_991_Turbo_21.book Seite 214 Mittwoch, 9. April 2014 2:19 14
Page 228 of 300
226 Maintenance and Car Care
Undercoating
Additional undercoating or rust protection agents on or near the exhaust system can become too hot when driving and ignite, causing a fire.fDo not apply additional undercoating or rust protection agent on or near the exhaust manifolds, exhaust pipes, catalytic converters or heat shields. During driving the substance used for undercoating could overheat and ignite.
How Emission Control Works
When an automobile engine is running, it uses energy generated through the combustion of a mixture of air and fuel. Depending on whether a car is driven fast or slowly or whether the engine is cold or hot, some of the fuel (hydrocarbons) may not be burned completely, but may be discharged into the engine crankcase or exhaust system. Additional hydrocarbons may enter the atmosphere through evaporation of fuel from the fuel tank. These hydrocarbons (HC), when released into the air, contribute to undesirable pollution.
In addition, carbon monoxide (CO) and oxides of nitrogen (NOx) contribute to engine emissions. They, too, are formed during the combustion process and discharged into the exhaust system.
To reduce these pollutants, your Porsche is equipped with a precisely calibrated fuel injection system to assure a finely balanced air/fuel mixture under all operating conditions.
Oxygen sensor
The oxygen sensor, installed in the exhaust pipe continuously senses the oxygen content of the exhaust and signals the information to an electronic control unit. The control unit corrects the air/fuel ratio, so the engine always receives an accurately metered air/fuel mixture.
Crankcase ventilation
Through crankcase ventilation, undesirable emissions from the engine crankcase are not permitted to reach the outside atmosphere. These emissions are recirculated from the crankcase to the air intake system. From here the emissions mix with the intake air and are later burned in the engine.
Catalytic converters
The catalytic converters are efficient “clean-up” devices built into the exhaust system of the vehicle. The catalytic converters burn the undesirable pollutants in the exhaust gas before it is released into the atmosphere.
The exclusive use of unleaded fuel is critically important for the life of the catalytic converters. Therefore, only unleaded fuel must be used.
The catalytic converters will be damaged by:
– Push or tow starting the vehicle, – Misfiring of the engine,– Turning off the ignition while the vehicle is moving,– Driving until the fuel tank is completely empty,– By other unusual operating conditions.fDo not continue to operate your vehicle under these conditions, since raw fuel might reach the catalytic converters. This could result in overheating of the converters. Federal law prohibits use of leaded fuel in this car.
Fuel Economy
Fuel economy will vary depending on where, when and how you drive, optional equipment installed, and the general condition of your car. A car tuned to specifications and correctly maintained, will help you to achieve optimal fuel economy.fHave your vehicle tuned to specifications. Air cleaner should be dirt free to allow proper engine “breathing”.Battery should be fully charged.Wheels should be properly aligned.Tires should be inflated to the correct pressure.
AfterMarket Undercoating
WARNINGh
14_991_Turbo_21.book Seite 226 Mittwoch, 9. April 2014 2:19 14
Page 270 of 300
268 Minor Repairs
Row B
Row C
No. Designation A
1 Front lid light Front lid actuator
High beam, FL
Low beam, FL
Side marker light, FR
Turn signal lights, RL, FL
40
2 Raised brake light, spoiler
Rear lid actuator
Rear fog light, right
Reversing light, left
Brake light, left
Tail light, left
Daytime driving light, FL
15
3 Alarm horn 15
4 Interior lighting
Hall sensors
Orientation light
License plate light
Rear wiper electronics activation
Heated rear window relay
Central locking LED
Door panels LED
Ambient light
Raised brake light
Rear fog light, left
Brake light, right
Reversing light, right
Daytime driving light, FR
Tail light, right
15
5 Fuel pump relay and control unit 20
6 Filler flap close/open
Washer pump, front/rear
10
7 Front spoiler control unit 30
8 Air conditioning control unit 7,5
9 Instrument cluster Steering columnstopwatch
10
10 PCM 25
No. Designation A
1 Center console button panel Gateway control unit
Diagnostic socket Ignition lock Passenger compartment monitoring sensorLight switch
Bluetooth phone charger
15
2 Start-relevant loads
Footwell lights
Electric ignition lock anti-removal lock
Turn signal light indicator, FL/FR
Emergency flasher button LED
Electric ignition lock light
Side turn signal lights, FR/FL
High beam, FR
Low beam, FR
Turn signal light indicator, RR
Side marker light, FL
40
3 Vehicle Tracking System control unit 5
4 Horn 15
No. Designation A
5 Cabriolet: Convertible-top lock closing mechanism open/closed
Filler flap
Cabriolet: Convertible top storage compartment catch open/close
Rear spoiler control extend/retract
30
6 Power window control unit, FL 25
7 Headlight cleaning system 30
8 PSM control unit 25
9 Alarm siren 5
10 Not used
No. Designation A
14_991_Turbo_21.book Seite 268 Mittwoch, 9. April 2014 2:19 14
Page 280 of 300
278 Minor Repairs
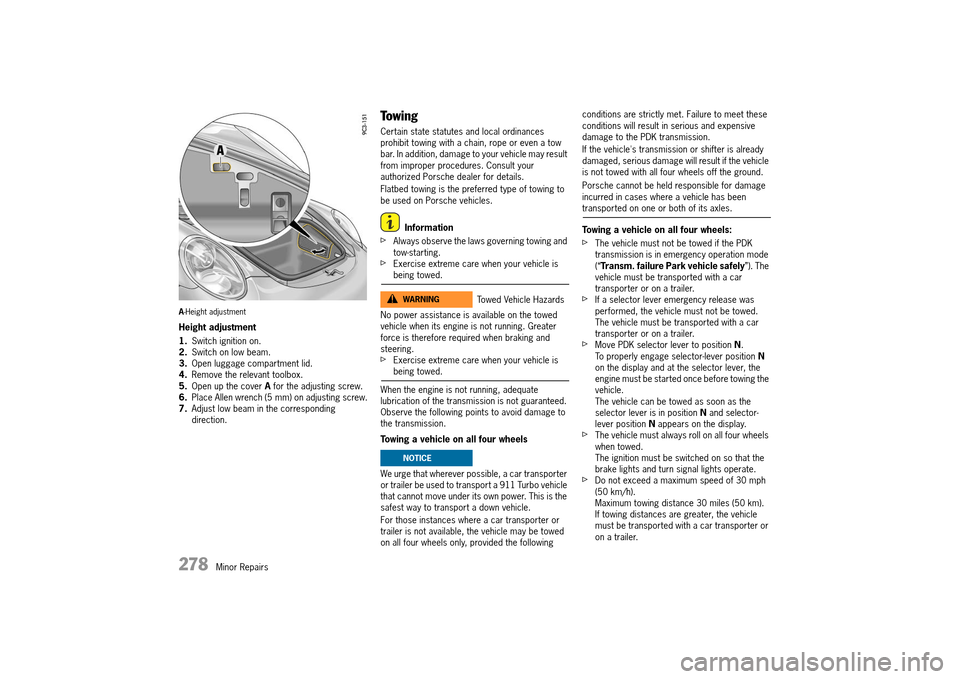
A-Height adjustment
Height adjustment
1. Switch ignition on. 2. Switch on low beam. 3. Open luggage compartment lid. 4. Remove the relevant toolbox. 5. Open up the cover A for the adjusting screw. 6. Place Allen wrench (5 mm) on adjusting screw. 7. Adjust low beam in the corresponding direction.
Towing
Certain state statutes and local ordinances prohibit towing with a chain, rope or even a tow bar. In addition, damage to your vehicle may result from improper procedures. Consult your authorized Porsche dealer for details.
Flatbed towing is the preferred type of towing to be used on Porsche vehicles.
Information
fAlways observe the laws governing towing and tow-starting.fExercise extreme care when your vehicle is being towed.
No power assistance is available on the towed vehicle when its engine is not running. Greater force is therefore required when braking and steering.fExercise extreme care when your vehicle is being towed.
When the engine is not running, adequate lubrication of the transmission is not guaranteed. Observe the following points to avoid damage to the transmission.
Towing a vehicle on all four wheels
We urge that wherever possible, a car transporter or trailer be used to transport a 911 Turbo vehicle that cannot move under its own power. This is the safest way to transport a down vehicle.
For those instances where a car transporter or trailer is not available, the vehicle may be towed on all four wheels only, provided the following
conditions are strictly met. Failure to meet these conditions will result in serious and expensive damage to the PDK transmission.
If the vehicle's transmission or shifter is already damaged, serious damage will result if the vehicle is not towed with all four wheels off the ground.
Porsche cannot be held responsible for damage incurred in cases where a vehicle has been transported on one or both of its axles.
Towing a vehicle on all four wheels:
fThe vehicle must not be towed if the PDK transmission is in emergency operation mode (“ Transm. failure Park vehicle safely”). The vehicle must be transported with a car transporter or on a trailer.fIf a selector lever emergency release was performed, the vehicle must not be towed. The vehicle must be transported with a car transporter or on a trailer.fMove PDK selector lever to position N. To properly engage selector-lever position N on the display and at the selector lever, the engine must be started once before towing the vehicle. The vehicle can be towed as soon as the selector lever is in position N and selector- lever position N appears on the display.fThe vehicle must always roll on all four wheels when towed.The ignition must be switched on so that the brake lights and turn signal lights operate.fDo not exceed a maximum speed of 30 mph (50 km/h).Maximum towing distance 30 miles (50 km).If towing distances are greater, the vehicle must be transported with a car transporter or on a trailer.
Towed Vehicle HazardsWARNINGh
NOTICE
14_991_Turbo_21.book Seite 278 Mittwoch, 9. April 2014 2:19 14
Page 300 of 300
298 Index
TPMS (Tire Pressure Monitoring System) ....................... 105 TransmissionPorsche Doppelkupplung (PDK) ......................... 172Transmission and chassis control systemsOverview (PSM, PASM, PDCC, PTV Plus) ............ 179Transport (on car trains, ferries, etc.)Securing the vehicle ......................................... 282Switching off inclination sensor ......................... 216Trip counterDisplay .............................................................. 93Resetting........................................................... 93Trip information ........................................................... 105Trunk entrapment .......................................................... 30Turn signal, stalk ........................................................... 82
UUltrasound sensor, ParkAssist ...................................... 207Underbody protection, care instructions ........................ 235Universal audio interface, installation position ................ 171Unlocking Opening vehicle door from inside......................... 23Retrieving personal settings from the key........... 143The vehicle cannot be unlocked........................... 26Unlocking and opening tailgate ............................ 25Unlocking vehicle door from inside ...................... 23Unlocking vehicle door with car key(remote control) ................................................. 21Unlocking vehicle door with Porsche Entry & Drive (keyless)........................... 21Upshift prompt .............................................................. 93USB interface, installation position ................................ 171
VVanity mirror ................................................................. 53Vehicle Keys ................................................................. 16Vehicle data ................................................................ 284Vehicle doorLocking from inside ............................................ 23Locking with car key (remote control) .................. 22Locking with Porsche Entry & Drive (keyless)........ 22Malfunctions when opening and closing................ 26Unlocking with car key (remote control) ............... 21Unlocking with Porsche Entry & Drive (keyless) ..... 21Vehicle informationRetrieving on multi-function display .................... 100Vehicle settingsAdapting multi-function display .......................... 118Adjusting on multi-function display ..................... 117
Adjusting volume of warning and information tones ............................................ 126Air-conditioning settings ................................... 123Changing button assignment on multi-function steering wheel ................................................. 127Changing the language .................................... 126Light and visibility settings................................ 120Locking settings .............................................. 122Porsche Active Safe settings ............................ 128Resetting to factory settings............................. 117Selecting settings menu ................................... 117Setting date and time....................................... 124Setting units .................................................... 125Storing on person buttons .......................... 34, 143Storing on the key ..................................... 34, 143Vents Adjusting........................................................... 59Opening/closing ................................................ 59 Voice control .............................................................. 171
WWarning messagesTire pressure................................................... 112 Washer fluid Antifreeze ....................................................... 224Topping up ...................................................... 224 Washer jets Heating ............................................................. 86Washing the vehicle, instructions .................................. 232WeightsDefinitions ....................................................... 204Weights, Technical data ............................................... 288Welcome Home functionSwitching on ..................................................... 80Wheel Attachment faces ............................................ 257Central Bolts ................................................... 258Central locking ................................................ 258Changing ........................................................ 258Checking pressure ........................................... 256Security wheel bolts......................................... 198 Wheel alignment ......................................................... 250Wheel attachment faces .............................................. 257Wheel change ............................................................. 251WheelsAdjusting......................................................... 250Central Bolts ................................................... 258Central locking ................................................ 258Changing ........................................................ 254Fixing a flat tire................................................ 265General information ......................................... 244
Inscription on alloy wheels ................................ 253 Inscription on radial tire .................................... 252Overview ......................................................... 286Replacing tires (general information) .................. 249Rim offset ....................................................... 286Security wheel bolt (wrench socket) ................... 257Size ................................................................ 286Snow chains (general information) ..................... 251Snow tires (general information) ........................ 250Storage ........................................................... 250Tightening torque ............................................. 258Tire pressure plate ........................................... 284Tire pressure, data (bar/psi) ............................. 287Tire sealant ..................................................... 265Wheel attachment faces ................................... 257Wheel balancing ............................................... 250Wheel bolts (care instructions)........................... 257WindowsAdjusting after connecting battery ....................... 63Care instructions .............................................. 234Heated washer jets ............................................ 86Opening/closing with rocker switch ..................... 62Storing end position ........................................... 63Windshield washer systemAdding washer fluid .......................................... 224Windshield wiper/washer stalk Adjusting the rain sensor sensitivity ..................... 85Windshield wiper/washer system......................... 86Windshield, fast wiping ....................................... 86Windshield, slow wiping ...................................... 86Wiping windshield once (one-touch operation) ....... 86 Windshield wipers Care instructions .............................................. 234Stalk ................................................................. 86 WindstopClosing.............................................................. 69Lowering ........................................................... 69Opening ............................................................ 69Raising .............................................................. 69Winter driving .............................................................. 272Winter tires Changing tires ................................................. 256General information .......................................... 250Storage ........................................................... 250 Wiper bladesCare instructions .............................................. 234Replacing ........................................................ 224Wrench socket for security wheel boltUsing .............................................................. 257
14_991_Turbo_21.book Seite 298 Mittwoch, 9. April 2014 2:19 14