ABS PORSCHE 944 1987 1.G Owners Manual
[x] Cancel search | Manufacturer: PORSCHE, Model Year: 1987, Model line: 944, Model: PORSCHE 944 1987 1.GPages: 66, PDF Size: 3.3 MB
Page 3 of 66

INDEX
A
ABS Acceleration diagram Accelerator pedal Air Bag System Air - cleaner
- conditioner
- filter
Alternator warning light Antifreeze Antilock, Brake system Anti-theft alarm Ashtray Automatic- garage door
- speed control
- transmission
- transmission fluid B
Battery
Boost pressure gauge
Brake - booster
- fluid
- fluid warning light
- pads
- parking
- pedal
- system
- warning light
Break-in hints
Bulb replacing
Buzzer 28,39
118-129
55
20, 21, 38, 3980, 8144-4680,81 39
74,75,11028, 39
11
42, 98
25
29
53-55
78,110,128
90-9234
27
39,79,11039
27,37,47,79,80 26
26, 27
26,27,11537
47
93-98
10,18,24,30
C/D
CASIS
Capacities
Car care instructions
Casis
Catalytic Converter
Cautions
Central locking
Central warning light
Cigarette lighter
Cleaning
Clock
Clutch pedal
Collapsible spare tire
Control warning light system
Coolant Temperature Gauge
Cooling system
Corrosion prevention
Dashboard
Defogging/defrosting
Dimensions
Doors
Driving hints
E/F
Electrical system
Emergency- flasher
- starting
Emission Control System
Engine - cooling
- exhaust
- hood
- number
- oil checking & changing
- oil
-speed, max 35
110
61-66
35
50,10267
13
37
41
61-66 40
27
85
36-39 36
74-77
65-66
24
44-46 114
12,138-9, 48, 49
89-92
41
92
100-103 74-77
48
586
69-72
69,110,111,128
34,47,52,106-
108
Fan control switch knob
Fan, radiator
Filling capacities
Fog lights
Fuel - economy
- evaporation control
- gauge
- recommendation
- tank
Fuses and relays
G/H
Gas Station Information
Gasohol
Gasoline
Gear ratio diagram
Gearshift lever
Glove compartment
Hatchback
Headlights
Headlight- dimmer
- flasher
- switch
- washing system
Heater/ventilation controls
Hood - front
- rear
Horn
I/J
Ignition/steering lock
Instrument illumination
Instruments
Interior ligh 44
36, 74 110
30, 96, 97
49
103 37
50, 51
50,110
89,126
126-129 51
50,51
122-125 52-55
42
56
30,95,99 30
30
30
31,32,81,11044-4658
56,57
21,24
24
30
33-40
43, 98
4
Jack
- supports
K/L
Keys
Kickdown
Lane changer
Leather
License plate light
Light switch
Lights - ashtray
- fog
- interior
- license plate
- parking
- turn signal
Locks - doors, wheels
Loudspeakers
Lubricants
Luggage compartment
M/O
Manual transmission
- oil
Mirrors
Oil- change
- consumption
- filter changing
- pressure gauge
- pressure warning light
Octane rating
Oxygen Sensor
P/R
Paint code number 68
87, 88, 129
10-11,86 55
30
65
98
30
98
30, 96, 97
43, 9898
30, 37, 93, 94
30,93,94
10-13, 86 89
110,111 57
52,122-125 77,11022,43
71,72
47, 69
71, 72 38
38
50, 51,106-108 101,102
7
Parking- brake
- lights
Performance
Power assisted steering
Power train
Power windows
Prop-up roof
Radiator fan
Rear - hood
- view mirrors
- window defogger
- wiper
Recirculation Switch
Refrigerant
Relays
Rims
Roof racks
Roof, removable S
Safe driving hints
Safetybelts
Safety belt warning light
Safety compliance sticker
Seat heating System
Seats
Sekuriflex windshield
Shift indicator
Shift points
Side marker lights
Ski racks
Snow- chains
- tires
Spare tire, collapsible
Spark plugs
Specifications, engine
26, 3730,37,93,94116731091259, 6036, 7456,572241424446,11089,12664,112,11357,11459, 60
8-9
17-21,6518,3771514-1631, 63, 643552-559457,11483, 84,112,113
83,84, 111,113
85106-108106-109
Speedometer
Starting procedures
Sun visors
T/U
Tachometer
Technical data
Tirepressure
Tires
Tool kit
Trip odometer
Transmission oil
Trunk
Turn signal lights
Undercoating
Unleaded fuel
V/W
Vehicle identification
Ventilation
Voltmeter
Warning/indicator lights
Washer reservoir
Washing
Water temperature gauge
Weatherstrips
Weights
Wheel alignment
Wheel nuts, lockable
Wheels
Wheel changing
Windows
Windshield- washer reservoir
- wiper/washer lever 3324, 2543
34, 35105-12582,112,113,12947,82-87,112,113683377, 78,11056,5730, 37, 93, 9465, 66,10050, 51,106-108,110
6-744-463835-4081,11061-6636641141158647,64,82-87,11285-8812,63,6481,11031
5
Page 15 of 66

ABS Brake System (Antilock brake system)
The ABS system represents a major
contribution to the enhancement of active
safety in your vehicle. This system prevents
the wheels from locking in a panic stop on
almost all road surfaces.
With ABS system in your vehicle, the
following areas are enhanced:
Full steerability , vehicle remains steerable
under all braking forces.
Good directional control , no swerving
caused by locking of wheels under braking
conditions.
Excellent stopping distance , stopping
distances are usually reduced because
controlled braking is maximized.
Prevention of wheel lock up , no brake-
induced sliding and thus no localized tire wear from emergency braking.
The crucial advantage of ABS system over a
conventional brake system is in the area of
maintaining directional control and
maneuverability of the car in emergency
situations, including panic braking in turns.
WARNING:
In spite of the improved handling afforded
by the ABS system, it still remains the
responsibility of the driver to adapt the
driving style to the prevailing road and
weather conditions, as well as, obeying
traffic laws. In no case, should the higher
degree of safety offered by ABS be
regarded as a
justification for taking greater risks. Other vehicles not equipped with the ABS
system may not be able to maintain
control, especially on wet or poor road
surfaces and thus may be more likely to
impact you in the rear. To minimize that r
isk, use your ABS system to increase your ability to maneuver to avoid dangerous
situations and not merely to try to stop in
the shortest distance possible.
Driving with the ABS System
A wheel speed sensor is fitted to each of the four wheels. If wheel slippage of either of the
front wheels or the rear wheels is sensed
during braking, the brake pressure is adjusted
automatically until the wheel no longer slips.
The brake pressure is regulated for each front
wheel individually and for both rear wheels together.
On a road surface which is slippery on only
one side, the rear wheel which is braking on
the slippery surface determines the brake
pressure which will be applied equally to both
rear wheels. This ensures that directional
stability is maintained. However, if braking
force approaches the wheel locking-up point
for all wheels (panic braking) the ABS system
will intervene in a way comparable with rapid rhythmic braking. The proper operation of ABS is perceived by the driver as a pulsating brake pedal in conjunction with audible noise
and perhaps some vibration. The driver is
thereby warned to reduce vehicle speed
appropriate for the prevailing road conditions.
If your ABS system should ever malfunction,
the ABS system is automatically switched off,
but the normal brake system, without ABS,
would remain fully operational. Such a malfunction would be indicated by the illumination of the central warning light, as well as the "ANTILOCK" light on the right hand
side of the instrument cluster.
If the ABS system becomes inoperative,
take your vehicle to your authorized dealer immediately.
Note
The control unit of the ABS brake system is
set for standard tire sizes. If non-standard
tires are fitted, the control unit may
misinterpret the speed of the vehicle, because of the variant data it receives from the sensors on the axles.
If the difference in rolling radius exceeds
approx. 17%, the control unit deactivates the
ABS system and the ABS warning lamp lights up.
28
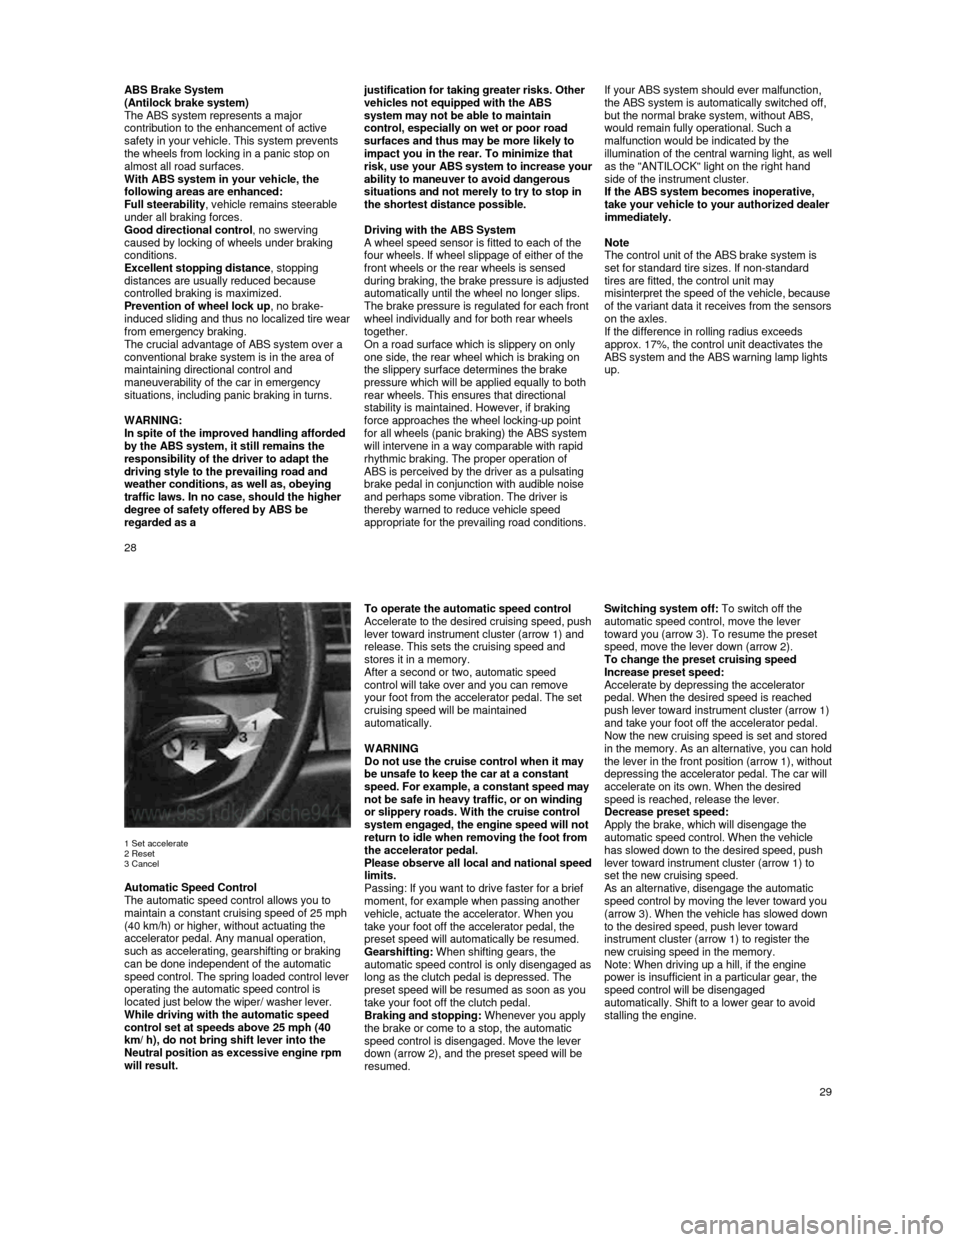
1 Set accelerate
2 Reset
3 Cancel
Automatic Speed Control
The automatic speed control allows you to
maintain a constant cruising speed of 25 mph
(40 km/h) or higher, without actuating the
accelerator pedal. Any manual operation,
such as accelerating, gearshifting or braking
can be done independent of the automatic
speed control. The spring loaded control lever
operating the automatic speed control is
located just below the wiper/ washer lever.
While driving with the automatic speed
control set at speeds above 25 mph (40
km/ h), do not bring shift lever into the
Neutral position as excessive engine rpm
will result.
To operate the automatic speed control Accelerate to the desired cruising speed, push lever toward instrument cluster (arrow 1) and
release. This sets the cruising speed and
stores it in a memory.
After a second or two, automatic speed control will take over and you can remove
your foot from the accelerator pedal. The set
cruising speed will be maintained
automatically.
WARNING
Do not use the cruise control when it may
be unsafe to keep the car at a constant
speed. For example, a constant speed may not be safe in heavy traffic, or on winding
or slippery roads. With the cruise control
system engaged, the engine speed will not
return to idle when removing the foot from
the accelerator pedal.
Please observe all local and national speed limits.
Passing: If you want to drive faster for a brief
moment, for example when passing another
vehicle, actuate the accelerator. When you
take your foot off the accelerator pedal, the
preset speed will automatically be resumed.
Gearshifting: When shifting gears, the
automatic speed control is only disengag
ed as long as the clutch pedal is depressed. The
preset speed will be resumed as soon as you
take your foot off the clutch pedal.
Braking and stopping: Whenever you apply
the brake or come to a stop, the automatic
speed control is disengaged. Move the lever
down (arrow 2), and the preset speed will be
resumed.
Switching system off: To switch off the
automatic speed control, move the lever
toward you (arrow 3). To resume the preset
speed, move the lever down (arrow 2).
To change the preset cruising speed
Increase preset speed:
Accelerate by depressing the accelerator pedal. When the desired speed is reached push lever toward instrument cluster (arrow 1) and take your foot off the accelerator pedal.
Now the new cruising speed is set and stored
in the memory. As an alternative, you can hold the lever in the front position (arrow 1), without depressing the accelerator pedal. The car will
accelerate on its own. When the desired
speed is reached, release the lever.
Decrease preset speed:
Apply the brake, which will disengage the automatic speed control. When the vehicle
has slowed down to the desired speed, push
lever toward instrument cluster (arrow 1) to
set the new cruising speed.
As an alternative, disengage the automatic
speed control by moving the lever toward you
(arrow 3). When the vehicle has slowed down
to the desired speed, push lever toward
instrument cluster (arrow 1) to register the
new cruising speed in the memory.
Note: When driving up a hill, if the engine
power is insufficient in a particular gear, the
speed control will be disengaged
automatically. Shift to a lower gear to avoid
stalling the engine.
29
Page 20 of 66

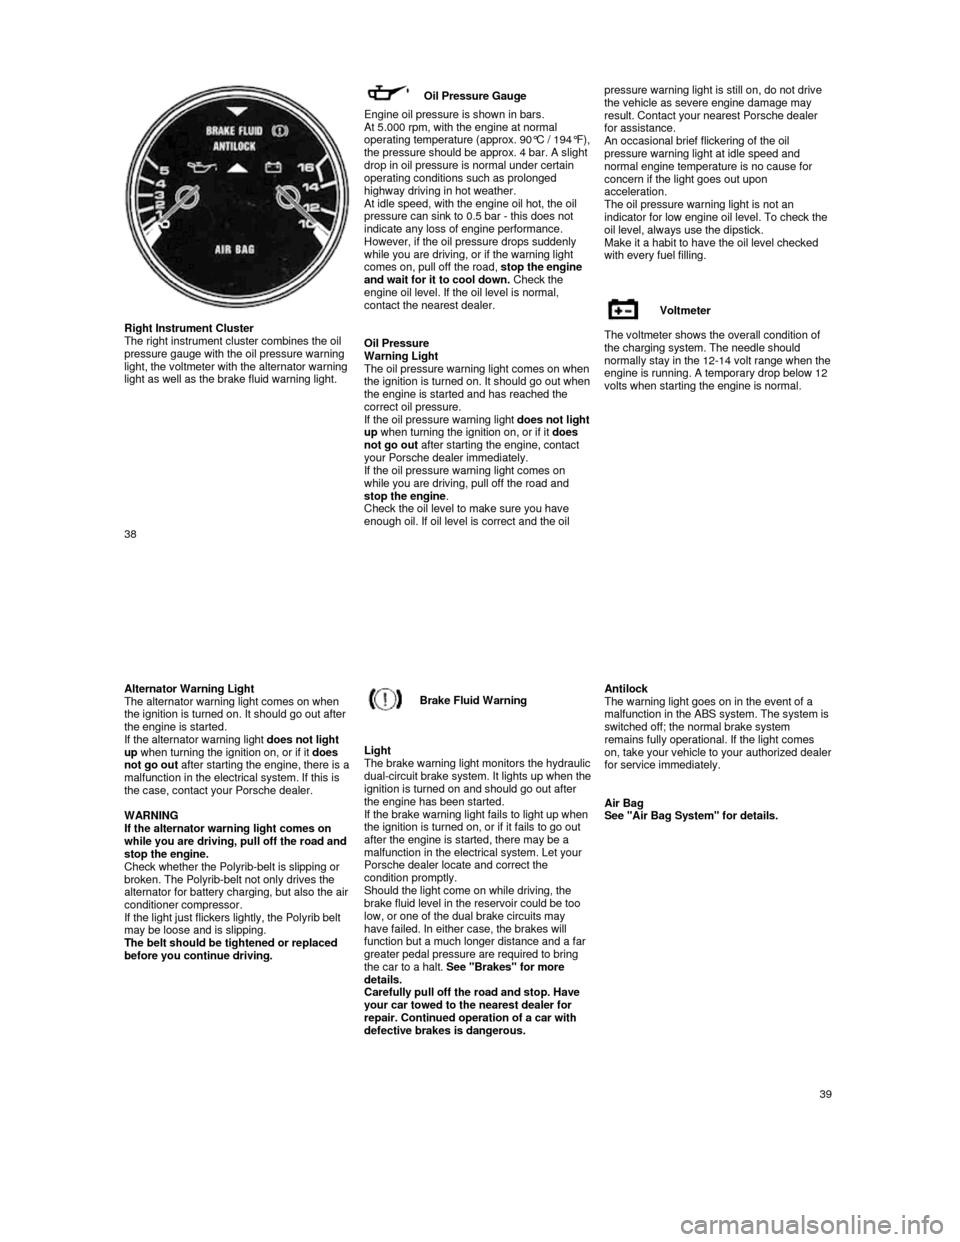
Right Instrument Cluster
The right instrument cluster combines the oil
pressure gauge with the oil pressure warning
light, the voltmeter with the alternator warning
light as well as the brake fluid warning light.
Oil Pressure Gauge
Engine oil pressure is shown in bars. At 5.000 rpm, with the engine at normal operating temperature (approx. 90°C / 194°F), the pressure should be approx. 4 bar. A slight
drop in oil pressure is normal under certain
operating conditions such as prolonged
highway driving in hot weather.
At idle speed, with the engine oil hot, the oil pressure can sink to 0.5 bar - this does not
indicate any loss of engine performance.
However, if the oil pressure drops suddenly
while you are driving, or if the warning light comes on, pull off the road,
stop the engine
and wait for it to cool down. Check the
engine oil level. If the oil level is normal,
contact the nearest dealer.
Oil Pressure
Warning Light
The oil pressure warning light comes on when the ignition is turned on. It should go out when the engine is started and has reached the
correct oil pressure.
If the oil pressure warning light
does not light up when turning the ignition on, or if it does
not go out after starting the engine, contact
your Porsche dealer immediately.
If the oil pressure warning light comes on
while you are driving, pull off the road and stop the engine .
Check the oil level to make sure you have
enough oil. If oil level is correct and the oil pressure warning light is still on, do not driv
e
the vehicle as severe engine damage may
result. Contact your nearest Porsche dealer
for assistance.
An occasional brief flickering of the oil pressure warning light at idle speed and
normal engine temperature is no cause for
concern if the light goes out upon
acceleration.
The oil pressure warning light is not an
indicator for low engine oil level. To check the
oil level, always use the dipstick.
Make it a habit to have the oil level checked
with every fuel filling.
Voltmeter
The voltmeter shows the overall condition of
the charging system. The needle should
normally stay in the 12-
14 volt range when the engine is running. A temporary drop below 12
volts when starting the engine is normal.
38
Alternator Warning Light
The alternator warning light comes on when
the ignition is turned on. It should go out after
the engine is started.
If the alternator warning light does not light
up when turning the ignition on, or if it does
not go out
after starting the engine, there is a malfunction in the electrical system. If this is
the case, contact your Porsche dealer.
WARNING
If the alternator warning light comes on
while you are driving, pull off the road and
stop the engine.
Check whether the Polyrib-belt is slipping or
broken. The Polyrib-belt not only drives the
alternator for battery charging, but also the air
conditioner compressor.
If the light just flickers lightly, the Polyrib bel t
may be loose and is slipping.
The belt should be tightened or replaced
before you continue driving.
Brake Fluid Warning
Light
The brake warning light monitors the hydraulic dual-circuit brake system. It lights up when the ignition is turned on and should go out after
the engine has been started.
If the brake warning light fails to light up when
the ignition is turned on, or if it fails to go out
after the engine is started, there may be a
malfunction in the electrical system. Let your
Porsche dealer locate and correct the
condition promptly.
Should the light come on while driving, the
brake fluid level in the reservoir could be too
low, or one of the dual brake circuits may
have failed. In either case, the brakes will
function but a much longer distance and a far
greater pedal pressure are required to bring
the car to a halt. See "Brakes" for more
details.
Carefully pull off the road and stop. Have
your car towed to the nearest dealer for
repair. Continued operation of a car with
defective brakes is dangerous.
Antilock
The warning light goes on in the event of a
malfunction in the ABS system. The system is
switched off; the normal brake system
remains fully operational. If the light comes
on, take your vehicle to your authorized dealer for service immediately.
Air Bag
See "Air Bag System" for details.
39
Page 37 of 66

Changing Engine Oil
and Filter
High quality-multi-
grade oils are suitable for all year round driving. Seasonal oil changes are
therefore not necessary. Only if multi-grade
oils are not readily available, a single-
grade oil of the correct viscosity can be used.
Specifications of the various oils to be used
are detailed under "Filling Capacities and
Engine Oil". The use of oil additives is not
recommended by Porsche.
WARNING
When removing oil drain plug with your fingers, keep your arms as high as
possible. This will prevent hot oil from
running down your arm. Wear eye
protection.
Always use a new gasket when reinstalling the plug. Do not overtighten
the plug.
Before changing the engine oil yourself,
make sure that the disposal of the engine
oil and the oil filter, as special wastes, can
be carried out in the proper manner. Under absolutely no circumstance should used
oil find its way into the sewage system,
soil, rivers, ponds, or other
environmentally damaging areas. If there is no possibility of disposing of used oil in the proper manner
(when in doubt, consult local authorities),
please have the oil changed by your dealer or a service station.
Oil change intervals specified in the Warranty
& Maintenance booklet accompanying the
vehicle apply to normal operating conditions
and must be adhered to, including intervals for oil filter change.
If you drive mostly short distances, or if you
operate the vehicle in dusty areas, or under
predominantly stop-and-go traffic conditions,
or when temperatures remain below freezing
for extended periods, the engine oil should be
changed more frequently.
When chang
ing the engine oil and the oil filter, the splash shield under the car has to be
removed first.
Drain the oil when the engine is still warm.
71
The oil filter should be changed at the inter-
vals listed in your Maintenance Schedule.
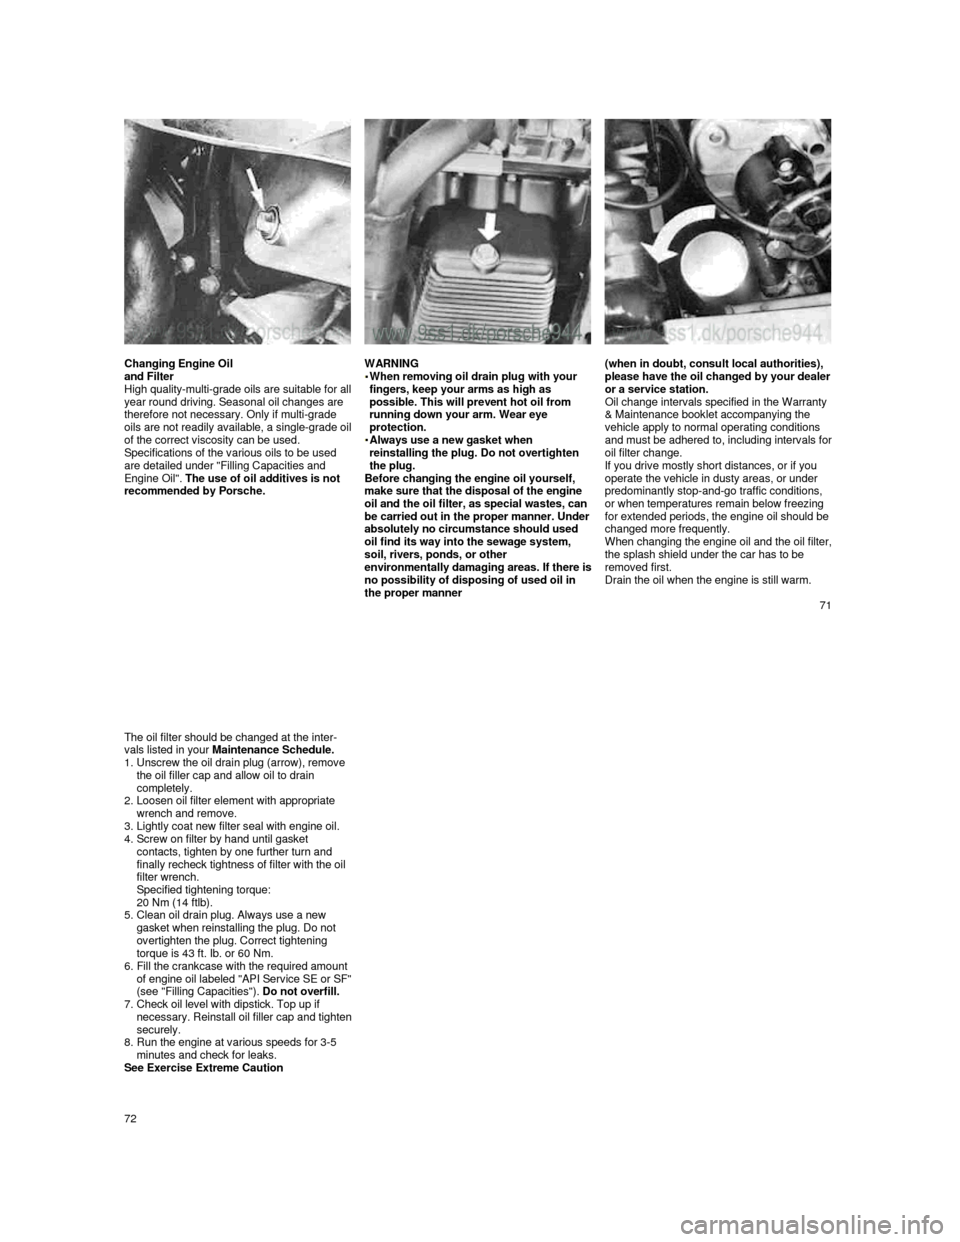
1. Unscrew the oil drain plug (arrow), remove the oil filler cap and allow oil to drain
completely.
2.
Loosen oil filter element with appropriate wrench and remove.
3. Lightly coat new filter seal with engine oil.
4. Screw on filter by hand until gasket
contacts, tighten by one further turn and
finally recheck tightness of filter with the oil
filter wrench.
Specified tightening torque:
20 Nm (14 ftlb).
5.
Clean oil drain plug. Always use a new
gasket when reinstalling the plug. Do not
overtighten the plug. Correct tightening
torque is 43 ft. Ib. or 60 Nm.
6.
Fill the crankcase with the required amount of engine oil labeled "API Service SE or SF" (see "Filling Capacities"). Do not overfill.
7. Check oil level with dipstick. Top up if necessary. Reinstall oil filler cap and tighten securely.
8. Run the engine at various speeds for 3-5
minutes and check for leaks.
See Exercise Extreme Caution
72
Page 41 of 66

Brake Fluid Reservoir
The brake fluid reservoir is in the engine
compartment. The reservoir has two
chambers, the front chamber for one brake
circuit and the rear chamber for the second
brake circuit and the hydraulic clutch.
The fluid level should be checked regularly. If
the level drops below the "min" mark on the
transparent reservoir, the cause should be
located and corrected by your dealer.
To add brake fluid , unscrew the cap. The
vent bore in the cap should be kept clean and
open.
944 / 944 S WARNING
Every 2 years the brake fluid has to be replaced. See your Warranty &
Maintenance booklet.
If brake fluid must be added to the reservoir, use only new and unused DOT
3 or DOT 4 brake fluid, that meets SAE
specification J1703 and conforms to
Motor Vehicle Safety Standard 116.
Do not use any other brake fluid or brake fluids that have absorbed moisture from
the open air, or brake fluid that is dirty. It
may cause premature wear or unreliable
braking action.
Do not add or mix DOT 5 silicone type brake fluid with the brake fluid in your
vehicle as severe component corrosion
may result. Such corrosion could lead to
brake system failure.
The brake warning light does not indicate brake fluid level. Check fluid level
between regular maintenance services.
Brake fluid is poisonous. Brake fluid is also harmful to the paint of your vehicle.
Checking Brake Pads
Brake pad wear will mainly depend upon the
degree of usage, and the type of driving you
do.
Thickness of the pads should be checked
during regular maintenance or whenever the
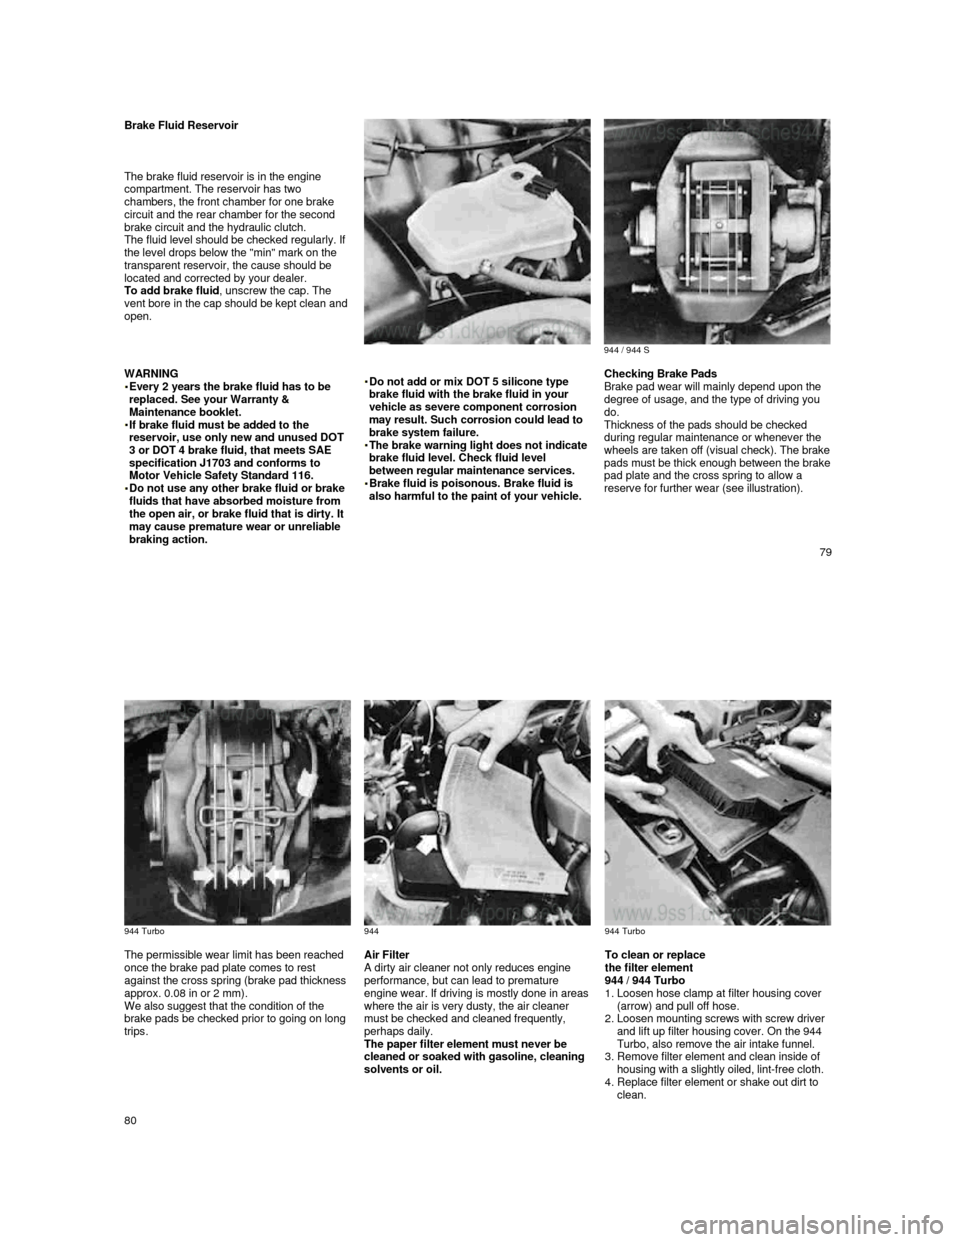
wheels are taken off (visual check). The brake pads must be thick enough between the brake pad plate and the cross spring to allow a
reserve for further wear (see illustration).
79
944 Turbo
944
944 Turbo
The permissible wear limit has been reached
once the brake pad plate comes to rest
against the cross spring (brake pad thickness
approx. 0.08 in or 2 mm).
We also suggest that the condition of the
brake pads be checked prior to going on long
trips. Air Filter
A dirty air cleaner not only reduces engine performance, but can lead to premature
engine wear. If driving is mostly done in areas
where the air is very dusty, the air cleaner must be checked and cleaned frequently,
perhaps daily.
The paper filter element must never be
cleaned or soaked with gasoline, cleaning
solvents or oil.
To clean or replace
the filter element
944 / 944 Turbo
1. Loosen hose clamp at filter housing cover (arrow) and pull off hose.
2.
Loosen mounting screws with screw driver
and lift up filter housing cover. On the 944
Turbo, also remove the air intake funnel.
3.
Remove filter element and clean inside of
housing with a slightly oiled, lint-free cloth.
4.
Replace filter element or shake out dirt to
clean.
80
Page 59 of 66

Wheel Alignment
Wheel camber*
Toe-in*
Toe angle difference*
Caster*
* at DIN curb weight Front
Rear
Front
Rear
-20' ± 15',
maximum difference left to right 20'
-1° ± 20', maximum difference left to right 30'
+ 10' ±5'
0° ± 10', maximum difference left to right 20' at 20° to left and right -1° ± 20'
2,5° + 30' - 15'
Brake System
Hydraulic dual circuit brake system with
front/rear brake circuits
internally ventilated disc brakes front and rearBrake power assist
Parking brake acting on rear wheels
Chassis, Suspension
Unitized construction
Front suspension
Rear suspension
Shock absorbers
Stabilizers
Independent coil/shock absorber struts, positive ki
ng-pin offset
Independent - diagonal arm, one torsion bar each
Double acting hydraulic shock absorbers, front and rear
Diameter - front: 20 mm (optional 21,5), Turbo: 22. 5 mm or 24 x 3.7 mm
rear: 14 mm or 20 mm (optional), Turbo: 18 mm
115
Performance*
Maximum speed
Acceleration 0-60 mph Time at end 1/4 mile*
Time at end 1/4 mile*
Manual transmission944
131 mph (210 km/h) 8.3 seconds
16.2 seconds
30.1 seconds
944 S
142 mph (228 km/h)
7.7 seconds
15.4 seconds
27.8 seconds
944 Turbo
152 mph (245 km/h)
6.1 seconds
14.4 seconds
26.0 seconds
Automatic transmission944
131 mph (210 km/h)
9.8 seconds
17.2 seconds
17.2 seconds
* At curb weight and half-load capacity, excluding optional equipment and accessories.
Climbing Performance
1st gear
2nd gear
3rd gear
4th gear
5th gear
Manual transmission944
approx. 61%
approx. 33%
approx. 21%
approx. 14%
approx. 8%
944 S
approx. 62% approx. 36%
approx. 22%
approx. 14%
approx. 9%
944 Turbo
approx. 62%
approx. 49%
approx. 30%
approx. 20%
approx. 14%
Automatic transmission944
approx. 36%
approx. 18%
approx. 10%
116