driver seat adjustment PORSCHE 944 1987 1.G Owners Manual
[x] Cancel search | Manufacturer: PORSCHE, Model Year: 1987, Model line: 944, Model: PORSCHE 944 1987 1.GPages: 66, PDF Size: 3.3 MB
Page 8 of 66

Front seats
The correct seating position is all-
important for safe and fatigue-free driving.
In order to satisfy individual requirements, the
seat has infinitely variable adjustment.
The rocker switches for the height adjustment
are located at the outboard side of the seat.
We recommend the following procedure for
finding the correct position for the driver's
seat:
1. Operate longitudinal adjustment until your leg is fully stretched with the clutch pedal
depressed while your foot is bent.
2.
Adjust desired fore/aft height.
3. Clasp upper portion of steering wheel. Then adjust backrest inclination so that both
shoulders remain in contact with the
backrest even with your arms fully
stretched.
4.
If necessary, correct the longitudinal
adjustment.
Seat Adjustment
The seats permit individual longitudinal
adjustment. After pulling up the locking lever
on the outboard side of the seat, the seat can
be repositioned forward or rearward.
WARNING
Do not adjust seats while the vehicle is in
motion. The seat may move unexpectedly
which could cause sudden loss of vehicle
control or personal injury. Backrest Adjustment
The backrests can be adjusted forward or
rea
rward by pulling up the locking lever on the inboard side of the seat.
WARNING
Front seat passengers should not ride in a
moving vehicle with the backrest reclined.
Safety belts only offer protection when the
backrest is upright and the belts are
properly positioned on the body.
Improperly positioned safety belts can
cause serious personal injury in an
accident.
14
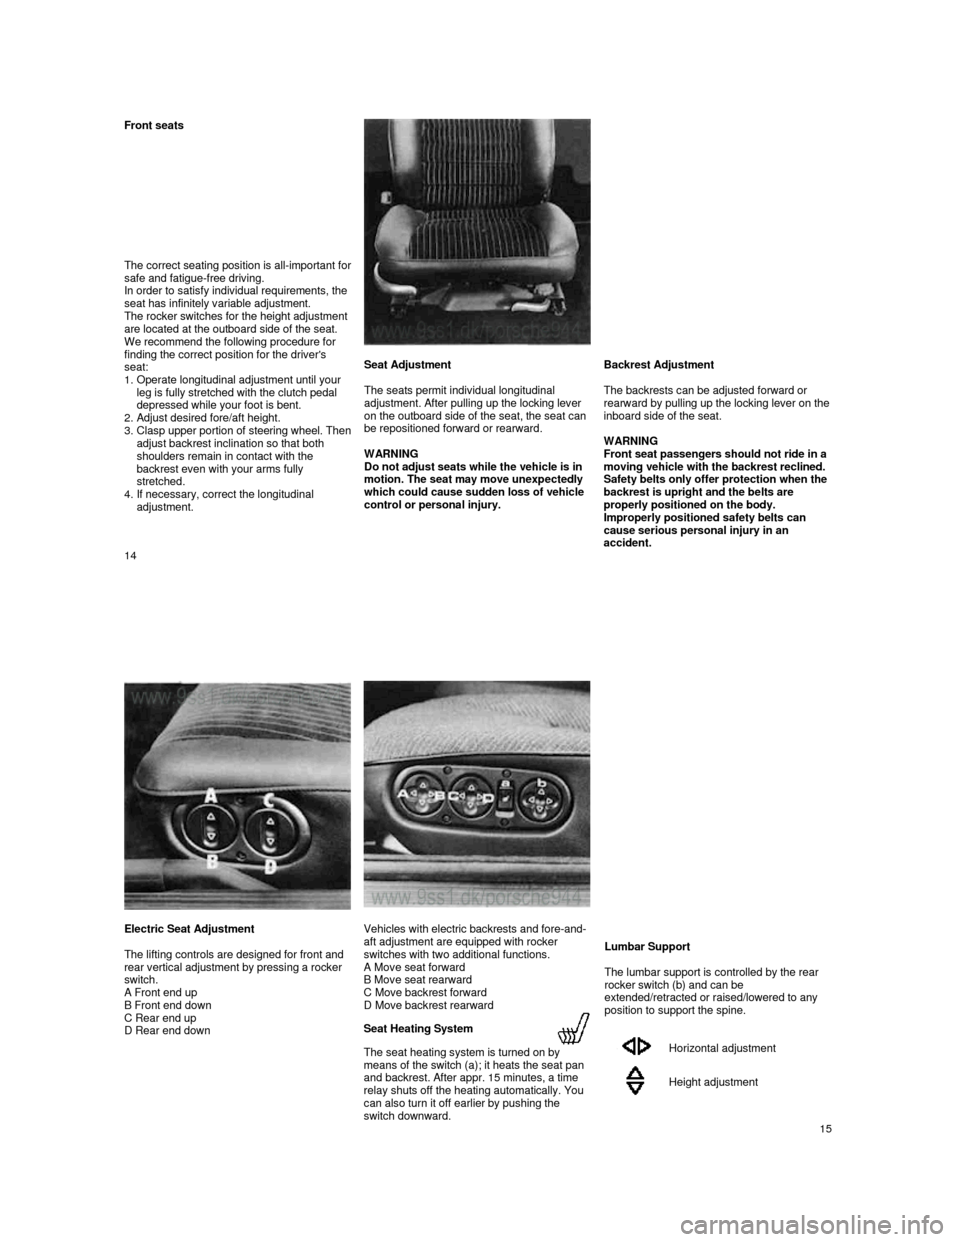
Electric Seat Adjustment
The lifting controls are designed for front and
rear vertical adjustment by pressing a rocker
switch.
A Front end up
B Front end down
C Rear end up
D Rear end down
Vehicles with electric backrests and fore-and-
aft adjustment are equipped with rocker
switches with two additional functions.
A Move seat forward
B Move seat rearward
C Move backrest forward
D Move backrest rearward
Seat Heating System
The seat heating system is turned on by
means of the switch (a); it heats the seat pan
and backrest. After appr. 15 minutes, a time
relay shuts off the heating automatically. You
can also turn it off earlier by pushing the
switch downward.
Lumbar Support
The lumbar support is controlled by the rear
rocker switch (b) and can be
extended/retracted or raised/lowered to any
position to support the spine.
Horizontal adjustment
Height adjustment
15
Page 9 of 66

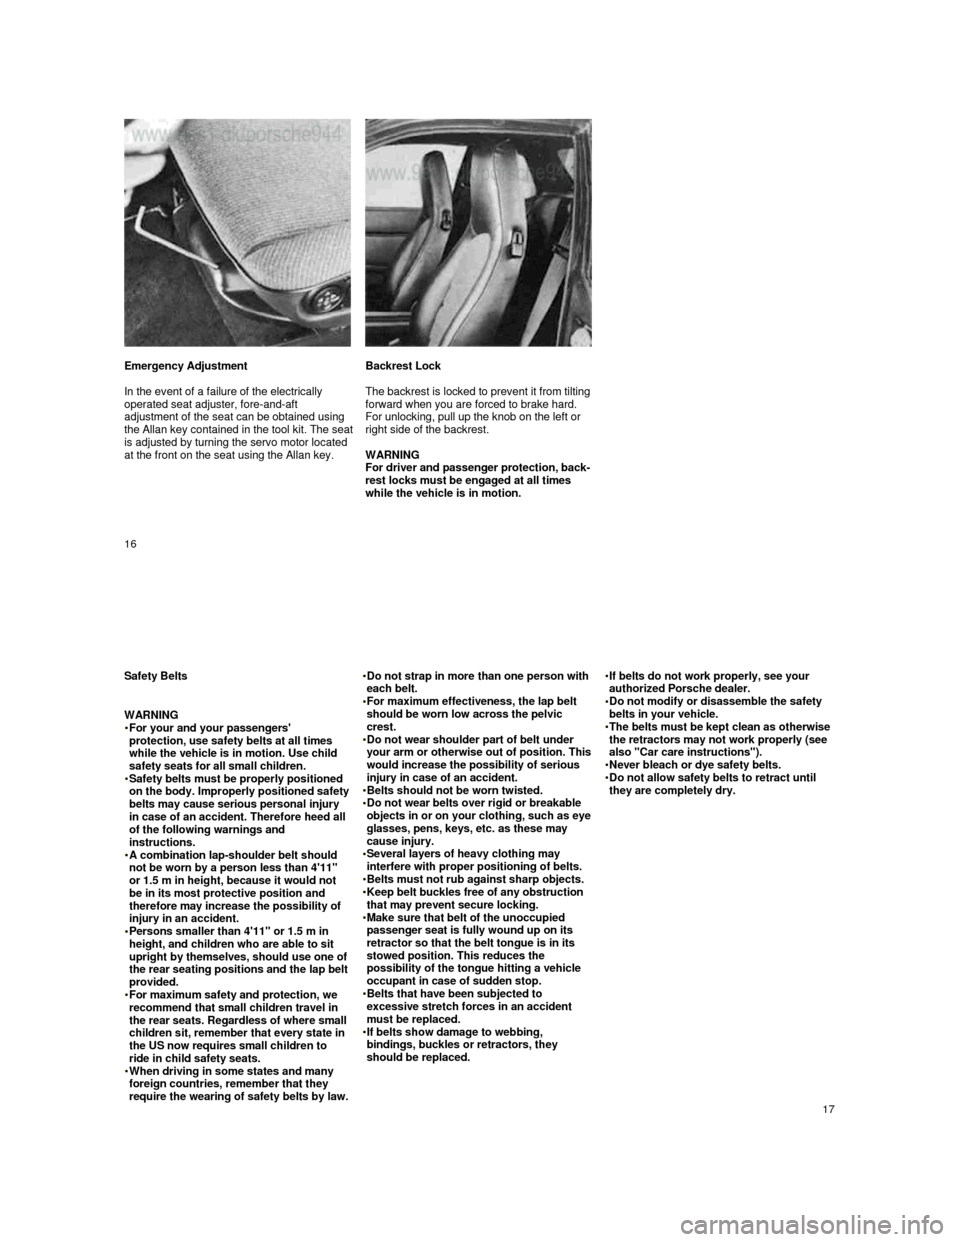
Emergency Adjustment
In the event of a failure of the electrically
operated seat adjuster, fore-and-aft
adjustment of the seat can be obtained using
the Allan key contained in the tool kit. The seat is adjusted by turning the servo motor located
at the front on the seat using the Allan key.
Backrest Lock
The backrest is locked to prevent it from tilting forward when you are forced to brake hard.
For unlocking, pull up the knob on the left or
right side of the backrest.
WARNING
For driver and passenger protection, back-
rest locks must be engaged at all times
while the vehicle is in motion.
16
Safety Belts
WARNING
For your and your passengers' protection, use safety belts at all times
while the vehicle is in motion. Use child
safety seats for all small children. Safety belts must be properly positioned on the body. Improperly positioned safety belts may cause serious personal injury
in case of an accident. Therefore heed all
of the following warnings and
instructions.
A combination lap-shoulder belt should not be worn by a person less than 4'11"
or 1.5 m in height, because it would not
be in its most protective position and
therefore may increase the possibility of
injury in an accident.
Persons smaller than 4'11" or 1.5 m in height, and children who are able to sit
upright by themselves, should use one of the rear seating positions and the lap belt provided. For maximum safety and protection, we recommend that small children travel in
the rear seats. Regardless of where small
children sit, remember that every state in
the US now requires small children to
ride in child safety seats. When driving in some states and many foreign countries, remember that they
require the wearing of safety belts by law.
Do not strap in more than one person with each belt. For maximum effectiveness, the lap belt should be worn low across the pelvic
crest.
Do not wear shoulder part of belt under your arm or otherwise out of position. This would increase the possibility of serious
injury in case of an accident.
Belts should not be worn twisted. Do not wear belts over rigid or breakable objects in or on your clothing, such as eye glasses, pens, keys, etc. as these may
cause injury.
Several layers of heavy clothing may interfere with proper positioning of belts. Belts must not rub against sharp objects. Keep belt buckles free of any obstruction that may prevent secure locking. Make sure that belt of the unoccupied passenger seat is fully wound up on its
retractor so that the belt tongue is in its
stowed position. This reduces the
possibility of the tongue hitting a vehicle
occupant in case of sudden stop.
Belts that have been subjected to excessive stretch forces in an accident
must be replaced.
If belts show damage to webbing, bindings, buckles or retractors, they
should be replaced.
If belts do not work properly, see your authorized Porsche dealer. Do not modify or disassemble the safety belts in your vehicle. The belts must be kept clean as otherwise the retractors may not work properly (see
also "Car care instructions").
Never bleach or dye safety belts. Do not allow safety belts to retract until they are completely dry.
17
Page 49 of 66

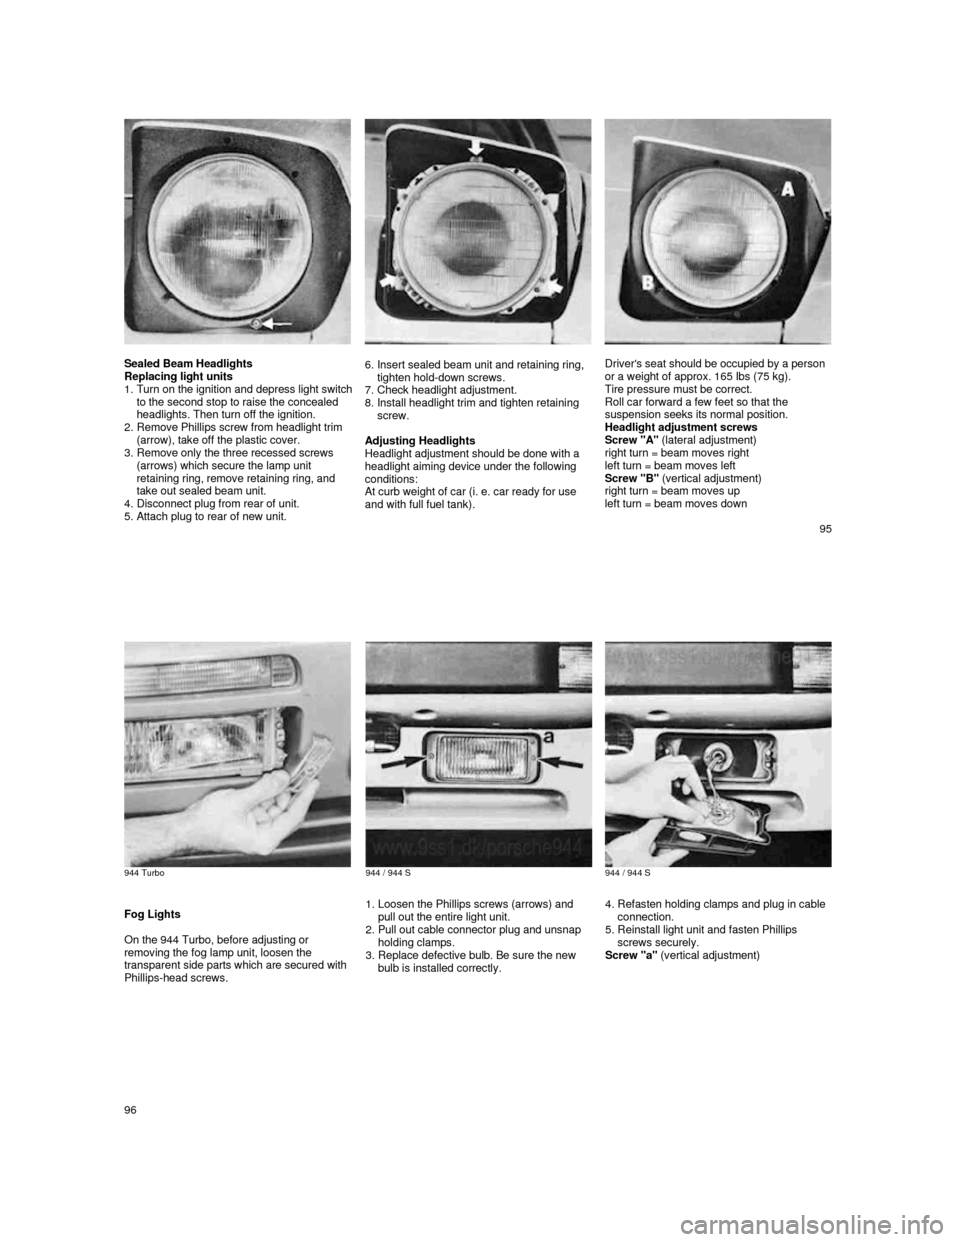
Sealed Beam Headlights
Replacing light units
1.
Turn on the ignition and depress light switch to the second stop to raise the concealed
headlights. Then turn off the ignition.
2.
Remove Phillips screw from headlight trim
(arrow), take off the plastic cover.
3.
Remove only the three recessed screws
(arrows) which secure the lamp unit
retaining ring, remove retaining ring, and
take out sealed beam unit.
4.
Disconnect plug from rear of unit.
5. Attach plug to rear of new unit.
6. Insert sealed beam unit and retaining ring,
tighten hold-down screws.
7.
Check headlight adjustment.
8. Install headlight trim and tighten retaining
screw.
Adjusting Headlights
Headlight adjustment should be done with a
headlight aiming device under the following
conditions:
At curb weight of car (i. e. car ready for use
and with full fuel tank).
Driver's seat should be occupied by a person
or a weight of approx. 165 Ibs (75 kg).
Tire pressure must be correct.
Roll car forward a few feet so that the
suspension seeks its normal position.
Headlight adjustment screws
Screw "A" (lateral adjustment)
right turn = beam moves right
left turn = beam moves left
Screw "B" (vertical adjustment)
right turn = beam moves up
left turn = beam moves down
95
944 Turbo
944 / 944 S
944 / 944 S
Fog Lights
On the 944 Turbo, before adjusting or
removing the fog lamp unit, loosen the
transparent side parts which are secured with
Phillips-head screws.
1. Loosen the Phillips screws (arrows) and
pull out the entire light unit.
2.
Pull out cable connector plug and unsnap
holding clamps.
3.
Replace defective bulb. Be sure the new
bulb is installed correctly.
4. Refasten holding clamps and plug in cable
connection.
5.
Reinstall light unit and fasten Phillips
screws securely.
Screw "a" (vertical adjustment)
96