PORSCHE CAYNNE S 2005 1.G Owners Manual
Manufacturer: PORSCHE, Model Year: 2005, Model line: CAYENNE S, Model: PORSCHE CAYENNE S 2005 1.GPages: 380, PDF Size: 3.17 MB
Page 101 of 380
Controls, Safety, Instruments
101
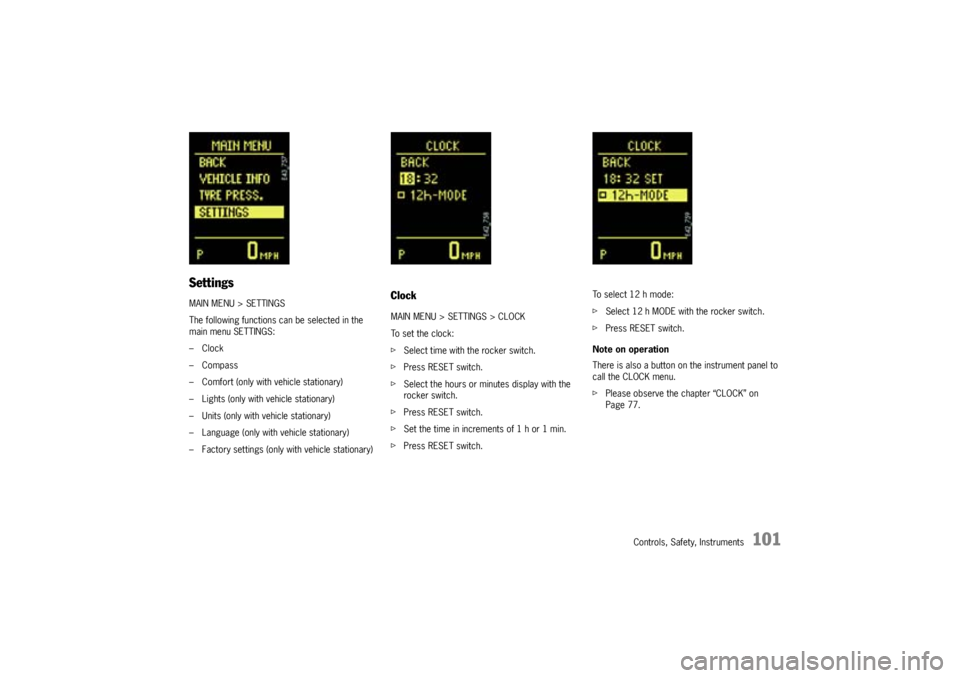
SettingsMAIN MENU > SETTINGS
The following functions can be selected in the
main menu SETTINGS:
–Clock
–Compass
– Comfort (only with vehicle stationary)
– Lights (only with vehicle stationary)
– Units (only with vehicle stationary)
– Language (only with vehicle stationary)
– Factory settings (only with vehicle stationary)
ClockMAIN MENU > SETTINGS > CLOCK
To set the clock:
fSelect time with the rocker switch.
fPress RESET switch.
fSelect the hours or minutes display with the
rocker switch.
fPress RESET switch.
fSet the time in increments of 1 h or 1 min.
fPress RESET switch.To select 12 h mode:
fSelect 12 h MODE with the rocker switch.
fPress RESET switch.
Note on operation
There is also a button on the instrument panel to
call the CLOCK menu.
fPlease observe the chapter “CLOCK” on
Page 77.
Page 102 of 380
102
Controls, Safety, Instruments
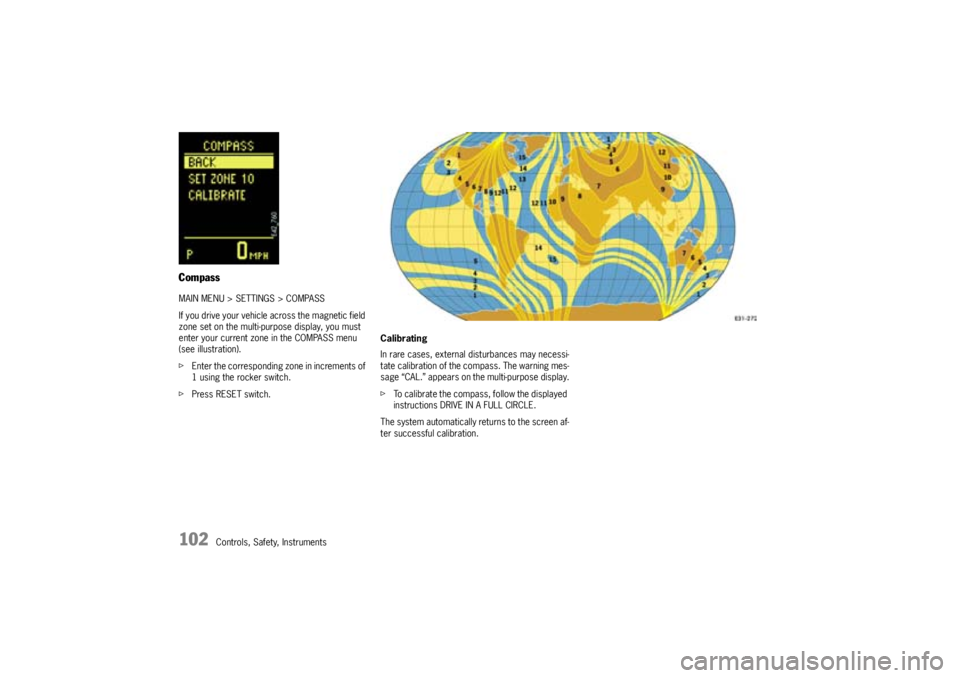
CompassMAIN MENU > SETTINGS > COMPASS
If you drive your vehicle across the magnetic field
zone set on the multi-purpose display, you must
enter your current zone in the COMPASS menu
(see illustration).
fEnter the corresponding zone in increments of
1 using the rocker switch.
fPress RESET switch.
Calibrating
In rare cases, external disturbances may necessi-
tate calibration of the compass. The warning mes-
sage “CAL.” appears on the multi-purpose display.
fTo calibrate the compass, follow the displayed
instructions DRIVE IN A FULL CIRCLE.
The system automatically returns to the screen af-
ter successful calibration.
Page 103 of 380

Controls, Safety, Instruments
103
ComfortMAIN MENU > SETTINGS > COMFORT
The COMFORT menu offers the following
submenus:
–Alarm
–Door opening
–Mirrors
fSelect the entry with the rocker switch.
fPress RESET switch.
Note on operation
Comfort settings can be made only when the vehi-
cle is stationary.Alarm
MAIN MENU > SETTINGS > COMFORT > ALARM
The passenger compartment monitoring system
and the inclination sensor (protection against
towing) can be temporarily deactivated in the
ALARM menu.
When locked again, the ultrasound passenger
compartment monitoring system and inclination
sensor are activated once more.
fPlease observe the chapter “COMFORT FUNC-
TION WHEN UNLOCKING THE VEHICLE” on
Page 30.
fPlease observe the chapter “TEMPORARILY
DEACTIVATING ULTRASOUND PASSENGER
COMPARTMENT MONITORING SYSTEM AND
INCLINATION SENSOR” on Page 28.Passenger compartment
The alarm is triggered if motion is detected in the
interior with the doors closed (e.g. if a window is
broken in a theft).
fSelect INTERIOR with the rocker switch.
fPress RESET switch.
This activates/deactivates passenger com-
partment monitoring.
Inclination
The alarm is triggered if the vehicle is raised mark-
edly at one end with the doors closed (e.g. theft
attempt by towing).
fSelect ANGLE with the rocker switch.
fPress RESET switch.
This activates/deactivates the inclination sen-
sor.
Page 104 of 380
104
Controls, Safety, Instruments Door opening
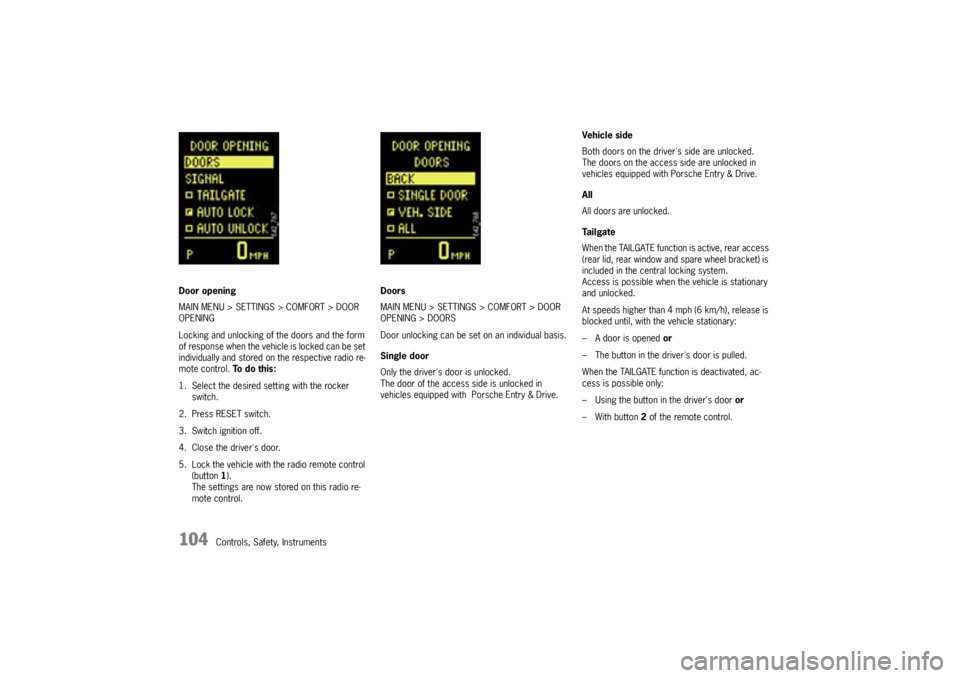
MAIN MENU > SETTINGS > COMFORT > DOOR
OPENING
Locking and unlocking of the doors and the form
of response when the vehicle is locked can be set
individually and stored on the respective radio re-
mote control. To d o t h i s :
1. Select the desired setting with the rocker
switch.
2. Press RESET switch.
3. Switch ignition off.
4. Close the driver's door.
5. Lock the vehicle with the radio remote control
(button1).
The settings are now stored on this radio re-
mote control.Doors
MAIN MENU > SETTINGS > COMFORT > DOOR
OPENING > DOORS
Door unlocking can be set on an individual basis.
Single door
Only the driver's door is unlocked.
The door of the access side is unlocked in
vehicles equipped with Porsche Entry & Drive.Vehicle side
Both doors on the driver's side are unlocked.
The doors on the access side are unlocked in
vehicles equipped with Porsche Entry & Drive.
All
All doors are unlocked.
Ta i l g a t e
When the TAILGATE function is active, rear access
(rear lid, rear window and spare wheel bracket) is
included in the central locking system.
Access is possible when the vehicle is stationary
and unlocked.
At speeds higher than 4 mph (6 km/h), release is
blocked until, with the vehicle stationary:
– A door is opened or
– The button in the driver's door is pulled.
When the TAILGATE function is deactivated, ac-
cess is possible only:
– Using the button in the driver's door or
– With button 2of the remote control.
Page 105 of 380
Controls, Safety, Instruments
105
Auto lock
If the AUTO LOCK function is active, the doors lock
automatically when the vehicle exceeds 4 mph
(6 km/h).
Note on operation
Automatically locked doors can be unlocked with
the central locking button and opened by pulling
on the inside door handle twice.
fPlease observe the chapter “UNLOCKING” on
Page 22.
Auto unlock
When the AUTO UNLOCK function is active, the
doors unlock automatically when the ignition key is
withdrawn (or when the ignition is switched off in
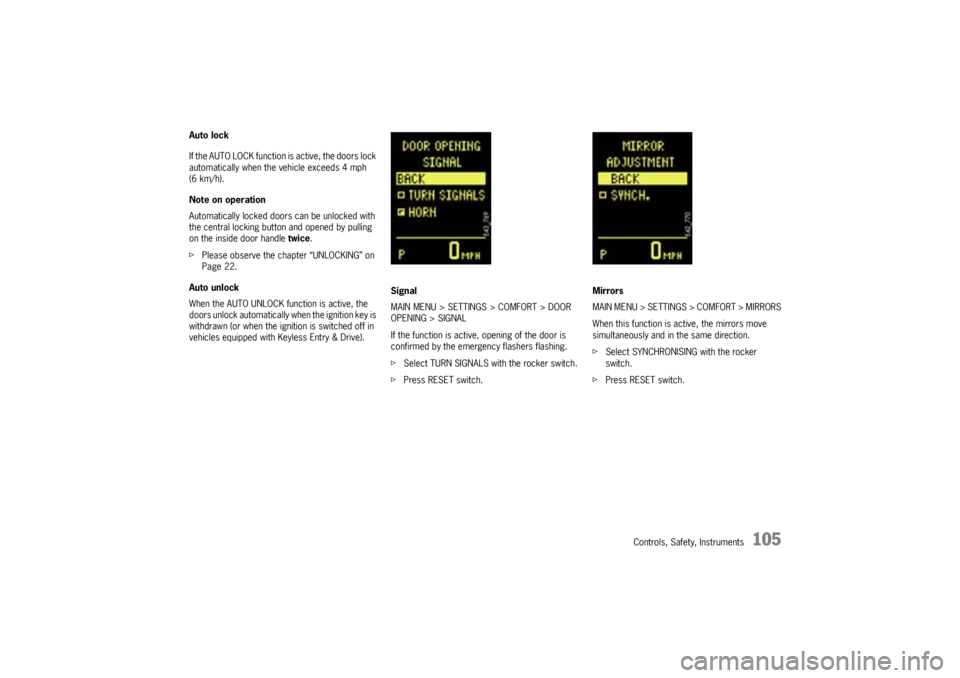
vehicles equipped with Keyless Entry & Drive).Signal
MAIN MENU > SETTINGS > COMFORT > DOOR
OPENING > SIGNAL
If the function is active, opening of the door is
confirmed by the emergency flashers flashing.
fSelect TURN SIGNALS with the rocker switch.
fPress RESET switch.Mirrors
MAIN MENU > SETTINGS > COMFORT > MIRRORS
When this function is active, the mirrors move
simultaneously and in the same direction.
fSelect SYNCHRONISING with the rocker
switch.
fPress RESET switch.
Page 106 of 380
106
Controls, Safety, Instruments
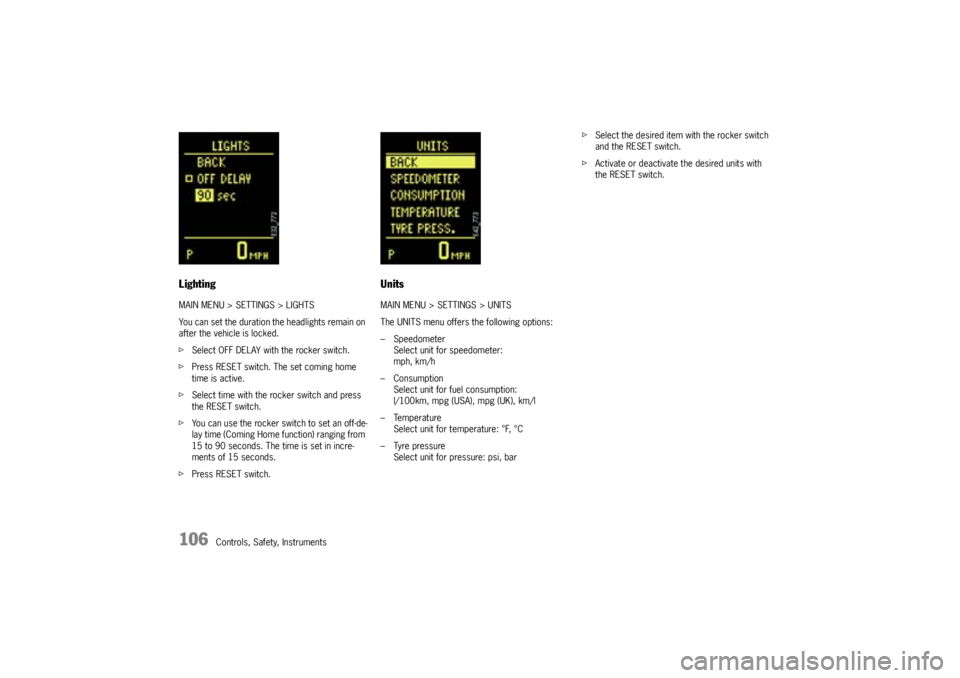
LightingMAIN MENU > SETTINGS > LIGHTS
You can set the duration the headlights remain on
after the vehicle is locked.
fSelect OFF DELAY with the rocker switch.
fPress RESET switch. The set coming home
time is active.
fSelect time with the rocker switch and press
the RESET switch.
fYou can use the rocker switch to set an off-de-
lay time (Coming Home function) ranging from
15 to 90 seconds. The time is set in incre-
ments of 15 seconds.
fPress RESET switch.
UnitsMAIN MENU > SETTINGS > UNITS
The UNITS menu offers the following options:
– Speedometer
Select unit for speedometer:
mph, km/h
– Consumption
Select unit for fuel consumption:
l/100km, mpg (USA), mpg (UK), km/l
– Temperature
Select unit for temperature: °F, °C
– Tyre pressure
Select unit for pressure: psi, barfSelect the desired item with the rocker switch
and the RESET switch.
fActivate or deactivate the desired units with
the RESET switch.
Page 107 of 380
Controls, Safety, Instruments
107
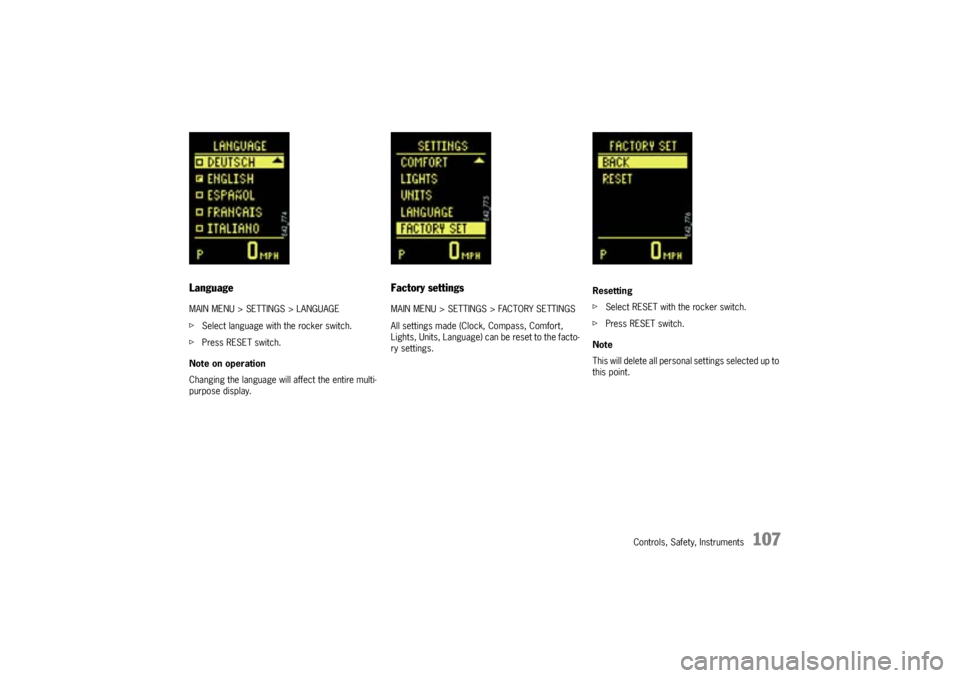
LanguageMAIN MENU > SETTINGS > LANGUAGE
fSelect language with the rocker switch.
fPress RESET switch.
Note on operation
Changing the language will affect the entire multi-
purpose display.
Factory settingsMAIN MENU > SETTINGS > FACTORY SETTINGS
All settings made (Clock, Compass, Comfort,
Lights, Units, Language) can be reset to the facto-
ry settings.Resetting
fSelect RESET with the rocker switch.
fPress RESET switch.
Note
This will delete all personal settings selected up to
this point.
Page 108 of 380

108
Controls, Safety, Instruments
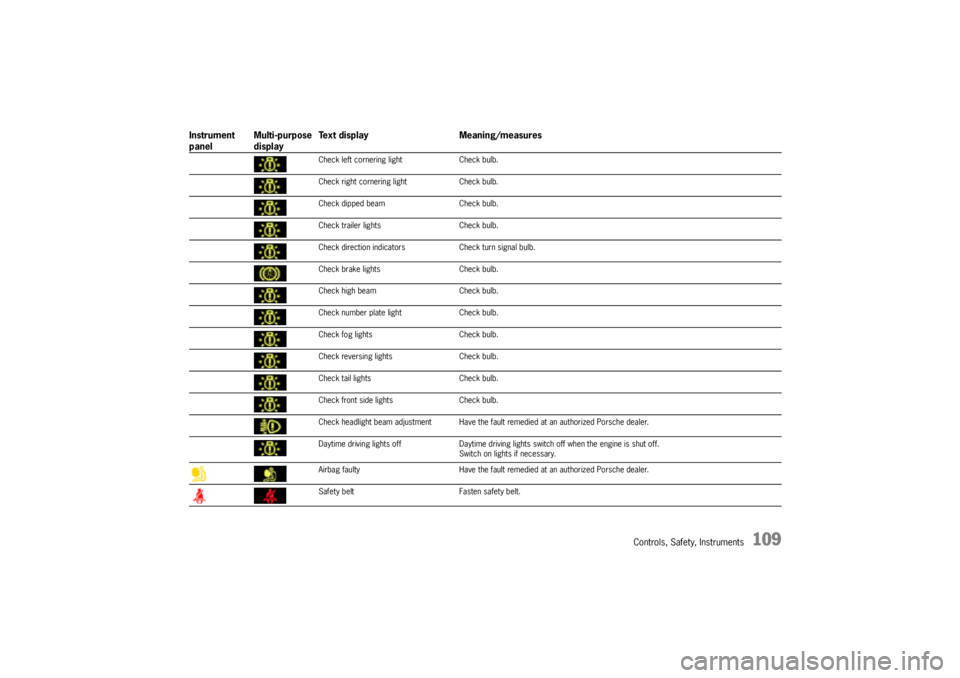
Warning Lights and Warning MessagesIf a warning message appears, always refer to the corresponding chapters in this Owner's Manual.
Instrument
panelMulti-purpose
displayText display Meaning/measures
Steering faulty Steering lock engaged.
Have the fault remedied at an authorized Porsche dealer.
Ignition lock faulty Do not continue driving.
Have the fault remedied at an authorized Porsche dealer.
System fault – Workshop Have the fault remedied at an authorized Porsche dealer.
Key not recognised in vehicle Make sure that you have the remote control with you.
Turn ignition key to left for
2 secondsEngage the steering lock.
Key: replace battery Replace the remote-control battery.
Move the steering wheel Turn the steering wheel so that the steering wheel lock can
engage/disengage.
Key not found Make sure that you have the remote control with you.
Switch selector lever to position “P”.Tiptronic S: The vehicle could roll away.
The ignition key can be withdrawn only in selector lever
positionP.
Apply the brake Apply the brake when starting.
Move selector lever to position
“P” or “N”Tiptronic S: The vehicle can be started only in position P or N.
Applying the clutch Manual transmission: Apply the clutch when starting.
Immobiliser active Have the fault remedied at an authorized Porsche dealer.
Page 109 of 380
Controls, Safety, Instruments
109
Check left cornering light Check bulb.
Check right cornering light Check bulb.
Check dipped beam Check bulb.
Check trailer lights Check bulb.
Check direction indicators Check turn signal bulb.
Check brake lights Check bulb.
Check high beam Check bulb.
Check number plate light Check bulb.
Check fog lights Check bulb.
Check reversing lights Check bulb.
Check tail lights Check bulb.
Check front side lights Check bulb.
Check headlight beam adjustment Have the fault remedied at an authorized Porsche dealer.
Daytime driving lights off Daytime driving lights switch off when the engine is shut off.
Switch on lights if necessary.
Airbag faulty Have the fault remedied at an authorized Porsche dealer.
Safety belt Fasten safety belt.
Instrument
panelMulti-purpose
displayText display Meaning/measures
Page 110 of 380

110
Controls, Safety, Instruments
Warning – Flat tire – Check tires Stop in a suitable place and check the tires. Change wheel if
necessary.
Check spare wheel – Required pressure:
50 psi/3.4 barAppears about every 6 months.
Check if the pressure of the mounted spare wheel matches the
required pressure, as it is not monitored electronically.
Tire pressure too low – Add air System detects a pressure loss of at least 2.9 psi. (0.2 bar).
Correct tire pressure at the next opportunity.
Collapsible spare wheel/sealing set
max. 50 mph (80 km/h) Observe maximum permitted speed.
Collapsible spare wheel 51 psi/3.5 bar
max. 50 mph (80 km/h) Information on driving with a collapsible spare wheel.
Observe maximum speed of max 50 mph or 80 km/h and
required pressure of 51 psi or 3.5 bar.
System not activeIndication when spare wheel or collapsible spare wheel is used
or tire pressure monitoring system is faulty.
Consult a qualified specialist workshop.
Select new set of wheels in the Tire pressure menu after
changing the wheels.
System not active – Brief disturbanceExternal interference (e.g., wireless headphones) or excessive
temperature (over 248 °F/120 °C) at the wheel transmitters.
Tire pressure monitoring system will reactivate itself.
System not active –
Too many wheel transmittersTire pressure monitoring system detects more than 4 wheel
transmitters (winter wheels in in the luggage compartment,
for example).
System will reactivate itself.
No monitoring – System learning After the tire type and size are selected in the tire pressure
menu, the system re-learns the tires.
Wheel change? Check settings Display after a wheel change without changed settings in the tire
pressure menu. Select tire type and size.
Instrument
panelMulti-purpose
displayText display Meaning/measures