check engine PORSCHE CAYNNE S 2005 1.G Owner's Guide
[x] Cancel search | Manufacturer: PORSCHE, Model Year: 2005, Model line: CAYENNE S, Model: PORSCHE CAYENNE S 2005 1.GPages: 380, PDF Size: 3.17 MB
Page 254 of 380

254
Maintenance, Car Care
Air CleanerfPlease observe the chapter “EXERCISE
EXTREME CAUTION WHEN WORKING ON YOUR
VEHICLE” on Page 242.
Regular replacement of the filter element is part of
servicing.
fIn dusty conditions, clean the filter element
more frequently and replace if necessary.Particle FilterThe fresh air passing through the particle filter into
the passenger compartment is virtually free of
dust and pollen.
fIf the outside air is polluted by exhaust fumes,
press the circulating-air button.
A dirty filter can be the cause of reduced air
throughput.
fHave filter replaced by your authorized
Porsche dealer.
Regular replacement of the filter is part of servic-
ing.
Automatic Transmission Fluid The torque converter and the transmission are lu-
bricated with Automatic Transmission Fluid (ATF).
fPlease observe the chapter “CAPACITIES” on
Page 362.
Do not tow the car or run the engine without ATF
in the transmission. The automatic transmission
may be damaged by even a tiny speck of dirt, only
a clean funnel or spout must be used when adding
AT F.
The ATF and transmission oil has to be checked
and changed at the intervals listed in your Mainte-
nance Schedule.
We recommend that you have the ATF and trans-
mission oil changed at your Porsche dealer, who
has the required lubricants and the necessary fill-
ing equipment.
If you suspect an oil leak in the transmission, have
your authorized Porsche dealer check it out imme-
diately.
Manual Transmission OilThe transmission oil has to be checked and
changed at the intervals listed in your Maintenance
Schedule.
fPlease observe the chapter “CAPACITIES” on
Page 362.
We recommend that you have the transmission oil
changed at your Porsche dealer, who has the re-
quired lubricants and the necessary filling equip-
ment.
If you suspect an oil leak in the transmission, have
your authorized Porsche dealer check it out imme-
diately.
Page 262 of 380

262
Maintenance, Car Care
Fuels containing MMTSome North American fuels contain an octane en-
hancing additive called methylcyclopentadienyl
manganese tricarbonyl (MMT).
If such fuels are used, your emission control sys-
tem performance may be negatively affected.
The check engine warning light on your instrument
panel may turn on.
If this occurs, Porsche recommends you stop us-
ing fuels containing MMT.
Portable Fuel Containers
Danger!
Portable fuel containers, full or partially
empty, may leak causing an explosion, or re-
sult in fire in case of an accident.
fNever carry additional fuel in portable contain-ers in your vehicle.
Fuel Evaporation ControlFuel tank ventingThe evaporation chamber and the carbon canister
prevent fuel from escaping to the atmosphere at
extreme high outside temperatures, when driving
abruptly around curves and when the car is parked
at an incline or in any other nonlevel position.Vapor control system and storageWhen the fuel tank is filled, vapors are collected in
the evaporation chamber by a vent line leading the
vapors to the carbon canister where they are
stored as long as the engine does not run.Purge systemWhen the engine is running, the fuel vapors from
the canister will be mixed with fresh air from the
ambient air of the canister. This mixture will be di-
rected to the intake air housing by the tank vent
line, mixed with the intake air and burned during
normal combustion.
Page 274 of 380

274
Maintenance, Car Care
Storing your PorscheIf you intend to store your Porsche for a prolonged
period, please consult your authorized Porsche
dealer. The staff will be glad to advise you on the
most suitable and necessary methods.
fClean your vehicle thoroughly inside and out-
side. Clean the engine compartment. The un-
der carriage and chassis components should
be free of dirt and salt deposits.
fFill up the fuel tank.
fChange the oil and oil filter, and run the engine
for several minutes.
fIncrease the tire pressure to 58 psi (4 bar).It is
not recommended to lift the vehicle, due to the
possibility of corrosion on shock absorber pis-
ton shafts.The vehicle should be moved slight-
ly, approximately every four weeks, to prevent
flat spot on the tires.Climate control
The air conditioning system should be in good
working condition and fully charged.
Windshield/Headlight washer
fCheck and correct antifreeze/cleaning solution
level as necessary.
Electrical system
fRemove the battery from the vehicle and store
it in a cool dry place, not on a cement floor.
When the battery is disconnected, the alarm
system is deactivated.
fRecharge the battery every 3 months. If the
battery remains in the vehicle with the cables
connected, it is necessary to check, remove
and recharge the battery every 2-3 weeks.
Do not fast charge the battery.
fPlease observe the chapter “CHARGE STATE”
on Page 320.Vehicle interior
The interior must be dry, especially in the area of
the floor carpets. The use of drying agents (Silica-
Gel) is recommended in vehicles with leather inte-
rior and in areas with high humidity. The recom-
mended amount is 3 fabric bags of 1.1 lbs.
(500 grams) each placed on the floor carpets.
Windows, doors, lids and roof must be closed.
The air vents should be opened.
Page 303 of 380

Practical Tips, Minor Repairs
303
Checking tire pressure with a pressure
gauge1. Remove the valve stem cap from the tire.
2. Press the pressure gauge onto the valve stem.
Note on operation
fDo not press too hard or force the valve stem
sideways, or air will escape.
If the sound of air escaping from the tire is
heard, reposition the pressure gauge.
3. Read the tire pressure on the gauge stem and
compare it to the permissble tire pressure.
This information can be found on the tire pres-
sure plate.
Please observe the chapter “TIRE PRES-
SURES, COLD” on Page 361.
4. Remove the pressure gauge.
fPlease observe the chapter “TIRE PRESSURE”
on Page 87.
Inflating tires on vehicles without air
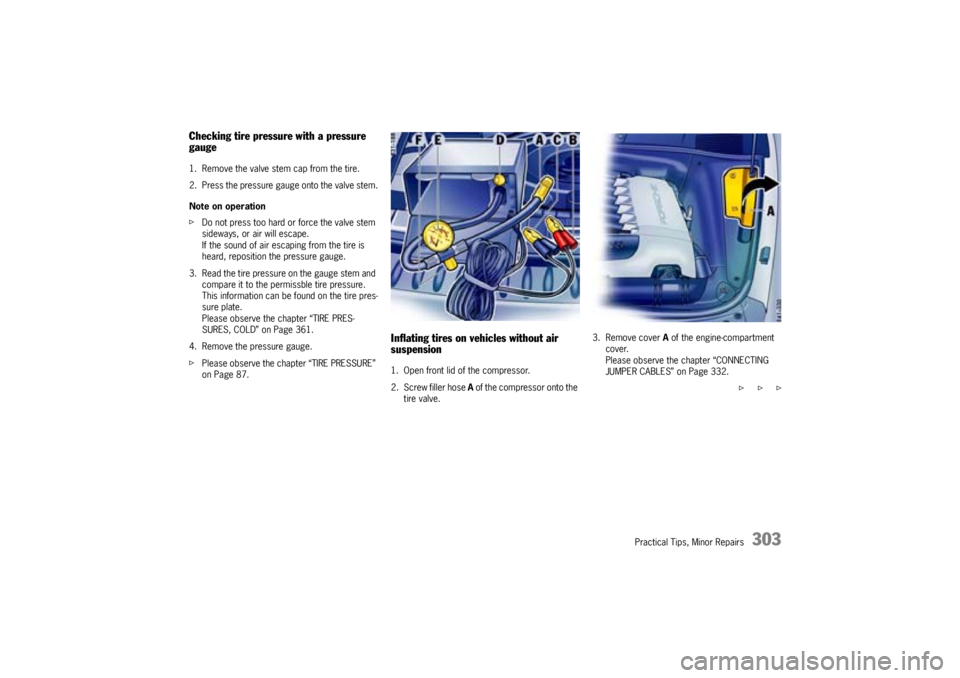
suspension1. Open front lid of the compressor.
2. Screw filler hose A of the compressor onto the
tire valve.3. Remove cover A of the engine-compartment
cover.
Please observe the chapter “CONNECTING
JUMPER CABLES” on Page 332.
f f f
Page 310 of 380

310
Practical Tips, Minor Repairs
Electrical SystemIn order to avoid damage and faults in electrical or
electronic systems, electrical accessories should
be installed at your authorized Porsche dealer.
fUse only accessories authorized by Porsche.
Warning!
Risk of short circuit and fire.
Replacing fuses or relays with engine running
or the ignition on could cause electrical
shock.
fDisconnect the battery during all work on the electrical system.
RelaysRelays should be checked or changed only by an
authorized workshop.Alarm system, central lockingThe status of the central locking and alarm system
is not changed by disconnecting the battery.
When the battery is disconnected, the alarm
system ceases to function.
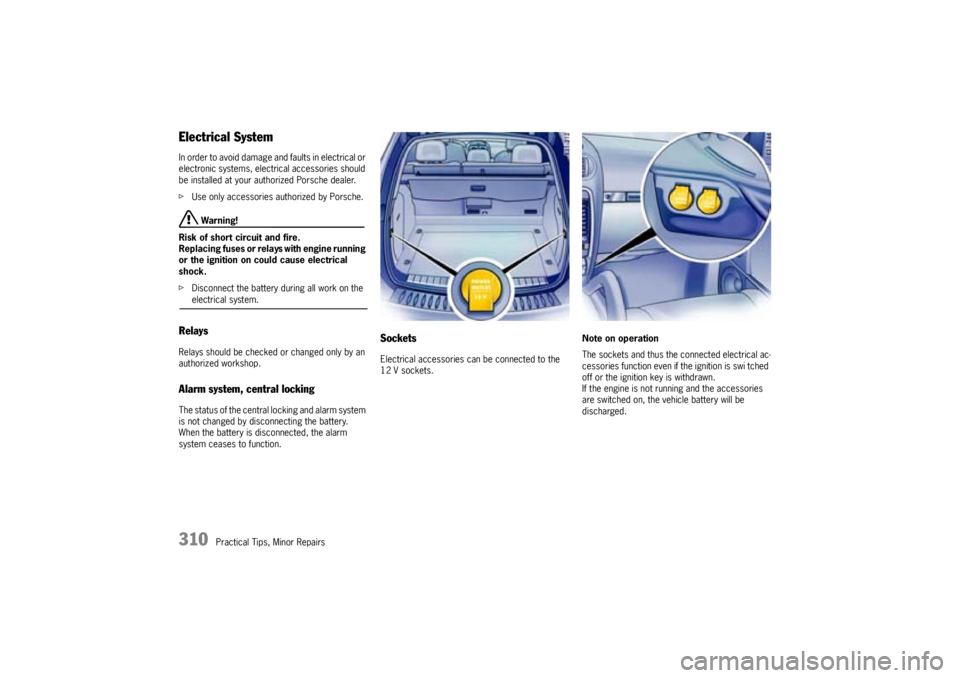
SocketsElectrical accessories can be connected to the
12 V sockets.Note on operation
The sockets and thus the connected electrical ac-
cessories function even if the ignition is swi tched
off or the ignition key is withdrawn.
If the engine is not running and the accessories
are switched on, the vehicle battery will be
discharged.
Page 311 of 380

Practical Tips, Minor Repairs
311
Changing fusesIn order to prevent damage to the electrical
system due to short circuits and overloads, the in-
dividual circuits are protected by fuses.
One fuse box is in the engine compartment. Two
additional fuse boxes are located in the outer ends
of the dashboard.
1. Switch off the consumer with the defective
fuse. Before replacing a fuse, switch off all
electrical consumers and remove the ignition
key.
2. Open the fuse-box lid.
3. Remove the corresponding fuse from its slot to
check it using the plastic gripper.
A blown fuse can be identified by the melted
metal strip.
4. Replace only with fuses of the same rating.
Note
If a fuse blows repeatedly, please consult an au-
thorized Porsche dealer immediately, so that the
short circuit can be located and corrected.
Never try to “repair“ fuses: you may cause serious
damage to other parts of the electrical system.
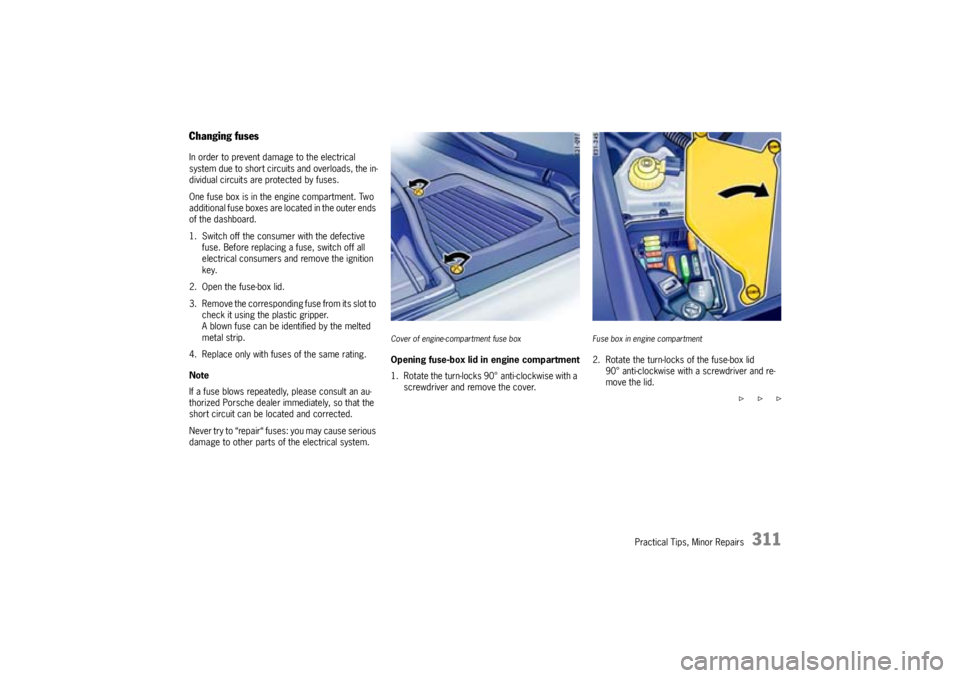
Cover of engine-compartment fuse boxOpening fuse-box lid in engine compartment
1. Rotate the turn-locks 90° anti-clockwise with a
screwdriver and remove the cover.
Fuse box in engine compartment2. Rotate the turn-locks of the fuse-box lid
90° anti-clockwise with a screwdriver and re-
move the lid.
f f f
Page 320 of 380

320
Practical Tips, Minor Repairs
Battery
Danger!
Risk of short circuit and fire.
fObserve all warning notes on the battery.
fDisconnect the battery during all work on the
electrical system.
fDo not lay tools or other metal objects on the
battery as they could cause a short circuit
across the battery terminal.
Hydrogen gas generated by the battery
could cause an explosion, resulting in severe
personal injuries.
fDo not expose the battery to an open flame,
electrical spark or a lit cigarette.
Risk of explosion
fDo not wipe the battery with a dry cloth.
fBefore touching the battery, discharge any
static electricity by touching the vehicle.
Risk of severe personal injury and damage to
the fabric, metal or paint.
fWear eye protection.
fDo not allow battery acid to come in contact
with your skin, eyes, fabric or painted surfac-
es.fIf you get electrolyte, which is an acid, in your
eyes or on your skin, immediately rinse with
cold water for several minutes and call a doc-
tor.
fSpilled electrolyte must be rinsed off at once
with a solution of baking soda and water to
neutralize the acid.
Battery posts, terminals and related acces-
sories contain lead and lead compounds,
chemicals known to the State of California to
cause cancer and reproductive harm.
fAlways protect your skin by washing thorough-
ly with soap and water.
Charge stateA well charged battery will not only prevent start-
ing problems but will also last longer.
In order to avoid unintended battery
discharge
fSwitch off unnecessary electrical loads in city
traffic, on short trips or in a line of traffic.
fAlways remove the ignition key from the igni-
tion switch when leaving the vehicle or
switch ignition off in vehicles with Porsche En-
try & Drive.
fAvoid using the Porsche Communication
Management system and the audio system
when the engine is not running.
Battery carefEnsure that battery is securely mounted.
fKeep terminals and connections clean and
properly tightened. Corrosion can be prevent-
ed by coating the terminals and connections
with petroleum jelly or silicone spray.
fEnsure that vent caps are securely tightened to
prevent spillage.
Checking the electrolyte fluid level
(only on low-maintenance batteries)
Generally, the electrolyte level must be checked
more often in summer than in the winter, and more
often when driving long distances.
fWhen adding water, use only clean containers.
In no case may alcohol (e.g. window cleaner
residues) be permitted to enter the battery.
fUnscrew and open the filler vent caps of each
cell.
With the car on a level surface, the fluid level
should meet the indicator mark in each cell.
fIf necessary, top up with distilled water. Do not
use acid. Only fill up to the mark, otherwise the
electrolyte will overflow when the battery is be-
ing charged and cause damage.
Page 321 of 380

Practical Tips, Minor Repairs
321
Winter operationDuring the winter months, battery capacity tends
to decrease as temperatures drop. Additionally,
more power is consumed while starting, and the
headlights, heater, rear window defogger, etc.,
are used more frequently.
Let your Porsche dealer test the battery's capaci-
ty before winter sets in.Vehicle storageIf the car stands for long periods in the garage or
workshop, the doors and lids should be closed.
fRemove the ignition key and, if necessary, dis-
connect the battery.
Notes on operation
fWhen the battery is disconnected, the alarm
system ceases to function.
If the vehicle was locked before the battery
was disconnected, the alarm will be triggered
when the battery is reconnected.
To deactivate the alarm system:
fLock the vehicle and unlock it again.Maintenance note
Even if you put your vehicle out of operation, the
battery still discharges.
The battery will discharge more quickly if your ve-
hicle is not driven on a daily basis over a distance
of several miles. The more often you drive your ve-
hicle, and the longer the distance driven on each
trip, the more opportunity the vehicle‘s charging
system will have to recharge the batteries.
fTo preserve its efficiency, charge the battery
about every 6 weeks.
fCheck the battery acid level and top off with
distilled water if necessary.
fStore a battery that has been removed in a
dark, cool place, but not subject to freezing.
Putting vehicle into operationAfter the battery is connected or charged, the
PSM warning light lights up on the instrument pan-
el and a message appears on the multi-purpose
display of the instrument panel to indicate a fault.
This fault can be remedied with a few simple
steps:
1. Start the engine.
To do this, turn the ignition key or the control
unit (on vehicles that have Porsche Entry &
Drive) to ignition lock position 2 twice.2. Perform a few steering movements and drive
a short distance in a straight line until the PSM
warning light goes out and the message is
erased from the memory of the multi-purpose
display of the instrument panel.
3. If the warnings does not go out, then:
Drive carefully to the nearest authorized
Porsche dealer.
Have the fault remedied by an authorized
Porsche dealer.
4. After the warnings disappear:
Stop the vehicle in a suitable place.
5. Perform adaptation of the power windows:
Please observe the chapter “STORING FINAL
POSITION OF THE DOOR WINDOWS” on
Page 31.
6. On vehicles with tire pressure monitoring sys-
tem:
Please observe the chapter “SYSTEM LEAR-
NING PHASE” on Page 89.
f f f
Page 333 of 380

Practical Tips, Minor Repairs
333
Charging the batteryYour authorized Porsche dealer will be pleased to
advise you about a suitable charger.
1. Always observe the instructions of the charger
manufacturer.
2. When charging the battery, ensure adequate
ventilation.
3. Check the acid level of a low-maintenance bat-
tery.
4. Connect charger to the jump starting points.
Only plug into the mains and switch the charg-
er on when it has been correctly connected up.
5. After charging, disconnect the charger.
6. Check the acid level of a low-maintenance bat-
tery.
After charging the battery After the battery is connected or the completely
discharged battery is charged, the PSM warning
light lights up on the instrument panel and a mes-
sage appears on the multi-purpose display of the
instrument panel to indicate a fault.
This fault can be remedied with a few simple
steps:
1. Start the engine.
To do this, turn the ignition key or the control
unit (on vehicles that have Porsche Entry &
Drive) to ignition lock position 2 twice.
2. Perform a few steering movements to the left
and to the right when vehicle is standing and
drive a short distance in a straight line until the
PSM warning light goes out and the message
is erased from the memory of the multi-pur-
pose display of the instrument panel.
3. If the warnings does not go out, then:
Drive carefully to the nearest authorized
Porsche dealer.
Have the fault remedied by an authorized
Porsche dealer.4. After the warnings disappear:
Stop the vehicle in a suitable place.
5. Perform adaptation of the power windows:
Please observe the chapter “STORING FINAL
POSITION OF THE DOOR WINDOWS” on
Page 31.
6. On vehicles with tire pressure monitoring sys-
tem:
Please observe the chapter “SYSTEM LEAR-
NING PHASE” on Page 89.
Page 369 of 380

Index
369
Warning light ........................................ 68
Brake-fluid level
Checking ............................................ 251
Brakes ................................................ 64
,226
Fluid.......................................... 251,362
Fluid warning light ...................... 112,252
Pads ............................................. 14,69
Test stand .......................................... 226
Warning light ........................................ 65
Wear .................................................. 112
Bulbs
Changing............................................ 346
Chart ................................................. 335
CCapacities .................................................. 362
Car care..................................................... 265
Car key
Battery ............................................... 334
Car Telephone ............................................ 173
Care ................................................. 269
,271
cargo area ................................................. 186
Carpet ....................................................... 272
Catalytic converter...................................... 264
Center differential lock ................................ 213
Central locking system ......................... 21,310
Button .................................................. 22
Button (rear) .................................. 22,31
Unlocking vehicle doors ......................... 21
Central vents ..................................... 134
,140
Changing wheels................................ 294,301
Check engine ............................................... 79
Checking hydraulic fluid (power steering) ...... 253
Child restraint anchorages ............................. 46Child restraint systems ..................................47
Child seat bracket .........................................48
Child seats ...................................................48
Installing ...............................................48
Childproof locks
Rear doors ...........................................26
Cigarette lighter ..........................................171
Circulating-air mode ...........................134
,139
Circulating-air mode, automatic ...........134,139
Cleaner
Air......................................................254
Particle...............................................254
Clock ..................................................77,101
Closing mechanism, power ..........................183
Clutch ........................................................202
Collapsible spare wheel ............. 92
,110
,222
,
......................................302
,327
,358
,359
Comfort function
Sliding/lifting roof.......................153,158
Comfort lighting ..........................................151
Coming Home function .......................106,151
Compass....................................................102
Compressor ......................................293,304
Coolant
Checking ............................................249
Cooling system .............................................75
Engine coolant level warning ..................75
Temperature gauge...............................75
Warning ................................................75
Cornering light ...................................117,342
Crankcase ventilation ..................................264
Crossing obstacles .....................................234
Cruise control
Accelerating .......................................125
Decelerating .......................................125Interrupting ........................................ 125
Speed limit ........................................ 124
Storing speed .................................... 124
Switching off ...................................... 126
Switching on ...................................... 124
Cupholder.................................................. 180
Closing rear ....................................... 181
Opening front ..................................... 180
opening rear ...................................... 181
Removing insert front ......................... 180
DData bank .................................................. 354
Diagnostic Socket ........................................ 15
Dimensions ................................................ 365
Dimming .................................................... 151
Button ............................................... 149
Door lock
Deicing .............................................. 267
Door locking, automatic ....................... 23
,104
Door mirrors .............................. 56
,151
,198
Automatic anti-dazzle operation ............. 58
Driving with a trailer ............................ 198
Extending ............................................ 57
Folding in ............................................. 57
Heating................................................ 57
Setting ................................................ 57
Swivelling, automatic ............................ 57
Door opening .......... 19
,20,21,23,26,104
Emergency operation ........................... 18
Door trim panel
Lighting ............................................. 151
Doors.......................................................... 26
Door-surrounding lighting ............................ 151