CAN Ram 1500 2015 Owner's Manual
[x] Cancel search | Manufacturer: RAM, Model Year: 2015, Model line: 1500, Model: Ram 1500 2015Pages: 871, PDF Size: 24.83 MB
Page 727 of 871
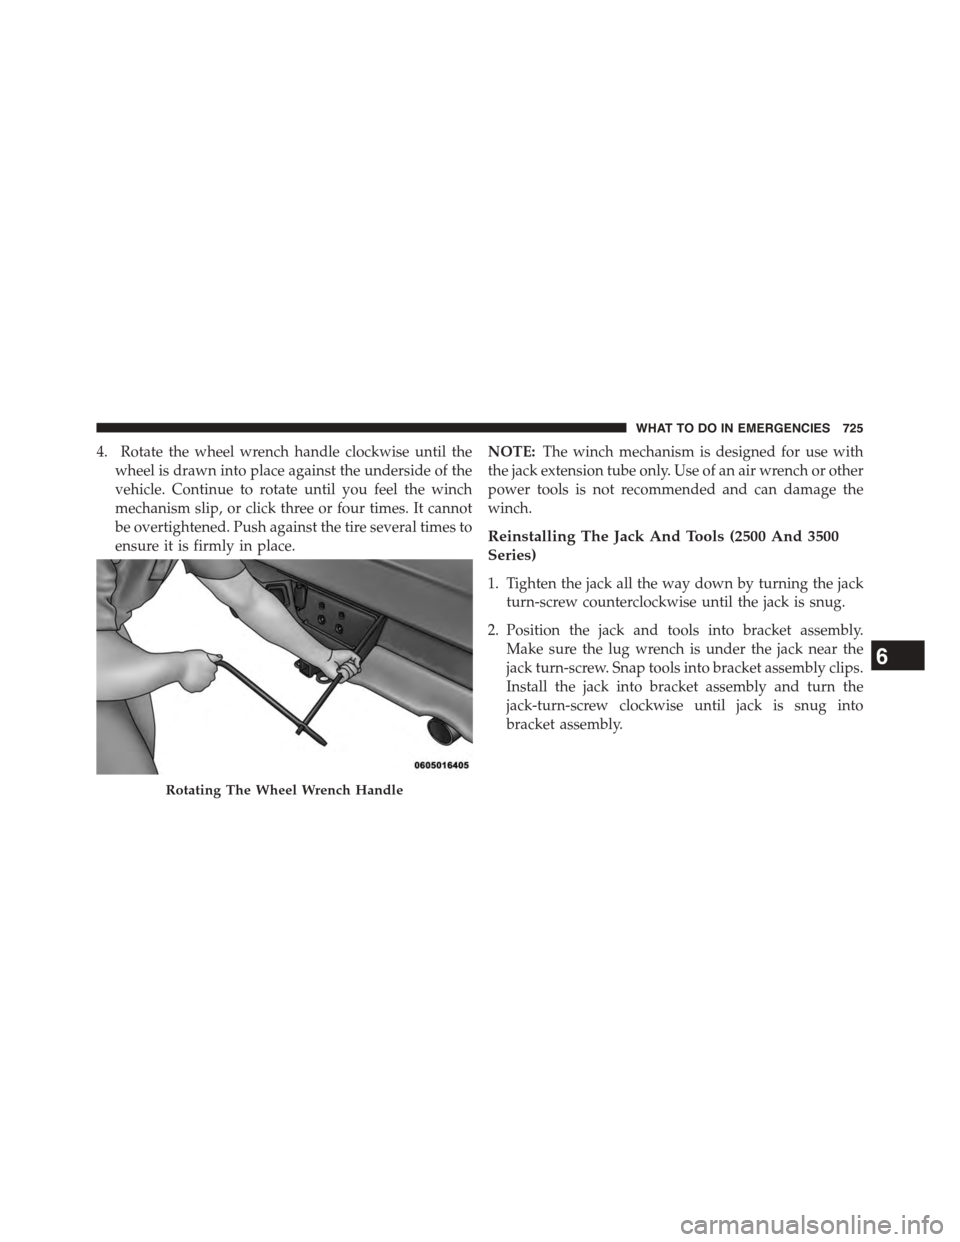
4. Rotate the wheel wrench handle clockwise until the
wheel is drawn into place against the underside of the
vehicle. Continue to rotate until you feel the winch
mechanism slip, or click three or four times. It cannot
be overtightened. Push against the tire several times to
ensure it is firmly in place.
NOTE:The winch mechanism is designed for use with
the jack extension tube only. Use of an air wrench or other
power tools is not recommended and can damage the
winch.
Reinstalling The Jack And Tools (2500 And 3500
Series)
1. Tighten the jack all the way down by turning the jack
turn-screw counterclockwise until the jack is snug.
2. Position the jack and tools into bracket assembly.
Make sure the lug wrench is under the jack near the
jack turn-screw. Snap tools into bracket assembly clips.
Install the jack into bracket assembly and turn the
jack-turn-screw clockwise until jack is snug into
bracket assembly.
Rotating The Wheel Wrench Handle
6
WHAT TO DO IN EMERGENCIES 725
Page 729 of 871
Hub Caps/Wheel Covers — If Equipped
The hub caps must be removed before raising the vehicle
off the ground.
CAUTION!
Use extreme caution when removing the front and
rear center caps. Damage can occur to the center cap
and/or the wheel if screwdriver type tools are used. A
pulling motion, not a pry off motion, is recom-
mended to remove the caps.
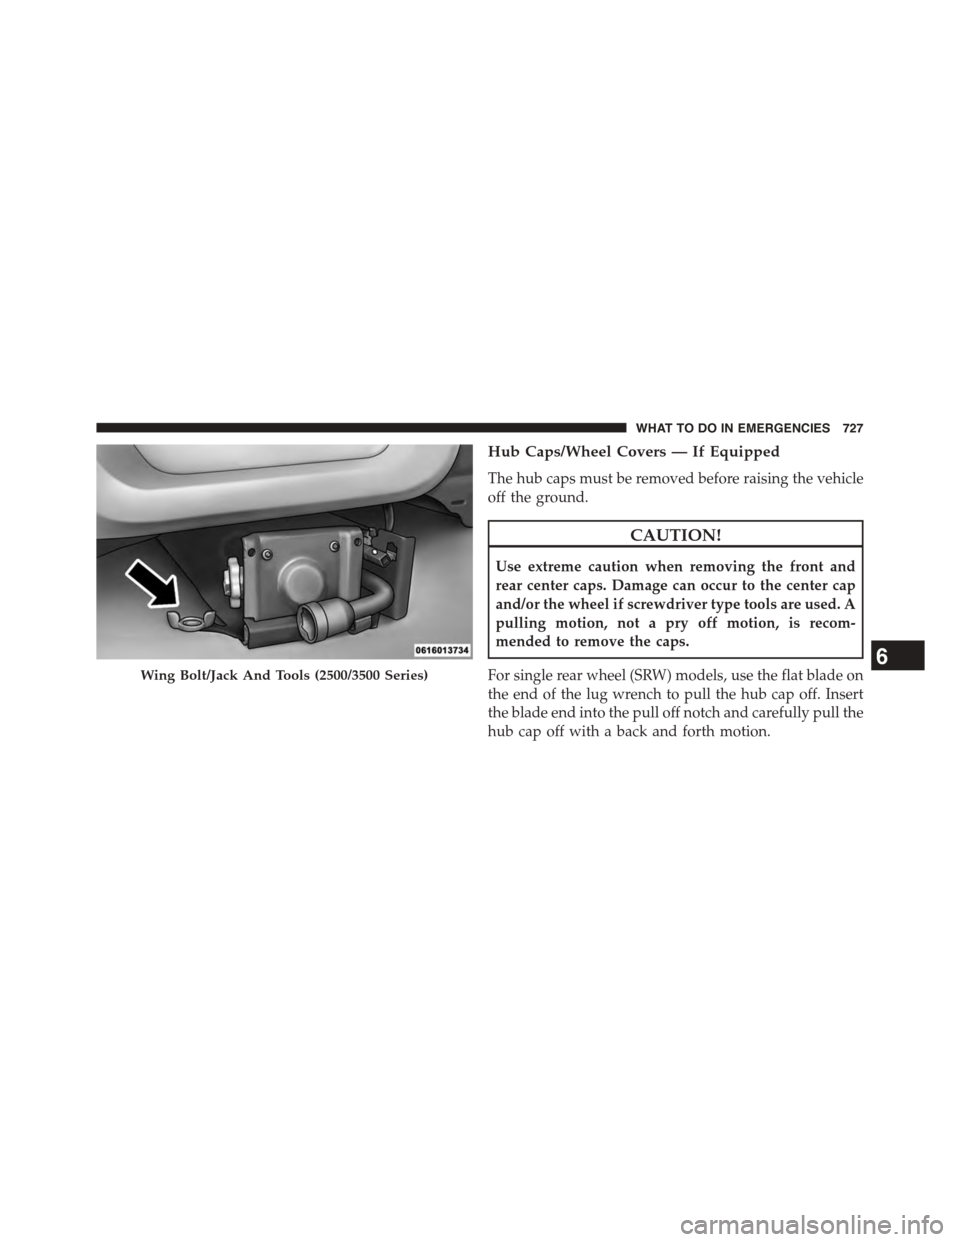
For single rear wheel (SRW) models, use the flat blade on
the end of the lug wrench to pull the hub cap off. Insert
the blade end into the pull off notch and carefully pull the
hub cap off with a back and forth motion.
Wing Bolt/Jack And Tools (2500/3500 Series)6
WHAT TO DO IN EMERGENCIES 727
Page 730 of 871
On 3500 models with dual rear wheels (DRW), you must
first remove the hub caps. The jack handle driver has a
hook at one end that will fit in the pull off notch of the
rear hub caps. Position the hook and pull straight out on
the ratchet firmly. The hub cap should pop off. The wheel
skins can now be removed. For the front hub cap, use the
flat blade on the end of the lug wrench to pull the caps
off. The wheel skin can now be removed.
CAUTION!
•Use a pulling motion to remove the hub cap. Do not
use a twisting motion when removing the hub cap,
damage to the hub cap; finish may occur.
•The rear hub caps on the dual rear wheel has two
pull off notches. Make sure that the hook of the
jack handle driver is located squarely in the cap
notch before attempting to pull off.
You must use the flat end of the lug wrench to pull off the
wheel skins. Locate the hub cap pull notches (2 notches
on each cap). Insert the flat tip completely and using a
back and forth motion, loosen the wheel skin. Repeat this
procedure around the tire until the skin pops off.
Replace the wheel skins first using a rubber mallet. When
replacing the hub caps, tilt the cap retainer over the lug
nut bolt circle and strike the high side down with a
rubber mallet. Be sure that the hub caps and wheel skins
are firmly seated around the wheel.
HOISTING
A conventional floor jack may be used at the jacking
locations. Refer to the graphics that show jacking loca-
tions. However, a floor jack or frame hoist must never be
used on any other parts of the underbody.
728 WHAT TO DO IN EMERGENCIES
Page 731 of 871
CAUTION!
Never use a floor jack directly under the differential
housing of a loaded truck or damage to your vehicle
may result.
JUMP-STARTING PROCEDURES
If your vehicle has a discharged battery it can be jump-
started using a set of jumper cables and a battery in
another vehicle or by using a portable battery booster
pack. Jump-starting can be dangerous if done improperly
so please follow the procedures in this section carefully.
NOTE:When using a portable battery booster pack
follow the manufacturer ’s operating instructions and
precautions.
CAUTION!
Do not use a portable battery booster pack or any
other booster source with a system voltage greater
than 12 Volts or damage to the battery, starter motor,
alternator or electrical system may occur.
WARNING!
Do not attempt jump-starting if the battery is frozen.
It could rupture or explode and cause personal injury.
Preparations For Jump-Start
The battery in your vehicle is located in the front of the
engine compartment, behind the left headlight assembly.
NOTE:The positive battery post is covered with a
protective cap. Lift up on the cap to gain access to the
positive battery post. Do not jump off fuses. Only jump
directly off positive post.
6
WHAT TO DO IN EMERGENCIES 729
Page 733 of 871
WARNING!
•Take care to avoid the radiator cooling fan when-
ever the hood is raised. It can start anytime the
ignition switch is ON. You can be injured by
moving fan blades.
•Remove any metal jewelry such as rings, watch
bands and bracelets that could make an inadvertent
electrical contact. You could be seriously injured.
•Batteries contain sulfuric acid that can burn your
skin or eyes and generate hydrogen gas which is
flammable and explosive. Keep open flames or
sparks away from the battery.
1. Set the parking brake, shift the automatic transmission
into PARK and turn the ignition to LOCK.
2. Turn off the heater, radio, and all unnecessary electri-
cal accessories.
3. If using another vehicle to jump-start the battery, park
the vehicle within the jumper cables reach, set the
parking brake and make sure the ignition is OFF.
WARNING!
Do not allow vehicles to touch each other as this
could establish a ground connection and personal
injury could result.
Jump-Starting Procedure
WARNING!
Failure to follow this jump-starting procedure could
result in personal injury or property damage due to
battery explosion.
6
WHAT TO DO IN EMERGENCIES 731
Page 736 of 871
FREEING A STUCK VEHICLE
If your vehicle becomes stuck in mud, sand, or snow, it
can often be moved using a rocking motion. Turn the
steering wheel right and left to clear the area around the
front wheels. Then shift back and forth between DRIVE
and REVERSE (with automatic transmission) or 2nd gear
and REVERSE (with manual transmission), while gently
pressing the accelerator. Use the least amount of accel-
erator pedal pressure that will maintain the rocking
motion, without spinning the wheels or racing the en-
gine.
NOTE:For trucks equipped with 8-speed automatic
transmission: Shifts between DRIVE and REVERSE can
only be achieved at wheel speeds of 5 mph (8 km/h) or
less. Whenever the transmission remains in NEUTRAL
for more than two seconds, you must press the brake
pedal to engage DRIVE or REVERSE.
CAUTION!
Racing the engine or spinning the wheels may lead to
transmission overheating and failure. Allow the en-
gine to idle with the transmission in NEUTRAL for at
least one minute after every five rocking-motion
cycles. This will minimize overheating and reduce
the risk of transmission failure during prolonged
efforts to free a stuck vehicle.
NOTE:Press the#ESC Off#switch, to place the Electronic
Stability Control (ESC) system in#Partial Off#mode,
before rocking the vehicle. Refer to “Electronic Brake
Control” in “Starting And Operating” for further infor-
mation. Once the vehicle has been freed, press the#ESC
Off#switch again to restore#ESC On#mode.
734 WHAT TO DO IN EMERGENCIES
Page 737 of 871
CAUTION!
•When “rocking” a stuck vehicle by shifting be-
tween DRIVE/2nd gear and REVERSE, do not spin
the wheels faster than 15 mph (24 km/h), or drive-
train damage may result.
•Revving the engine or spinning the wheels too fast
may lead to transmission overheating and failure.
It can also damage the tires. Do not spin the wheels
above 30 mph (48 km/h) while in gear (no trans-
mission shifting occurring).
WARNING!
Fast spinning tires can be dangerous. Forces gener-
ated by excessive wheel speeds may cause damage, or
even failure, of the axle and tires. A tire could
(Continued)
WARNING!(Continued)
explode and injure someone. Do not spin your vehi-
cle’s wheels faster than 30 mph (48 km/h) or for
longer than 30 seconds continuously without stop-
ping when you are stuck and do not let anyone near
a spinning wheel, no matter what the speed.
EMERGENCY TOW HOOKS — IF EQUIPPED
Your vehicle may be equipped with emergency tow
hooks.
NOTE:For off-road recovery, it is recommended to use
both of the front tow hooks to minimize the risk of
damage to the vehicle.
6
WHAT TO DO IN EMERGENCIES 735
Page 738 of 871
WARNING!
•Do not use a chain for freeing a stuck vehicle.
Chains may break, causing serious injury or death.
•Stand clear of vehicles when pulling with tow
hooks. Tow straps may become disengaged, caus-
ing serious injury.
CAUTION!
Tow hooks are for emergency use only to rescue a
vehicle stranded off-road. Do not use tow hooks for
tow truck hookup or highway towing. You could
damage your vehicle.
SHIFT LEVER OVERRIDE
If a malfunction occurs and the shift lever cannot be
moved out of the PARK position, you can use one of the
following procedures to temporarily move the shift lever:
Column Shifter — If Equipped
1. Turn the engine off.
2. Firmly apply the parking brake.
3. Tilt the steering wheel to the full up position.
4. Press and maintain firm pressure on the brake pedal.
5. Insert a screwdriver or similar tool, into the access port
(ringed circle) on the bottom of the steering column
and push and hold the override release lever up.
736 WHAT TO DO IN EMERGENCIES
Page 741 of 871
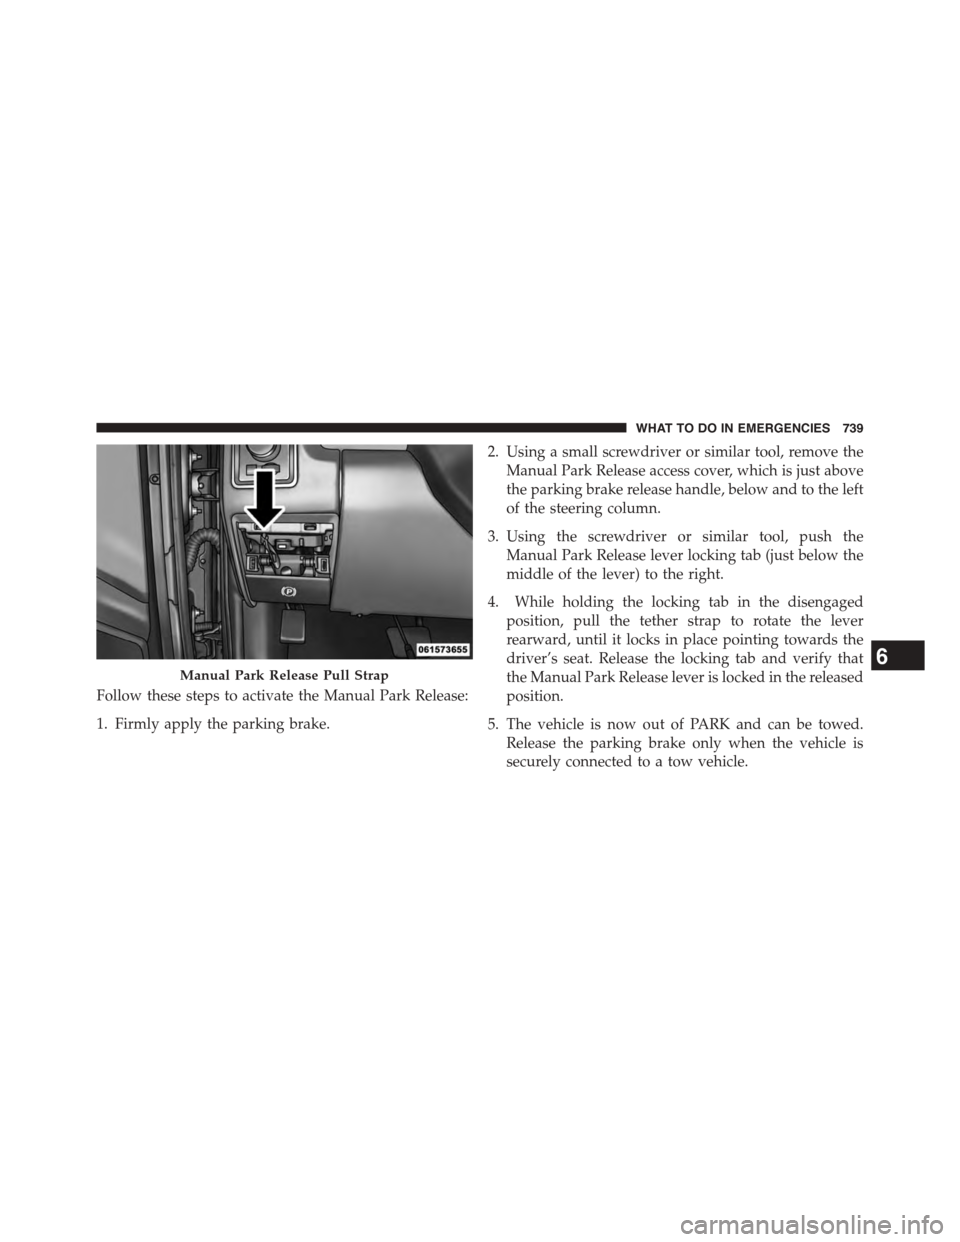
Follow these steps to activate the Manual Park Release:
1. Firmly apply the parking brake.
2. Using a small screwdriver or similar tool, remove the
Manual Park Release access cover, which is just above
the parking brake release handle, below and to the left
of the steering column.
3. Using the screwdriver or similar tool, push the
Manual Park Release lever locking tab (just below the
middle of the lever) to the right.
4. While holding the locking tab in the disengaged
position, pull the tether strap to rotate the lever
rearward, until it locks in place pointing towards the
driver’s seat. Release the locking tab and verify that
the Manual Park Release lever is locked in the released
position.
5. The vehicle is now out of PARK and can be towed.
Release the parking brake only when the vehicle is
securely connected to a tow vehicle.
Manual Park Release Pull Strap6
WHAT TO DO IN EMERGENCIES 739
Page 742 of 871
To Reset The Manual Park Release:
1. Push the locking tab to the right, to unlock the lever.
2. Rotate the Manual Park Release lever forward to its
original position, until the locking tab snaps into place
to secure the lever.
3. Pull gently on the tether strap to confirm that the lever
is locked in its stowed position.
4. Re-install the access cover.
TOWING A DISABLED VEHICLE
This section describes procedures for towing a disabled
vehicle using a commercial wrecker service. If the trans-
mission and drivetrain are operable, disabled vehicles
may also be towed as described under “Recreational
Towing” in the “Starting and Operating” section.
NOTE:Vehicles equipped with air suspension must be
placed in Transport mode, before tying them down (from
the body) on a trailer or flatbed truck. Refer to#Air
Suspension#in#Starting and Operating#for more infor-
mation. If the vehicle cannot be placed in Transport mode
(for example, engine will not run), tie-downs must be
fastened to the axles (not to the body). Failure to follow
these instructions may cause fault codes to be set and/or
cause loss of proper tie-down tension.
740 WHAT TO DO IN EMERGENCIES