Ram 1500 2015 Owner's Manual
Manufacturer: RAM, Model Year: 2015, Model line: 1500, Model: Ram 1500 2015Pages: 871, PDF Size: 24.83 MB
Page 401 of 871

situations or environments, such as aboard airplanes. If
you are unsure of restrictions, you are encouraged to ask
for authorization before turning on the wireless radio.
This device complies with Part 15 of the FCC Rules and
with Industry Canada license-exempt RSS standard(s).
Operation is subject to the following two conditions:
1. this device may not cause harmful interference, and
2. this device must accept any interference received,
including interference that may cause undesired op-
eration.
Le présent appareil est conforme aux CNR d’Industrie
Canada applicables aux appareils radio exempts de li-
cence. L’exploitation est autorisée aux deux conditions
suivantes: (1) l’appareil ne doit pas produire de brouil-
lage, et (2) l’utilisateur de l’appareil doit accepter tout
brouillage radioélectrique subi, même si le brouillage est
susceptible d’en compromettre le fonctionnement.
NOTE:
•This equipment has been tested and found to comply
with the limits for a Class B digital device, pursuant to
Part 15 of the FCC Rules. These limits are designed to
provide reasonable protection against harmful inter-
ference in a residential installation. This equipment
generates, uses and can radiate radio frequency energy
and, if not installed and used in accordance with the
instructions, may cause harmful interference to radio
communications. However, there is no guarantee that
interference will not occur in a particular installation.
•If this equipment does cause harmful interference to
radio or television reception, which can be determined
by turning the equipment off and on, the user is
encouraged to try to correct the interference by one or
more of the following measures:
•Increase the separation between the equipment and
receiver.
4
UNDERSTANDING YOUR INSTRUMENT PANEL 399
Page 402 of 871
•Consult the dealer or an experienced radio technician
for help.
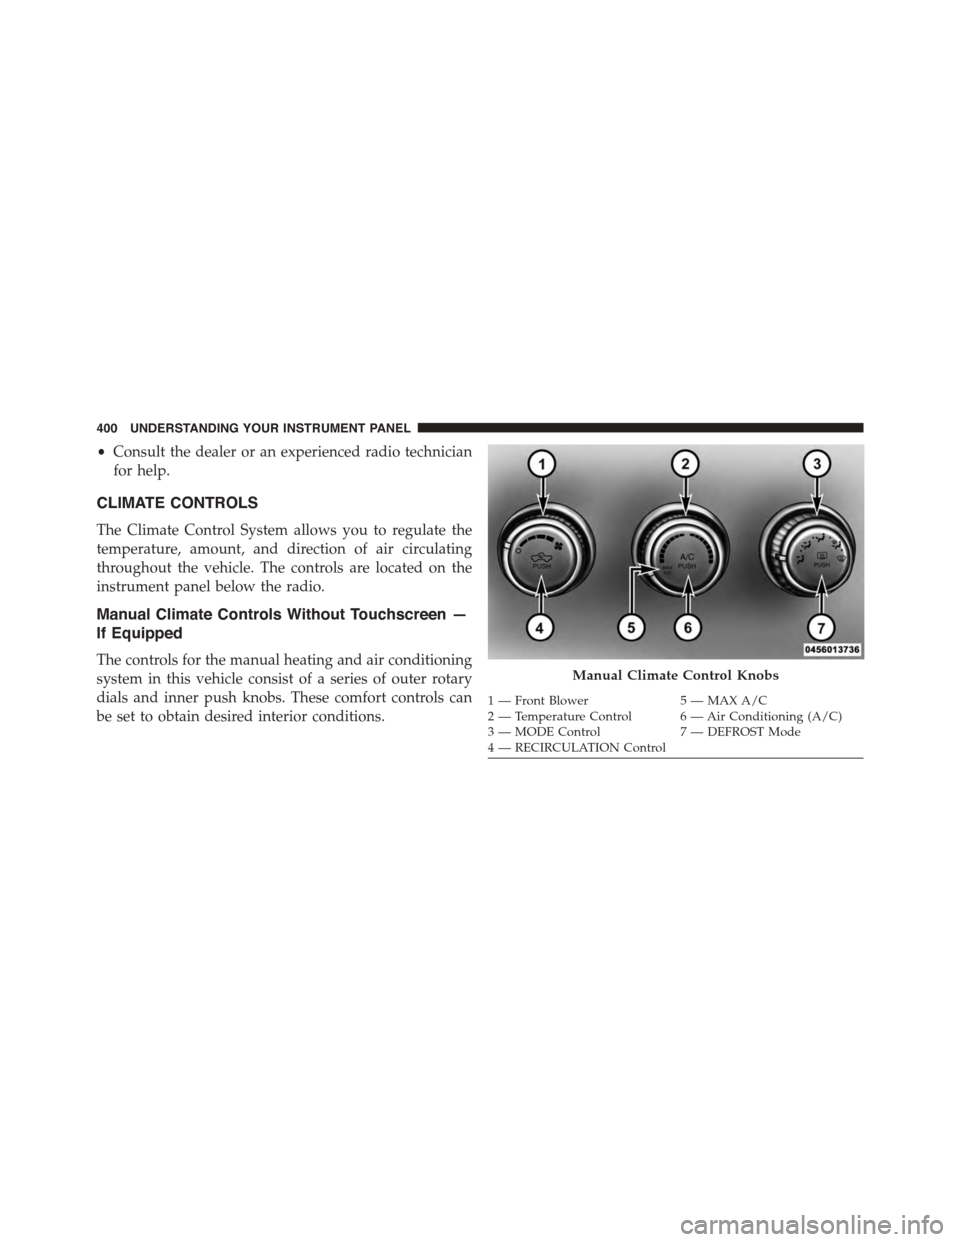
CLIMATE CONTROLS
The Climate Control System allows you to regulate the
temperature, amount, and direction of air circulating
throughout the vehicle. The controls are located on the
instrument panel below the radio.
Manual Climate Controls Without Touchscreen —
If Equipped
The controls for the manual heating and air conditioning
system in this vehicle consist of a series of outer rotary
dials and inner push knobs. These comfort controls can
be set to obtain desired interior conditions.
Manual Climate Control Knobs
1—FrontBlower5—MAXA/C2—TemperatureControl 6—AirConditioning(A/C)3—MODEControl7—DEFROSTMode4—RECIRCULATIONControl
400 UNDERSTANDING YOUR INSTRUMENT PANEL
Page 403 of 871
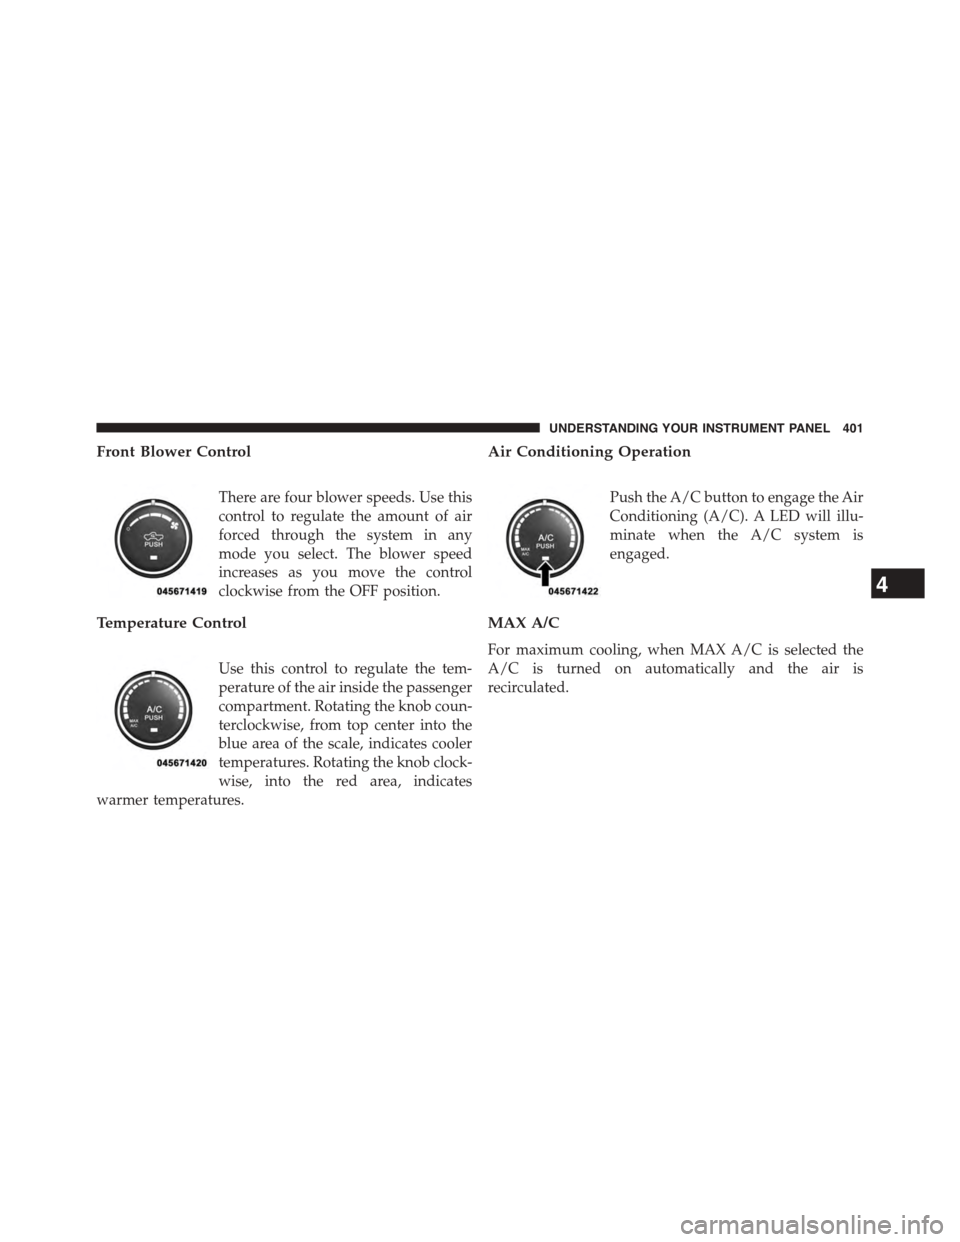
Front Blower Control
There are four blower speeds. Use this
control to regulate the amount of air
forced through the system in any
mode you select. The blower speed
increases as you move the control
clockwise from the OFF position.
Temperature Control
Use this control to regulate the tem-
perature of the air inside the passenger
compartment. Rotating the knob coun-
terclockwise, from top center into the
blue area of the scale, indicates cooler
temperatures. Rotating the knob clock-
wise, into the red area, indicates
warmer temperatures.
Air Conditioning Operation
Push the A/C button to engage the Air
Conditioning (A/C). A LED will illu-
minate when the A/C system is
engaged.
MAX A/C
For maximum cooling, when MAX A/C is selected the
A/C is turned on automatically and the air is
recirculated.
4
UNDERSTANDING YOUR INSTRUMENT PANEL 401
Page 404 of 871
NOTE:A/C cannot be deselected when in MAX A/C
position. The LED will blink three times if the A/C
button is pushed. If your air conditioning performance
seems lower than expected, check the front of the A/C
condenser (located in front of the radiator), for an accu-
mulation of dirt or insects. Clean with a gentle water
spray from behind the radiator and through the con-
denser. Fabric front fascia protectors may reduce airflow
to the condenser, reducing air conditioning performance.
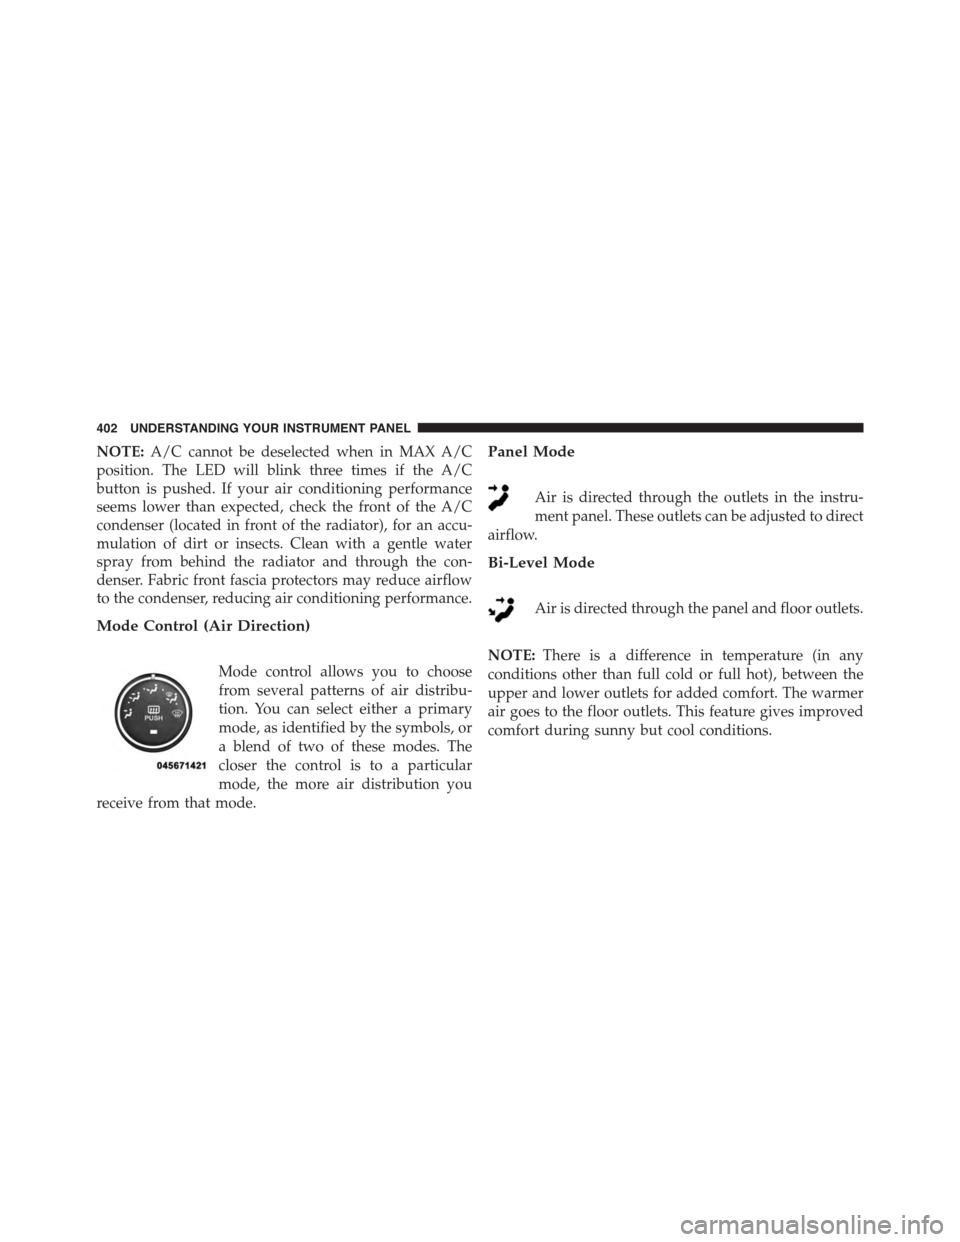
Mode Control (Air Direction)
Mode control allows you to choose
from several patterns of air distribu-
tion. You can select either a primary
mode, as identified by the symbols, or
a blend of two of these modes. The
closer the control is to a particular
mode, the more air distribution you
receive from that mode.
Panel Mode
Air is directed through the outlets in the instru-
ment panel. These outlets can be adjusted to direct
airflow.
Bi-Level Mode
Air is directed through the panel and floor outlets.
NOTE:There is a difference in temperature (in any
conditions other than full cold or full hot), between the
upper and lower outlets for added comfort. The warmer
air goes to the floor outlets. This feature gives improved
comfort during sunny but cool conditions.
402 UNDERSTANDING YOUR INSTRUMENT PANEL
Page 405 of 871
Floor Mode
Air is directed through the floor outlets with a
small amount through the defrost and side win-
dow demist outlets.
Mix Mode
Air is directed through the floor, defrost and side
window demist outlets. This setting works best in
cold or snowy conditions that require extra heat at the
windshield. This setting is good for maintaining comfort,
while reducing moisture on the windshield.
Defrost Mode
Air is directed through the windshield and side
window demist outlets. Use the DEFROST mode
with maximum blower and warm temperature settings
for best windshield and side window defrosting.
NOTE:The air conditioning compressor operates in MIX
and DEFROST, or a blend of these modes even if the A/C
button is not pushed. This dehumidifies the air to help
dry the windshield. To improve fuel economy, use these
modes only when necessary.
Recirculation Control
Push the Recirculation Control button to
choose between outside air intake or recircula-
tion of the air inside the vehicle. A LED will
illuminate when you are in Recirculation
mode. Only use the Recirculation mode to temporarily
block out any outside odors, smoke, or dust, and to cool
the interior rapidly upon initial start-up in very hot or
humid weather.
4
UNDERSTANDING YOUR INSTRUMENT PANEL 403
Page 406 of 871
NOTE:
•If the RECIRCULATION button is pushed when the
system is in Defrost mode, the Recirculation LED
indicator will flash three times and then turn off to
indicate Recirculation mode is not allowed.
•Continuous use of the Recirculation mode may make
the inside air stuffy and window fogging may occur.
Extended use of this mode is not recommended.
•In cold or damp weather, the use of the Recirculation
mode will cause windows to fog on the inside because
of moisture buildup inside the vehicle. For maximum
defogging, select the outside air position.
•The A/C can be deselected manually without disturb-
ing the mode control selection by pushing the A/C
button.
Air Outlets
The airflow from each of the instrument panel outlets can be
adjusted for direction, and turned on or off to control airflow.
NOTE:For maximum airflow to the rear, the center
instrument panel outlets can be directed toward the rear
seat passengers.
Economy Mode
If ECONOMY mode is desired, push the A/C button to
turn off the LED indicator and the A/C compressor.
Rotate the temperature control knob to the desired tem-
perature. Also, make sure to select only Panel, Bi-Level or
Floor modes.
Stop/Start System — If Equipped
While in an Autostop, the Climate Controls system may
automatically adjust airflow to maintain cabin comfort.
Customer settings will be maintained upon return to an
engine running condition.
404 UNDERSTANDING YOUR INSTRUMENT PANEL
Page 407 of 871
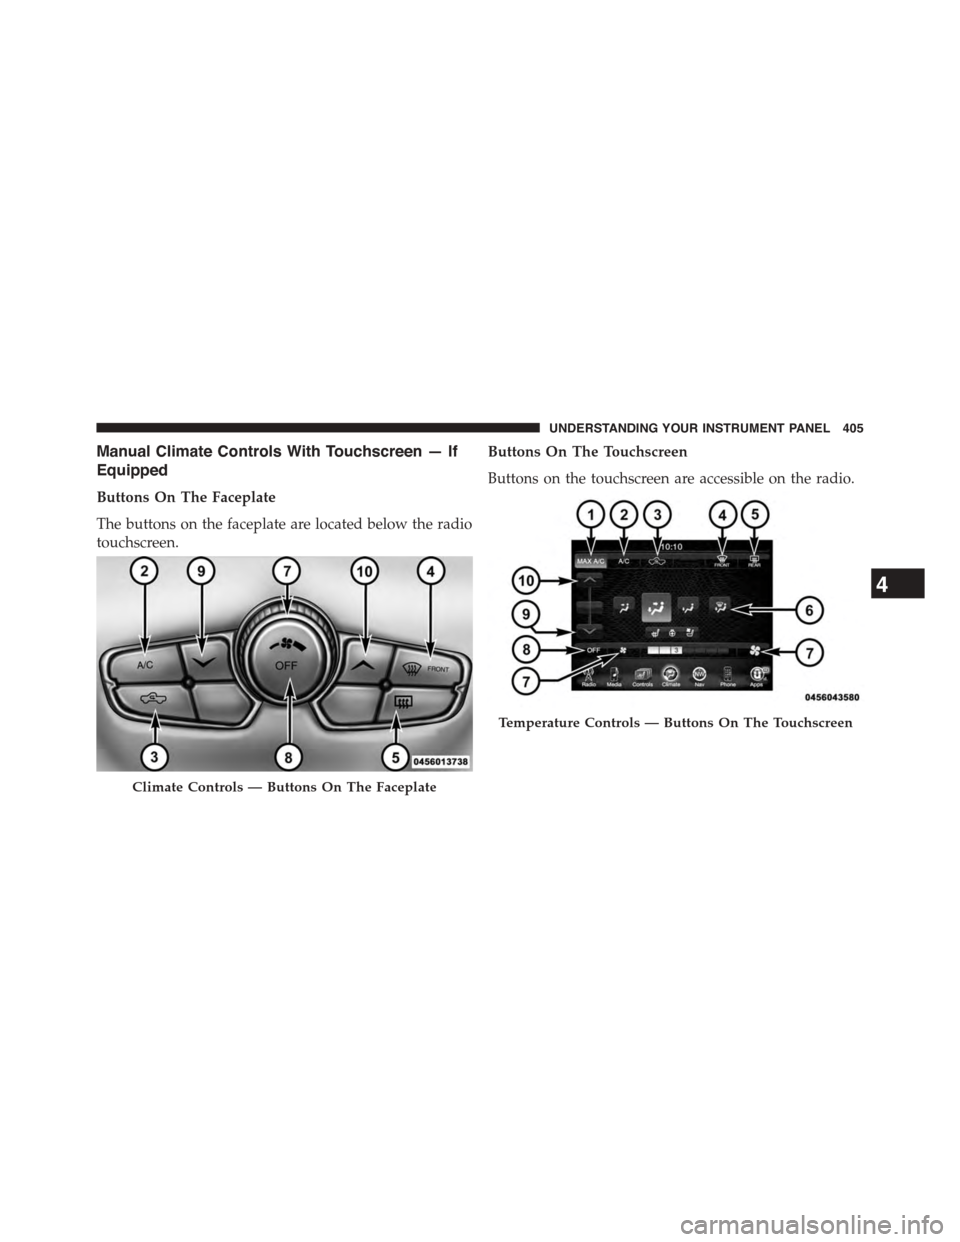
Manual Climate Controls With Touchscreen — If
Equipped
Buttons On The Faceplate
The buttons on the faceplate are located below the radio
touchscreen.
Buttons On The Touchscreen
Buttons on the touchscreen are accessible on the radio.
Climate Controls — Buttons On The Faceplate
Temperature Controls — Buttons On The Touchscreen
4
UNDERSTANDING YOUR INSTRUMENT PANEL 405
Page 408 of 871
Button Descriptions (Applies To Both Buttons On The
Faceplate and Buttons On The Touchscreen)
1. MAX A/C Button
Press and release to toggle between MAX A/C and the
prior settings. The button on the touchscreen illuminates
when MAX A/C is ON. In MAX A/C, the blower level
and mode position can be adjusted to desired user
settings. Pressing other settings will cause the MAX A/C
operation to switch to the prior settings and the MAX
A/C indicator will turn off.
2. A/C Button
Press and release to change the current setting, the
indicator illuminates when A/C is ON. Performing this
function again will cause the A/C operation to switch
into manual mode and the A/C indicator will turn off.
3. Recirculation Button
Press and release to change the current setting; the
indicator illuminates when ON.
4. Front Defrost Button
Press and release to change the current airflow setting to
Defrost mode. The indicator illuminates when this fea-
ture is ON. Air comes from the windshield and side
window demist outlets. When the defrost button is
selected, the blower level will increase. Use Defrost mode
with maximum temperature settings for best windshield
and side window defrosting and defogging. Performing
this function will cause the ATC to switch into manual
mode. If the front defrost mode is turned off the climate
system will return the previous setting.
5. Defrost Button
Press and release this button to turn on the rear window
defroster (if equipped) and the heated outside mirrors (if
406 UNDERSTANDING YOUR INSTRUMENT PANEL
Page 409 of 871
equipped). An indicator will illuminate when the rear
window defroster is on. The rear window defroster
automatically turns off after 10 minutes.
CAUTION!
Failure to follow these cautions can cause damage to
the heating elements:
•Use care when washing the inside of the rear
window. Do not use abrasive window cleaners on
the interior surface of the window. Use a soft cloth
and a mild washing solution, wiping parallel to the
heating elements. Labels can be peeled off after
soaking with warm water.
•Do not use scrapers, sharp instruments, or abrasive
window cleaners on the interior surface of the
window.
•Keep all objects a safe distance from the window.
6. Modes
The airflow distribution mode can be adjusted so air
comes from the instrument panel outlets, floor outlets,
and demist outlets. The Mode settings are as follows:
•Panel Mode
Air comes from the outlets in the instrument
panel. Each of these outlets can be individu-
ally adjusted to direct the flow of air. The air
vanes of the center outlets and outboard outlets can
be moved up and down or side to side to regulate
airflow direction. There is a shut off wheel located
below the air vanes to shut off or adjust the amount
of airflow from these outlets.
•Bi-Level Mode
Air comes from the instrument panel outlets
and floor outlets. A slight amount of air is
directed through the defrost and side window
demister outlets.
4
UNDERSTANDING YOUR INSTRUMENT PANEL 407
Page 410 of 871
NOTE:BI-LEVEL mode is designed under comfort con-
ditions to provide cooler air out of the panel outlets and
warmer air from the floor outlets.
•Floor Mode
Air comes from the floor outlets. A slight
amount of air is directed through the defrost
and side window demister outlets.
•Mix Mode
Air comes from the floor, defrost and side
window demister outlets. This mode works
best in cold or snowy conditions.
NOTE:The air conditioning compressor operates in MIX
and DEFROST modes even if the A/C button is not
pressed. This dehumidifies the air to help dry the wind-
shield. To improve fuel economy, utilize these modes
only when required.
7. Blower Control
Blower control is used to regulate the amount of air
forced through the climate system. There are seven
blower speeds available. Adjusting the blower will cause
automatic mode to switch to manual operation. The
speeds can be selected using either buttons on the
faceplate or buttons on the touchscreen as follows:
Blower Control Knob On The Faceplate
The blower speed increases as you turn the control
clockwise from the lowest blower setting. The blower
speed decreases as you turn the blower control knob
counterclockwise.
Buttons On The Touchscreen
Use the small blower icon to reduce the blower setting
and the large blower icon to increase the blower setting.
Blower can also be selected by pressing the blower bar
area between the icons.
408 UNDERSTANDING YOUR INSTRUMENT PANEL