radio controls Ram 1500 2018 User Guide
[x] Cancel search | Manufacturer: RAM, Model Year: 2018, Model line: 1500, Model: Ram 1500 2018Pages: 372, PDF Size: 7.1 MB
Page 8 of 372
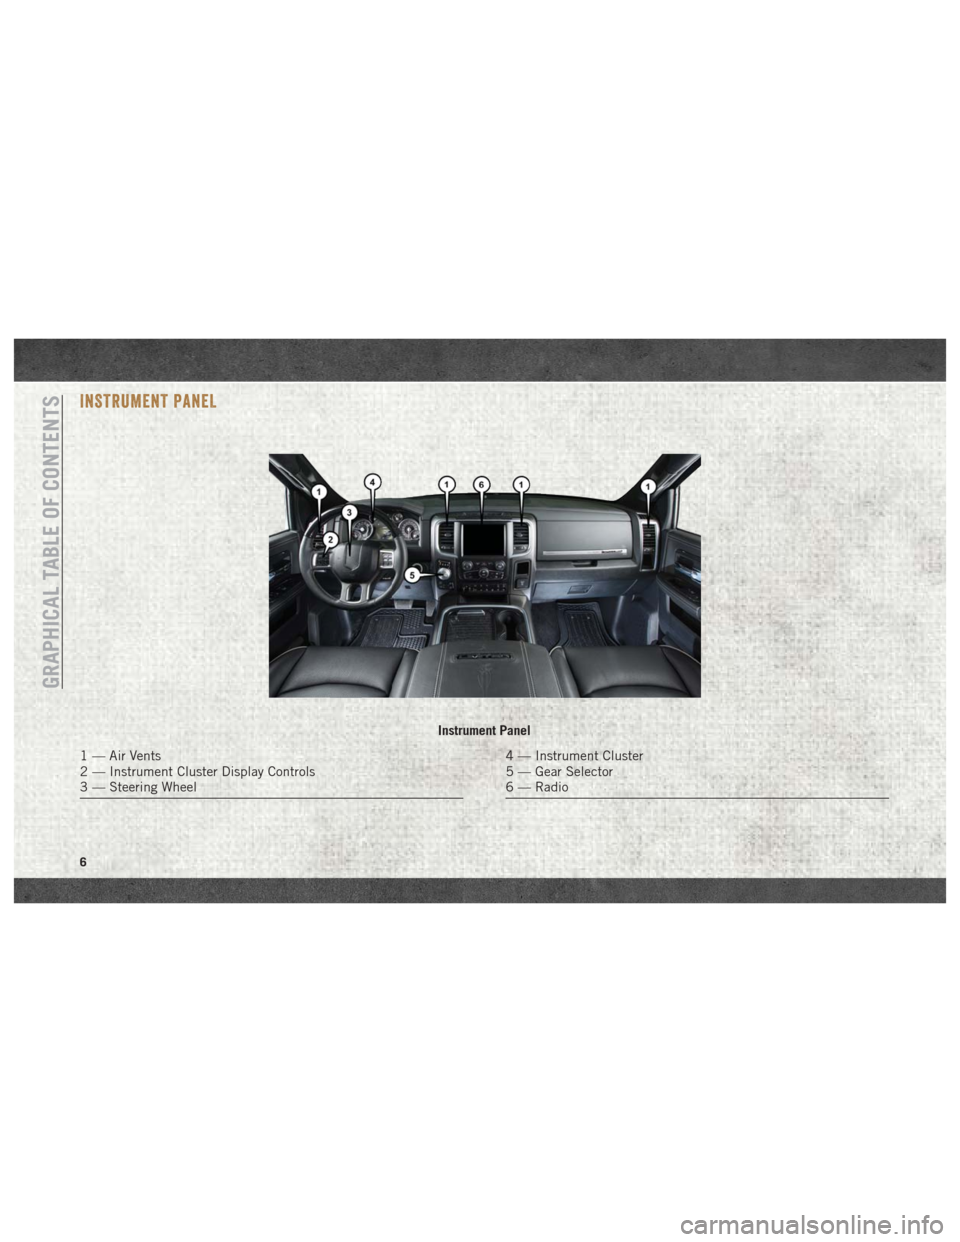
INSTRUMENT PANEL
Instrument Panel
1 — Air Vents
2 — Instrument Cluster Display Controls
3 — Steering Wheel4 — Instrument Cluster
5 — Gear Selector
6 — Radio
GRAPHICAL TABLE OF CONTENTS
6
Page 68 of 372
INSTRUMENT CLUSTER DISPLAY
Your vehicle may be equipped with an instru-
ment cluster display, which offers useful in-
formation to the driver. With the ignition in
the STOP/OFF mode, opening/closing of a
door will activate the display for viewing, and
display the total miles, or kilometers, in the
odometer. Your instrument cluster display is
designed to display important information
about your vehicle’s systems and features.
Using a driver interactive display located on
the instrument panel, your instrument clus-
ter display can show you how systems are
working and give you warnings when they are
not. The steering wheel mounted controls
allow you to scroll through the main menus
and submenus. You can access the specific
information you want and make selections
and adjustments.
Instrument Cluster Display
Controls
The instrument cluster display features a
driver-interactive display that is located in
the instrument cluster.
The instrument cluster display menu items
may consist of the following:
• Speedometer
• Vehicle Info
• Fuel Economy Info
• Trip A
• Trip B
• Audio
• Trailer Tow
• Stored Messages
• Screen Setup
• Vehicle Settings (Not Equipped with aUconnect touchscreen radio) The system allows the driver to select infor-
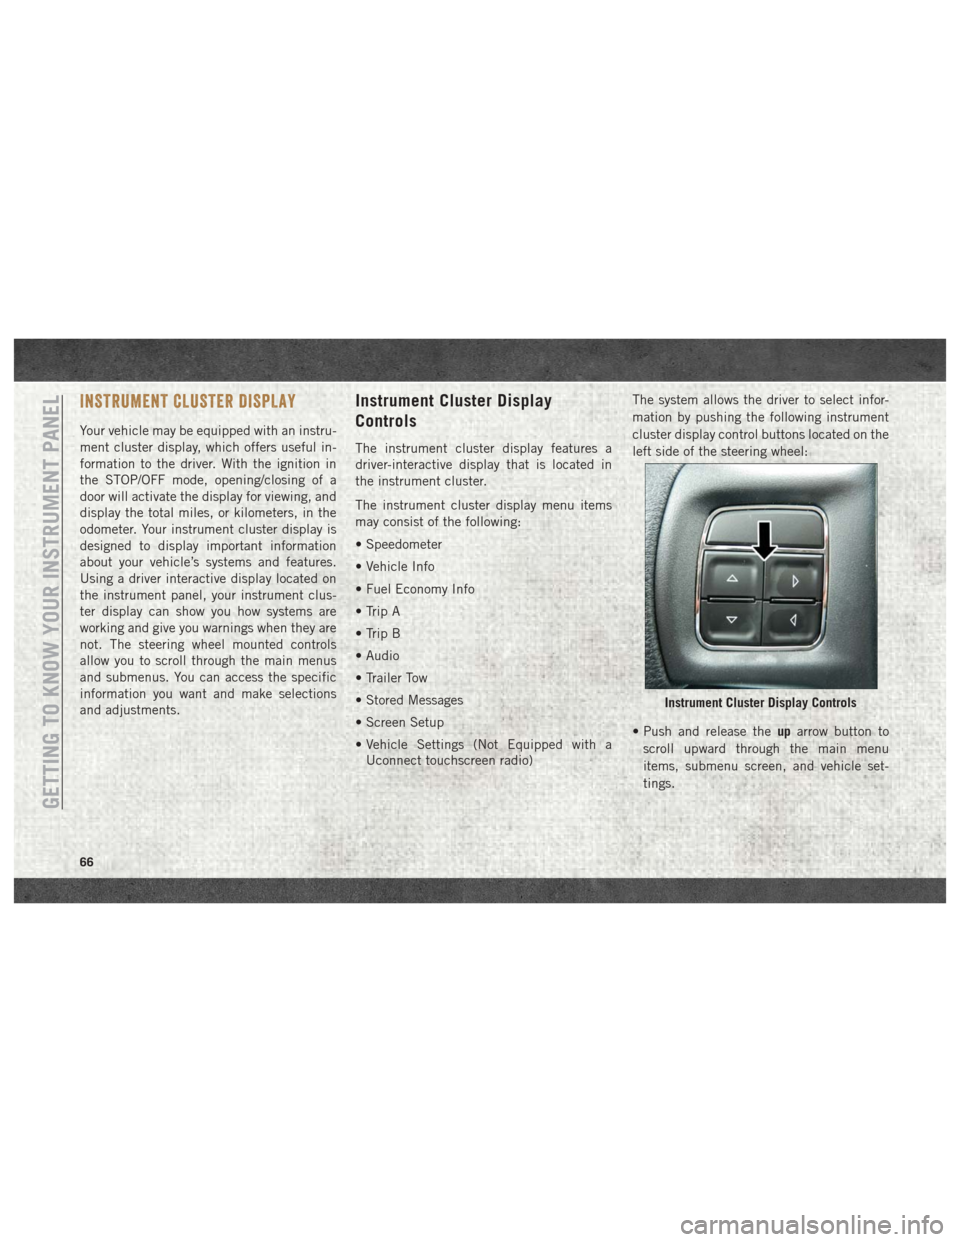
mation by pushing the following instrument
cluster display control buttons located on the
left side of the steering wheel:
• Push and release the
uparrow button to
scroll upward through the main menu
items, submenu screen, and vehicle set-
tings.
Instrument Cluster Display Controls
GETTING TO KNOW YOUR INSTRUMENT PANEL
66
Page 291 of 372
MULTIMEDIA
CYBERSECURITY..............291
RADIO 3.0 ................. .292
Clock Setting.................293
Audio Setting .................293
Radio Operation ...............293
Disc Operation — If Equipped ......293
USB/Audio Jack (AUX) Manual
Operation ...................294
UCONNECT 3.0 ...............295
Clock Setting.................296
Audio Setting .................296
Radio Operation ...............296
Disc Operation — If Equipped ......296
USB/Audio Jack (AUX) Manual
Operation ...................297
UCONNECT 3 WITH 5-INCH DISPLAY . .298
Controls On The Front Panel .......298
Clock Setting .................299
Equalizer, Balance And Fade .......299
Radio Mode ..................300
Media Mode .................301 Bluetooth Source
..............304
UCONNECT 4C/4C NAV WITH 8.4-INCH
DISPLAY.................. .306
Uconnect 4C/4C NAV At A Glance . . . .306
Personalized Menu Bar...........309
Radio .....................310
Android Auto .................310
Apple CarPlay Integration .........314
SIRIUSXM GUARDIAN — IF EQUIPPED.316
SiriusXM Guardian — If Equipped
(Available on Uconnect 4C NAV) .....316
SiriusXM Guardian Activation ......317
Download The Uconnect App .......318
Renewing Subscriptions (Uconnect 4C
NAV)......................318
Maintaining Your SiriusXM Guardian
Account ...................318
Built-In Features ..............318
SiriusXM Guardian Remote Features . .321
UCONNECT SETTINGS ...........324
TIPS CONTROLS AND GENERAL
INFORMATION ............... .325
Steering Wheel Audio Controls ......325
Reception Conditions ............325
Care And Maintenance ...........325
Anti-Theft Protection ............325
IPOD/USB/MEDIA PLAYER CONTROL . .325
Audio Jack (AUX)..............326
USB Port ...................326
Bluetooth Streaming Audio ........326
NAVIGATION................ .327
Changing The Navigation Voice Prompt
Volume....................327
Finding Points Of Interest .........329
Finding A Place By Spelling The Name .329
One-Step Voice Destination Entry . . . .329
Setting Your Home Location ........329
Home .....................330
Adding A Stop ................330
Taking A Detour ...............330
SiriusXM Traffic Plus (4C NAV) .....330
SiriusXM Travel Link (4C NAV) ......331
UCONNECT PHONE............332
MULTIMEDIA
289
Page 300 of 372
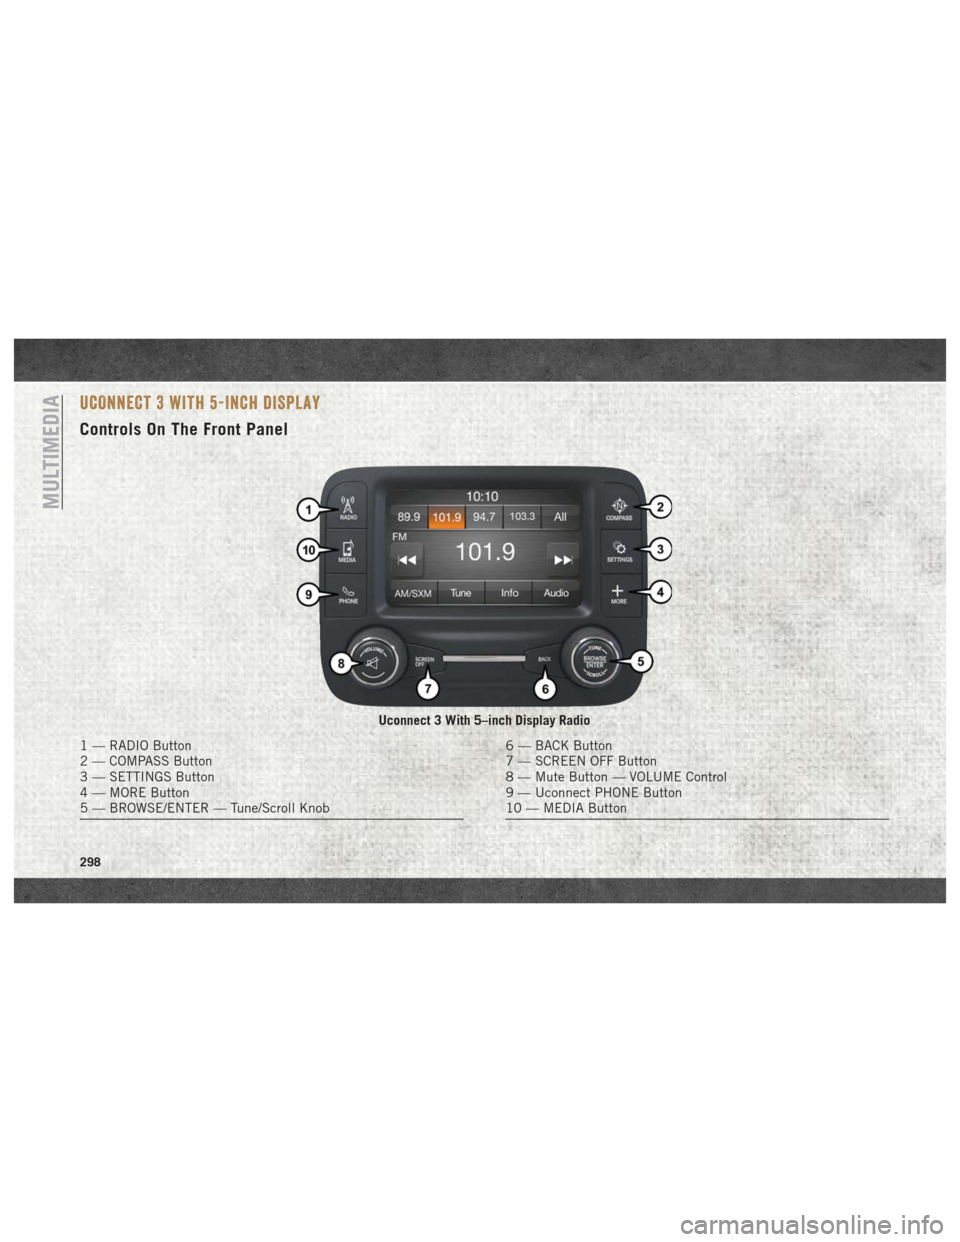
UCONNECT 3 WITH 5-INCH DISPLAY
Controls On The Front Panel
Uconnect 3 With 5–inch Display Radio
1 — RADIO Button
2 — COMPASS Button
3 — SETTINGS Button
4 — MORE Button
5 — BROWSE/ENTER — Tune/Scroll Knob6 — BACK Button
7 — SCREEN OFF Button
8 — Mute Button — VOLUME Control
9 — Uconnect PHONE Button
10 — MEDIA Button
MULTIMEDIA
298
Page 305 of 372
Browse
Press the “Browse” button on the touch-
screen to scroll through and select a desired
track on the Disc. Press the “Exit” button on
the touchscreen if you wish to cancel the
browse function.
Eject Button — Ejecting a Disc
Push the eject button to eject the disc. If you
have ejected a disc and have not removed it
within ten seconds, it will be reloaded. If the
Disc is not removed, the radio will reinsert the
disc but will not play it.
A disc can be ejected with the radio and
ignition OFF.
USB/iPod Mode
USB/iPod Mode is entered by either inserting
a USB Jump Drive or iPod cable into the USB
port, or by pushing the MEDIA button located
on the faceplate. Once in Media Mode, press
the “Source” button on the touchscreen and
select “USB/iPod.”Inserting USB/iPod Device
Gently insert the USB/iPod device into the
USB Port. If you insert a USB/iPod device
with the ignition ON, the unit will switch to
USB/iPod mode and begin to play when you
insert the device. The display will show the
track number and index time in minutes and
seconds. Play will begin at the start of track
one.
Browse
Press the “Browse” button on the touch-
screen to select Artist, Albums, Genres,
Songs, Playlists or Folders from the USB/
iPod device. Once the desired selection is
made you can chose from the available media
by pressing the button on the touchscreen.
Press the “Exit” button on the touchscreen if
you wish to cancel the browse function.
AUX Mode
AUX Mode is entered by inserting a AUX
device using a stereo cable with a 3.5 mm
audio jack into the AUX port, or by pushing
the MEDIA button located on the faceplate.
Once in Media Mode, press the “Source”
button on the touchscreen and select “AUX.”Inserting Auxiliary Device
Gently insert the Auxiliary device cable into
the AUX Port. If you insert a Auxiliary device
with the ignition ON, the unit will switch to
AUX mode and begin to play when you insert
the device cable.
Controlling The Auxiliary Device
The control of the Auxiliary device (e.g., se-
lecting playlists, play, fast forward, etc.) can-
not be provided by the radio; use the device
controls instead. Adjust the volume with the
VOLUME/MUTE rotary knob, or with the vol-
ume of the attached device.
The vehicle radio unit is acting as the ampli-
fier for audio output from the Auxiliary de-
vice. Therefore if the volume control on the
Auxiliary device is set too low, there will be
insufficient audio signal for the radio unit to
play the music on the device.
Track Selection
Seek Up/Seek Down
Press and release the “Right Arrow”but-
ton on the touchscreen for the next selection.
Press and release the “Left Arrow”
button
303
Page 313 of 372
plan, that allows you to project your smart-
phone and a number of its apps onto the
touchscreen radio display. Android Auto au-
tomatically brings you useful information,
and organizes it into simple cards that appear
just when they are needed. Android Auto can
be used with Google's best-in-class speech
technology, the steering wheel controls, the
knobs and buttons on your radio faceplate,
and the radio display’s touchscreen to control
many of your apps. To use Android Auto
follow the following procedure:
1. Download the Android Auto app from theGoogle Play store on your Android-
powered smartphone.
2. Connect your Android powered smart- phone to one of the media USB ports in
your vehicle. If the Android Auto app was
not downloaded, the first time you plug
your device in, the app will begin to
download. NOTE:
Be sure to use the factory-provided USB
cable that came with your phone, as after-
market cables may not work.
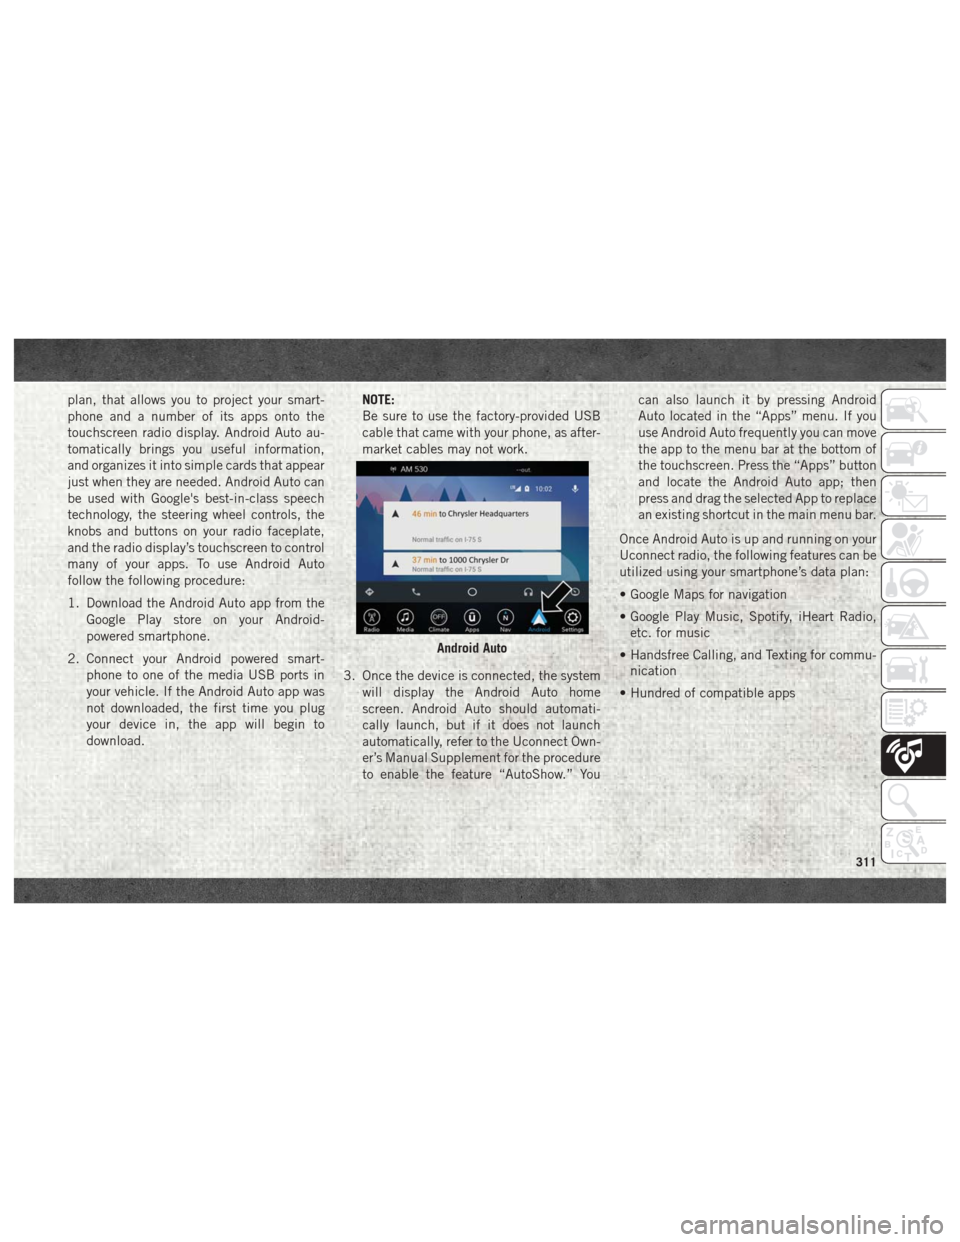
3. Once the device is connected, the system will display the Android Auto home
screen. Android Auto should automati-
cally launch, but if it does not launch
automatically, refer to the Uconnect Own-
er’s Manual Supplement for the procedure
to enable the feature “AutoShow.” You can also launch it by pressing Android
Auto located in the “Apps” menu. If you
use Android Auto frequently you can move
the app to the menu bar at the bottom of
the touchscreen. Press the “Apps” button
and locate the Android Auto app; then
press and drag the selected App to replace
an existing shortcut in the main menu bar.
Once Android Auto is up and running on your
Uconnect radio, the following features can be
utilized using your smartphone’s data plan:
• Google Maps for navigation
• Google Play Music, Spotify, iHeart Radio, etc. for music
• Handsfree Calling, and Texting for commu- nication
• Hundred of compatible apps
Android Auto
311
Page 316 of 372
Apple CarPlay Integration
Uconnect works seamlessly with Apple Car-
Play, the smarter, more secure way to use
your iPhone in the car, and stay focused on
the road. Use your Uconnect Touchscreen
display, the vehicle's knobs and controls, and
your voice with Siri to get access to Apple
Music, Maps, Messages, and more.
To use CarPlay, make sure you are using
iPhone 5 or later, have Siri enabled in Set-
tings, ensure your iPhone is unlocked for the
very first connection only, and then use the
following procedure:
1. Connect your iPhone to one of the mediaUSB ports in your vehicle.
NOTE:
Be sure to use the factory-provided Light-
ning cable that came with your phone, as
aftermarket cables may not work.
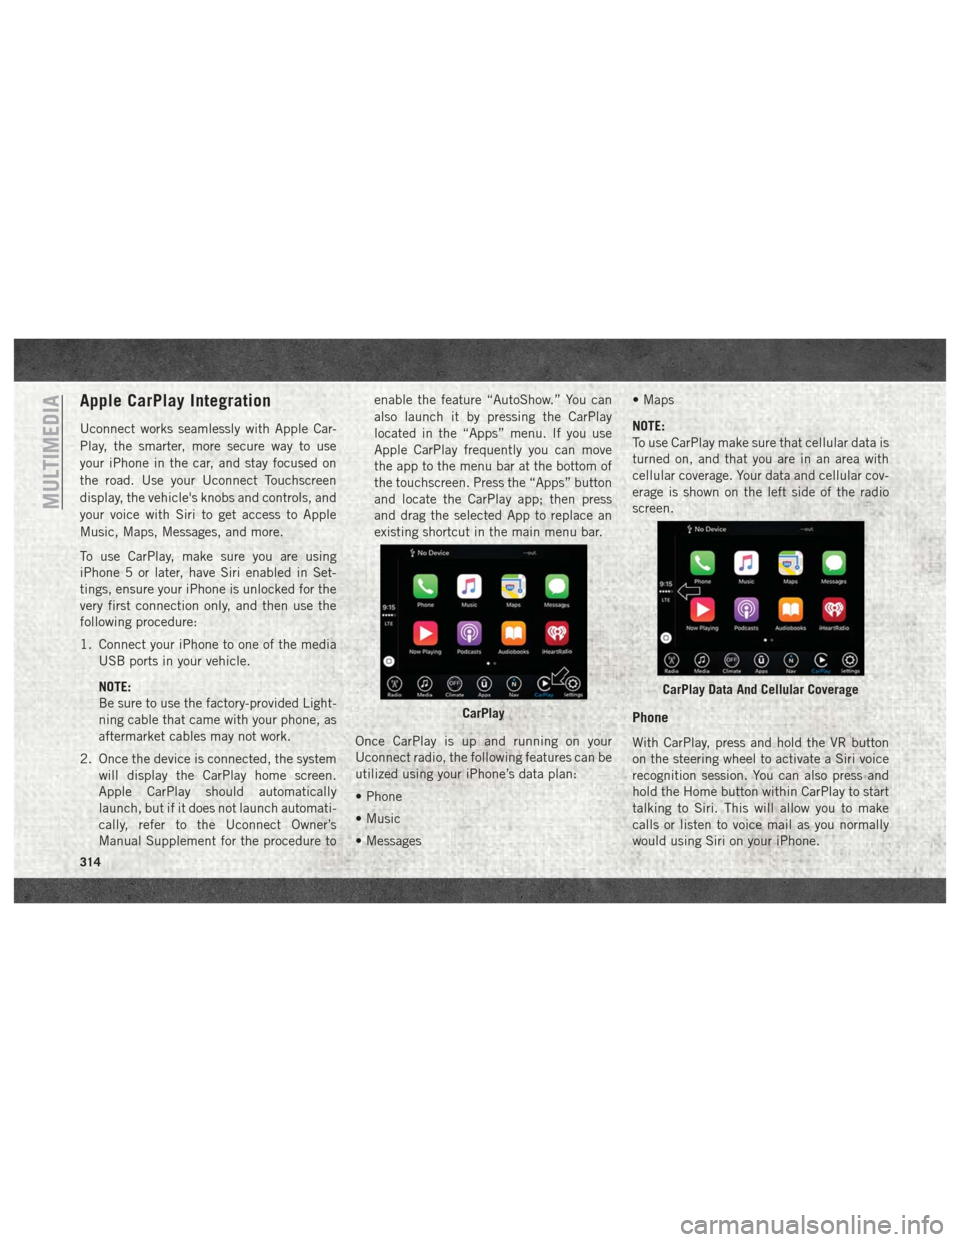
2. Once the device is connected, the system will display the CarPlay home screen.
Apple CarPlay should automatically
launch, but if it does not launch automati-
cally, refer to the Uconnect Owner’s
Manual Supplement for the procedure to enable the feature “AutoShow.” You can
also launch it by pressing the CarPlay
located in the “Apps” menu. If you use
Apple CarPlay frequently you can move
the app to the menu bar at the bottom of
the touchscreen. Press the “Apps” button
and locate the CarPlay app; then press
and drag the selected App to replace an
existing shortcut in the main menu bar.
Once CarPlay is up and running on your
Uconnect radio, the following features can be
utilized using your iPhone’s data plan:
• Phone
• Music
• Messages • Maps
NOTE:
To use CarPlay make sure that cellular data is
turned on, and that you are in an area with
cellular coverage. Your data and cellular cov-
erage is shown on the left side of the radio
screen.
Phone
With CarPlay, press and hold the VR button
on the steering wheel to activate a Siri voice
recognition session. You can also press and
hold the Home button within CarPlay to start
talking to Siri. This will allow you to make
calls or listen to voice mail as you normally
would using Siri on your iPhone.
CarPlay
CarPlay Data And Cellular Coverage
MULTIMEDIA
314
Page 328 of 372
There are many ways to play music from
MP3 players, or USB devices through your
vehicle's sound system. Press your Media
button on the touchscreen to begin.
Audio Jack (AUX)
• The AUX allows a device to be plugged intothe radio and utilize the vehicle’s sound
system, using a 3.5 mm audio cable, to
amplify the source and play through the
vehicle speakers.
• Pressing the “AUX” button on the touch- screen will change the mode to auxiliary
device if the audio jack is connected, allow-
ing the music from your device to be heard
through the vehicle's speakers. To activate
the AUX, plug in the audio jack.
• The functions of the device are controlled using the device buttons. The volume may
be controlled using the radio or device.
USB Port
• Connect your compatible device using aUSB cable into the USB Port. USB Memory
sticks with audio files can also be used.
Audio from the device can be played on the
vehicles sound system while providing
metadata (artist, track title, album, etc.)
information on the radio display.
• When connected, the compatible USB de- vice can be controlled using the radio or
Steering Wheel Audio Controls to play, skip
to the next or previous track, browse, and
list the contents.
• The battery charges when plugged into the USB port (if supported by the specific de-
vice).
• To route the USB cable out of the center console, use the access cut out. NOTE:
When connecting your device for the first
time, the system may take several minutes to
read your music, depending on the number of
files. For example, the system will take ap-
proximately five minutes for every
1,000 songs loaded on the device. Also dur-
ing the reading process, the Shuffle and
Browse functions will be disabled. This pro-
cess is needed to ensure the full use of your
features and only happens the first time it is
connected. After the first time, the reading
process of your device will take considerably
less time unless changes are made or new
songs are added to the playlist.
Bluetooth Streaming Audio
If using a Bluetooth equipped device you may
also be able to stream music to your vehicle's
sound system. Your connected device must
be Bluetooth compatible and paired with
your system (see Uconnect Phone for pairing
instructions). You can access the music from
your connected Bluetooth device by pressing
the Bluetooth button on the touchscreen
while in Media mode.
MULTIMEDIA
326
Page 364 of 372
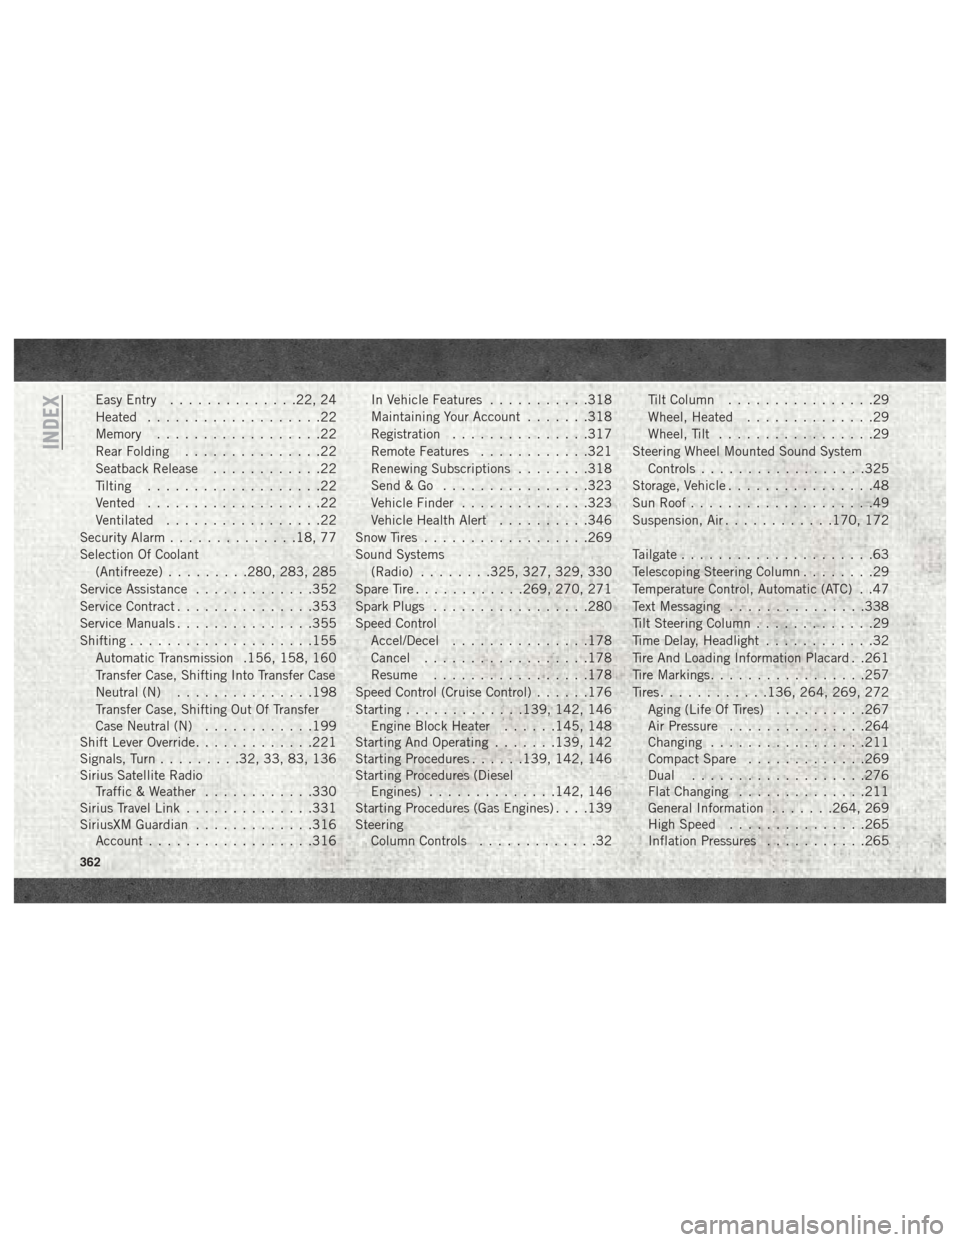
Easy Entry..............22, 24
Heated ...................22
Memory ..................22
Rear Folding ...............22
Seatback Release ............22
Tilting ...................22
Vented ...................22
Ventilated .................22
Security Alarm ..............18, 77
Selection Of Coolant (Antifreeze) .........280, 283, 285
Service Assistance .............352
Service Contract ...............353
Service Manuals ...............355
Shifting ....................155
Automatic Transmission .156, 158, 160
Transfer Case, Shifting Into Transfer Case
Neutral (N) ...............198
Transfer Case, Shifting Out Of Transfer
Case Neutral (N) ............199
Shift Lever Override .............221
Signals, Turn .........32, 33, 83, 136
Sirius Satellite Radio Traffic & Weather ............330
Sirius Travel Link ..............331
SiriusXM Guardian .............316
Account ..................316 In Vehicle Features
...........318
Maintaining Your Account .......318
Registration ...............317
Remote Features ............321
Renewing Subscriptions ........318
Send&Go ................323
Vehicle Finder ..............323
Vehicle Health Alert ..........346
Snow Tires ..................269
Sound Systems (Radio) ........325, 327, 329, 330
Spare Tire ............269, 270, 271
Spark Plugs .................280
Speed Control Accel/Decel .............. .178
Cancel ..................178
Resume .................178
Speed
Control (Cruise Control) ......176
Starting .............139, 142, 146
Engine Block Heater ......145, 148
Starting And Operating .......139, 142
Starting Procedures ......139, 142, 146
Starting Procedures (Diesel Engines) ..............142, 146
Starting Procedures (Gas Engines) . . . .139
Steering Column Controls .............32 Tilt Column
................29
Wheel, Heated ..............29
Wheel, Tilt .................29
Steering Wheel Mounted Sound System Controls ..................325
Storage, Vehicle ................48
Sun Roof ....................49
Suspension, Air ............170, 172
Tailgate .....................63
Telescoping Steering Column ........29
Temperature Control, Automatic (ATC) . .47
Text Messaging ...............338
Tilt Steering Column .............29
Time Delay, Headlight ............32
Tire And Loading Information Placard . .261
Tire Markings .................257
Tires ............136, 264, 269, 272
Aging (Life Of Tires) ..........267
Air Pressure ...............264
Changing .................211
Compact Spare .............269
Dual ...................276
Flat Changing ..............211
General Information .......264, 269
High Speed ...............265
Inflation Pressures ...........265
INDEX
362