warning light Ram 1500 2018 User Guide
[x] Cancel search | Manufacturer: RAM, Model Year: 2018, Model line: 1500, Model: Ram 1500 2018Pages: 372, PDF Size: 7.1 MB
Page 51 of 372
POWER SUNROOF — IF EQUIPPED
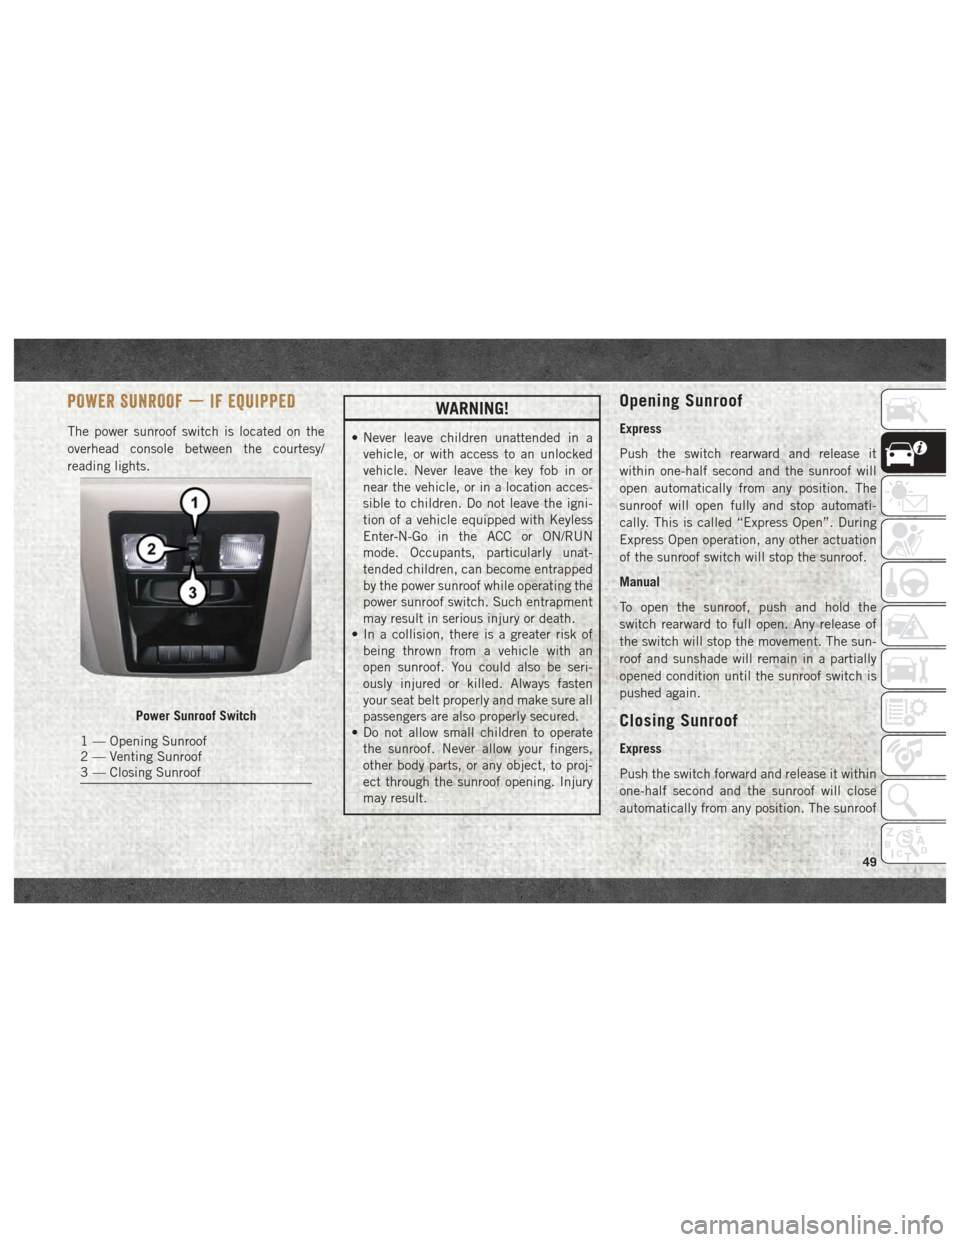
The power sunroof switch is located on the
overhead console between the courtesy/
reading lights.
WARNING!
• Never leave children unattended in avehicle, or with access to an unlocked
vehicle. Never leave the key fob in or
near the vehicle, or in a location acces-
sible to children. Do not leave the igni-
tion of a vehicle equipped with Keyless
Enter-N-Go in the ACC or ON/RUN
mode. Occupants, particularly unat-
tended children, can become entrapped
by the power sunroof while operating the
power sunroof switch. Such entrapment
may result in serious injury or death.
• In a collision, there is a greater risk of
being thrown from a vehicle with an
open sunroof. You could also be seri-
ously injured or killed. Always fasten
your seat belt properly and make sure all
passengers are also properly secured.
• Do not allow small children to operate
the sunroof. Never allow your fingers,
other body parts, or any object, to proj-
ect through the sunroof opening. Injury
may result.
Opening Sunroof
Express
Push the switch rearward and release it
within one-half second and the sunroof will
open automatically from any position. The
sunroof will open fully and stop automati-
cally. This is called “Express Open”. During
Express Open operation, any other actuation
of the sunroof switch will stop the sunroof.
Manual
To open the sunroof, push and hold the
switch rearward to full open. Any release of
the switch will stop the movement. The sun-
roof and sunshade will remain in a partially
opened condition until the sunroof switch is
pushed again.
Closing Sunroof
Express
Push the switch forward and release it within
one-half second and the sunroof will close
automatically from any position. The sunroof
Power Sunroof Switch
1 — Opening Sunroof
2 — Venting Sunroof
3 — Closing Sunroof
49
Page 53 of 372
2. Reach into the opening beneath the cen-ter of the hood and push the safety latch
lever to the left to release it, before raising
the hood.
To Close The Hood
Lower the hood to approximately 12 inches
(30 cm) from the engine compartment and
drop it. Make sure that the hood is completely
closed.
WARNING!
Be sure the hood is fully latched before
driving your vehicle. If the hood is not fully
latched, it could open when the vehicle is
in motion and block your vision. Failure to
follow this warning could result in serious
injury or death.
CAUTION!
To prevent possible damage, do not slam
the hood to close it. Use a firm downward
push at the front center of the hood to
ensure that both latches engage.
UNIVERSAL GARAGE DOOR OPENER
(HOMELINK)
• HomeLink replaces up to three hand-heldtransmitters that operate devices such as
garage door openers, motorized gates,
lighting or home security systems. The
HomeLink unit is powered by your vehicles
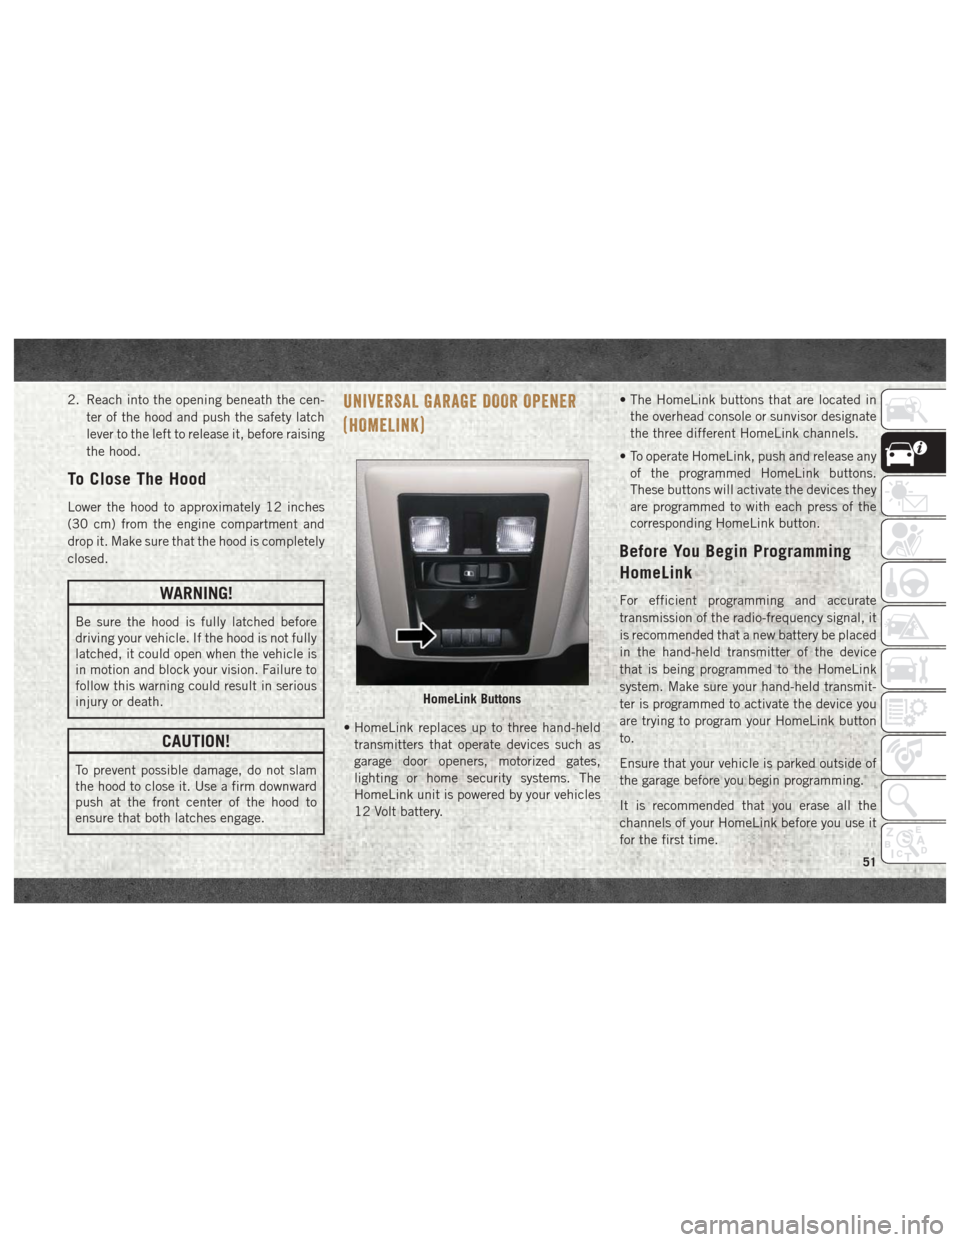
12 Volt battery. • The HomeLink buttons that are located in
the overhead console or sunvisor designate
the three different HomeLink channels.
• To operate HomeLink, push and release any of the programmed HomeLink buttons.
These buttons will activate the devices they
are programmed to with each press of the
corresponding HomeLink button.
Before You Begin Programming
HomeLink
For efficient programming and accurate
transmission of the radio-frequency signal, it
is recommended that a new battery be placed
in the hand-held transmitter of the device
that is being programmed to the HomeLink
system. Make sure your hand-held transmit-
ter is programmed to activate the device you
are trying to program your HomeLink button
to.
Ensure that your vehicle is parked outside of
the garage before you begin programming.
It is recommended that you erase all the
channels of your HomeLink before you use it
for the first time.
HomeLink Buttons
51
Page 58 of 372
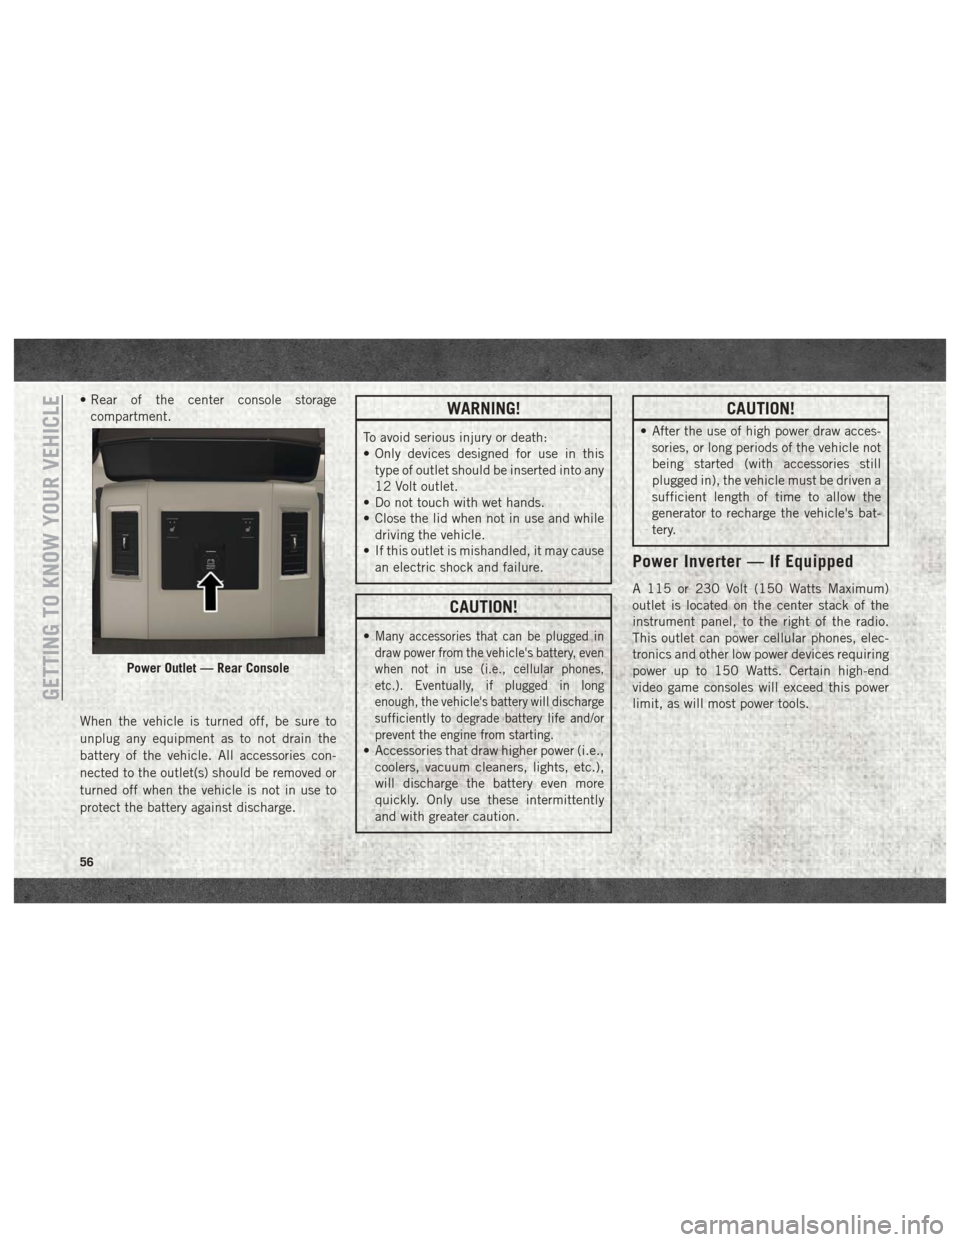
• Rear of the center console storagecompartment.
When the vehicle is turned off, be sure to
unplug any equipment as to not drain the
battery of the vehicle. All accessories con-
nected to the outlet(s) should be removed or
turned off when the vehicle is not in use to
protect the battery against discharge.WARNING!
To avoid serious injury or death:
• Only devices designed for use in this type of outlet should be inserted into any
12 Volt outlet.
• Do not touch with wet hands.
• Close the lid when not in use and while
driving the vehicle.
• If this outlet is mishandled, it may cause
an electric shock and failure.
CAUTION!
•Many accessories that can be plugged in
draw power from the vehicle's battery, even
when not in use (i.e., cellular phones,
etc.). Eventually, if plugged in long
enough, the vehicle's battery will discharge
sufficiently to degrade battery life and/or
prevent the engine from starting.
• Accessories that draw higher power (i.e.,coolers, vacuum cleaners, lights, etc.),
will discharge the battery even more
quickly. Only use these intermittently
and with greater caution.
CAUTION!
• After the use of high power draw acces-sories, or long periods of the vehicle not
being started (with accessories still
plugged in), the vehicle must be driven a
sufficient length of time to allow the
generator to recharge the vehicle's bat-
tery.
Power Inverter — If Equipped
A 115 or 230 Volt (150 Watts Maximum)
outlet is located on the center stack of the
instrument panel, to the right of the radio.
This outlet can power cellular phones, elec-
tronics and other low power devices requiring
power up to 150 Watts. Certain high-end
video game consoles will exceed this power
limit, as will most power tools.
Power Outlet — Rear Console
GETTING TO KNOW YOUR VEHICLE
56
Page 62 of 372
CAUTION!
Leaving the lid open for extended periods
of time could cause the vehicle battery to
discharge. If the lid is required to stay
open for extended periods of time, it is
recommended that the bin lights be
turned off manually using the on/off
switch.
The interior of the RamBox will automatically
illuminate when the lid is opened. In addition
to the automatic illumination switch, there is
a manual on/off switch located at the rear of
each storage bin. Pushing the switch once
will turn off the bin lights, pushing the switch
again will turn the lights back on.
Cargo bins feature two removable drain plugs
(to allow water to drain from bins). To remove
plug, pull up on the edge. To install push plug
downward into drain hole.
NOTE:
Provisions are provided in the bins for cargo
dividers and shelf supports. These accesso-
ries (in addition to other RamBox accesso-
ries) are available from Mopar.
Locking And Unlocking RamBox
Push and release the lock or unlock button on
the key fob to lock and unlock all doors, the
tailgate and the RamBox (if equipped). Refer
to “Keys” in “Getting To Know Your Vehicle”
in the Owner’s Manual for further details. The
RamBox storage bins can be locked using the
vehicle key. To lock and unlock the storage
bin, insert the key into the keyhole on the
push button and turn clockwise to lock or
counterclockwise to unlock. Always return
the key to the upright (vertical) position be-
fore removing the key from the push button.
CAUTION!
• Ensure cargo bin lids are closed and latched before moving or driving vehicle.
• Loads applied to the top of the bin lid
should be minimized to prevent damage
to the lid and latching/hinging mecha-
nisms.
• Damage to the RamBox bin may occur
due to heavy/sharp objects placed in bin
that shift due to vehicle motion. In order
to minimize potential for damage, se-
CAUTION!
cure all cargo to prevent movement and
protect inside surfaces of bin from
heavy/sharp objects with appropriate
padding.
RamBox Safety Warning
Carefully follow these warnings to help pre-
vent personal injury or damage to your
vehicle:
WARNING!
• Always close the storage bin coverswhen your vehicle is unattended.
• Do not allow children to have access to
the storage bins. Once in the storage
bin, young children may not be able to
escape. If trapped in the storage bin,
children can die from suffocation or heat
stroke.
• In an accident, serious injury could re-
sult if the storage bin covers are not
properly latched.
GETTING TO KNOW YOUR VEHICLE
60
Page 67 of 372
GETTING TO KNOW YOUR INSTRUMENT PANEL
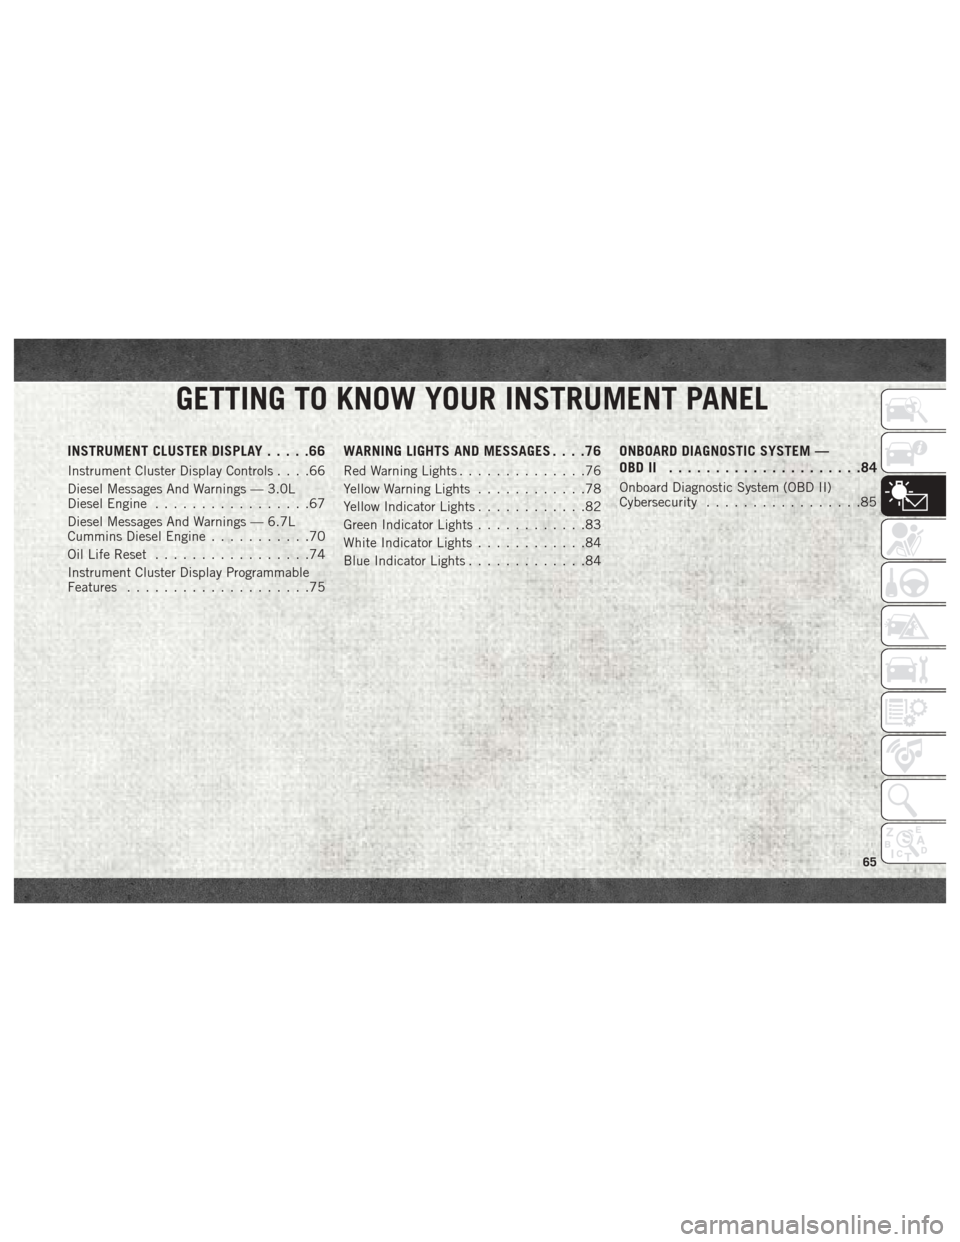
INSTRUMENT CLUSTER DISPLAY.....66
Instrument Cluster Display Controls ....66
Diesel Messages And Warnings — 3.0L
Diesel Engine .................67
Diesel Messages And Warnings — 6.7L
Cummins Diesel Engine ...........70
Oil Life Reset .................74
Instrument Cluster Display Programmable
Features ....................75
WARNING LIGHTS AND MESSAGES ....76
Red Warning Lights..............76
Yellow Warning Lights ............78
Yellow Indicator Lights ............82
Green Indicator Lights ............83
White Indicator Lights ............84
Blue Indicator Lights .............84
ONBOARD DIAGNOSTIC SYSTEM —
OBDII .....................84
Onboard Diagnostic System (OBD II)
Cybersecurity.................85
GETTING TO KNOW YOUR INSTRUMENT PANEL
65
Page 70 of 372
tion. At this point the engine Powertrain
Control Module (PCM) will register a fault
code, the instrument panel will display a
MIL light.
CAUTION!
See your authorized dealer, as damage to
the exhaust system could occur soon with
continued operation.
• Exhaust Filter Full — Power Reduced See
Dealer — This message indicates the PCM
has derated the engine to limit the likeli-
hood of permanent damage to the after-
treatment system. If this condition is not
corrected and a dealer service is not per-
formed, extensive exhaust after-treatment
damage can occur. To correct this condition
it will be necessary to have your vehicle
serviced by your local authorized dealer. NOTE:
Failing to follow the oil change indicator,
changing your oil and resetting the oil change
indicator by 0 miles remaining will prevent
the diesel exhaust filter from performing it's
cleaning routine. This will shortly result in a
Malfunction Indicator Light (MIL) and re-
duced engine power. Only an authorized
dealer will be able to correct this condition.
CAUTION!
See your authorized dealer, as damage to
the exhaust system could occur soon with
continued operation.
Diesel Exhaust Fluid (DEF) Warning Mes-
sages
Your vehicle will begin displaying warning
messages when the DEF level reaches a driv-
ing range of approximately 500 miles
(800 km). If the following warning message
sequence is ignored, your vehicle may not
restart unless DEF is added with in the dis-
played mileage shown in the cluster mes-
sage. •
Engine Will Not Restart in XXXX mi DEF Low
Refill Soon — This message will display
when DEF driving range is less than
500 miles, DEF fluid top off is required
with in the displayed mileage. The message
will be displayed in the cluster during ve-
hicle start up with the current allowed mile-
age and accompanied by a single chime.
The remaining mileage can be pulled up
anytime by way of the “Messages” list
within the instrument cluster display.
• Engine Will Not Restart in XXXX mi Refill DEF
— This message will display when DEF
driving range is less than 200 miles. It is
also displayed at 150 miles and 100 miles.
DEF fluid top off is required with in the
displayed mileage. The message will be
displayed in the instrument cluster display
during vehicle start up with an updated
distance mileage, and it will be accompa-
nied by a single chime. Starting at
100 miles, remaining range will be con-
tinuously displayed while operating the ve-
hicle. Chimes will also accompany the 75,
50 and 25 mile remaining distances. The
DEF Low telltale will be on continuously
until DEF fluid is topped off.
GETTING TO KNOW YOUR INSTRUMENT PANEL
68
Page 71 of 372
•Engine Will Not Restart Refill DEF — This
message will display when the DEF driving
range is less than 1 mile, DEF fluid top off
is required or the engine will not restart.
The message will be displayed in the instru-
ment cluster display during vehicle start
up, and it will be accompanied by a single
chime. The DEF Low telltale will be illumi-
nated continuously until DEF fluid tank is
filled with a minimum of two gallons of
DEF.
Diesel Exhaust Fluid (DEF) Fault Warning
Messages
There are different messages which are dis-
played if the vehicle detects that the DEF
system has been filled with a fluid other than
DEF, has experienced component failures, or
when tampering has been detected.
When the DEF system needs to be serviced
the following warnings will display:
• Service DEF System See Dealer — This mes-
sage will display when the fault is initially
detected and each time the vehicle is
started. The message will be accompanied
by a single chime and the Malfunction Indicator Light. We recommend you drive to
your nearest authorized dealer and have
your vehicle serviced immediately. If not
corrected in 50 miles, vehicle will enter the
“Engine Will not restart in XXXmi Service
DEF See dealer” warning stage and mes-
sage.
• Incorrect DEF Detected See Dealer — This
message will display if the DEF system has
detected the incorrect fluid has been intro-
duced to the DEF tank. The message will be
accompanied by a single chime. We recom-
mend you drive to your nearest authorized
dealer and have your vehicle serviced im-
mediately. If not corrected in 30 miles,
vehicle will enter the “Engine Will not re-
start in XXX mi Service DEF See dealer”
warning stage and message.
• Engine Will Not Restart in XXX mi Service DEF
See Dealer — This message is first dis-
played if the fault detected is not serviced
after 50 miles of operation. It is also dis-
played at 150 miles 125 miles and
100 miles. System service is required
within the displayed mileage. The message
will be displayed during vehicle start up
with an updated distance mileage, and it will be accompanied by a single chime.
Starting at 100 miles, remaining range will
be continuously displayed while operating
the vehicle. Chimes will also accompany
the 75, 50 and 25 mile remaining dis-
tances. We recommend you drive to your
nearest authorized dealer and have your
vehicle serviced immediately.
• Engine Will Not Restart Service DEF System
See Dealer — This message will display if
DEF system issue detected is not serviced
during the allowed period. Your engine will
not restart unless your vehicle is serviced by
your authorized dealer. This message will
be displayed when under 1 mile until en-
gine will not start and each time the vehicle
is started, and will be continuously dis-
played. The message will be accompanied
by a single chime. Your Malfunction Indi-
cator Light will be continuously illumined.
We highly recommend you drive to your
nearest authorized dealer if the message
appears while engine is running.
• Engine Will Not Start Service DEF System See
Dealer — This message will display when
the fault detected is not serviced after the
Engine will not restart Service DEF System
69
Page 72 of 372
See Dealer message is displayed on the
next subsequent restart. Your engine will
not start unless your vehicle is serviced by
your authorized dealer. The message will be
accompanied by a single chime. Your Mal-
function Indicator Light will be continu-
ously illuminated. If the message appears
and you can not start the engine, we rec-
ommend you have your vehicle towed to
your nearest authorized dealer
immediately.
Diesel Messages And Warnings
— 6.7L Cummins Diesel Engine
Diesel Particulate Filter (DPF) Messages
The Cummins diesel engine meets all diesel
emissions standards, resulting in one of the
lowest emitting diesel engines ever pro-
duced. To achieve these emissions stan-
dards, your vehicle is equipped with a state-
of-the-art engine and exhaust system. These
systems are seamlessly integrated into your
vehicle and managed by the Powertrain Con-
trol Module (PCM). The PCM manages enginecombustion to allow the exhaust system’s
catalyst to trap and burn Particulate Matter
(PM) pollutants, with no input or interaction
on your part.
WARNING!
A hot exhaust system can start a fire if you
park over materials that can burn. Such
materials might be grass or leaves coming
into contact with your exhaust system. Do
not park or operate your vehicle in areas
where your exhaust system can contact
anything that can burn.
Your vehicle has the ability to alert you to
additional maintenance required on your ve-
hicle or engine. The following messages may
display in your instrument cluster display:
• Perform Service — Your vehicle will require
emissions maintenance at a set interval. To
help remind you when this maintenance is
due, the instrument cluster display will
display “Perform Service”. When the “Per-
form Service” message is displayed in the
instrument cluster display it is necessary to
have the emissions maintenance per-
formed. Emissions maintenance may in- clude replacing the Closed Crankcase Ven-
tilation (CCV) filter element. The procedure
for clearing and resetting the "Perform Ser-
vice" indicator message is located in the
appropriate Service Information.
• Exhaust System — Regeneration Required
Now — "Exhaust Filter XX% Full Safely
Drive at Highway Speeds to Remedy" will
be displayed in the instrument cluster dis-
play if the exhaust particulate filter reaches
80% of its maximum storage capacity. Un-
der conditions of exclusive short duration
and low speed driving cycles, your Cum-
mins diesel engine and exhaust after-
treatment system may never reach the con-
ditions required to remove the trapped PM.
If this occurs, the “Exhaust Filter XX% Full
Safely Drive at Highway Speeds to Rem-
edy” message will be displayed in the in-
strument cluster display. If this message is
displayed, you will hear one chime to assist
in alerting you of this condition
By simply driving your vehicle at highway
speeds for as little as 45 minutes, you can
remedy the condition in the particulate filter
system and allow your Cummins diesel en-
gine and exhaust after-treatment system to
GETTING TO KNOW YOUR INSTRUMENT PANEL
70
Page 78 of 372
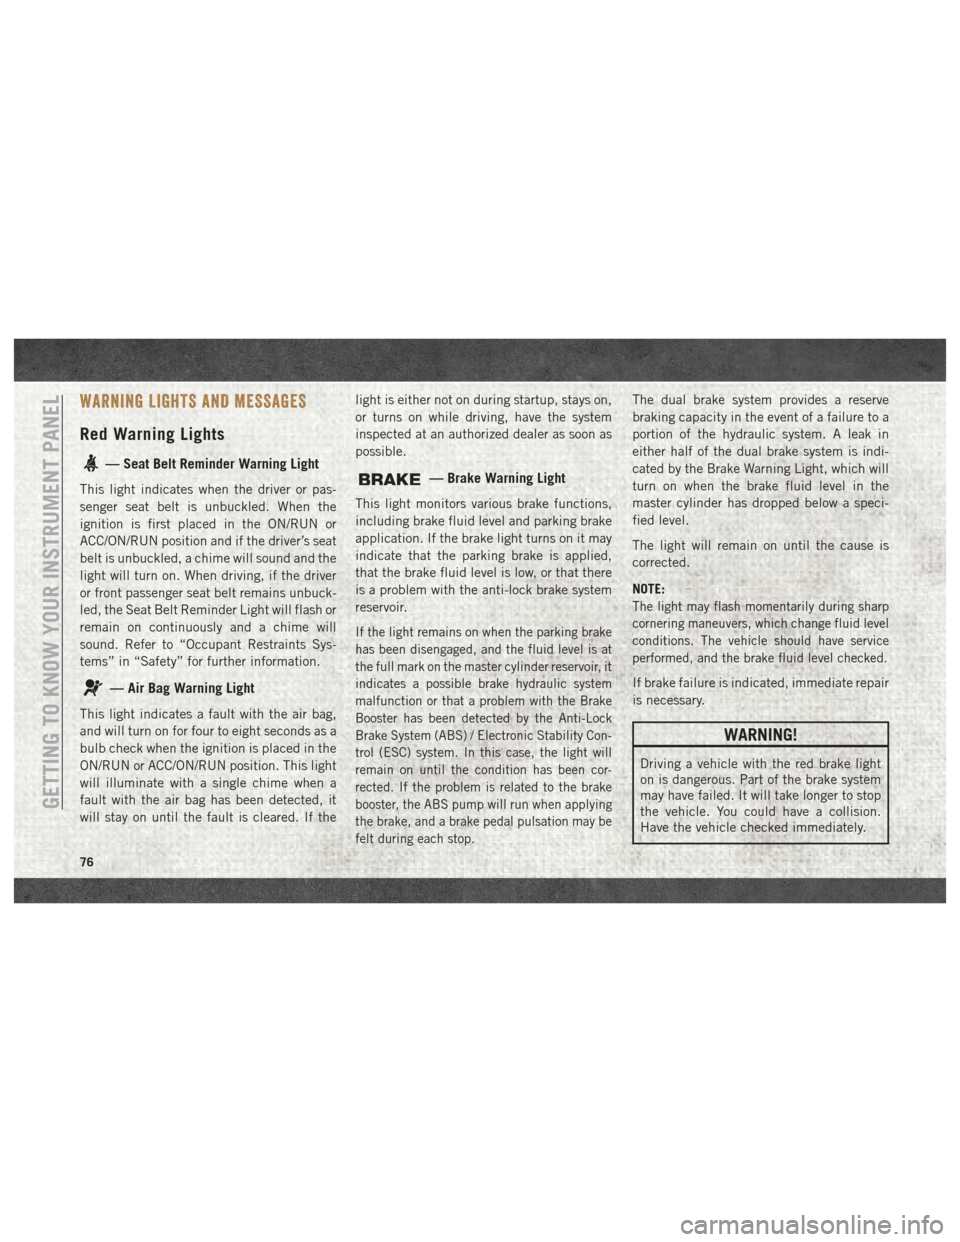
WARNING LIGHTS AND MESSAGES
Red Warning Lights
— Seat Belt Reminder Warning Light
This light indicates when the driver or pas-
senger seat belt is unbuckled. When the
ignition is first placed in the ON/RUN or
ACC/ON/RUN position and if the driver’s seat
belt is unbuckled, a chime will sound and the
light will turn on. When driving, if the driver
or front passenger seat belt remains unbuck-
led, the Seat Belt Reminder Light will flash or
remain on continuously and a chime will
sound. Refer to “Occupant Restraints Sys-
tems” in “Safety” for further information.
— Air Bag Warning Light
This light indicates a fault with the air bag,
and will turn on for four to eight seconds as a
bulb check when the ignition is placed in the
ON/RUN or ACC/ON/RUN position. This light
will illuminate with a single chime when a
fault with the air bag has been detected, it
will stay on until the fault is cleared. If thelight is either not on during startup, stays on,
or turns on while driving, have the system
inspected at an authorized dealer as soon as
possible.
— Brake Warning Light
This light monitors various brake functions,
including brake fluid level and parking brake
application. If the brake light turns on it may
indicate that the parking brake is applied,
that the brake fluid level is low, or that there
is a problem with the anti-lock brake system
reservoir.
If the light remains on when the parking brake
has been disengaged, and the fluid level is at
the full mark on the master cylinder reservoir, it
indicates a possible brake hydraulic system
malfunction or that a problem with the Brake
Booster has been detected by the Anti-Lock
Brake System (ABS) / Electronic Stability Con-
trol (ESC) system. In this case, the light will
remain on until the condition has been cor-
rected. If the problem is related to the brake
booster, the ABS pump will run when applying
the brake, and a brake pedal pulsation may be
felt during each stop.
The dual brake system provides a reserve
braking capacity in the event of a failure to a
portion of the hydraulic system. A leak in
either half of the dual brake system is indi-
cated by the Brake Warning Light, which will
turn on when the brake fluid level in the
master cylinder has dropped below a speci-
fied level.
The light will remain on until the cause is
corrected.
NOTE:
The light may flash momentarily during sharp
cornering maneuvers, which change fluid level
conditions. The vehicle should have service
performed, and the brake fluid level checked.
If brake failure is indicated, immediate repair
is necessary.
WARNING!
Driving a vehicle with the red brake light
on is dangerous. Part of the brake system
may have failed. It will take longer to stop
the vehicle. You could have a collision.
Have the vehicle checked immediately.
GETTING TO KNOW YOUR INSTRUMENT PANEL
76
Page 79 of 372
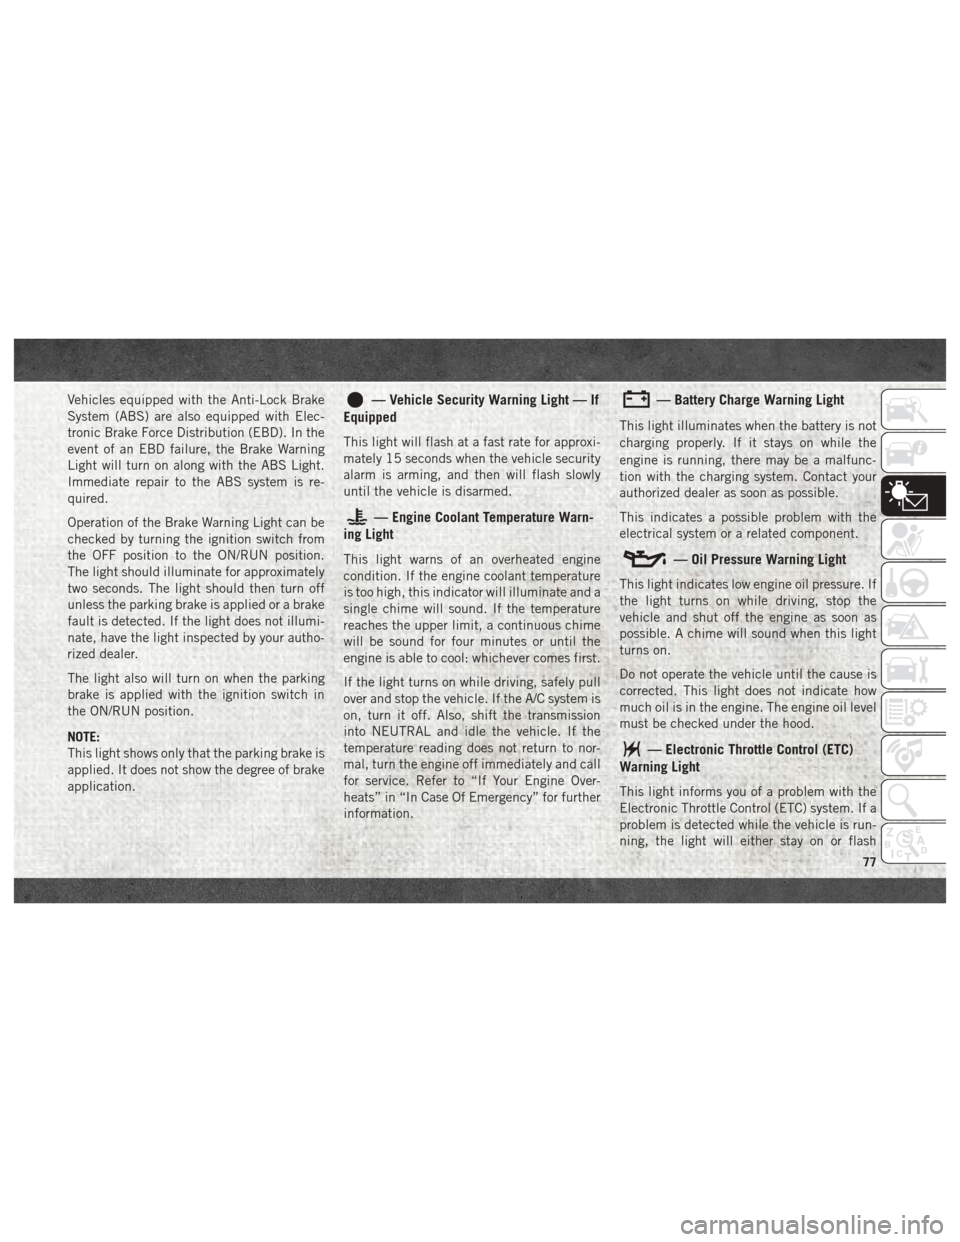
Vehicles equipped with the Anti-Lock Brake
System (ABS) are also equipped with Elec-
tronic Brake Force Distribution (EBD). In the
event of an EBD failure, the Brake Warning
Light will turn on along with the ABS Light.
Immediate repair to the ABS system is re-
quired.
Operation of the Brake Warning Light can be
checked by turning the ignition switch from
the OFF position to the ON/RUN position.
The light should illuminate for approximately
two seconds. The light should then turn off
unless the parking brake is applied or a brake
fault is detected. If the light does not illumi-
nate, have the light inspected by your autho-
rized dealer.
The light also will turn on when the parking
brake is applied with the ignition switch in
the ON/RUN position.
NOTE:
This light shows only that the parking brake is
applied. It does not show the degree of brake
application.— Vehicle Security Warning Light — If
Equipped
This light will flash at a fast rate for approxi-
mately 15 seconds when the vehicle security
alarm is arming, and then will flash slowly
until the vehicle is disarmed.
— Engine Coolant Temperature Warn-
ing Light
This light warns of an overheated engine
condition. If the engine coolant temperature
is too high, this indicator will illuminate and a
single chime will sound. If the temperature
reaches the upper limit, a continuous chime
will be sound for four minutes or until the
engine is able to cool: whichever comes first.
If the light turns on while driving, safely pull
over and stop the vehicle. If the A/C system is
on, turn it off. Also, shift the transmission
into NEUTRAL and idle the vehicle. If the
temperature reading does not return to nor-
mal, turn the engine off immediately and call
for service. Refer to “If Your Engine Over-
heats” in “In Case Of Emergency” for further
information.
— Battery Charge Warning Light
This light illuminates when the battery is not
charging properly. If it stays on while the
engine is running, there may be a malfunc-
tion with the charging system. Contact your
authorized dealer as soon as possible.
This indicates a possible problem with the
electrical system or a related component.
— Oil Pressure Warning Light
This light indicates low engine oil pressure. If
the light turns on while driving, stop the
vehicle and shut off the engine as soon as
possible. A chime will sound when this light
turns on.
Do not operate the vehicle until the cause is
corrected. This light does not indicate how
much oil is in the engine. The engine oil level
must be checked under the hood.
— Electronic Throttle Control (ETC)
Warning Light
This light informs you of a problem with the
Electronic Throttle Control (ETC) system. If a
problem is detected while the vehicle is run-
ning, the light will either stay on or flash
77