engine Ram 1500 2020 Owners Manual
[x] Cancel search | Manufacturer: RAM, Model Year: 2020, Model line: 1500, Model: Ram 1500 2020Pages: 674, PDF Size: 32.69 MB
Page 422 of 674
420 STARTING AND OPERATING
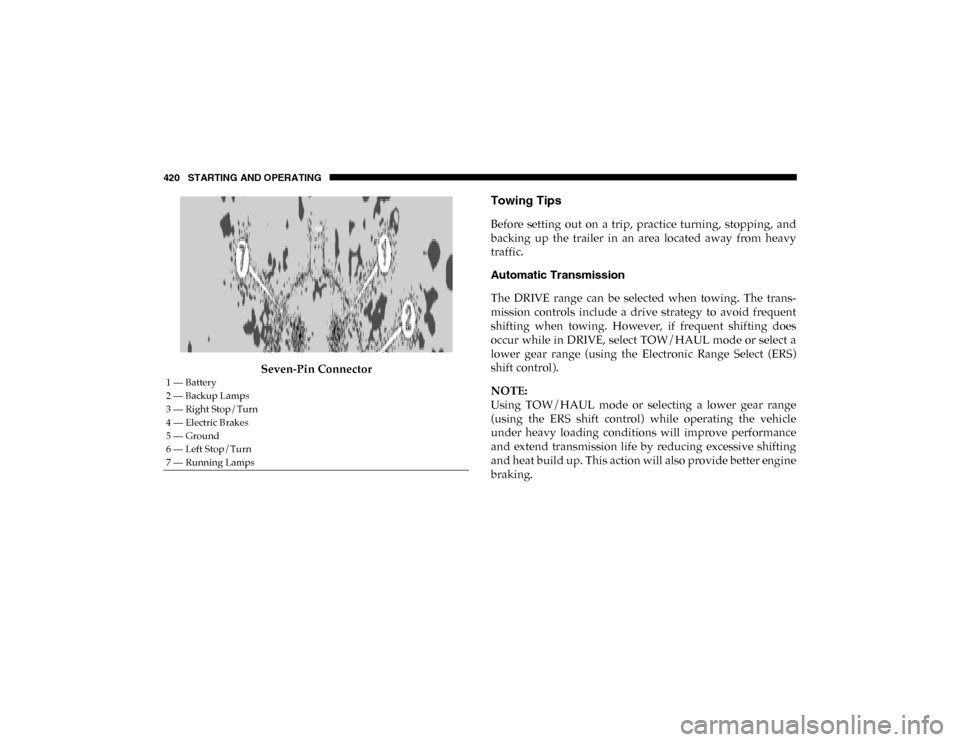
Seven-Pin Connector
Towing Tips
Before setting out on a trip, practice turning, stopping, and
backing up the trailer in an area located away from heavy
traffic.
Automatic Transmission
The DRIVE range can be selected when towing. The trans-
mission controls include a drive strategy to avoid frequent
shifting when towing. However, if frequent shifting does
occur while in DRIVE, select TOW/HAUL mode or select a
lower gear range (using the Electronic Range Select (ERS)
shift control).
NOTE:
Using TOW/HAUL mode or selecting a lower gear range
(using the ERS shift control) while operating the vehicle
under heavy loading conditions will improve performance
and extend transmission life by reducing excessive shifting
and heat build up. This action will also provide better engine
braking.
1 — Battery
2 — Backup Lamps
3 — Right Stop/Turn
4 — Electric Brakes
5 — Ground
6 — Left Stop/Turn
7 — Running Lamps
2020_DT_1500_OM_US.book Page 420
Page 423 of 674
STARTING AND OPERATING 421
Tow/Haul Mode
To reduce potential for automatic transmission overheating,
activate TOW/HAUL mode when driving in hilly areas, or
select a lower gear range (using the Electronic Range Select
(ERS) shift control) on more severe grades.
Speed Control — If Equipped
• Do not use on hilly terrain or with heavy loads.
• When using the speed control, if you experience speeddrops greater than 10 mph (16 km/h), disengage until you
can get back to cruising speed.
• Use speed control in flat terrain and with light loads to maximize fuel efficiency.
Cooling System
To reduce potential for engine and transmission over -
heating, take the following actions:
City Driving
In city traffic — while stopped, place the transmission in
NEUTRAL, but do not increase engine idle speed. Highway Driving
• Reduce speed
• Temporarily turn off air conditioning
Air Suspension System
To aid in attaching/detaching the trailer from the vehicle, the air
suspension system can be used. Refer to “Air Suspension
System” in “Starting And Operating” for further information.
NOTE:
The vehicle must remain in the engine running position
while attaching a trailer for proper leveling of the air suspen
-
sion system.
SNOWPLOW
NOTE:
Do not use this model vehicle for snowplow applications.
WARNING!
Snowplows and other aftermarket equipment should not
be added to the front end of your vehicle. The airbag
crash sensors may be affected by the change in the front
end structure. The airbags could deploy unexpectedly or
could fail to deploy during a collision resulting in
serious injury or death.
5
2020_DT_1500_OM_US.book Page 421
Page 425 of 674
STARTING AND OPERATING 423
be placed in Transport mode (for example, engine will not
run), tie-downs must be fastened to the axles (not to the
body). Failure to follow these instructions may cause fault
codes to be set and/or cause loss of proper tie-down
tension.
Recreational Towing — Two-Wheel Drive Models
DO NOT flat tow this vehicle. Damage to the drivetrain
will result.
Recreational towing (for two-wheel drive models) is allowed
ONLY if the rear wheels are OFF the ground. This may be
accomplished using a tow dolly or vehicle trailer. If using a
tow dolly, follow this procedure:
NOTE:
If vehicle is equipped with air suspension, ensure the vehicle
is set to Normal Ride Height.
1. Properly secure the dolly to the tow vehicle, following the dolly manufacturer's instructions.
2. Drive the rear wheels onto the tow dolly.
3. Apply the parking brake. Place the transmission in PARK. 4. Properly secure the rear wheels to the dolly, following the
dolly manufacturer's instructions.
5. Turn the ignition OFF.
6. Install a suitable clamping device, designed for towing, to secure the front wheels in the straight position.
Recreational Towing — Four-Wheel Drive Models
NOTE:
The transfer case must be shifted into NEUTRAL (N) for
recreational towing. The transmission must be shifted into
PARK for recreational towing. Refer to the following for the
proper transfer case NEUTRAL (N) shifting procedure for
your vehicle. CAUTION!
Towing with the rear wheels on the ground will cause
severe transmission damage. Damage from improper
towing is not covered under the New Vehicle Limited
Warranty.
5
2020_DT_1500_OM_US.book Page 423
Page 427 of 674

STARTING AND OPERATING 425
1. Bring the vehicle to a complete stop on level ground, withthe engine running. Apply the parking brake.
2. Press and hold the brake pedal.
3. Shift the transmission to NEUTRAL. The driver's door must be closed (or the driver's seat belt buckled) so that
the transmission will remain in NEUTRAL when the
brake pedal is released.
NOTE:
If vehicle is equipped with air suspension, ensure the vehicle
is set to Normal Ride Height.
4. Using a ballpoint pen or similar object, push and hold the recessed transfer case NEUTRAL (N) button (at the center
of the transfer case switches). The NEUTRAL (N) indi -
cator light will illuminate, and remain lit, when the shift
to NEUTRAL (N) is complete. After the shift is completed
and the NEUTRAL (N) light stays on, release the
NEUTRAL (N) button. 5. Release the parking brake.
6. Shift the transmission into REVERSE.
7. Release the brake pedal for five seconds and ensure that
there is no vehicle movement.
8. Repeat steps 6 and 7 with the transmission in DRIVE.
9. Shift the transmission to NEUTRAL. Apply the parking brake. Turn OFF the engine. For vehicles with Keyless
Enter-N-Go, push and hold the ENGINE START/STOP
button until the engine shuts off. The transmission will
automatically select PARK when the engine is turned off.
10. Turn the ignition to the OFF mode.
11. Attach the vehicle to the tow vehicle using a suitable tow bar.
12. Turn the ignition to the ON/RUN mode, but do not start the engine.
13. Release the parking brake.
14. Turn the ignition OFF.
CAUTION!
It is necessary to follow these steps to be certain that the
transfer case is fully in NEUTRAL (N) before
recreational towing to prevent damage to internal parts.
5
2020_DT_1500_OM_US.book Page 425
Page 428 of 674

426 STARTING AND OPERATING
NOTE:
• Steps 2 and 3 are requirements that must be met beforepushing the NEUTRAL (N) button, and must continue to
be met until the shift has been completed. If any of these
requirements are not met before pushing the NEUTRAL
(N) button or are no longer met during the shift, the
NEUTRAL (N) indicator light will flash continuously until
all requirements are met or until the NEUTRAL (N) button
is released.
• The ignition must be in the ON/RUN mode for a shift to take place and for the position indicator lights to be oper -
able. If the ignition is not in the ON/RUN mode, the shift
will not take place and no position indicator lights will be
on or flashing.
• A flashing NEUTRAL (N) position indicator light indi -
cates that shift requirements have not been met.
• If the vehicle is equipped with air suspension, the engine should be started and left running for a minimum of 60
seconds (with all the doors closed) at least once every 24
hours. This process allows the air suspension to adjust the
vehicle’s ride height to compensate for temperature
effects. Shifting Out Of NEUTRAL (N)
Use the following procedure to prepare your vehicle for
normal usage:
1. Bring the vehicle to a complete stop, leaving it connected
to the tow vehicle.
2. Press and hold the brake pedal.
3. Start the engine. Apply the parking brake. Shift the trans -
mission into NEUTRAL.
4. Using a ballpoint pen or similar object, push and hold the recessed transfer case NEUTRAL (N) button (at the center
of the transfer case switches).
5. When the NEUTRAL (N) indicator light turns off, release the NEUTRAL (N) button.
6. Turn the engine OFF. The transmission will automatically select PARK when the engine is turned off.
7. Release the brake pedal.
8. Disconnect vehicle from the tow vehicle.
9. Press and hold the brake pedal.
2020_DT_1500_OM_US.book Page 426
Page 429 of 674

STARTING AND OPERATING 427
10. Start the engine.
11. Release the parking brake.
12. Shift the transmission into DRIVE, release the brakepedal, and check that the vehicle operates normally.
NOTE:
• Steps 3 and 4 are requirements that must be met before pushing the button to shift out of NEUTRAL (N), and must
continue to be met until the shift has been completed. If
any of these requirements are not met before pushing the
button or are no longer met during the shift, the
NEUTRAL (N) indicator light will flash continuously until
all requirements are met or until the button is released.
• The ignition must be in the ON/RUN mode for a shift to take place and for the position indicator lights to be oper -
able. If the ignition is not in the ON/RUN mode, the shift
will not take place and no position indicator lights will be
on or flashing.
• A flashing NEUTRAL (N) position indicator light indi -
cates that shift requirements have not been met.DRIVING TIPS
Driving On Slippery Surfaces
Acceleration
Rapid acceleration on snow covered, wet, or other slippery
surfaces may cause the driving wheels to pull erratically to
the right or left. This phenomenon occurs when there is a
difference in the surface traction under the rear (driving)
wheels.
Driving Through Water
Driving through water more than a few inches/centimeters
deep will require extra caution to ensure safety and prevent
damage to your vehicle.
WARNING!
Rapid acceleration on slippery surfaces is dangerous.
Unequal traction can cause sudden pulling of the rear
wheels. You could lose control of the vehicle and
possibly have a collision. Accelerate slowly and carefully
whenever there is likely to be poor traction (ice, snow,
wet, mud, loose sand, etc.).5
2020_DT_1500_OM_US.book Page 427
Page 431 of 674
STARTING AND OPERATING 429
Off-Road Driving Tips
Care should be taken when attempting to climb steep hills or
driving diagonally across a hill or slope. If natural obstacles
force you to travel diagonally up or down a hill, choose a
mild angle and keep as little side tilt as possible. Keep the
vehicle moving and make turns slowly and cautiously.
If you must back down a hill, back straight down using
REVERSE gear. Never back down in NEUTRAL or diago-
nally across the hill. When driving over sand, mud, and other soft terrain, shift to
low gear and drive steadily. Apply the accelerator slowly to
avoid spinning the wheels.
Do not reduce the tire pressures for this type of driving.
After Driving Off-Road
Off-road operation puts more stress on your vehicle than
does most on-road driving. After going off-road, it is always
a good idea to check for damage. That way you can get any
problems taken care of right away and have your vehicle
ready when you need it.
• Completely inspect the underbody of your vehicle. Check
tires, body structure, steering, suspension, and exhaust
system for damage.
• Inspect the radiator for mud and debris and clean as required.
• Check threaded fasteners for looseness, particularly on the chassis, drivetrain components, steering, and suspension.
Retighten them, if required, and torque to the values spec -
ified in the Service Manual.
• Check for accumulations of plants or brush. These things could be a fire hazard. They might hide damage to fuel
lines, brake hoses, axle pinion seals, and propeller shafts.
• Driving through standing water may cause damage to
your vehicle’s drivetrain components. Always inspect
your vehicle’s fluids (i.e., engine oil, transmission, axle,
etc.) for signs of contamination (i.e., fluid that is milky
or foamy in appearance) after driving through standing
water. Do not continue to operate the vehicle if any
fluid appears contaminated, as this may result in
further damage. Such damage is not covered by the
New Vehicle Limited Warranty.
• Getting water inside your vehicle’s engine can cause it to lock up and stall out, and cause serious internal
damage to the engine. Such damage is not covered by
the New Vehicle Limited Warranty. CAUTION!
(Continued)
5
2020_DT_1500_OM_US.book Page 429
Page 446 of 674
444 IN CASE OF EMERGENCY
3. Turn the desired bulb socket a quarter turn and removethe socket and bulb from housing.
CHMSL Bulb And Socket
4. Pull the desired bulb straight from the socket.
NOTE:
• Outside Bulbs: Cargo Lamps
• Inside Bulb: Center High Mounted Stop Lamp
5. Reverse the procedure for installation of bulbs and housing.FUSES
WARNING!
• When replacing a blown fuse, always use an appro -
priate replacement fuse with the same amp rating as the
original fuse. Never replace a fuse with another fuse of
higher amp rating. Never replace a blown fuse with
metal wires or any other material. Do not place a fuse
inside a circuit breaker cavity or vice versa. Failure to
use proper fuses may result in serious personal injury,
fire and/or property damage.
• Before replacing a fuse, make sure that the ignition is off and that all the other services are switched off and/
or disengaged.
• If the replaced fuse blows again, contact an authorized dealer.
• If a general protection fuse for safety systems (air bag system, braking system), power unit systems (engine
system, transmission system) or steering system blows,
contact an authorized dealer.
2020_DT_1500_OM_US.book Page 444
Page 447 of 674
IN CASE OF EMERGENCY 445
External Power Distribution Center
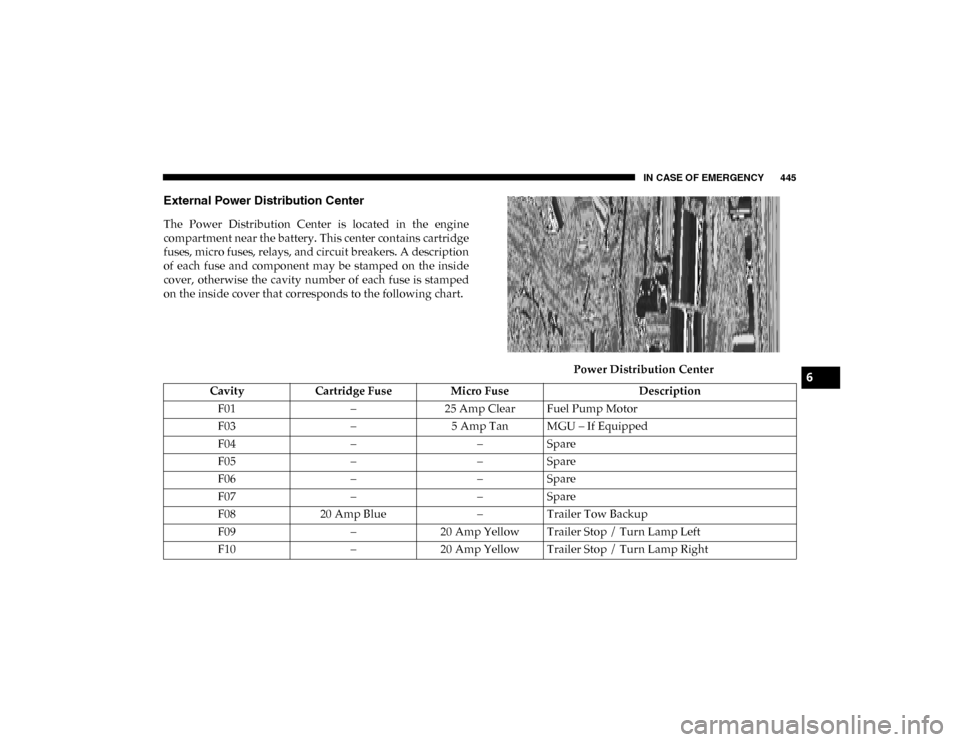
The Power Distribution Center is located in the engine
compartment near the battery. This center contains cartridge
fuses, micro fuses, relays, and circuit breakers. A description
of each fuse and component may be stamped on the inside
cover, otherwise the cavity number of each fuse is stamped
on the inside cover that corresponds to the following chart.Power Distribution Center
CavityCartridge Fuse Micro Fuse Description
F01 –25 Amp Clear Fuel Pump Motor
F03 –5 Amp Tan MGU – If Equipped
F04 ––Spare
F05 ––Spare
F06 ––Spare
F07 ––Spare
F08 20 Amp Blue –Trailer Tow Backup
F09 –20 Amp Yellow Trailer Stop / Turn Lamp Left
F10 –20 Amp Yellow Trailer Stop / Turn Lamp Right
6
2020_DT_1500_OM_US.book Page 445
Page 456 of 674
454 IN CASE OF EMERGENCY
JACKING AND TIRE CHANGING NOTE:
If your vehicle is equipped with an air suspension system,
there is a feature which allows the automatic leveling to be
disabled to assist with changing a tire.
This feature can be activated through the Uconnect system.
Refer to “Uconnect Settings” in “Multimedia” for further
information.
Jack Location
The jack and jack tools are stored under the front passenger
seat.
WARNING!
• Do not attempt to change a tire on the side of the vehicle close to moving traffic. Pull far enough off the road to
avoid the danger of being hit when operating the jack
or changing the wheel.
• Being under a jacked-up vehicle is dangerous. The vehicle could slip off the jack and fall on you. You
could be crushed. Never put any part of your body
under a vehicle that is on a jack. If you need to get
under a raised vehicle, take it to a service center where
it can be raised on a lift.
• Never start or run the engine while the vehicle is on a jack.
• The jack is designed to be used as a tool for changing tires only. The jack should not be used to lift the
vehicle for service purposes. The vehicle should be
jacked on a firm level surface only. Avoid ice or slip -
pery areas.
2020_DT_1500_OM_US.book Page 454