engine Ram 1500 2020 Owner's Manual
[x] Cancel search | Manufacturer: RAM, Model Year: 2020, Model line: 1500, Model: Ram 1500 2020Pages: 674, PDF Size: 32.69 MB
Page 465 of 674
IN CASE OF EMERGENCY 463
Jacking Instructions
Jack Warning Label
1. Remove the spare tire, jack, and tools from the stored location.
2. Using the lug wrench, loosen the wheel nuts (but do not remove), by turning them counterclockwise one turn
while the wheel is still on the ground.
WARNING!
Carefully follow these tire changing warnings to help
prevent personal injury or damage to your vehicle:
• Always park on a firm, level surface as far from the edge of the roadway as possible before raising the vehicle.
• Turn on the Hazard Warning flasher.
• Block the wheel diagonally opposite the wheel to be raised.
• Apply the parking brake firmly and set the transmission in PARK.
• Never start or run the engine with the vehicle on a jack.
• Do not let anyone sit in the vehicle when it is on a jack.
• Do not get under the vehicle when it is on a jack. If you need to get under a raised vehicle, take it to a service center
where it can be raised on a lift.
• Only use the jack in the positions indicated and for lifting this vehicle during a tire change.
• If working on or near a roadway, be extremely careful of motor traffic.
• To assure that spare tires, flat or inflated, are securely stowed, spares must be stowed with the valve stem facing
the ground.
CAUTION!
Do not attempt to raise the vehicle by jacking on
locations other than those indicated in the Jacking
Instructions for this vehicle.
6
2020_DT_1500_OM_US.book Page 463
Page 474 of 674
472 IN CASE OF EMERGENCY
JUMP STARTING
If your vehicle has a discharged battery, it can be jump
started using a set of jumper cables and a battery in another
vehicle, or by using a portable battery booster pack. Jump
starting can be dangerous if done improperly, so please
follow the procedures in this section carefully.
NOTE:
When using a portable battery booster pack, follow the
manufacturer's operating instructions and precautions.
Preparations For Jump Start
The battery in your vehicle is located in the front of the
engine compartment, behind the left headlight assembly.
NOTE:
The positive battery post may be covered with a protective
cap if equipped. Lift up on the cap to gain access to the posi-
tive battery post. Do not jump off fuses. Only jump directly
off positive post which has a positive (+) symbol on or
around the post.
Positive Battery Post
WARNING!
Do not attempt jump starting if the battery is frozen. It
could rupture or explode and cause personal injury.
CAUTION!
Do not use a portable battery booster pack or any other
booster source with a system voltage greater than 12
Volts or damage to the battery, starter motor, alternator
or electrical system may occur.
2020_DT_1500_OM_US.book Page 472
Page 476 of 674
474 IN CASE OF EMERGENCY
1. Connect the positive (+) end of the jumper cable to the
positive (+) post of the discharged vehicle.
NOTE:
Do not jump off fuses. Only jump directly off positive
post.
2. Connect the opposite end of the positive (+) jumper cable
to the positive (+) post of the booster battery.
3. Connect the negative (-) end of the jumper cable to the
negative (-) post of the booster battery.
4. Connect the opposite end of the negative (-) jumper cable
to a good engine ground (exposed metal part of the
discharged vehicle’s engine) away from the battery and
the fuel injection system. 5. Start the engine in the vehicle that has the booster battery,
let the engine idle a few minutes, and then start the
engine in the vehicle with the discharged battery.
6. Once the engine is started, remove the jumper cables in the reverse sequence:
Disconnecting The Jumper Cables
1. Disconnect the negative (-) end of the jumper cable from
the engine ground of the vehicle with the discharged
battery.
2. Disconnect the opposite end of the negative (-) jumper
cable from the negative (-) post of the booster battery.
3. Disconnect the positive (+) end of the jumper cable from
the positive (+) post of the booster battery.
4. Disconnect the opposite end of the positive (+) jumper
cable from the positive (+) post of the vehicle with the
discharged battery.
WARNING!
Do not connect the jumper cable to the negative (-) post
of the discharged battery. The resulting electrical spark
could cause the battery to explode and could result in
personal injury. Only use the specific ground point, do
not use any other exposed metal parts.
CAUTION!
Do not connect jumper cable to any of the fuses on the
positive battery terminal. The resulting electrical current
will blow the fuse.
2020_DT_1500_OM_US.book Page 474
Page 477 of 674
IN CASE OF EMERGENCY 475
If frequent jump starting is required to start your vehicle you
should have the battery and charging system inspected at an
authorized dealer.
IF YOUR ENGINE OVERHEATS
In any of the following situations, you can reduce the poten-
tial for overheating by taking the appropriate action.
• On the highways — slow down.
• In city traffic — while stopped, place the transmission in NEUTRAL (N), but do not increase the engine idle speed
while preventing vehicle motion with the brakes. NOTE:
There are steps that you can take to slow down an impending
overheat condition:
• If your Air Conditioner (A/C) is on, turn it off. The A/C
system adds heat to the engine cooling system and turning
the A/C off can help remove this heat.
• You can also turn the temperature control to maximum heat, the mode control to floor and the blower control to
high. This allows the heater core to act as a supplement to
the radiator and aids in removing heat from the engine
cooling system.
CAUTION!
Accessories plugged into the vehicle power outlets draw
power from the vehicle’s battery, even when not in use
(i.e., cellular devices, etc.). Eventually, if plugged in long
enough without engine operation, the vehicle’s battery
will discharge sufficiently to degrade battery life and/or
prevent the engine from starting.
WARNING!
You or others can be badly burned by hot engine coolant
(antifreeze) or steam from your radiator. If you see or
hear steam coming from under the hood, do not open the
hood until the radiator has had time to cool. Never try to
open a cooling system pressure cap when the radiator or
coolant bottle is hot.6
2020_DT_1500_OM_US.book Page 475
Page 478 of 674
476 IN CASE OF EMERGENCY
MANUAL PARK RELEASE
To push or tow the vehicle in cases where the transmission
will not shift out of PARK (P) (such as a dead battery), a
Manual Park Release is available.
Follow these steps to activate the Manual Park Release:
1. Apply firm pressure to the brake pedal while seated inthe driver’s seat.
2. Apply the parking brake if possible.
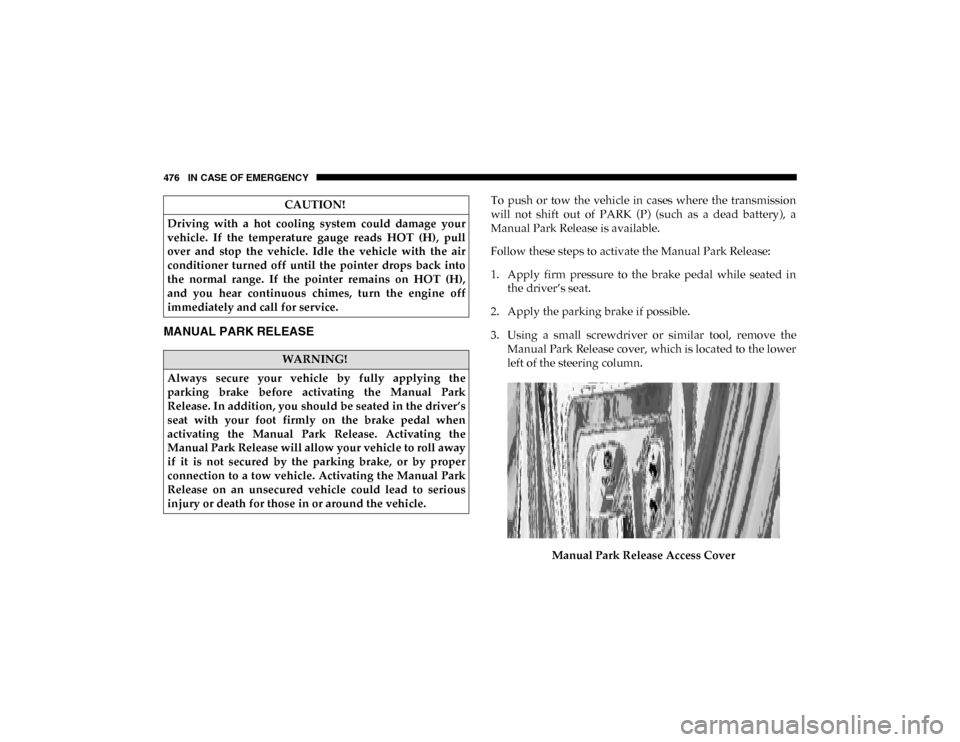
3. Using a small screwdriver or similar tool, remove the Manual Park Release cover, which is located to the lower
left of the steering column.
Manual Park Release Access Cover
CAUTION!
Driving with a hot cooling system could damage your
vehicle. If the temperature gauge reads HOT (H), pull
over and stop the vehicle. Idle the vehicle with the air
conditioner turned off until the pointer drops back into
the normal range. If the pointer remains on HOT (H),
and you hear continuous chimes, turn the engine off
immediately and call for service.
WARNING!
Always secure your vehicle by fully applying the
parking brake before activating the Manual Park
Release. In addition, you should be seated in the driver’s
seat with your foot firmly on the brake pedal when
activating the Manual Park Release. Activating the
Manual Park Release will allow your vehicle to roll away
if it is not secured by the parking brake, or by proper
connection to a tow vehicle. Activating the Manual Park
Release on an unsecured vehicle could lead to serious
injury or death for those in or around the vehicle.
2020_DT_1500_OM_US.book Page 476
Page 479 of 674

IN CASE OF EMERGENCY 477
NOTE:
When the lever is locked in the released position the access
cover cannot be reinstalled.
4. Behind the Manual Park Release access cover is theorange tether strap. Pull the tether strap out as far as it
will go, then release it. The tether and lever will remain
outside of the trim panel and the transmission should
now be in NEUTRAL, allowing the vehicle to be moved.
To Reset The Manual Park Release:
1. Apply firm pressure to the brake pedal while seated in the driver’s seat.
2. Pull the tether strap out again, then release it.
3. Allow the tether to retract with the lever back to its orig -
inal position.
4. Verify the transmission is in PARK.
5. Confirm that the tether has retracted fully and re-install the access cover. If the access cover cannot be reinstalled,
repeat steps 1 though 4.
6. Re-install the access cover.FREEING A STUCK VEHICLE
If your vehicle becomes stuck in mud, sand, or snow, it can
often be moved using a rocking motion. Turn the steering
wheel right and left to clear the area around the front wheels.
Then shift back and forth between DRIVE (D) and REVERSE
(R), while gently pressing the accelerator. Use the least
amount of accelerator pedal pressure that will maintain the
rocking motion, without spinning the wheels or racing the
engine.
NOTE:
Shifts between DRIVE and REVERSE can only be achieved at
wheel speeds of 5 mph (8 km/h) or less. Whenever the trans -
mission remains in NEUTRAL (N) for more than two
seconds, you must press the brake pedal to engage DRIVE or
REVERSE.
NOTE:
Push the “ESC Off” switch, to place the Electronic Stability
Control (ESC) system in “Partial Off” mode, before rocking
the vehicle. Refer to “Electronic Brake Control” in “Safety”
for further information. Once the vehicle has been freed,
push the “ESC Off” switch again to restore “ESC On” mode.
6
2020_DT_1500_OM_US.book Page 477
Page 480 of 674

478 IN CASE OF EMERGENCY
TOWING A DISABLED VEHICLE
This section describes procedures for towing a disabled
vehicle using a commercial towing service.
If the transmission and drivetrain are operable, disabled
vehicles may also be towed as described under “Recreational
Towing (Behind Motorhome, Etc.)” in the “Starting And
Operating” section.
NOTE:
Vehicles equipped with the Active-Level Four Corner Air
Suspension System must be placed in Transport mode,
before tying them down (from the body) on a trailer or
flatbed truck. If the vehicle cannot be placed in Transport
mode (for example, engine will not run), tie-downs must be
fastened to the axles (not to the body). Failure to follow these
instructions may cause fault codes to be set and/or cause loss
of proper tie-down tension.
Refer to "Active-Level Four Corner Air Suspension System
— If Equipped" in "Starting And Operating" for more infor-
mation.
WARNING!
Fast spinning tires can be dangerous. Forces generated by
excessive wheel speeds may cause damage, or even failure, of
the axle and tires. A tire could explode and injure someone.
Do not spin your vehicle's wheels faster than 30 mph (48 km/ h) or for longer than 30 seconds continuously without
stopping when you are stuck and do not let anyone near a
spinning wheel, no matter what the speed.
CAUTION!
• Racing the engine or spinning the wheels may lead to transmission overheating and failure. Allow the engine to
idle with the transmission in NEUTRAL for at least one
minute after every five rocking-motion cycles. This will
minimize overheating and reduce the risk of transmission
failure during prolonged efforts to free a stuck vehicle.
• When “rocking” a stuck vehicle by shifting between DRIVE and REVERSE, do not spin the wheels faster than
15 mph (24 km/h), or drivetrain damage may result.
• Revving the engine or spinning the wheels too fast may lead to transmission overheating and failure. It can also
damage the tires. Do not spin the wheels above 30 mph
(48 km/h) while in gear (no transmission shifting occur-
ring).
2020_DT_1500_OM_US.book Page 478
Page 482 of 674

480 IN CASE OF EMERGENCY
(Continued)
Two-Wheel Drive Models
The manufacturer recommends towing your vehicle with all
four wheels OFF the ground using a flatbed.
If flatbed equipment is not available, and the transmission is
operable, the vehicle may be towed (with rear wheels on the
ground) under the following conditions:
• The transmission must be in NEUTRAL.
NOTE:
Refer to “Manual Park Release” in this section for instruc -
tions on shifting the transmission to NEUTRAL when the
engine is OFF.
• The towing speed must not exceed 30 mph (48 km/h).
• The towing distance must not exceed 30 miles (48 km).
If the transmission is not operable, or the vehicle must be
towed faster than 30 mph (48 km/h) or farther than 30 miles (48 km), tow with the rear wheels OFF the ground. Accept -
able methods are to tow the vehicle on a flatbed, or with the
front wheels raised and the rear wheels on a towing dolly, or
(when using a suitable steering wheel stabilizer to hold the
front wheels in the straight position) with the rear wheels
raised and the front wheels on the ground.
Four-Wheel Drive Models
The manufacturer recommends towing with all wheels OFF
the ground. Acceptable methods are to tow the vehicle on a
flatbed or with one end of vehicle raised and the opposite
end on a towing dolly.
If flatbed equipment is not available, and the transfer case is
operable, the vehicle may be towed (in the forward direction,
with ALL wheels on the ground), IF the transfer case is in
NEUTRAL (N) and the transmission is in PARK.
Refer to “Recreational Towing” in “Starting And Operating”
for further information and detailed instructions. CAUTION!
Towing this vehicle in violation of the above
requirements can cause severe transmission damage.
Damage from improper towing is not covered under the
New Vehicle Limited Warranty.
CAUTION!
• Front or rear wheel lifts must not be used (if the remaining wheels are on the ground). Internal damage
to the transmission or transfer case will occur if a front
or rear wheel lift is used when towing.
2020_DT_1500_OM_US.book Page 480
Page 484 of 674

482
SERVICING AND MAINTENANCE
SCHEDULED SERVICING
Your vehicle is equipped with an automatic oil change indi-
cator system. The oil change indicator system will remind
you that it is time to take your vehicle in for scheduled main -
tenance.
Based on engine operation conditions, the oil change indi -
cator message will illuminate. This means that service is
required for your vehicle. Operating conditions such as
frequent short-trips, trailer tow, and extremely hot or cold
ambient temperatures will influence when the “Oil Change
Required” message is displayed. Severe Operating Condi -
tions can cause the change oil message to illuminate as early
as 3,500 miles (5,600 km) since last reset. Have your vehicle
serviced as soon as possible, within the next 500 miles
(805 km).
An authorized dealer will reset the oil change indicator
message after completing the scheduled oil change. If a
scheduled oil change is performed by someone other than your authorized dealer, the message can be reset by referring
to the steps described under “Instrument Cluster Display” in
“Getting To Know Your Instrument Panel”.
NOTE:
Under no circumstances should oil change intervals exceed
10,000 miles (16,000 km), 12 months or 350 hours of engine
run time, whichever comes first. The 350 hours of engine run
or idle time is generally only a concern for fleet customers.
Severe Duty All Models
NOTE:
Change Engine Oil at 4,000 miles (6,500 km) or 350 hours of
engine run time if the vehicle is operated in a dusty and off
road environment or is operated predominantly at idle, or
only very low engine RPM. This type of vehicle use is consid
-
ered Severe Duty.
2020_DT_1500_OM_US.book Page 482
Page 485 of 674

SERVICING AND MAINTENANCE 483
Once A Month Or Before A Long Trip:
• Check engine oil level.
• Check windshield washer fluid level.
• Check tire pressure and look for unusual wear or damage.Rotate tires at the first sign of irregular wear, even if it
occurs before the oil indicator system turns on.
• Check the fluid levels of the coolant reservoir, brake master cylinder, and fill as needed.
• Check function of all interior and exterior lights.Maintenance Plan
Required Maintenance
Refer to the Maintenance Plan on the following pages for
required maintenance.
NOTE:
Using white lithium grease, lubricate the door hinge roller pivot joints twice a year to prevent premature wear. At Every Oil Change Interval As Indicated By Oil Change Indicator System:
• Change the oil and filter.
• Rotate the tires. Rotate at the first sign of irregular wear, even if it occurs before the oil indicator system turns on.
• Inspect the battery and clean and tighten terminals as required.
• Inspect the CV/Universal joints.
• Inspect the brake pads, shoes, rotors, drums, and hoses.
• Inspect the engine cooling system protection and hoses.
• Inspect the exhaust system.
• Inspect the engine air cleaner if using in dusty or off-road conditions.
7
2020_DT_1500_OM_US.book Page 483