set clock Ram 1500 2020 Owner's Manual
[x] Cancel search | Manufacturer: RAM, Model Year: 2020, Model line: 1500, Model: Ram 1500 2020Pages: 674, PDF Size: 32.69 MB
Page 69 of 674
GETTING TO KNOW YOUR VEHICLE 67
Headlight Switch
Rotate the headlight switch clockwise to the first detent for
parking light and instrument panel light operation. Rotate
the headlight switch to the second detent for headlight,
parking light, and instrument panel light operation.
Daytime Running Lights (DRLs) — If Equipped
The headlights on your vehicle will illuminate when the
engine is started. This provides a constant "lights on" condi -
tion until the ignition is placed in the OFF position. If the
parking brake is applied, the Daytime Running Lights
(DRLs) will turn off. Also, if a turn signal is activated, the
DRL lamp on the same side of the vehicle may turn off for the
duration of the turn signal activation. Once the turn signal is
no longer active, the DRL lamp will illuminate.
NOTE:
If allowed by law in the country in which the vehicle was
purchased, the Daytime Running Lights can be turned on
and off using the Uconnect System, refer to “Uconnect
Settings” in “Multimedia” for further information.
2
2020_DT_1500_OM_US.book Page 67
Page 72 of 674

70 GETTING TO KNOW YOUR VEHICLE
Automatic Headlights — If Equipped
This system automatically turns your headlights on or off
based on ambient light levels. To turn the system on, turn the
headlight switch to the extreme clockwise position aligning
the indicator with the AUTO on the headlight switch. When
the system is on, the Headlight Time Delay feature is also on.
This means your headlights will stay on for up to 90 seconds
after the ignition is placed in the OFF position. To turn the
Automatic System off, turn the headlight switch counter-
clockwise to the O (off) position.
NOTE:
The engine must be running before the headlights will come
on in the Automatic mode.
Parking Lights And Panel Lights
To turn on the parking lights and instrument panel lights,
from the O (off) position, rotate the headlight switch clock -
wise to the first detent. To turn off the parking lights, rotate
the headlight switch back to the O (off) position.
Headlights On With Wipers (Available With Automatic
Headlights Only)
When this feature is active, the headlights will turn on
approximately 10 seconds after the wipers are turned on if the headlight switch is placed in the AUTO position. In addi
-
tion, the headlights will turn off when the wipers are turned
off, if they were turned on by this feature.
NOTE:
This feature can be programmed through the Uconnect
system. Refer to “Uconnect Settings” in “Multimedia” for
further information.
Headlight Delay
To aid in your exit, your vehicle is equipped with a headlight
delay that will leave the headlights on for approximately up
to 90 seconds. This delay is initiated when the ignition is
turned off while the headlight switch is on, and then the
headlight switch is cycled off. Headlight delay can be
canceled by either turning the headlight switch on then off,
or by placing the ignition in the ON/RUN position.
NOTE:
This feature can be programmed through the Uconnect
system. Refer to “Uconnect Settings” in “Multimedia” for
further information.
2020_DT_1500_OM_US.book Page 70
Page 81 of 674
GETTING TO KNOW YOUR VEHICLE 79
IconDescription
MAX A/C Setting
Rotate the temperature control knob until it is set to MAX A/C. This is the coldest setting and puts the
A/C to maximum power.
A/C Button
Push the A/C button to engage the Air Conditioning (A/C).
Recirculation Button
Push the button on the faceplate to change the system between recirculation mode and outside air
mode. The Recirculation indicator and the A/C indicator illuminate when Recirculation mode is
turned on. Recirculation can be used when outside conditions, such as smoke, odors, dust, or
humidity are present. Recirculation can be used in all modes except for Defrost. Recirculation may be
unavailable if conditions exist that could create fogging on the inside of the windshield. The A/C can
be deselected manually without disturbing the mode control selection. Continuous use of the
Recirculation mode may make the inside air stuffy and window fogging may occur. Extended use of
this mode is not recommended.
Temperature Control
Use this control knob to regulate the temperature of the air inside the passenger compartment.
Rotating the knob counterclockwise, from top center into the blue area of the scale, indicates cooler
temperatures. Rotating the knob clockwise, into the red area, indicates warmer temperatures.
2
2020_DT_1500_OM_US.book Page 79
Page 82 of 674
80 GETTING TO KNOW YOUR VEHICLE
Blower Control
There are seven blower speeds. Use this control knob to regulate the amount of air forced through the
system in any mode you select. The blower speed increases as you move the control clockwise from
the off position.
Modes Control
Rotate the Mode Control Knob to change the airflow distribution mode. The airflow distribution mode
can be adjusted so air comes from the instrument panel outlets, floor outlets, defrost outlets and
demist outlets. The Mode settings are as follows:
Panel Mode Panel Mode
Air comes from the outlets in the instrument panel. Each of these outlets can be individually adjusted
to direct the flow of air. The air vanes of the center outlets and outboard outlets can be moved up and
down or side to side to regulate airflow direction. There is a shut off wheel located below the air vanes
to shut off or adjust the amount of airflow from these outlets.
Bi-Level Mode Bi-Level Mode
Air comes from the instrument panel outlets and floor outlets. A slight amount of air is directed
through the defrost and side window demister outlets.
NOTE:
Bi-Level mode is designed under comfort conditions to provide cooler air out of the panel outlets and
warmer air from the floor outlets.
Icon
Description
2020_DT_1500_OM_US.book Page 80
Page 90 of 674

88 GETTING TO KNOW YOUR VEHICLE
SYNC
Press the SYNC button on the touchscreen to toggle the SYNC feature on/off. The SYNC indicator
illuminates when SYNC is on. SYNC is used to synchronize the passenger temperature setting with
the driver temperature setting. Changing the passenger’s temperature setting while in SYNC will
automatically exit this feature.
NOTE:
The SYNC button is only available on the touchscreen.
Faceplate Blower Knob
Touchscreen
Blower Buttons Blower Control
Blower Control is used to regulate the amount of air forced through the climate system. There are
seven blower speeds available. Adjusting the blower will cause automatic mode to switch to manual
operation. The speeds can be selected using either the blower control knob on the faceplate or the
buttons on the touchscreen.
•
Faceplate: The blower speed increases as you turn the blower control knob clockwise from the lowest
blower setting. The blower speed decreases as you turn the blower control knob counterclockwise.
• Touchscreen: Use the small blower icon to reduce the blower setting and the large blower icon to
increase the blower setting. Blower can also be selected by pressing the blower bar area between the
icons.
Icon
Description
2020_DT_1500_OM_US.book Page 88
Page 465 of 674
IN CASE OF EMERGENCY 463
Jacking Instructions
Jack Warning Label
1. Remove the spare tire, jack, and tools from the stored location.
2. Using the lug wrench, loosen the wheel nuts (but do not remove), by turning them counterclockwise one turn
while the wheel is still on the ground.
WARNING!
Carefully follow these tire changing warnings to help
prevent personal injury or damage to your vehicle:
• Always park on a firm, level surface as far from the edge of the roadway as possible before raising the vehicle.
• Turn on the Hazard Warning flasher.
• Block the wheel diagonally opposite the wheel to be raised.
• Apply the parking brake firmly and set the transmission in PARK.
• Never start or run the engine with the vehicle on a jack.
• Do not let anyone sit in the vehicle when it is on a jack.
• Do not get under the vehicle when it is on a jack. If you need to get under a raised vehicle, take it to a service center
where it can be raised on a lift.
• Only use the jack in the positions indicated and for lifting this vehicle during a tire change.
• If working on or near a roadway, be extremely careful of motor traffic.
• To assure that spare tires, flat or inflated, are securely stowed, spares must be stowed with the valve stem facing
the ground.
CAUTION!
Do not attempt to raise the vehicle by jacking on
locations other than those indicated in the Jacking
Instructions for this vehicle.
6
2020_DT_1500_OM_US.book Page 463
Page 562 of 674

560 MULTIMEDIA
Push the MORE or SETTINGS button on the faceplate, then
press the Settings button on the touchscreen (if equipped) to
display the Settings menu screen. In this mode, the Uconnect
system allows you to access programmable features that may
be equipped such as Display, Units, Voice, Clock, Safety &
Driving Assistance, Brakes, Lights, Doors & Locks, Power
Side Steps (if equipped), Auto-On Comfort (if equipped),
Engine Off Options, Suspension (if equipped), Trailer Brake,
Audio, Phone/Bluetooth®, SiriusXM® Setup (if equipped),
Restore Settings, Clear Personal Data, and System Informa-
tion.
NOTE:
Only one category may be selected at a time. When making a selection, press the button on the touch
-
screen to enter the desired mode. Once in the desired mode,
press and release the preferred setting until the button is
highlighted. Once the setting is complete, either press the
Back arrow or the Done button on the touchscreen. Pressing
the Up or Down arrow buttons on the touchscreen on the
right side of the screen will allow you to toggle up or down
through the list of available settings.
NOTE:
All settings should be changed with the ignition in the ON/
RUN position.
2020_DT_1500_OM_US.book Page 560
Page 564 of 674

562 MULTIMEDIA
Units — If Equipped
After pressing Units on the touchscreen, the following will be available:
Voice
After pressing the Voice button on the touchscreen, the following settings will be available:
Clock
After pressing the Clock button on the touchscreen, the following settings will be available:Setting Name
Selectable Options
Units USMetric Custom
Setting Name Selectable Options
Voice Response Length Brief Detailed
Show Command List AlwaysWith Help Never
Setting Name Selectable Options
Set Time 12 hour24 hour
NOTE:
Within the “Set Time” feature, press the corresponding arrow above and below the current time to adjust, and then select
“AM” or “PM”.
2020_DT_1500_OM_US.book Page 562
Page 577 of 674
MULTIMEDIA 575
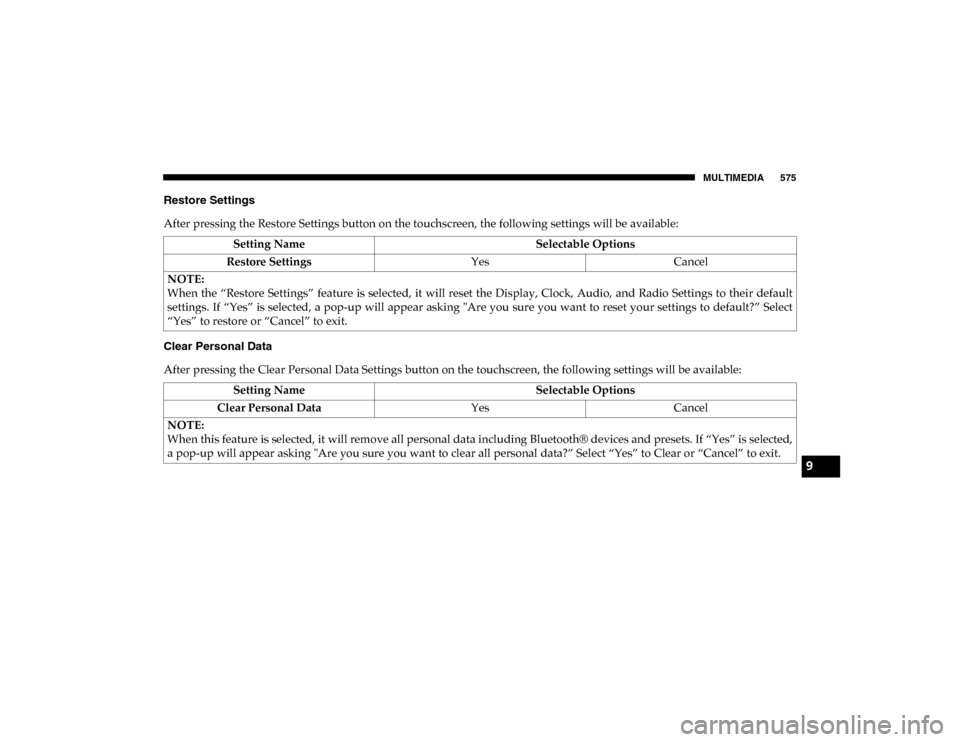
Restore Settings
After pressing the Restore Settings button on the touchscreen, the following settings will be available:
Clear Personal Data
After pressing the Clear Personal Data Settings button on the touchscreen, the following settings will be available:Setting Name
Selectable Options
Restore Settings YesCancel
NOTE:
When the “Restore Settings” feature is selected, it will reset the Display, Clock, Audio, and Radio Settings to their default
settings. If “Yes” is selected, a pop-up will appear asking "Are you sure you want to reset your settings to default?” Select
“Yes” to restore or “Cancel” to exit.
Setting Name Selectable Options
Clear Personal Data YesCancel
NOTE:
When this feature is selected, it will remove all personal data including Bluetooth® devices and presets. If “Yes” is selected,
a pop-up will appear asking "Are you sure you want to clear all personal data?” Select “Yes” to Clear or “Cancel” to exit.
9
2020_DT_1500_OM_US.book Page 575
Page 578 of 674
576 MULTIMEDIA
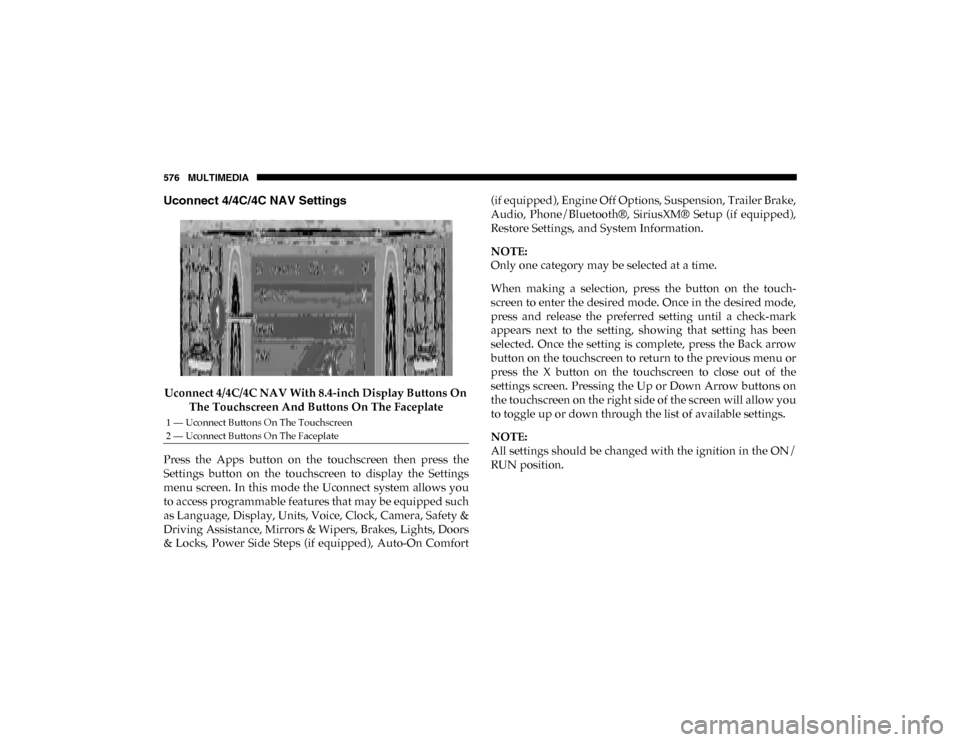
Uconnect 4/4C/4C NAV Settings
Uconnect 4/4C/4C NAV With 8.4-inch Display Buttons On The Touchscreen And Buttons On The Faceplate
Press the Apps button on the touchscreen then press the
Settings button on the touchscreen to display the Settings
menu screen. In this mode the Uconnect system allows you
to access programmable features that may be equipped such
as Language, Display, Units, Voice, Clock, Camera, Safety &
Driving Assistance, Mirrors & Wipers, Brakes, Lights, Doors
& Locks, Power Side Steps (if equipped), Auto-On Comfort (if equipped), Engine Off Options, Suspension, Trailer Brake,
Audio, Phone/Bluetooth®, SiriusXM® Setup (if equipped),
Restore Settings, and System Information.
NOTE:
Only one category may be selected at a time.
When making a selection, press the button on the touch
-
screen to enter the desired mode. Once in the desired mode,
press and release the preferred setting until a check-mark
appears next to the setting, showing that setting has been
selected. Once the setting is complete, press the Back arrow
button on the touchscreen to return to the previous menu or
press the X button on the touchscreen to close out of the
settings screen. Pressing the Up or Down Arrow buttons on
the touchscreen on the right side of the screen will allow you
to toggle up or down through the list of available settings.
NOTE:
All settings should be changed with the ignition in the ON/
RUN position.
1 — Uconnect Buttons On The Touchscreen
2 — Uconnect Buttons On The Faceplate
2020_DT_1500_OM_US.book Page 576