navigation RAM 1500 2021 Owners Manual
[x] Cancel search | Manufacturer: RAM, Model Year: 2021, Model line: 1500, Model: RAM 1500 2021Pages: 496, PDF Size: 20.89 MB
Page 2 of 496

WARNING: Operating, servicing and maintaining a passenger vehicle or off-highway
motor vehicle can expose you to chemicals including engine exhaust, carbon monoxide,
phthalates, and lead, which are known to the State of California to cause cancer and birth defects
or other reproductive harm. To minimize exposure, avoid breathing exhaust, do not idle the
engine except as necessary, service your vehicle in a well-ventilated area and wear gloves or wash
your hands frequently when servicing your vehicle. For more information go to
www.P65Warnings.ca.gov/passenger-vehicle.
The driver’s primary responsibility is the safe operation of the vehicle. Driving while distracted can result in loss of vehicle control, resulting in an accident and
personal injury. FCA US LLC strongly recommends that the driver use extreme caution when using any device or feature that may take their attention off the
road. Use of any electrical devices, such as cellular telephones, computers, portable radios, vehicle navigation or other devices, by the driver while the vehicle
is moving is dangerous and could lead to a serious accident. Texting while driving is also dangerous and should never be done while the vehicle is moving. If you
find yourself unable to devote your full attention to vehicle operation, pull off the road to a safe location and stop your vehicle. Some states or provinces prohibit
the use of cellular telephones or texting while driving. It is always the driver’s responsibility to comply with all local laws.
This Owner’s Manual has been prepared to help you get acquainted with your new Ram brand vehicle and to provide a convenient reference for common
questions.
Not all features shown in this manual may apply to your vehicle. For additional information on accessories to help personalize your vehicle, visit
www.mopar.com/en-us/care/owners-manual.html (U.S.), www.owners.mopar.ca (Canada) or your local Ram brand dealer.
DRIVING AND ALCOHOL
Drunk driving is one of the most frequent causes of accidents. Your driving ability can be seriously
impaired with blood alcohol levels far below the legal minimum. If you are drinking, don’t drive. Ride with
a designated non-drinking driver, call a cab, a friend or use public transportation.
This Owner’s Manual illustrates and describes the operation of features and equipment that are either standard or optional on this vehicle. This manual may
also include a description of features and equipment that are no longer available or were not ordered on this vehicle. Please disregard any features and
equipment that are no longer available or were not ordered on this vehicle. FCA US LLC reserves the right to make changes in design and specifications, and/or
make additions to or improvements to its products without imposing any obligation upon itself to install them on products previously manufactured.
With respect to vehicles sold in Canada, the name FCA US LLC shall be deemed to be deleted and the name FCA Canada Inc. used in substitution therefore.
If you are the first registered retail owner of your vehicle, you may obtain a complimentary printed copy of the Warranty Booklet by calling
1-866-726-4636 (U.S.) or 1-800-387-1143 (Canada), or by contacting your dealer.
This Owner’s Manual is intended to familiarize you with the important features of your vehicle. Your most up-to-date Owner’s Manual, Navigation/Uconnect
manuals and Warranty Booklet can be found by visiting the website on the back cover. U.S. residents can purchase replacement kits by visiting
www.techauthority.com and Canadian residents can purchase replacement kits by calling 1-800-387-1143.
WARNING
Driving after drinking can lead to an accident. Your perceptions are less sharp, your reflexes are slower
and your judgment is impaired when you have been drinking. Never drink and then drive.
Page 45 of 496
GETTING TO KNOW YOUR VEHICLE43
GET STARTED
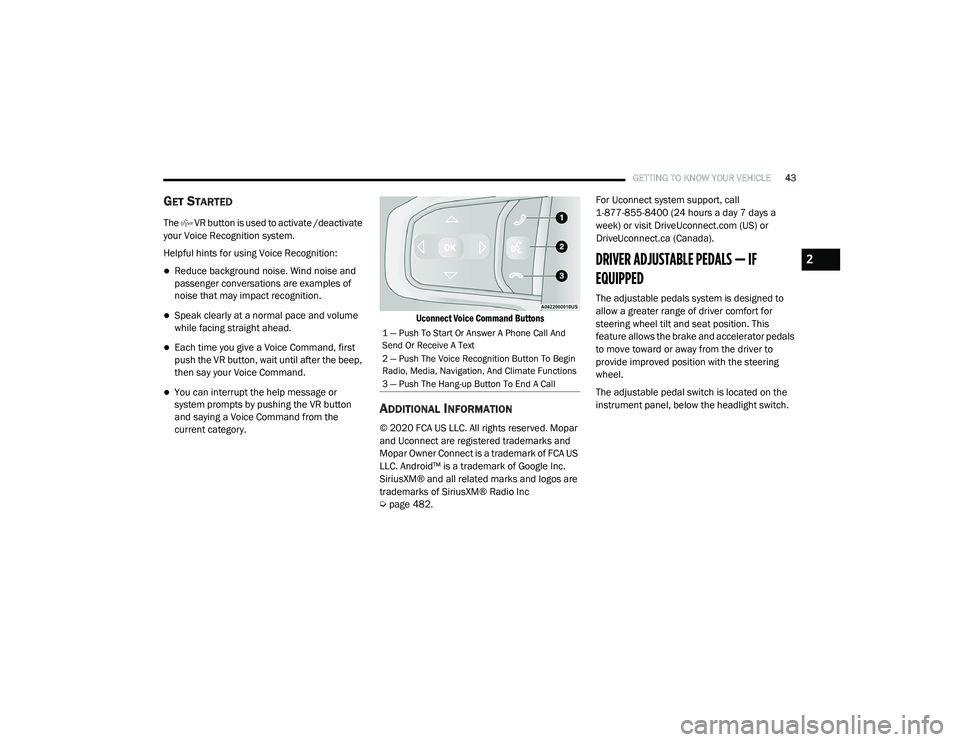
The VR button is used to activate /deactivate
your Voice Recognition system.
Helpful hints for using Voice Recognition:
Reduce background noise. Wind noise and
passenger conversations are examples of
noise that may impact recognition.
Speak clearly at a normal pace and volume
while facing straight ahead.
Each time you give a Voice Command, first
push the VR button, wait until after the beep,
then say your Voice Command.
You can interrupt the help message or
system prompts by pushing the VR button
and saying a Voice Command from the
current category.
Uconnect Voice Command Buttons
ADDITIONAL INFORMATION
© 2020 FCA US LLC. All rights reserved. Mopar
and Uconnect are registered trademarks and
Mopar Owner Connect is a trademark of FCA US
LLC. Android™ is a trademark of Google Inc.
SiriusXM® and all related marks and logos are
trademarks of SiriusXM® Radio Inc
Ú
page 482. For Uconnect system support, call
1-877-855-8400 (24 hours a day 7 days a
week) or visit DriveUconnect.com (US) or
DriveUconnect.ca (Canada).
DRIVER ADJUSTABLE PEDALS — IF
EQUIPPED
The adjustable pedals system is designed to
allow a greater range of driver comfort for
steering wheel tilt and seat position. This
feature allows the brake and accelerator pedals
to move toward or away from the driver to
provide improved position with the steering
wheel.
The adjustable pedal switch is located on the
instrument panel, below the headlight switch.
1 — Push To Start Or Answer A Phone Call And
Send Or Receive A Text
2 — Push The Voice Recognition Button To Begin
Radio, Media, Navigation, And Climate Functions
3 — Push The Hang-up Button To End A Call
2
21_DT_OM_EN_USC_t.book Page 43
Page 204 of 496
202STARTING AND OPERATING
CHANGING LANESENSE STATUS
The LaneSense system has settings to adjust
the intensity of the torque warning and the
warning zone sensitivity (Early/Medium/Late)
that you can configure through the Uconnect
system Úpage 237.
NOTE:
When enabled the system operates above
37 mph (60 km/h) and below 112 mph (180 km/h).
The warnings are disabled with use of the
turn signal.
The system will not apply torque to the
steering wheel whenever a safety system
engages (Anti-Lock Brakes, Traction Control
System, Electronic Stability Control, Forward
Collision Warning, etc.).
PARKVIEW REAR BACK UP CAMERA
The ParkView Rear Back Up Camera allows you
to see an on-screen image of the rear
surroundings of your vehicle whenever the gear
selector is put into REVERSE. The image will be
displayed on the Navigation/Multimedia radio
display screen along with a caution note to “Check Entire Surroundings” across the top of
the screen. After five seconds this note will
disappear. The ParkView Camera is located in
the center of the tailgate handle.
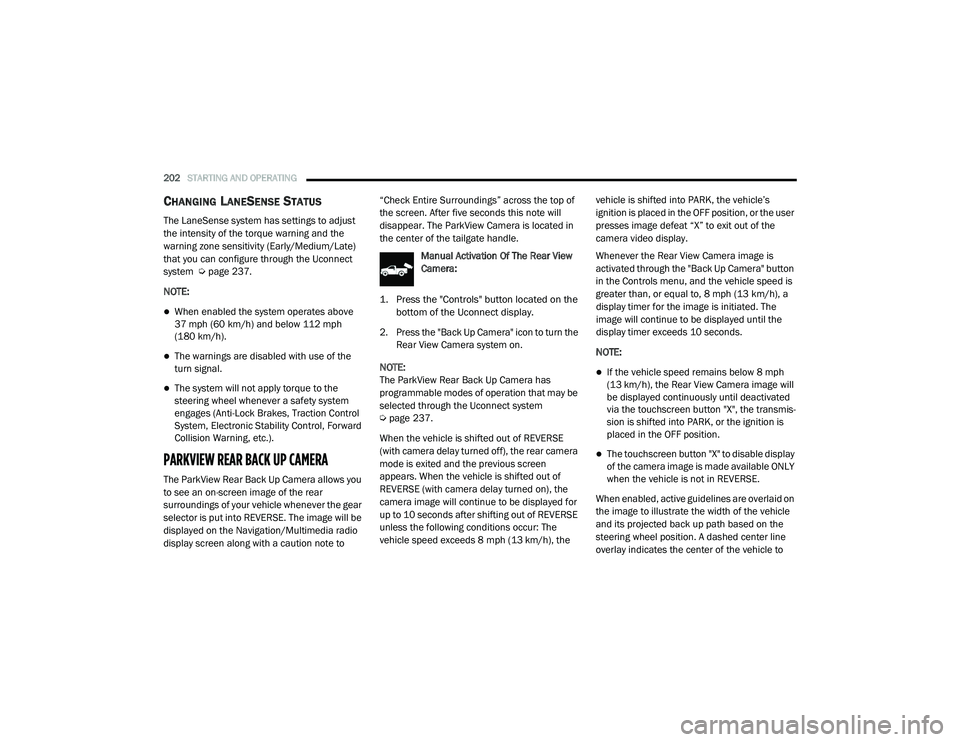
Manual Activation Of The Rear View
Camera:
1. Press the "Controls" button located on the bottom of the Uconnect display.
2. Press the "Back Up Camera" icon to turn the Rear View Camera system on.
NOTE:
The ParkView Rear Back Up Camera has
programmable modes of operation that may be
selected through the Uconnect system
Ú page 237.
When the vehicle is shifted out of REVERSE
(with camera delay turned off), the rear camera
mode is exited and the previous screen
appears. When the vehicle is shifted out of
REVERSE (with camera delay turned on), the
camera image will continue to be displayed for
up to 10 seconds after shifting out of REVERSE
unless the following conditions occur: The
vehicle speed exceeds 8 mph (13 km/h), the vehicle is shifted into PARK, the vehicle’s
ignition is placed in the OFF position, or the user
presses image defeat “X” to exit out of the
camera video display.
Whenever the Rear View Camera image is
activated through the "Back Up Camera" button
in the Controls menu, and the vehicle speed is
greater than, or equal to, 8 mph (13 km/h), a
display timer for the image is initiated. The
image will continue to be displayed until the
display timer exceeds 10 seconds.
NOTE:
If the vehicle speed remains below 8 mph
(13 km/h), the Rear View Camera image will
be displayed continuously until deactivated
via the touchscreen button "X", the transmis -
sion is shifted into PARK, or the ignition is
placed in the OFF position.
The touchscreen button "X" to disable display
of the camera image is made available ONLY
when the vehicle is not in REVERSE.
When enabled, active guidelines are overlaid on
the image to illustrate the width of the vehicle
and its projected back up path based on the
steering wheel position. A dashed center line
overlay indicates the center of the vehicle to
21_DT_OM_EN_USC_t.book Page 202
Page 241 of 496

MULTIMEDIA239
Keyboard — If Equipped This setting will change the keyboard type on the display. The selectable
keyboards are ABCDEF Keyboard, QWERTY Keyboard, and AZERTY
Keyboard.
Touchscreen Beep This setting will allow you to turn the touchscreen beep on or off.
Control Screen Timeout This setting allows you to set the Control Screen to turn off automatically
after five seconds or stay open until manually closed.
Navigation Next Turn Pop-ups Displayed in Cluster — If Equipped This setting will display navigation prompts in the Instrument Cluster
Display.
Phone Pop-ups Displayed In Cluster This setting will display smartphone notifications and messages in the
Instrument Cluster Display.
Fuel Saver Display This setting will enable fuel saver mode in the Instrument Cluster Display.
Ready To Drive Pop-ups — If Equipped This setting will enable the Ready To Drive Pop-ups in the Instrument
Cluster Display.
Setting Name
Description
5
21_DT_OM_EN_USC_t.book Page 239
Page 242 of 496
240MULTIMEDIA
Units
When the Units button is pressed on the touchscreen, the system displays the different measurement options. The selected unit of measurement will
display in the instrument cluster display and Navigation system (if equipped). The available settings are:
Voice
When the Voice button is pressed on the touchscreen, the system displays the options related to the vehicle’s Voice Recognition feature.
Setting Name Description
US This setting will change the unit of measurement on the display to US.
Metric This setting will change the unit of measurement on the display to Metric.
Custom This setting changes the “Speed” (MPH or km/h), “Distance” (mi or km),
“Fuel Consumption” (MPG [US], MPG [UK], L/100 km, or km/L),
“Pressure” (psi, kPa, or bar), “Temperature” (°C or °F), and “Capacity”
(Gal [US], Gal [UK], or L) units of measurement independently.
Setting Name
Description
Voice Response Length This setting will change the response length for the Voice Recognition
system. The “Brief” setting provides a shortened audio description from
the system. The “Detailed” setting provides the full audio description
from the system.
Show Command List This setting will allow you to turn the command list on or off. The “Always”
setting will always show the command list. The “With Help” setting will
show the command list and provide a brief description of what the
command does. The “Never” setting will turn the command list off.
21_DT_OM_EN_USC_t.book Page 240
Page 257 of 496

MULTIMEDIA255
The following are the available icons that can be customized in the cluster:
NOTE:
After the HUD layout customization is completed, press the Save button located in the upper left corner of the touchscreen, and then the OK button
under the “Save changes?” screen. Once saved, the instrument cluster will display a message “Setting Saved”.
Press the X button located in the upper right corner of the touchscreen, and then press the Cancel button to exit out of customizing the HUD layout.
Doing this will not retain any information customized in the layout view. The instrument cluster display will return to the layout options screen.
Pressing any other menu item on the touchscreen, for example “Climate”, will take the user back to whatever screen they were previously on before
accessing the HUD layout Ú page 118.
Feature Name IconDescription
Speed This icon will show the vehicle’s current speed.
Turn-By-Turn — If Equipped This icon will show the upcoming direction for
Navigation.
Speed Limit This icon will show the current speed limit of the
area you are driving in.
Driver Assist/Adaptive Cruise Control/Cruise Control And Lane Sense — If Equipped This icon will show information related to Driver
Assist, Adaptive Cruise Control, Cruise Control, and Lane Sense.
Gear This icon will show the current gear the vehicle
is in.
5
21_DT_OM_EN_USC_t.book Page 255
Page 285 of 496
MULTIMEDIA283
NOTE:
Certain SiriusXM Guardian™ services are
dependent upon an operative telematics
device, a cellular connection, navigation map
data, and GPS satellite signal reception, which
can limit the ability to reach the response
center or reach emergency support.
Not all features of SiriusXM Guardian™ are
available everywhere at all times, particularly
in remote or enclosed areas.
Other factors outside the control of SiriusXM
Guardian™ that may limit or prevent service
delivery are hills, structures, buildings,
tunnels, weather, damage to the electrical
system or other important parts of your
vehicle, network congestion, civil distur-
bances, actions of third parties or the govern -
ment, Internet failure, and/or the physical
location of your vehicle, such as in an under -
ground parking structure or under a bridge.
Not all SiriusXM Guardian™ features are
available for all models.
SiriusXM Guardian™ provides:
The ability to remotely lock/unlock and remote
start your vehicle from virtually anywhere by
using the Uconnect App or your computer.
Send & Go capability with the Uconnect App.
Use the Uconnect App to easily search, map
and send your locations directly to your
Uconnect Navigation.
The ability to locate your vehicle, when you
forget where you parked, using the Vehicle
Finder function of the Uconnect App.
Before you drive, familiarize yourself with the
easy-to-use Uconnect system and SiriusXM
Guardian™ services.
The ASSIST and SOS Call Buttons On Your
Rearview Mirror Or Overhead Console
The ASSIST Button is used for contacting
Roadside Assistance, Vehicle Care, Uconnect
Care, and SiriusXM Guardian™ Customer Care.
The SOS Call button connects you directly to
SiriusXM Guardian™ Customer Care for
assistance in an emergency.
Activation
To unlock the full potential of SiriusXM
Guardian™ in your vehicle, you must activate
your SiriusXM Guardian™ services.
1. Press the Apps icon on the bottom of your in-vehicle touchscreen.
2. Select the Activate Services icon from your
list of apps.
3. For customers in the United States , select
“Customer Care” to speak with a SiriusXM
Guardian™ Customer Care agent who will
activate services in your vehicle, or select
“Enter Email” to activate on the web.
For customers in Canada , enter your email
address to activate services in your vehicle.
Included Trial Period For New Vehicles
Your new vehicle may come with an included
trial period for use of the SiriusXM Guardian™
services starting on the date of vehicle
purchase. To get started with your trial,
enrollment in SiriusXM Guardian™ is required.
The Uconnect 4C/4C NAV includes a trial* of
SiriusXM Guardian™ services from your date of
purchase.
* Included trial applies to new vehicles only.
Features And Packages
After the trial period, you must purchase a
subscription to continue your services by calling
a SiriusXM Guardian™ Customer Care agent.
5
21_DT_OM_EN_USC_t.book Page 283
Page 287 of 496
MULTIMEDIA285
d. After clicking the email link, it will take
you to a website and prompt you to
assign your account with a password.
e. Once you have added a password, the website will direct you to your homepage
where you can add in your vehicle’s VIN.
a. Click the Register button
b. Select the correct country and email address then click “Register”.
c. You will then receive an email notification to confirm/verify your newly created
account.
d. After clicking the email link, it will take you to a website and prompt you to
assign your account with a password.
e. Once you have added a password, the website will direct you to your homepage
where you can add in your vehicle’s VIN.
For customers in Canada, register your
account via your vehicle.
a. Press the Apps button in the bottom menu bar.
b. Press the Activate Services button from the apps list. c. Enter your email and press “OK”. A confir
-
mation email will be sent to the provided
email address.
d. Press “Continue Activation” from the confirmation email. It may take a short
time before remote services will be avail -
able, but you will be able to log into the
Uconnect App and the owner’s site.
Once on the Remote screen and you have set
up your four-digit PIN, you can begin using
Remote Door Lock/Unlock, Remote Vehicle
Start, and activate your horn and lights
remotely, if equipped.
Press the Location button on the bottom
menu bar of the app to bring up a map to
locate your vehicle or send a location to your
Uconnect Navigation, if equipped.
Press the Settings side menu in the upper left
corner of the app to bring up app settings and
access the Assist Call Centers.
Using Your Owner’s Site
Your Owner’s Site website
https://www.mopar.com/en-us.html (US
Residents), or www.mopar.ca (Canadian
Residents) provides you with all the information
you need, all in one place. You can track your service history, find recommended accessories
for your vehicle, watch videos about your
vehicle's features, and easily access your
manuals. It is also where you can manage your
SiriusXM Guardian™ account. This section will
familiarize you with the key elements of the
website that will help you get the most of your
SiriusXM Guardian™ system.
For customers in the United States, press the
Sign In/Register button and enter your email
address and password.
For customers in Canada, press the My Vehicle
button. Select from “Dashboard”, “Vehicle
Health Report”, and “Recalls”. The website will
then prompt you to log-in using your email
address and password.
Edit/Edit Profile:
To manage the details of your SiriusXM
Guardian™ account, such as your contact
information, password and SiriusXM
Guardian™ PIN, click on the Edit/Edit Profile
button to access the details of your account.
5
21_DT_OM_EN_USC_t.book Page 285
Page 295 of 496
MULTIMEDIA293
Disclaimers
If Roadside Assistance Call is provided to your
vehicle, you agree to be responsible for any
additional roadside assistance service costs
that you may incur. In order to provide SiriusXM
Guardian™ services to you, we may record and
monitor your conversations with Roadside
Assistance Call, Vehicle Care, Uconnect Care, or
SiriusXM Guardian™ Customer Care, whether
such conversations are initiated through the
SiriusXM Guardian™ services in your vehicle, or
via a landline or mobile device, and may share
information obtained through such recording
and monitoring in accordance with regulatory
requirements. You acknowledge, agree and
consent to any recording, monitoring or sharing
of information obtained through any such call
recordings.
Send & Go
Description
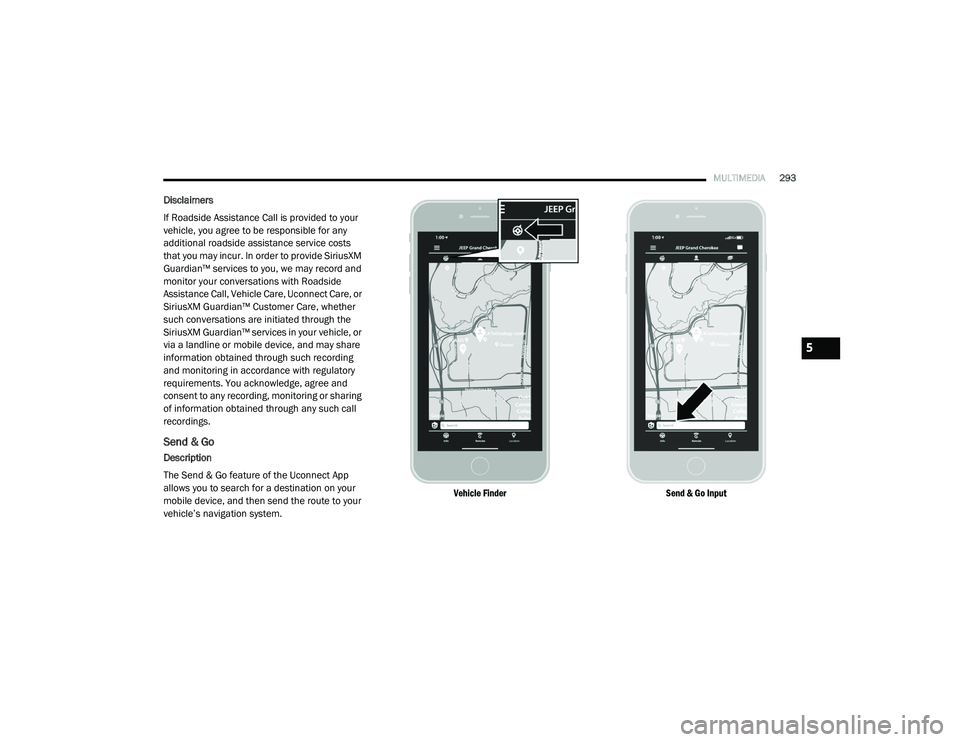
The Send & Go feature of the Uconnect App
allows you to search for a destination on your
mobile device, and then send the route to your
vehicle’s navigation system.
Vehicle Finder
Send & Go Input
5
21_DT_OM_EN_USC_t.book Page 293
Page 296 of 496
294MULTIMEDIA
How It Works
1. Use the Uconnect App to find the
destination.
There are multiple ways to find a destina -
tion. After selecting the “Location” tab at
the bottom of the App, press the search box
to browse through one of the categories pro -
vided, or type the name or keyword in the
search box at the top of the App. You can
also select categories such as Favorites or
Contact List.
2. Select your destination from the list that appears. Location information will then be
displayed on the map.
From this screen, you will be able to:
View the location on a map.
See the distance from your current loca-
tion.
Send the address by selecting “Send to
Vehicle” from the mobile app.
3. Send the destination to the Uconnect Navigation in your vehicle. You can also call
the destination by pressing the Call button. 4. Confirm your destination inside your vehicle
by pressing the Send To Vehicle option on
the pop-up that appears on the radio
touchscreen.
Requirements
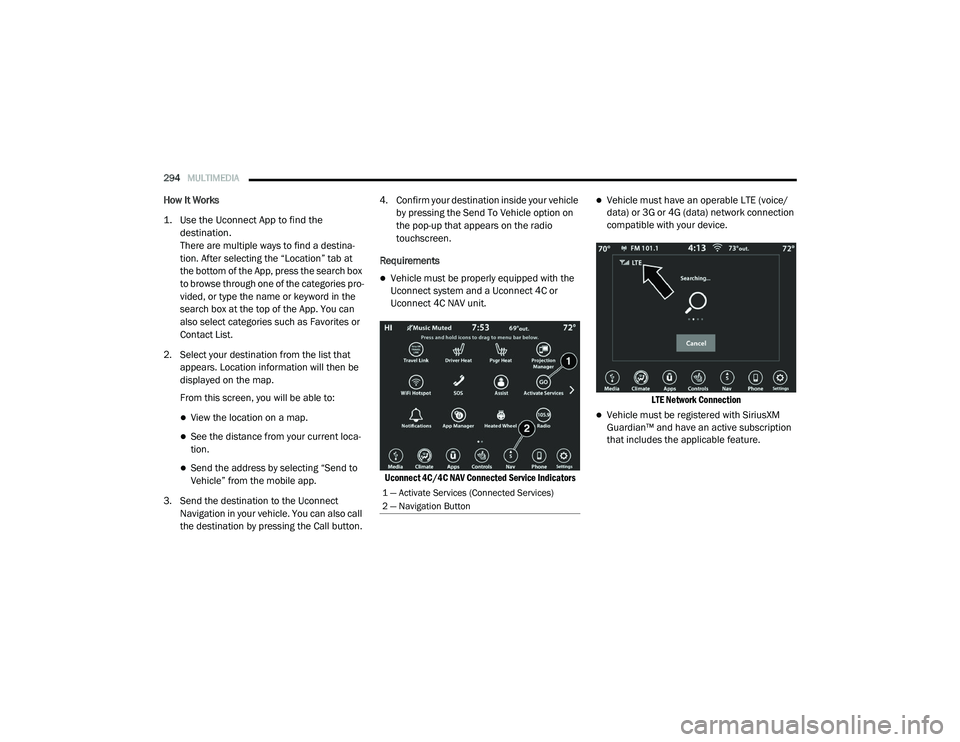
Vehicle must be properly equipped with the
Uconnect system and a Uconnect 4C or
Uconnect 4C NAV unit.
Uconnect 4C/4C NAV Connected Service Indicators
Vehicle must have an operable LTE (voice/
data) or 3G or 4G (data) network connection
compatible with your device.
LTE Network Connection
Vehicle must be registered with SiriusXM
Guardian™ and have an active subscription
that includes the applicable feature.
1 — Activate Services (Connected Services)
2 — Navigation Button
21_DT_OM_EN_USC_t.book Page 294