stop start RAM 1500 2022 Manual Online
[x] Cancel search | Manufacturer: RAM, Model Year: 2022, Model line: 1500, Model: RAM 1500 2022Pages: 496, PDF Size: 18.03 MB
Page 386 of 496

384IN CASE OF EMERGENCY
4. Place the jack and tools in the storage position holding the jack by the jack turn-screw, slip the
jack and tools under the seat so that the
bottom slot engages into the fastener on the
floor.
NOTE:Ensure that the jack slides into the front hold down
location.
5. Turn the wing bolt clockwise to secure to the floor pan. Reinstall the plastic cover.
Jack Hold Down Wing Bolt
JUMP STARTING
If your vehicle has a discharged battery, it can be
jump started using a set of jumper cables and a
battery in another vehicle, or by using a portable
battery booster pack. Jump starting can be
dangerous if done improperly, so please follow the
procedures in this section carefully.
NOTE:When using a portable battery booster pack, follow
the manufacturer's operating instructions and
precautions.
PREPARATIONS FOR JUMP START
The battery in your vehicle is located in the front of
the engine compartment, behind the left headlight
assembly.
WARNING!
After using the jack and tools, always reinstall
them in the original carrier and location. While
driving you may experience abrupt stopping,
rapid acceleration or sharp turns. A loose jack,
tools, bracket or other objects in the vehicle may
move around with force, resulting in serious
injury.
WARNING!
Do not attempt jump starting if the battery is
frozen. It could rupture or explode and cause
personal injury.
CAUTION!
Do not use a portable battery booster pack or
any other booster source with a system voltage
greater than 12 Volts or damage to the battery,
starter motor, alternator or electrical system may
occur.
22_DT_OM_EN_USC_t.book Page 384
Page 398 of 496

396SERVICING AND MAINTENANCE
Additional Maintenance
Replace cabin air filter. To be replaced every 12,000 mi (19,000 km).
For severe dusty driving conditions,
inspect and replace the Evaporative
System Fresh Air Filter as necessary;
replacement may be more frequent
depending on conditions. X X X X X X X X X X X X X X
Replace engine air cleaner. XX XXX
If equipped with Stop/Start, replace
accessory drive belt with OEM grade
Mopar® belt. X
Replace spark plugs.
1X
Flush and replace the engine coolant at
10 years or 150,000 miles (240,000 km)
whichever comes first. X
X
Inspect the transfer case fluid, change for
any of the following: police, taxi, fleet, or
frequent trailer towing. X
X
Mileage or time passed (whichever
comes first)
20,000
30,000
40,000
50,000
60,000
70,000
80,000
90,000
100,000
110,000
120,000
130,000
140,000
150,000
Or Years: 2 3 4 5 6 7 8 9 10 11 12 13 14 15
Or Kilometers:
32,000
48,000
64,000
80,000
96,000
112,000
128,000
144,000
160,000
176,000
192,000
208,000
224,000
240,000
22_DT_OM_EN_USC_t.book Page 396
Page 405 of 496

SERVICING AND MAINTENANCE403
ENGINE COMPARTMENT
3.6L ENGINE WITH STOP/START
1 — Motor Generator Unit Coolant Reservoir Pressure Cap 6 — Battery
2 — Engine Coolant Reservoir Pressure Cap 7 — Engine Air Cleaner Filter
3 — Engine Oil Dipstick 8 — Washer Fluid Reservoir Cap
4 — Engine Oil Fill 9 — Power Distribution Center (Fuses)
5 — Brake Fluid Reservoir
8
22_DT_OM_EN_USC_t.book Page 403
Page 406 of 496

404SERVICING AND MAINTENANCE
5.7L ENGINE WITHOUT STOP/START
1 — Engine Air Cleaner Filter 6 — Battery
2 — Engine Coolant Pressure Cap 7 — Engine Coolant Reservoir Cap
3 — Engine Oil Fill 8 — Washer Fluid Reservoir Cap
4 — Engine Oil Dipstick 9 — Power Distribution Center (Fuses)
5 — Brake Fluid Reservoir Cap
22_DT_OM_EN_USC_t.book Page 404
Page 407 of 496

SERVICING AND MAINTENANCE405
5.7L ENGINE WITH STOP/START
1 — Engine Air Cleaner Filter 6 — Battery
2 — Engine Coolant Pressure Cap 7 — Engine Coolant Reservoir Cap
3 — Engine Oil Fill 8 — Washer Fluid Reservoir Cap
4 — Engine Oil Dipstick 9 — Power Distribution Center (Fuses)
5 — Brake Fluid Reservoir Cap
8
22_DT_OM_EN_USC_t.book Page 405
Page 414 of 496

412SERVICING AND MAINTENANCE
G/T AIR FILTER MAINTENANCE
Clean Engine Air Filter
The scheduled air filter cleaning interval is 30,
000 miles (48,280 km), or if in a dusty
environment the engine air filter should be
checked periodically to ensure optimal air flow.
1. Spray the air filter with the recommended
Mopar® air filter cleaner or apply mild
dishwashing detergent and water and let sit
for at least 10 minutes to loosen dir before
rinsing.
NOTE:Never use strong detergents, high pressure, or
gasoline on the air filter.
2. Rinse the air filter with cool low-pressure water applied from the inside (clean side) out in
order to flush the dirt out of the filter. Continue
to rinse the filter until all traces of the cleaner
have been removed.
NOTE:It may be necessary to repeat steps 1 and 2 if the
air filter is not completely clean.
3. After rinsing the air filter, gently shake off the excess water and allow air filter to dry
naturally.
NOTE:Do not use forced air pressure as it may damage
the filtering capabilities of the filter’s microfibers
and also void its warranty.
DRAINING FUEL/WATER SEPARATOR
F
ILTER — DIESEL ENGINE
The fuel/water separator filter housing is located
inside the frame rail, behind the left front wheel.
The best access to this water drain valve is from
under the vehicle.
If water is detected in the water separator while the
engine is running, or while the ignition switch is in
the ON/RUN position, the Water In Fuel Indicator
Light will illuminate and an audible chime will be
heard. At this point, you should stop the engine
and drain the water from the filter housing.
Fuel Filter Assembly
If the Water In Fuel Indicator Light comes on and a
single chime is heard while you are driving, or with
the ignition in the ON position, there may be a
problem with your water separator wiring or
sensor. See an authorized dealer for service.
CAUTION!
Do not drain the fuel/water separator filter
when the engine is running.
Diesel fuel will damage blacktop paving
surfaces. Drain the filter into an appropriate
container.
1 — Water In Fuel Drain Valve
CAUTION!
If the Water In Fuel Indicator Light remains on,
DO NOT START the engine before you drain water
from the fuel filter to avoid engine damage.
22_DT_OM_EN_USC_t.book Page 412
Page 420 of 496

418SERVICING AND MAINTENANCE
ACCESSORY DRIVE BELT INSPECTION
When inspecting accessory drive belts, small
cracks that run across the ribbed surface of the
belt from rib to rib, are considered normal. This is
not a reason to replace the belt. However, cracks
running along a rib (not across) are not normal. Any
belt with cracks running along a rib must be
replaced. Also have the belt replaced if it has
excessive wear, frayed cords or severe glazing.
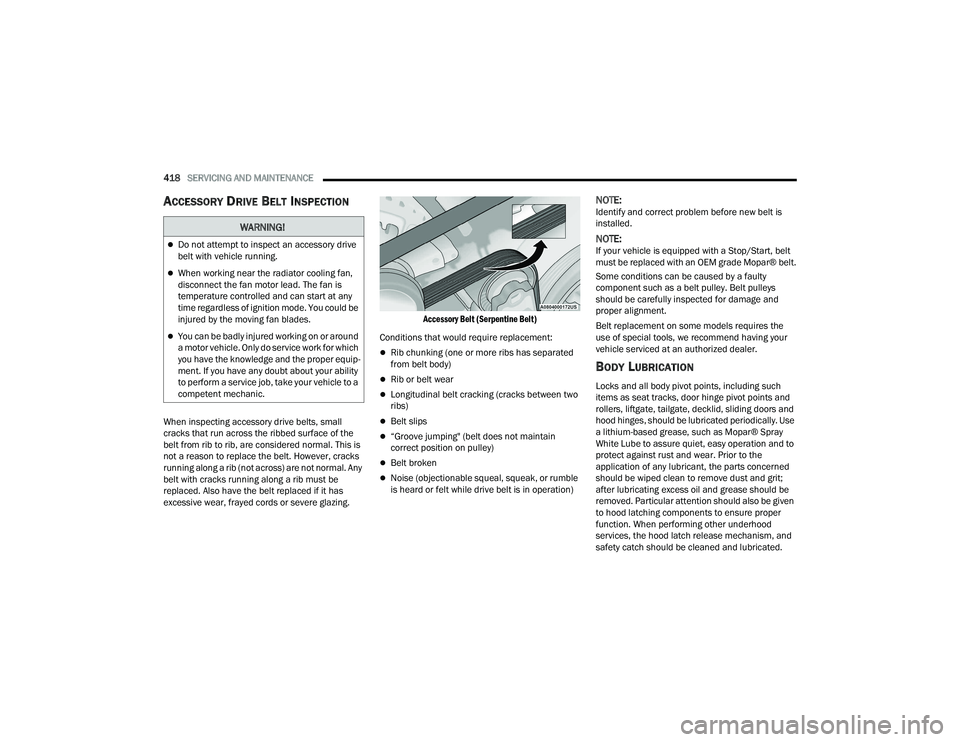
Accessory Belt (Serpentine Belt)
Conditions that would require replacement:
Rib chunking (one or more ribs has separated
from belt body)
Rib or belt wear
Longitudinal belt cracking (cracks between two
ribs)
Belt slips
“Groove jumping" (belt does not maintain
correct position on pulley)
Belt broken
Noise (objectionable squeal, squeak, or rumble
is heard or felt while drive belt is in operation)
NOTE:Identify and correct problem before new belt is
installed.
NOTE:If your vehicle is equipped with a Stop/Start, belt
must be replaced with an OEM grade Mopar® belt.
Some conditions can be caused by a faulty
component such as a belt pulley. Belt pulleys
should be carefully inspected for damage and
proper alignment.
Belt replacement on some models requires the
use of special tools, we recommend having your
vehicle serviced at an authorized dealer.
BODY LUBRICATION
Locks and all body pivot points, including such
items as seat tracks, door hinge pivot points and
rollers, liftgate, tailgate, decklid, sliding doors and
hood hinges, should be lubricated periodically. Use
a lithium-based grease, such as Mopar® Spray
White Lube to assure quiet, easy operation and to
protect against rust and wear. Prior to the
application of any lubricant, the parts concerned
should be wiped clean to remove dust and grit;
after lubricating excess oil and grease should be
removed. Particular attention should also be given
to hood latching components to ensure proper
function. When performing other underhood
services, the hood latch release mechanism, and
safety catch should be cleaned and lubricated.
WARNING!
Do not attempt to inspect an accessory drive
belt with vehicle running.
When working near the radiator cooling fan,
disconnect the fan motor lead. The fan is
temperature controlled and can start at any
time regardless of ignition mode. You could be
injured by the moving fan blades.
You can be badly injured working on or around
a motor vehicle. Only do service work for which
you have the knowledge and the proper equip -
ment. If you have any doubt about your ability
to perform a service job, take your vehicle to a
competent mechanic.
22_DT_OM_EN_USC_t.book Page 418
Page 423 of 496

SERVICING AND MAINTENANCE421
(Continued)
Under normal operating conditions, the catalytic
converter will not require maintenance. However, it
is important to keep the engine properly tuned to
assure proper catalyst operation and prevent
possible catalyst damage.
NOTE:Intentional tampering with emissions control
systems can result in civil penalties being
assessed against you.
In unusual situations involving grossly
malfunctioning engine operation, a scorching odor
may suggest severe and abnormal catalyst
overheating. If this occurs, stop the vehicle, turn off
the engine and allow it to cool. Service, including a
tune-up to manufacturer's specifications, should
be obtained immediately. To minimize the possibility of catalytic converter
damage:
Do not interrupt the ignition when the transmis
-
sion is in gear and the vehicle is in motion.
Do not try to start the vehicle by pushing or
towing the vehicle.
Do not idle the engine with any ignition compo -
nents disconnected or removed, such as when
diagnostic testing, or for prolonged periods
during very rough idle or malfunctioning oper -
ating conditions.
COOLING SYSTEM
Engine Coolant Checks
Check the engine coolant (antifreeze) protection
every 12 months (before the onset of freezing
weather, where applicable). If the engine coolant is
dirty or rusty in appearance, the system should be
drained, flushed and refilled with fresh coolant.
Check the front of the A/C condenser (if equipped)
or radiator for any accumulation of bugs, leaves,
etc. If dirty, clean by gently spraying water from a
garden hose vertically down the face of the A/C
condenser (if equipped) or the back of the radiator
core.
Check the engine cooling system hoses for brittle
rubber, cracking, tears, cuts and tightness of the
connection at the coolant recovery bottle and
radiator. Inspect the entire system for leaks.
DO NOT REMOVE THE COOLANT PRESSURE CAP
WHEN THE COOLING SYSTEM IS HOT.
Damage to the catalytic converter can result if
your vehicle is not kept in proper operating
condition. In the event of engine malfunction,
particularly involving engine misfire or other
apparent loss of performance, have your
vehicle serviced promptly. Continued opera -
tion of your vehicle with a severe malfunction
could cause the converter to overheat,
resulting in possible damage to the converter
and vehicle.
CAUTION!
WARNING!
You or others can be badly burned by hot
engine coolant (antifreeze) or steam from your
radiator. If you see or hear steam coming from
under the hood, do not open the hood until the
radiator has had time to cool. Never open a
cooling system pressure cap when the radi -
ator or coolant bottle is hot.
Keep hands, tools, clothing, and jewelry away
from the radiator cooling fan when the hood is
raised. The fan starts automatically and may
start at any time, whether the engine is
running or not.
When working near the radiator cooling fan,
disconnect the fan motor lead or turn the igni -
tion to the OFF mode. The fan is temperature
controlled and can start at any time the igni -
tion is in the ON mode.
WARNING!
8
22_DT_OM_EN_USC_t.book Page 421
Page 463 of 496

SERVICING AND MAINTENANCE461
TRACTION GRADES
The Traction grades, from highest to
lowest, are AA, A, B, and C. These grades
represent the tire's ability to stop on wet
pavement, as measured under
controlled conditions on specified
government test surfaces of asphalt and
concrete. A tire marked C may have poor
traction performance.
TEMPERATURE GRADES
The Temperature grades are A (the
highest), B, and C, representing the tire's
resistance to the generation of heat and
its ability to dissipate heat, when tested
under controlled conditions on a
specified indoor laboratory test wheel. Sustained high temperature can cause
the material of the tire to degenerate
and reduce tire life, and excessive
temperature can lead to sudden tire
failure. The grade C corresponds to a
level of performance, which all
passenger vehicle tires must meet
under the Federal Motor Vehicle Safety
Standard No. 109. Grades B and A
represent higher levels of performance
on the laboratory test wheel, than the
minimum required by law.
STORING THE VEHICLE
If you are storing your vehicle for more than three
weeks, we recommend that you take the following
steps to minimize the drain on your vehicle's
battery:
Disconnect the negative cable from battery.
Any time you store your vehicle or keep it out of
service (i.e., vacation) for two weeks or more,
run the air conditioning system at idle for about
five minutes in the fresh air and high blower
setting. This will ensure adequate system lubri-
cation to minimize the possibility of compressor
damage when the system is started again.
BODYWORK
PROTECTION FROM ATMOSPHERIC
A
GENTS
Vehicle body care requirements vary according to
geographic locations and usage. Chemicals that
make roads passable in snow and ice and those
that are sprayed on trees and road surfaces during
other seasons are highly corrosive to the metal in
your vehicle. Outside parking, which exposes your
vehicle to airborne contaminants, road surfaces on
which the vehicle is operated, extreme hot or cold
weather and other extreme conditions will have an
adverse effect on paint, metal trim, and underbody
protection.
WARNING!
The traction grade assigned to this tire is based
on straight-ahead braking traction tests, and
does not include acceleration, cornering,
hydroplaning, or peak traction characteristics.
WARNING!
The temperature grade for this tire is
established for a tire that is properly inflated and
not overloaded. Excessive speed, underinflation,
or excessive loading, either separately or in
combination, can cause heat buildup and
possible tire failure.
8
22_DT_OM_EN_USC_t.book Page 461
Page 484 of 496

482 Bed Divider
...................................................... 97Bed Step.......................................................... 90Bedliner......................................................... 463Belts, Seat..................................................... 368Blind Spot Monitoring.................................... 319Bluetooth Connecting To A Particular MobilePhone Or Audio Device After Pairing
..... 276Body Builders Guide........................................ 11Body Mechanism Lubrication........................ 418Bodywork....................................................... 461B-Pillar Location............................................. 448Brake Assist System...................................... 313Brake Control System.................................... 313Brake Fluid.......................................... 425, 476Brake System...................................... 425, 466Fluid Check............................................... 425Master Cylinder......................................... 425Parking...................................................... 150Warning Light............................................ 128Brake/Transmission Interlock....................... 154Bulb Replacement......................................... 438Bulbs, Light.......................................... 370, 438
C
Camera.......................................................... 199Camera, AUX.................................................. 203Camera, Rear................................................ 199Camera, Surround View................................. 200
Camera, Trailer 360...................................... 203Capacities, Fuel............................................ 472Caps, FillerOil (Engine)............................................... 403Radiator (Coolant Pressure)..................... 423Car Washes................................................... 462Carbon Monoxide Warning............................ 370Care And Maintenance................................. 461Cargo Light..............................................57, 135CD................................................................. 270Cellular Phone.............................................. 302Center High Mounted Stop Light................... 443Center Seat Storage Compartment.................. 70Charge Air Cooler.......................................... 424Chart, Tire Sizing........................................... 445Check Engine Light
(Malfunction Indicator Light)......................... 139Checking Your Vehicle For Safety................. 368Checks, Safety.............................................. 368Child Restraint.............................................. 354Child RestraintsBooster Seats........................................... 357Child Seat Installation..................... 363, 364How To Stow An unused ALR Seat Belt.... 362Infant And Child Restraints....................... 356Locating The LATCH Anchorages.............. 361Lower Anchors And Tethers ForChildren................................................ 359Older Children And Child Restraints......... 357Seating Positions...................................... 358
Clean Air Gasoline......................................... 468CleaningWheels...................................................... 457Climate Control................................................62Automatic....................................................62Manual........................................................65Cold Weather Operation................................ 145Compact Spare Tire...................................... 456Connected Services...................................... 282Connected Services FAQ............................... 297Connected Services Features....................... 286Connected Services, Getting Started............ 284Connected Services, Introduction................. 283Contract, Service........................................... 478Controls........................................................ 262Cooling Pressure Cap (Radiator Cap)............ 423Cooling System.................................... 130, 421Adding Coolant (Antifreeze)...................... 422Coolant Level..........................421, 423, 424Cooling Capacity....................................... 472Disposal Of Used Coolant......................... 423Drain, Flush, And Refill............................. 422Inspection........................................ 423, 424Points To Remember................................ 424Pressure Cap............................................ 423Radiator Cap............................................. 423Selection Of Coolant (Antifreeze)......................... 422, 472, 473Corrosion Protection..................................... 461
22_DT_OM_EN_USC_t.book Page 482