stop start RAM 1500 2023 User Guide
[x] Cancel search | Manufacturer: RAM, Model Year: 2023, Model line: 1500, Model: RAM 1500 2023Pages: 416, PDF Size: 20.59 MB
Page 72 of 416
70GETTING TO KNOW YOUR VEHICLE
Frequent exposure of items to the UV-C light can cause
early fading of the item’s colored surfaces.
For optimum effectiveness, the UV-C lights must be
free of fingerprints, moisture, and dust. Clean with a
lint-free cloth.
WINDOWS
POWER WINDOWS
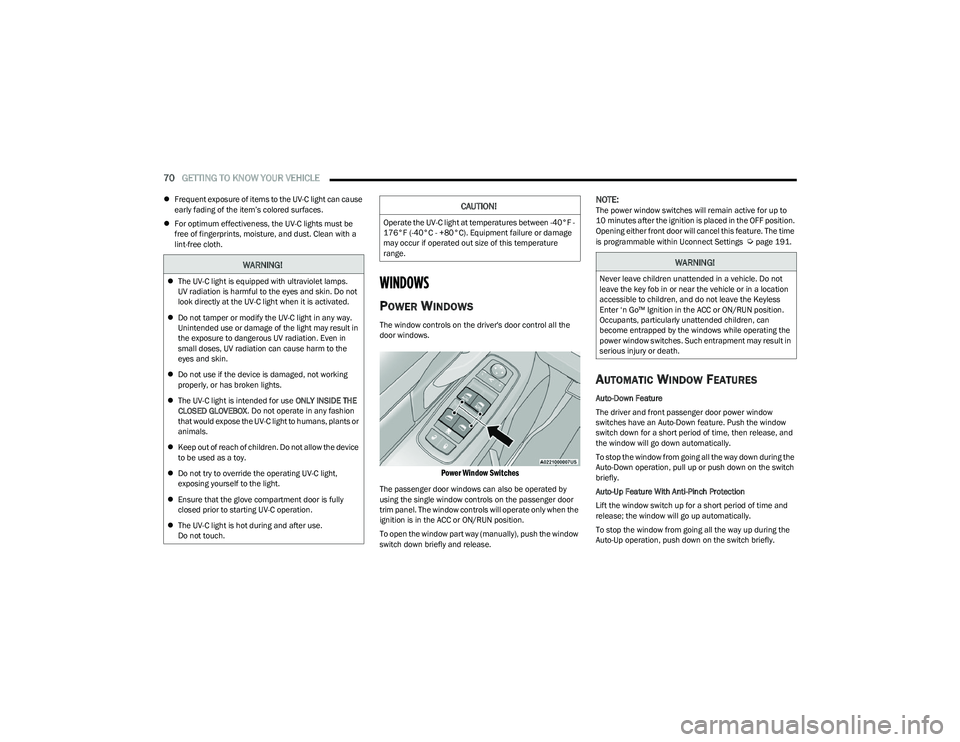
The window controls on the driver's door control all the
door windows.
Power Window Switches
The passenger door windows can also be operated by
using the single window controls on the passenger door
trim panel. The window controls will operate only when the
ignition is in the ACC or ON/RUN position.
To open the window part way (manually), push the window
switch down briefly and release.
NOTE:The power window switches will remain active for up to
10 minutes after the ignition is placed in the OFF position.
Opening either front door will cancel this feature. The time
is programmable within Uconnect Settings
Úpage 191.
AUTOMATIC WINDOW FEATURES
Auto-Down Feature
The driver and front passenger door power window
switches have an Auto-Down feature. Push the window
switch down for a short period of time, then release, and
the window will go down automatically.
To stop the window from going all the way down during the
Auto-Down operation, pull up or push down on the switch
briefly.
Auto-Up Feature With Anti-Pinch Protection
Lift the window switch up for a short period of time and
release; the window will go up automatically.
To stop the window from going all the way up during the
Auto-Up operation, push down on the switch briefly.
WARNING!
The UV-C light is equipped with ultraviolet lamps.
UV radiation is harmful to the eyes and skin. Do not
look directly at the UV-C light when it is activated.
Do not tamper or modify the UV-C light in any way.
Unintended use or damage of the light may result in
the exposure to dangerous UV radiation. Even in
small doses, UV radiation can cause harm to the
eyes and skin.
Do not use if the device is damaged, not working
properly, or has broken lights.
The UV-C light is intended for use ONLY INSIDE THE
CLOSED GLOVEBOX . Do not operate in any fashion
that would expose the UV-C light to humans, plants or
animals.
Keep out of reach of children. Do not allow the device
to be used as a toy.
Do not try to override the operating UV-C light,
exposing yourself to the light.
Ensure that the glove compartment door is fully
closed prior to starting UV-C operation.
The UV-C light is hot during and after use.
Do not touch.
CAUTION!
Operate the UV-C light at temperatures between -40°F -
176°F (-40°C - +80°C). Equipment failure or damage
may occur if operated out size of this temperature
range.
WARNING!
Never leave children unattended in a vehicle. Do not
leave the key fob in or near the vehicle or in a location
accessible to children, and do not leave the Keyless
Enter ‘n Go™ Ignition in the ACC or ON/RUN position.
Occupants, particularly unattended children, can
become entrapped by the windows while operating the
power window switches. Such entrapment may result in
serious injury or death.
23_DT_OM_EN_USC_t.book Page 70
Page 96 of 416
94GETTING TO KNOW YOUR INSTRUMENT PANEL
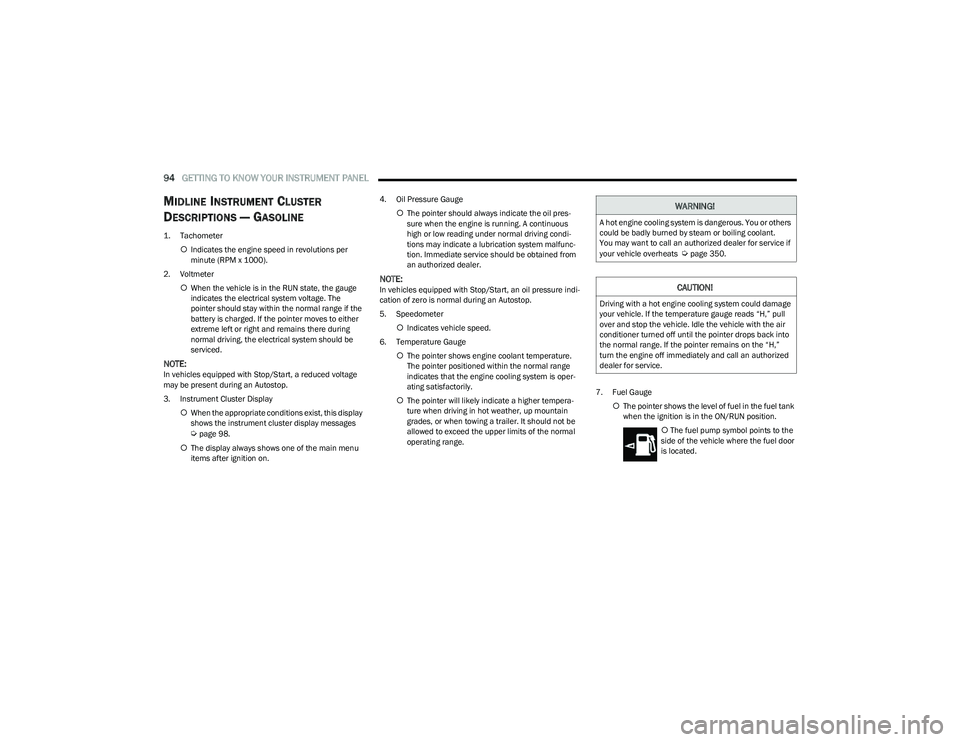
MIDLINE INSTRUMENT CLUSTER
D
ESCRIPTIONS — GASOLINE
1. Tachometer
Indicates the engine speed in revolutions per
minute (RPM x 1000).
2. Voltmeter When the vehicle is in the RUN state, the gauge
indicates the electrical system voltage. The
pointer should stay within the normal range if the
battery is charged. If the pointer moves to either
extreme left or right and remains there during
normal driving, the electrical system should be
serviced.
NOTE:In vehicles equipped with Stop/Start, a reduced voltage
may be present during an Autostop.
3. Instrument Cluster Display
When the appropriate conditions exist, this display
shows the instrument cluster display messages
Úpage 98.
The display always shows one of the main menu
items after ignition on. 4. Oil Pressure Gauge
The pointer should always indicate the oil pres -
sure when the engine is running. A continuous
high or low reading under normal driving condi -
tions may indicate a lubrication system malfunc -
tion. Immediate service should be obtained from
an authorized dealer.
NOTE:In vehicles equipped with Stop/Start, an oil pressure indi -
cation of zero is normal during an Autostop.
5. Speedometer
Indicates vehicle speed.
6. Temperature Gauge The pointer shows engine coolant temperature.
The pointer positioned within the normal range
indicates that the engine cooling system is oper -
ating satisfactorily.
The pointer will likely indicate a higher tempera -
ture when driving in hot weather, up mountain
grades, or when towing a trailer. It should not be
allowed to exceed the upper limits of the normal
operating range. 7. Fuel Gauge
The pointer shows the level of fuel in the fuel tank
when the ignition is in the ON/RUN position.
The fuel pump symbol points to the
side of the vehicle where the fuel door
is located.
WARNING!
A hot engine cooling system is dangerous. You or others
could be badly burned by steam or boiling coolant.
You may want to call an authorized dealer for service if
your vehicle overheats
Úpage 350.
CAUTION!
Driving with a hot engine cooling system could damage
your vehicle. If the temperature gauge reads “H,” pull
over and stop the vehicle. Idle the vehicle with the air
conditioner turned off until the pointer drops back into
the normal range. If the pointer remains on the “H,”
turn the engine off immediately and call an authorized
dealer for service.
23_DT_OM_EN_USC_t.book Page 94
Page 103 of 416

GETTING TO KNOW YOUR INSTRUMENT PANEL101
OIL LIFE RESET
Use this QR code to access your digital
experience.
Your vehicle is equipped with an
engine oil change indicator system.
The “Oil Change Required” message
will display in the instrument cluster
display for five seconds after a single
chime has sounded, to indicate the
next scheduled oil change interval. The engine oil change
indicator system is duty cycle based, which means the
engine oil change interval may fluctuate, dependent upon
your personal driving style.
Unless reset, this message will continue to display each
time you place the ignition in the ON/RUN position. To turn
off the message temporarily, push and release the OK or
arrow buttons. To reset the oil change indicator system
(after performing the scheduled maintenance), refer to
the following procedure:
1. Without pressing the brake pedal, push the ENGINE START/STOP button and place the ignition in the
ON/RUN position (do not start the engine).
2. Push and release the down arrow button to scroll
downward through the main menu to “Vehicle Info.”
3. Push and release the right arrow button to access
the ”Oil Life” screen. 4. Push and hold the
OK button to reset oil life. If
conditions are met, the gauge and numeric display
will update to show 100%. If conditions are not met a
pop-up message of “To reset oil life engine must be
off with ignition in run” will be displayed (for five
seconds), and the user will remain at the Oil Life
screen.
5. Push and release the up or down arrow button
to exit the submenu screen.
NOTE:If the indicator message illuminates when you start the
vehicle, the oil change indicator system did not reset. If
necessary, repeat this procedure.
DISPLAY MENU ITEMS
Push and release the up or down arrow button until
the desired selectable menu icon is highlighted in the
instrument cluster display.
Speedometer
Push and release the up or down arrow button
until the speedometer menu item is highlighted in the
instrument cluster display. Push and release the OK
button to cycle the display between mph and km/h.
Driver Assist — If Equipped
The Driver Assist menu displays the status of the ACC and
LaneSense systems.
Push and release the up or down arrow button
until the Driver Assist menu is displayed in the instrument
cluster display. Adaptive Cruise Control (ACC) Feature
The instrument cluster display displays the current ACC
system settings. The information displayed depends on
ACC system status.
Push the ACC on/off button (located on the steering
wheel) until one of the following displays in the instrument
cluster display:
Adaptive Cruise Control Off
When ACC is deactivated, the display will read “Adaptive
Cruise Control Off.”
Adaptive Cruise Control Ready
When ACC is activated but the vehicle speed setting has
not been selected, the display will read “Adaptive Cruise
Control Ready.”
Push the SET + or the SET- button (located on the steering
wheel) and the following will display in the instrument
cluster display:
ACC SET
When ACC is set, the set speed will display in the
instrument cluster
Úpage 145.
The ACC screen may display once again if any ACC activity
occurs, which may include any of the following:
Distance Setting Change
System Cancel
Driver Override
System Off
ACC Proximity Warning
ACC Unavailable Warning
3
23_DT_OM_EN_USC_t.book Page 101
Page 104 of 416
102GETTING TO KNOW YOUR INSTRUMENT PANEL
LaneSense — If Equipped
The instrument cluster display displays the current
LaneSense system settings. The information displayed
depends on LaneSense system status and the conditions
that need to be met
Úpage 116.
Vehicle Info
Push and release the up or down arrow button until
the Vehicle Info menu icon is displayed in the instrument
cluster display. Push and release the left or right
arrow button to scroll through the information submenus
and push and release the OK button to select or reset the
resettable submenus.
BASE AND MIDLINE CLUSTER
Tire Pressure Monitor System
Air Suspension — If Equipped
Coolant Temperature — If Equipped
Trans Temperature
Oil Temperature
Oil Pressure — If Equipped
Oil Life
Battery Voltage — If Equipped
Gauge Summary — If Equipped
Coolant Temp
Trans Temp
Oil Temp
Oil Pressure
Engine Hours — If Equipped
PREMIUM CLUSTER
Fuel Economy
Average
Current
Range to Empty
Gauge Summary
Coolant Temperature — If Equipped
Battery Voltage — If Equipped
Trans Temperature
Oil Summary
Oil Temperature
Oil Life
Oil Pressure — If Equipped
Tire Pressure Monitor System
Stop/Start — If Equipped
Air Suspension Status — If Equipped
Engine Hours — If Equipped
Off Road – If Equipped
Push and release the up or down arrow button
until the Off Road menu icon is displayed in the instrument
cluster display. Push and release the left or right
arrow button to scroll through the information submenus.
Vehicle Dynamics
Front Wheel Angle: displays the graphical and
numerical value of calculated average front wheel
angle from the steering wheel orientation.
Transfer Case Lock Status: displays “Lock”
graphic only during 4WD High, 4WD Auto, 4WD
Low status.
Axle Lock And Sway Bar Status (If Equipped):
displays front and rear or rear only axle locker
graphic, and sway bar connection graphic with text
message (connected or disconnected).
Pitch And Roll
Displays the pitch and roll of the vehicle in the
graphic with the angle number on the screen.
NOTE:When vehicle speed becomes too high to display the pitch
and roll, “- -” will display in place of the numbers, and the
graphic will be grayed out. A message indicating the
necessary speed for the feature to become available will
also display.
Fuel Economy
Push and release the up or down arrow button until
the Fuel Economy menu item is highlighted in the
instrument cluster display. Push and hold the OK button to
reset Average Fuel Economy.
Current Fuel Economy
Average Fuel Economy
Range To Empty
23_DT_OM_EN_USC_t.book Page 102
Page 105 of 416
GETTING TO KNOW YOUR INSTRUMENT PANEL103
Trip Info
Push and release the up or down arrow button until
the Trip menu item is highlighted in the instrument cluster
display. Push and release the right or left arrow
button to enter the submenus of Trip A and Trip B. The Trip
A or Trip B information will display the following:
Distance
Average Fuel Economy
Elapsed Time
Push and hold OK button to reset all information.
Navigation — If Equipped
Push and release the up or down arrow button until
the Navigation display title is highlighted in the instrument
cluster display, “Hold OK to Start Route” will display when
no active route is set. “Hold OK to Cancel Route” will
display when active route is set. Use the left or right
arrow button to zoom in or out on the display
Úpage 191.
Stop/Start — If Equipped
Push and release the up or down arrow button until
the Stop/Start icon/title is highlighted in the instrument
cluster display. The screen will display the Stop/Start
status.
Trailer Tow — If Equipped
Push and release the up or down arrow button until
the Trailer Tow menu item is highlighted in the instrument
cluster display. Push and release the right or left
arrow button to cycle through the following trailer tow
information:
Trip (trailer specific) Distance: Push and hold the OK
button to reset the distance.
Integrated Trailer Brake Module (ITBM):
Braking Output
Trailer Type
ITBM Gain
Trailer Tire Pressure Monitoring: The Instrument
Cluster Display will display the Trailer Tire Pressure for
a connected trailer with sensors that match the active
trailer profile. When a low tire is present, the low tire
value will be displayed in red, and the affected low tire
will have a red glow. “Trailer Tire Low“ will be displayed
on the center bottom of the Instrument Cluster Display
screen.
Trailer Light Check — If Equipped: Push and hold the OK
button to begin the Trailer Light Test sequence
Úpage 182.
Audio
Push and release the up or down arrow button until
the Audio Menu icon/title is highlighted in the instrument
cluster display. This menu will display the audio source
information, including the Song name, Artist name, and
audio source with an accompanying graphic.
Phone Call Status
When a call is incoming, a Phone Call Status pop-up will
display on the screen. The pop-up will remain until the
phone is answered or ignored.
NOTE:The call status will temporarily replace the previous media
source information displayed on the screen. When the
pop-up is no longer displayed, the display will return to the
last used screen.
Stored Messages
Push and release the up or down arrow button until
the Messages Menu item is highlighted. This feature
shows the number of stored warning messages Example:
“Oil Change Required”. Push and release the right or
left arrow button to cycle through stored messages.
3
23_DT_OM_EN_USC_t.book Page 103
Page 110 of 416

108GETTING TO KNOW YOUR INSTRUMENT PANEL
RED WARNING LIGHTS
Air Bag Warning Light
This warning light will illuminate to indicate a
fault with the air bag, and will turn on for four to
eight seconds as a bulb check when the
ignition is placed in the ON/RUN or ACC/ON/
RUN position. This light will illuminate with a single chime
when a fault with the air bag has been detected, it will stay
on until the fault is cleared. If the light is either not on
during startup, stays on, or turns on while driving, have the
system inspected at an authorized dealer as soon as
possible.
Brake Warning Light
This warning light monitors various brake
functions, including brake fluid level and
parking brake application. If the brake light
turns on it may indicate that the parking brake
is applied, that the brake fluid level is low, or that there is
a problem with the Anti-Lock Brake System reservoir.
If the light remains on when the parking brake has been
disengaged, and the fluid level is at the full mark on the
master cylinder reservoir, it indicates a possible brake
hydraulic system malfunction or that a problem with the
Brake Booster has been detected by the Anti-Lock Brake
System (ABS) / Electronic Stability Control (ESC) system.
In this case, the light will remain on until the condition has
been corrected. If the problem is related to the brake
booster, the ABS pump will run when applying the brake,
and a brake pedal pulsation may be felt during each stop. The dual brake system provides a reserve braking capacity
in the event of a failure to a portion of the hydraulic
system. A leak in either half of the dual brake system is
indicated by the Brake Warning Light, which will turn on
when the brake fluid level in the master cylinder has
dropped below a specified level.
The light will remain on until the cause is corrected.
NOTE:The light may flash momentarily during sharp cornering
maneuvers, which change fluid level conditions. The
vehicle should have service performed, and the brake
fluid level checked.
If brake failure is indicated, immediate repair is necessary.
Vehicles equipped with the Anti-Lock Brake System (ABS)
are also equipped with Electronic Brake Force Distribution
(EBD). In the event of an EBD failure, the Brake Warning
Light will turn on along with the ABS Light. Immediate
repair to the ABS system is required.
Operation of the Brake Warning Light can be checked by
turning the ignition switch from the OFF position to the
ON/RUN position. The light should illuminate for
approximately two seconds.
The light should then turn off unless the parking brake is
applied or a brake fault is detected. If the light does not
illuminate, have the light inspected by an authorized
dealer.
The light also will turn on when the parking brake is
applied with the ignition switch in the ON/RUN position.
NOTE:This light shows only that the parking brake is applied.
It does not show the degree of brake application.
Battery Charge Warning Light
This warning light will illuminate when the
battery is not charging properly. If it stays on
while the engine is running, there may be a
malfunction with the charging system. Contact
an authorized dealer as soon as possible.
This indicates a possible problem with the electrical
system or a related component.
Door Open Warning Light
This indicator will illuminate when a door is
ajar/open and not fully closed.
NOTE:If the vehicle is moving there will also be a single chime.
WARNING!
Driving a vehicle with the red brake light on is
dangerous. Part of the brake system may have failed. It
will take longer to stop the vehicle. You could have a
collision. Have the vehicle checked immediately.
23_DT_OM_EN_USC_t.book Page 108
Page 111 of 416
GETTING TO KNOW YOUR INSTRUMENT PANEL109
Electric Power Steering (EPS) Fault
Warning Light
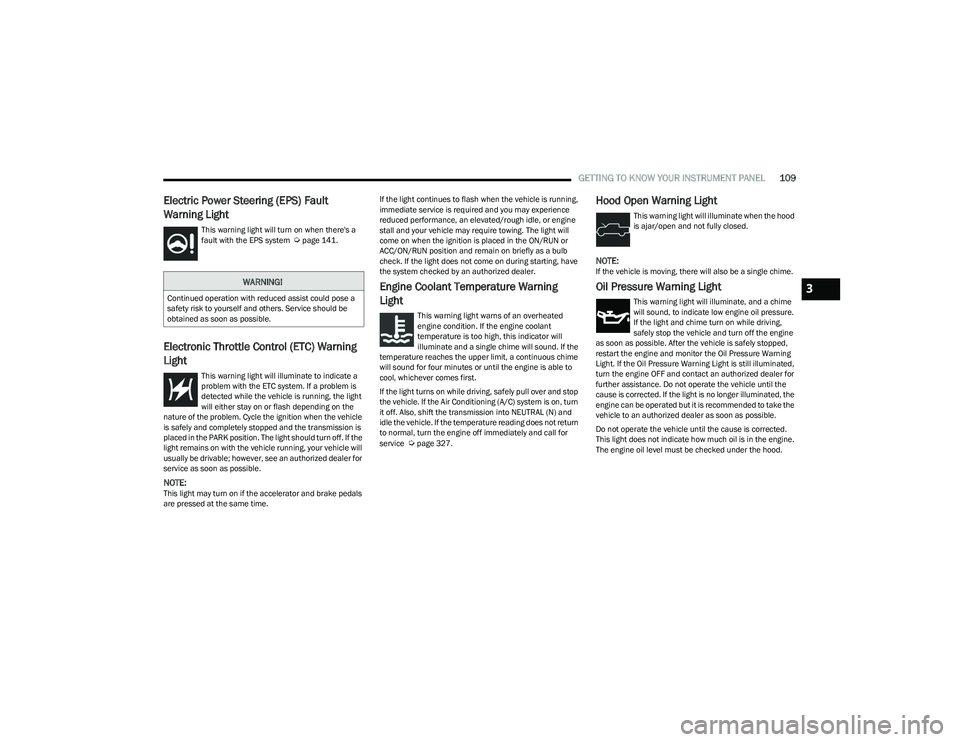
This warning light will turn on when there's a
fault with the EPS system Úpage 141.
Electronic Throttle Control (ETC) Warning
Light
This warning light will illuminate to indicate a
problem with the ETC system. If a problem is
detected while the vehicle is running, the light
will either stay on or flash depending on the
nature of the problem. Cycle the ignition when the vehicle
is safely and completely stopped and the transmission is
placed in the PARK position. The light should turn off. If the
light remains on with the vehicle running, your vehicle will
usually be drivable; however, see an authorized dealer for
service as soon as possible.
NOTE:This light may turn on if the accelerator and brake pedals
are pressed at the same time. If the light continues to flash when the vehicle is running,
immediate service is required and you may experience
reduced performance, an elevated/rough idle, or engine
stall and your vehicle may require towing. The light will
come on when the ignition is placed in the ON/RUN or
ACC/ON/RUN position and remain on briefly as a bulb
check. If the light does not come on during starting, have
the system checked by an authorized dealer.
Engine Coolant Temperature Warning
Light
This warning light warns of an overheated
engine condition. If the engine coolant
temperature is too high, this indicator will
illuminate and a single chime will sound. If the
temperature reaches the upper limit, a continuous chime
will sound for four minutes or until the engine is able to
cool, whichever comes first.
If the light turns on while driving, safely pull over and stop
the vehicle. If the Air Conditioning (A/C) system is on, turn
it off. Also, shift the transmission into NEUTRAL (N) and
idle the vehicle. If the temperature reading does not return
to normal, turn the engine off immediately and call for
service
Úpage 327.
Hood Open Warning Light
This warning light will illuminate when the hood
is ajar/open and not fully closed.
NOTE:If the vehicle is moving, there will also be a single chime.
Oil Pressure Warning Light
This warning light will illuminate, and a chime
will sound, to indicate low engine oil pressure.
If the light and chime turn on while driving,
safely stop the vehicle and turn off the engine
as soon as possible. After the vehicle is safely stopped,
restart the engine and monitor the Oil Pressure Warning
Light. If the Oil Pressure Warning Light is still illuminated,
turn the engine OFF and contact an authorized dealer for
further assistance. Do not operate the vehicle until the
cause is corrected. If the light is no longer illuminated, the
engine can be operated but it is recommended to take the
vehicle to an authorized dealer as soon as possible.
Do not operate the vehicle until the cause is corrected.
This light does not indicate how much oil is in the engine.
The engine oil level must be checked under the hood.
WARNING!
Continued operation with reduced assist could pose a
safety risk to yourself and others. Service should be
obtained as soon as possible.3
23_DT_OM_EN_USC_t.book Page 109
Page 113 of 416

GETTING TO KNOW YOUR INSTRUMENT PANEL111
Electric Park Brake Warning Light
This warning light will illuminate to indicate the
Electric Park Brake is not functioning properly
and service is required. Contact an authorized
dealer.
Electronic Stability Control (ESC) Active
Warning Light — If Equipped
This warning light will indicate when the ESC
system is Active. The ESC Indicator Light in the
instrument cluster will come on when the
ignition is placed in the ON/RUN or ACC/ON/
RUN position, and when ESC is activated. It should go out
with the engine running. If the ESC Indicator Light comes
on continuously with the engine running, a malfunction
has been detected in the ESC system. If this warning light
remains on after several ignition cycles, and the vehicle
has been driven several miles (kilometers) at speeds
greater than 30 mph (48 km/h), see an authorized dealer
as soon as possible to have the problem diagnosed and
corrected.
The ESC OFF Indicator Light and the ESC Indicator Light
come on momentarily each time the ignition is placed
in the ON/RUN or ACC/ON/RUN position.
The ESC system will make buzzing or clicking sounds
when it is active. This is normal; the sounds will stop
when ESC becomes inactive.
This light will come on when the vehicle is in an ESC
event.
Electronic Stability Control (ESC) OFF
Warning Light — If Equipped
This warning light indicates the ESC is off.
Each time the ignition is turned to ON/RUN or
ACC/ON/RUN, the ESC system will be on, even
if it was turned off previously.
Service LaneSense Warning Light —
If Equipped
This warning light will illuminate when the
LaneSense system is not operating and
requires service. Please contact an authorized
dealer.
Low Fuel Warning Light
When the fuel level is less than a quarter tank,
and the Distance to Empty is less than
50 miles, this light will turn on and remain on
until fuel is added.
A single warning chime will sound with Low Fuel Warning.
Low Washer Fluid Warning Light —
If Equipped
This warning light will illuminate when the
windshield washer fluid is low.
Engine Check/Malfunction Indicator
Warning Light (MIL)
The MIL is a part of an Onboard Diagnostic
System called OBD II that monitors engine and
automatic transmission control systems. This
warning light will illuminate when the ignition is
in the ON/RUN position before engine start. If the bulb
does not come on when turning the ignition switch from
OFF to ON/RUN, have the condition checked promptly.
Certain conditions, such as a loose or missing gas cap,
poor quality fuel, etc., may illuminate the light after engine
start. The vehicle should be serviced if the light stays on
through several typical driving styles. In most situations,
the vehicle will drive normally and will not require towing.
When the engine is running, the MIL may flash to alert
serious conditions that could lead to immediate loss of
power or severe catalytic converter damage. The vehicle
should be serviced by an authorized dealer as soon as
possible if this occurs.
WARNING!
A malfunctioning catalytic converter can reach higher
temperatures than in normal operating conditions. This
can cause a fire if you drive slowly or park over
flammable substances such as dry plants, wood,
cardboard, etc. This could result in death or serious
injury to the driver, occupants or others.
3
23_DT_OM_EN_USC_t.book Page 111
Page 114 of 416
112GETTING TO KNOW YOUR INSTRUMENT PANEL
Rear Axle Locker Fault Warning Light —
If Equipped
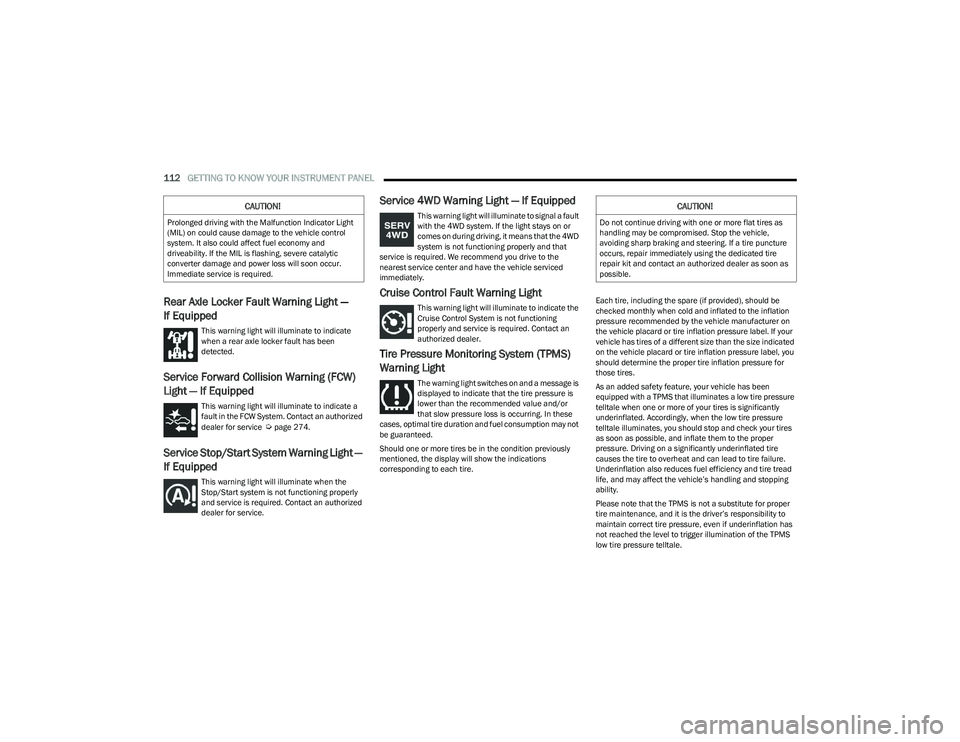
This warning light will illuminate to indicate
when a rear axle locker fault has been
detected.
Service Forward Collision Warning (FCW)
Light — If Equipped
This warning light will illuminate to indicate a
fault in the FCW System. Contact an authorized
dealer for service
Úpage 274.
Service Stop/Start System Warning Light —
If Equipped
This warning light will illuminate when the
Stop/Start system is not functioning properly
and service is required. Contact an authorized
dealer for service.
Service 4WD Warning Light — If Equipped
This warning light will illuminate to signal a fault
with the 4WD system. If the light stays on or
comes on during driving, it means that the 4WD
system is not functioning properly and that
service is required. We recommend you drive to the
nearest service center and have the vehicle serviced
immediately.
Cruise Control Fault Warning Light
This warning light will illuminate to indicate the
Cruise Control System is not functioning
properly and service is required. Contact an
authorized dealer.
Tire Pressure Monitoring System (TPMS)
Warning Light
The warning light switches on and a message is
displayed to indicate that the tire pressure is
lower than the recommended value and/or
that slow pressure loss is occurring. In these
cases, optimal tire duration and fuel consumption may not
be guaranteed.
Should one or more tires be in the condition previously
mentioned, the display will show the indications
corresponding to each tire. Each tire, including the spare (if provided), should be
checked monthly when cold and inflated to the inflation
pressure recommended by the vehicle manufacturer on
the vehicle placard or tire inflation pressure label. If your
vehicle has tires of a different size than the size indicated
on the vehicle placard or tire inflation pressure label, you
should determine the proper tire inflation pressure for
those tires.
As an added safety feature, your vehicle has been
equipped with a TPMS that illuminates a low tire pressure
telltale when one or more of your tires is significantly
underinflated. Accordingly, when the low tire pressure
telltale illuminates, you should stop and check your tires
as soon as possible, and inflate them to the proper
pressure. Driving on a significantly underinflated tire
causes the tire to overheat and can lead to tire failure.
Underinflation also reduces fuel efficiency and tire tread
life, and may affect the vehicle’s handling and stopping
ability.
Please note that the TPMS is not a substitute for proper
tire maintenance, and it is the driver’s responsibility to
maintain correct tire pressure, even if underinflation has
not reached the level to trigger illumination of the TPMS
low tire pressure telltale.
CAUTION!
Prolonged driving with the Malfunction Indicator Light
(MIL) on could cause damage to the vehicle control
system. It also could affect fuel economy and
driveability. If the MIL is flashing, severe catalytic
converter damage and power loss will soon occur.
Immediate service is required.
CAUTION!
Do not continue driving with one or more flat tires as
handling may be compromised. Stop the vehicle,
avoiding sharp braking and steering. If a tire puncture
occurs, repair immediately using the dedicated tire
repair kit and contact an authorized dealer as soon as
possible.
23_DT_OM_EN_USC_t.book Page 112
Page 117 of 416
GETTING TO KNOW YOUR INSTRUMENT PANEL115
LaneSense Indicator Light — If Equipped
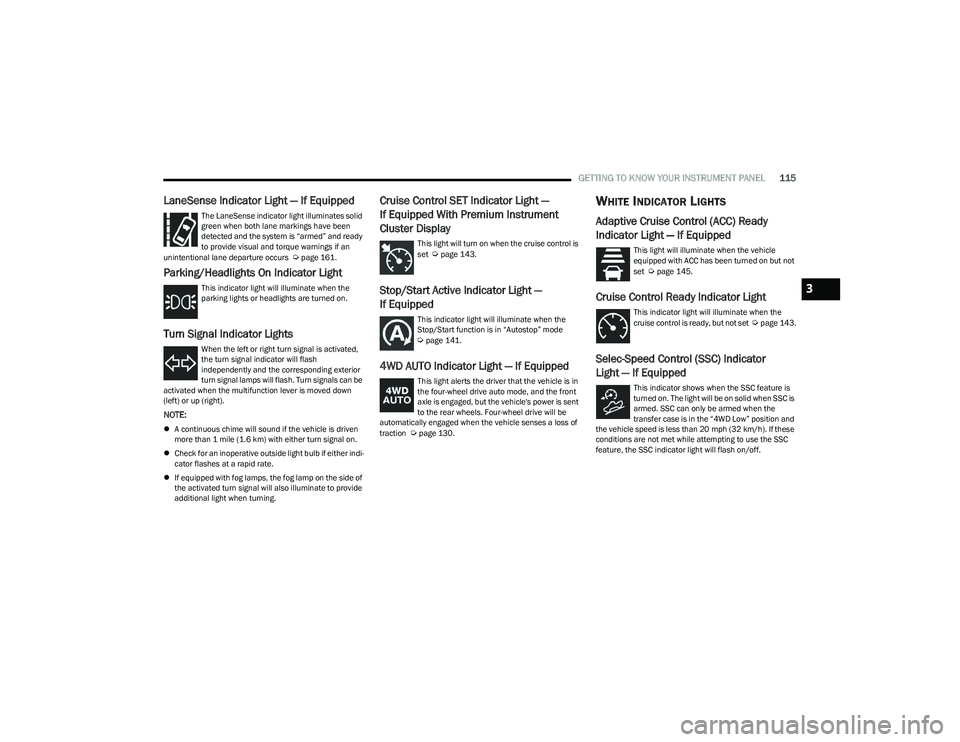
The LaneSense indicator light illuminates solid
green when both lane markings have been
detected and the system is “armed” and ready
to provide visual and torque warnings if an
unintentional lane departure occurs
Úpage 161.
Parking/Headlights On Indicator Light
This indicator light will illuminate when the
parking lights or headlights are turned on.
Turn Signal Indicator Lights
When the left or right turn signal is activated,
the turn signal indicator will flash
independently and the corresponding exterior
turn signal lamps will flash. Turn signals can be
activated when the multifunction lever is moved down
(left) or up (right).
NOTE:
A continuous chime will sound if the vehicle is driven
more than 1 mile (1.6 km) with either turn signal on.
Check for an inoperative outside light bulb if either indi -
cator flashes at a rapid rate.
If equipped with fog lamps, the fog lamp on the side of
the activated turn signal will also illuminate to provide
additional light when turning.
Cruise Control SET Indicator Light —
If Equipped With Premium Instrument
Cluster Display
This light will turn on when the cruise control is
set Úpage 143.
Stop/Start Active Indicator Light —
If Equipped
This indicator light will illuminate when the
Stop/Start function is in “Autostop” mode
Úpage 141.
4WD AUTO Indicator Light — If Equipped
This light alerts the driver that the vehicle is in
the four-wheel drive auto mode, and the front
axle is engaged, but the vehicle's power is sent
to the rear wheels. Four-wheel drive will be
automatically engaged when the vehicle senses a loss of
traction
Úpage 130.
WHITE INDICATOR LIGHTS
Adaptive Cruise Control (ACC) Ready
Indicator Light — If Equipped
This light will illuminate when the vehicle
equipped with ACC has been turned on but not
set
Úpage 145.
Cruise Control Ready Indicator Light
This indicator light will illuminate when the
cruise control is ready, but not set Úpage 143.
Selec-Speed Control (SSC) Indicator
Light — If Equipped
This indicator shows when the SSC feature is
turned on. The light will be on solid when SSC is
armed. SSC can only be armed when the
transfer case is in the “4WD Low” position and
the vehicle speed is less than 20 mph (32 km/h). If these conditions are not met while attempting to use the SSC
feature, the SSC indicator light will flash on/off.
3
23_DT_OM_EN_USC_t.book Page 115