reset Ram 2500 2011 Owner's Manual
[x] Cancel search | Manufacturer: RAM, Model Year: 2011, Model line: 2500, Model: Ram 2500 2011Pages: 622
Page 37 of 622
To stop the window from going all the way down during
the Auto-Down operation, pull up on the switch briefly.
To open the window part way, press to the first detent
and release it when you want the window to stop.
Auto-Up Feature with Anti-Pinch Protection
(4-Door Models Driver’s and Front Passenger Door
Only) — If Equipped
Lift the window switch to the second detent, release, and
the window will go up automatically.
To stop the window from going all the way up during the
Auto Up operation, push down on the switch briefly.
To close the window part way, lift the window switch to
the first detent and release when you want the window to
stop.
NOTE:
•If the window runs into any obstacle during the
auto-closure, it will reverse direction and then go backdown. Remove the obstacle and use the window
switch again to close the window. Any impact due to
rough road conditions may trigger the auto reverse
function unexpectedly during auto closure. If this
happens, pull the switch lightly to the first detent and
hold to close the window manually.
•If the Auto-Up function is lost, reset the Auto-Up
function by running the window all the way up and
then hold the switch in the full up position for two
seconds.
WARNING!
There is no anti-pinch protection when the window
is almost closed. Be sure to clear all objects from the
window before closing.
36 THINGS TO KNOW BEFORE STARTING YOUR VEHICLE
Page 38 of 622
Auto-Up Reset
It may be necessary at some point in time to reactivate the
Auto-up/Auto-down feature. To do so, perform the
following steps:
1. Pull the window switch up to close the window
completely and continue to hold the switch up for an
additional two seconds after the window is closed.
2. Push the window switch down firmly to the second
detent to open the window completely and continue to
hold the switch down for an additional two seconds after
the window is fully open.
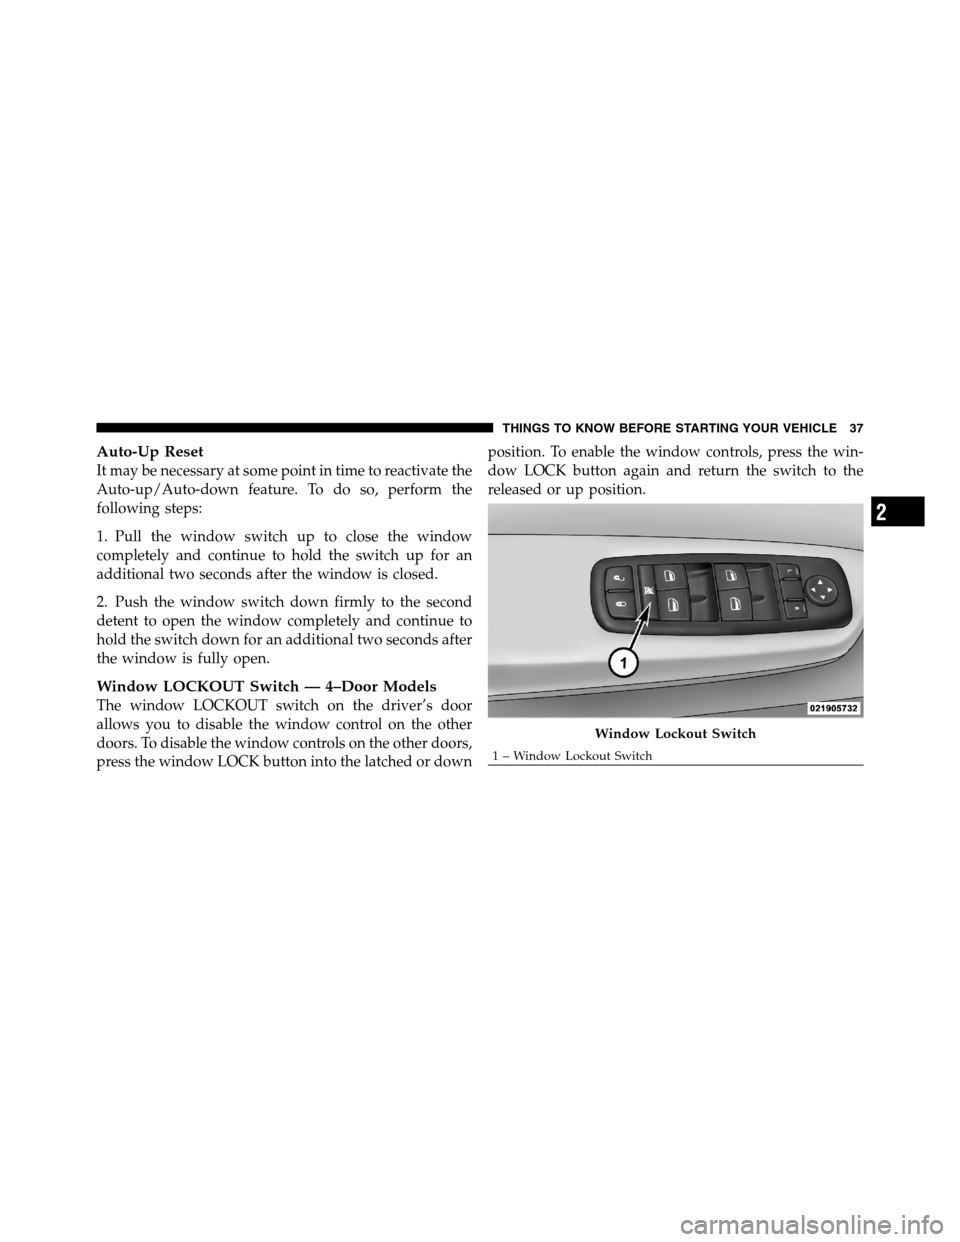
Window LOCKOUT Switch — 4–Door Models
The window LOCKOUT switch on the driver’s door
allows you to disable the window control on the other
doors. To disable the window controls on the other doors,
press the window LOCK button into the latched or downposition. To enable the window controls, press the win-
dow LOCK button again and return the switch to the
released or up position.
Window Lockout Switch
1 – Window Lockout Switch
2
THINGS TO KNOW BEFORE STARTING YOUR VEHICLE 37
Page 117 of 622
DRIVER MEMORY SEAT — IF EQUIPPED
Driver memory seats allow the driver to recall settings
for the adjustable pedals, mirrors, seats and the radio
presets using the key fob.
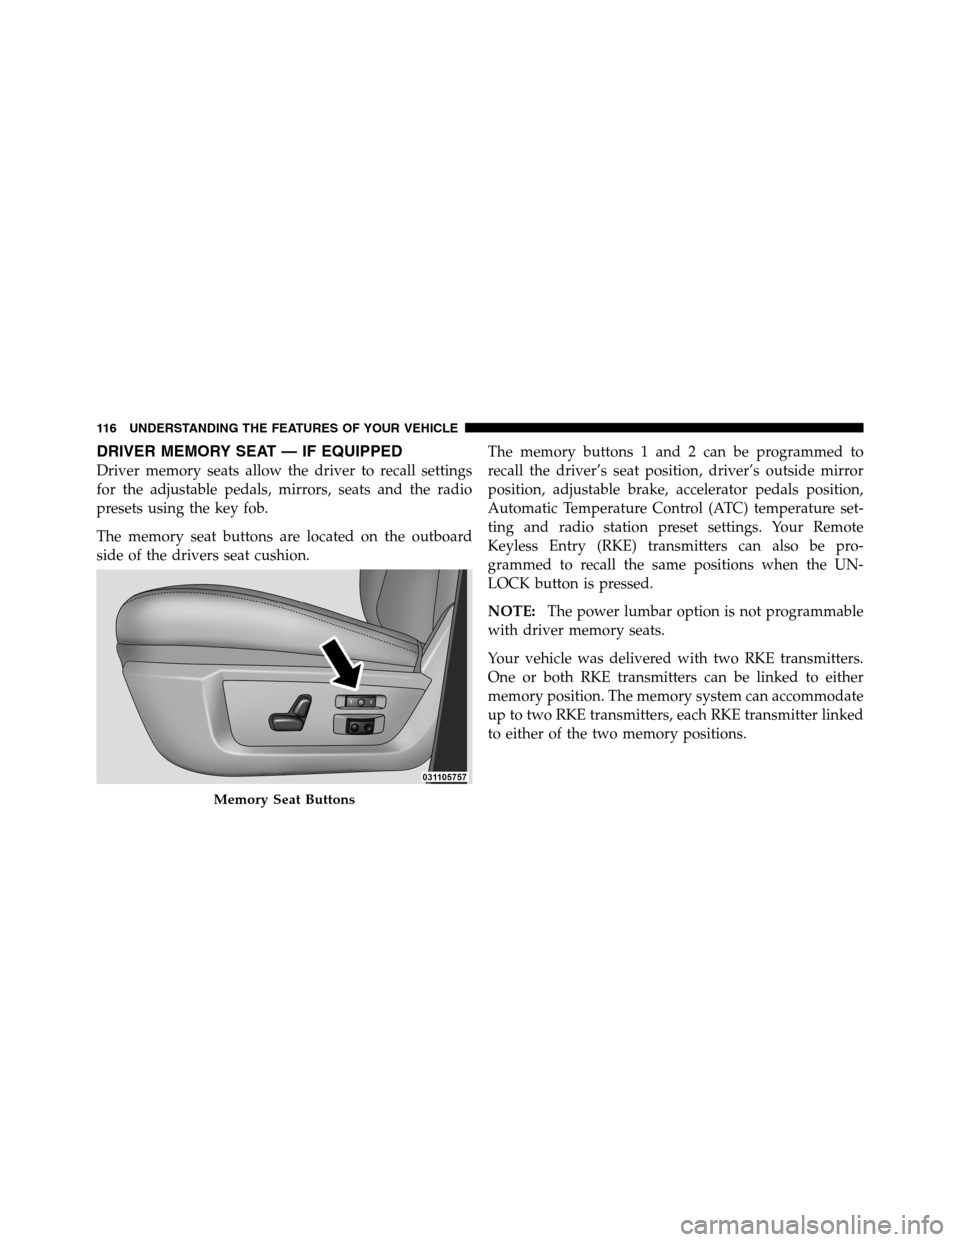
The memory seat buttons are located on the outboard
side of the drivers seat cushion.The memory buttons 1 and 2 can be programmed to
recall the driver’s seat position, driver’s outside mirror
position, adjustable brake, accelerator pedals position,
Automatic Temperature Control (ATC) temperature set-
ting and radio station preset settings. Your Remote
Keyless Entry (RKE) transmitters can also be pro-
grammed to recall the same positions when the UN-
LOCK button is pressed.
NOTE:The power lumbar option is not programmable
with driver memory seats.
Your vehicle was delivered with two RKE transmitters.
One or both RKE transmitters can be linked to either
memory position. The memory system can accommodate
up to two RKE transmitters, each RKE transmitter linked
to either of the two memory positions.
Memory Seat Buttons
116 UNDERSTANDING THE FEATURES OF YOUR VEHICLE
Page 118 of 622

Setting Memory Positions and Linking RKE
Transmitter to Memory
NOTE:Each time the S (SET) button and a numbered
button (1 or 2) are pressed, you erase the memory settings
for that button and store new settings.
1. Turn the vehicle key to the ON/RUN position.
2. Adjust the driver’s seat, recliner, and both sideview
mirrors to the desired positions.
NOTE:Not all motors may be moved at one time. Refer
to “Seats/Eight-Way Power Seat” in this section for
further information.
3. Adjust the brake and accelerator pedals to the desired
positions.
4. Turn on the radio and set the radio station presets (up
to 10 AM and 10 FM stations can be set).5. Adjust the Automatic Temperature Control (ATC)
while the ATC is in Auto mode.
6. Press and release the SET button located on the
driver’s seat.
7. Within five seconds, press and release MEMORY
button 1 or 2 on the driver’s seat. The next steps must be
performed within 10 seconds if you desire to also use a
RKE transmitter to recall memory positions.
8. Turn the ignition OFF and remove the key.
9. Press and release the LOCK button on one of the RKE
transmitters.
10. Repeat the above steps to set the next memory
position using the other numbered memory button or to
link another RKE transmitter to memory.
3
UNDERSTANDING THE FEATURES OF YOUR VEHICLE 117
Page 120 of 622

To disable another RKE transmitter linked to either
memory position, repeat Steps 1-3 for each RKE trans-
mitter.
NOTE:The capability to link RKE transmitters to
memory is enabled when delivered from the factory. The
capability to link RKE transmitters to memory can be
disabled (or later re-enabled) by an authorized dealer. For
vehicles equipped with the Electronic vehicle Informa-
tion Center (EVIC), refer to “Electronic Vehicle Informa-
tion Center (EVIC)/Customer-Programmable Features”
in “Understanding Your Instrument Panel” for further
information.
Self-Limiting Control
The memory system includes a self-limiting control for
full travel positioning of power seat and adjustable pedal
movement (all directions). This self-limiting control may,
however, develop an unintended movement limitation if
an obstruction is encountered sometime during usage.One example of such an occurrence may include a box or
package obstructing the full rearward movement of the
driver’s seat. Once the obstruction is removed, the self-
limiting control may store a new maximum position. the
self-limiting control may be reset by reaching the new
stored position, then press and release MEMORY button
1 or 2. Continued seat travel beyond the new stored
position will indicate the self-limiting control has been
reset.
Driver Easy Exit and Easy Entry Control
This additional feature provides automatic driver’s seat
positioning which will enhance driver mobility into and
out of the vehicle. The seat cushion will move rearward
approximately 2.5 in (60 mm) when the key is removed
from the ignition switch. The seat will move forward
approximately 2.5 in (60 mm) when the key is placed into
the ignition and turned out of the LOCK position. Each
stored memory setting will have an associated Easy Exit
and Easy Entry position. The Easy Exit and Easy Entry
3
UNDERSTANDING THE FEATURES OF YOUR VEHICLE 119
Page 136 of 622

ELECTRONIC SPEED CONTROL — IF EQUIPPED
When engaged, Electronic Speed Control takes over the
accelerator operation at speeds greater than 25 mph
(40 km/h). The Electronic Speed Control lever is located
on the right side of the steering wheel.NOTE:In order to ensure proper operation, the Elec-
tronic Speed Control System has been designed to shut
down if multiple Speed Control functions are operated at
the same time. If this occurs, the Electronic Speed Control
System can be reactivated by pushing the Electronic
Speed Control ON/OFF button and resetting the desired
vehicle set speed.
To Activate
Push the ON/OFF button (located in the end of the lever)
once and the cruise indicator light (located in the mes-
sage window of the cluster) will illuminate showing that
the Electronic Speed Control system is on. To turn the
Electronic Speed Control system off, push the ON/OFF
button a second time and both the Electronic Speed
Control system and indicator will turn off.
Electronic Speed Control Lever
3
UNDERSTANDING THE FEATURES OF YOUR VEHICLE 135
Page 165 of 622

For vehicles equipped with an optional floor shifter.
POWER INVERTER — IF EQUIPPED
A 115 Volt (150 Watts Maximum) outlet is located on the
center stack of the instrument panel, to the right of theradio. This outlet can power cellular phones, electronics
and other low power devices requiring power up to 150
Watts. Certain high-end video games, such as Playsta-
tion3 and XBox360 will exceed this power limit, as will
most power tools.
The power inverter is designed with built-in overload
protection. If the power rating of 150 Watts is exceeded,
the power inverter will automatically shut down. Once
the electrical device has been removed from the outlet the
inverter should automatically reset. If the power rating
exceeds approximately 170 Watts, the power inverter
may have to be reset manually. To reset the inverter
manually press the power inverter button OFF and ON.
To avoid overloading the circuit, check the power ratings
on electrical devices prior to using the inverter.
Optional Floor Shifter
1 — Cigar Lighter
2 — Ash Receiver 164 UNDERSTANDING THE FEATURES OF YOUR VEHICLE
Page 211 of 622
NOTE:
•The “ESC Off Indicator Light” and the “ESC
Activation/Malfunction Indicator Light” come on mo-
mentarily each time the ignition switch is turned to
ON/RUN.
•Each time the ignition is turned to ON/RUN, the ESC
system will be ON even if it was turned off previously.
•The ESC system will make buzzing or clicking sounds
when it is active. This is normal; the sounds will stop
when ESC becomes inactive following the maneuver
that caused the ESC activation.
13. Vehicle Security Light — If Equipped
This light will flash at a fast rate for approxi-
mately 15 seconds, when the vehicle security
alarm is arming, and then will flash slowly
until the vehicle is disarmed.14. Oil Pressure Gauge
The pointer should always indicate some oil pressure
when the engine is running. A continuous high or low
reading under normal driving conditions may indicate a
lubrication system malfunction. Immediate service
should be obtained from an authorized dealer.
15. Odometer/Trip Odometer Button/ECO (Fuel Saver
Indicator) Button — If Equipped
Press this button to toggle between the odometer display,
trip odometer display or the “ECO” display. Holding the
button in resets the trip odometer reading when in trip
mode.
If equipped with Electronic Vehicle Information Center
(EVIC) the “ECO” message will be displayed in the EVIC
display in the instrument cluster. Refer to ”Electronic
Vehicle Information Center (EVIC) — If Equipped” for
further information.
210 UNDERSTANDING YOUR INSTRUMENT PANEL
Page 212 of 622
16. Odometer Display / Electronic Vehicle Information
Center (EVIC) Display Area — If Equipped
Odometer Display
The odometer shows the total distance the vehicle has
been driven. U.S. Federal regulations require that upon
transfer of vehicle ownership, the seller certify to the
purchaser the correct mileage that the vehicle has been
driven. If your odometer needs to be repaired or serviced,
the repair technician should leave the odometer reading
the same as it was before the repair or service. If s/he
cannot do so, then the odometer must be set at zero, and
a sticker must be placed in the door jamb stating what the
mileage was before the repair or service. It is a good idea
for you to make a record of the odometer reading before
the repair/service, so that you can be sure that it is
properly reset, or that the door jamb sticker is accurate if
the odometer must be reset at zero.The two trip odometers show individual trip mileage. To
switch from odometer to trip odometers, press and
release the TRIP ODOMETER button.
To reset a trip odometer, display the desired trip odom-
eter to be reset then push and hold the button for
approximately two seconds until the display resets.
Vehicle Odometer Messages
When the appropriate conditions exist, the following
messages will display in the odometer:
ECO...................Fuel Saver Indicator Off
ECO-ON................Fuel Saver Indicator On
Lo tirE...................... LowTirePressure
noFUSE..........................Fuse Fault
CHAngE OIL............... OilChange Required
LoWASH.................... LowWasher Fluid
4
UNDERSTANDING YOUR INSTRUMENT PANEL 211
Page 214 of 622
Lo tirE
When the appropriate condition exists, the odometer
display will toggle between Lo and tirE for three cycles.
noFUSE
If the vehicle diagnostic system determines that the
Ignition Off Draw (IOD) fuse is improperly installed, or
damaged, a “noFUSE” message will display in the odom-
eter display area. For further information on fuses and
fuse locations refer to “Fuses” in “Maintaining Your
Vehicle”.
CHAngE OIL
Your vehicle is equipped with an engine oil change
indicator system. TheCHAngE OILmessage will flash in
the instrument cluster odometer for approximately
12 seconds after a single chime has sounded to indicate
the next scheduled oil change interval. The engine oil
change indicator system is duty cycle-based, whichmeans the engine oil change interval may fluctuate
dependent upon your personal driving style.
Unless reset, this message will continue to display each
time you turn the ignition switch to the ON/RUN
position. To turn off the message temporarily, press and
release the Trip Odometer button on the instrument
cluster. To reset the oil change indicator system (after
performing the scheduled maintenance), refer to the
following procedure:
1. Turn the ignition switch to the ON/RUN position
(Do not start the engine).
2. Fully depress the accelerator pedal slowly three
times within 10 seconds.
3. Turn the ignition switch to the OFF/LOCK position.
NOTE:If the indicator message illuminates when you
start the vehicle, the oil change indicator system did not
reset. If necessary repeat this procedure.
4
UNDERSTANDING YOUR INSTRUMENT PANEL 213