ECO mode Ram 2500 2017 Service Manual
[x] Cancel search | Manufacturer: RAM, Model Year: 2017, Model line: 2500, Model: Ram 2500 2017Pages: 734, PDF Size: 7.3 MB
Page 402 of 734
During cold temperatures, transmission operation may be
modified depending on engine and transmission tempera-
ture as well as vehicle speed. This feature improves warm
up time of the engine and transmission to achieve maxi-
mum efficiency. Engagement of both the torque converter
clutch and the top overdrive gear are inhibited until the
transmission fluid is warm (refer to the “Note” under
“Torque Converter Clutch” in this section). During ex-
tremely cold temperatures (-16°F [-27°C] or below), opera-
tion may briefly be limited to first and direct gears only.
Normal operation will resume once the transmission tem-
perature has risen to a suitable level.
Transmission Limp Home Mode
Transmission function is monitored electronically for ab-
normal conditions. If a condition is detected that could
result in transmission damage, Transmission Limp Home
Mode is activated. In this mode, the transmission remains
in direct gear regardless of which forward gear is selected.
PARK, REVERSE, and NEUTRAL will continue to operate.
The Malfunction Indicator Light (MIL) may be illuminated.
Limp Home Mode allows the vehicle to be driven to an
authorized dealer for service without damaging the trans-
mission.In the event of a momentary problem, the transmission can
be reset to regain all forward gears by performing the
following steps:
1. Stop the vehicle.
2. Shift the transmission into PARK.
3. Turn the ignition to the OFF position.
4. Wait approximately 10 seconds.
5. Restart the engine.
6. Shift into the desired gear range. If the problem is no
longer detected, the transmission will return to normal
operation.
NOTE: Even if the transmission can be reset, we recom-
mend that you visit your authorized dealer at your earliest
possible convenience. Your authorized dealer has diagnos-
tic equipment to determine if the problem could recur.
If the transmission cannot be reset, authorized dealer
service is required.
400 STARTING AND OPERATING
Page 405 of 734
Overdrive Operation
The automatic transmission includes an electronically con-
trolled Overdrive (fourth and fifth gears). The transmission
will automatically shift into Overdrive if the following
conditions are present:
•The gear selector is in the DRIVE position,
• The transmission fluid has reached an adequate tem-
perature,
• The engine coolant (antifreeze) has reached an adequate
temperature,
• Vehicle speed is sufficiently high,
• The TOW/HAUL switch has not been activated, and
• The driver is not heavily pressing the accelerator.
When To Use TOW/HAUL Mode
When driving in hilly areas, towing a trailer, carrying a
heavy load, etc., and frequent transmission shifting occurs,
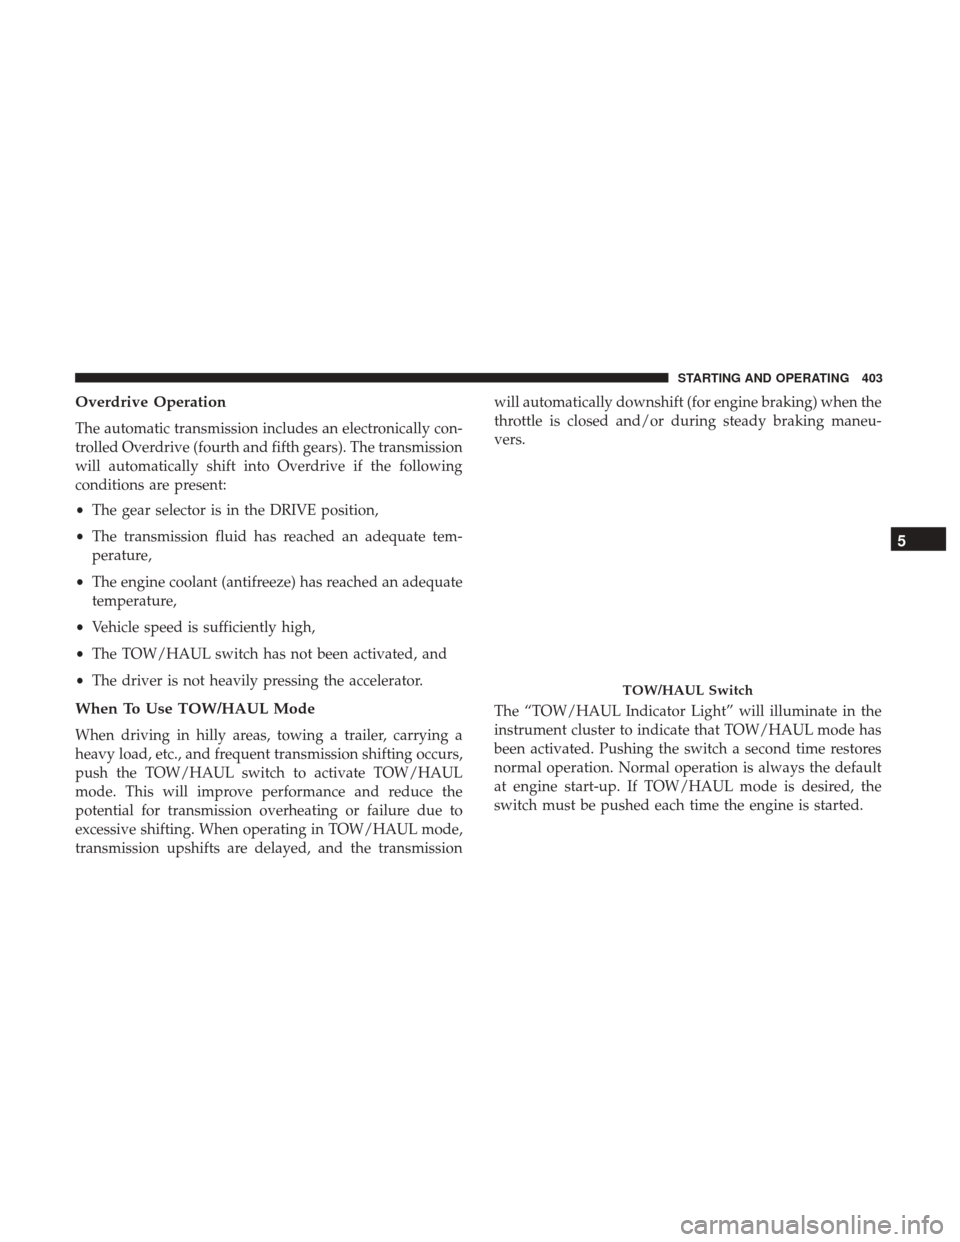
push the TOW/HAUL switch to activate TOW/HAUL
mode. This will improve performance and reduce the
potential for transmission overheating or failure due to
excessive shifting. When operating in TOW/HAUL mode,
transmission upshifts are delayed, and the transmission will automatically downshift (for engine braking) when the
throttle is closed and/or during steady braking maneu-
vers.
The “TOW/HAUL Indicator Light” will illuminate in the
instrument cluster to indicate that TOW/HAUL mode has
been activated. Pushing the switch a second time restores
normal operation. Normal operation is always the default
at engine start-up. If TOW/HAUL mode is desired, the
switch must be pushed each time the engine is started.
TOW/HAUL Switch
5
STARTING AND OPERATING 403
Page 411 of 734
gear range will improve performance and extend transmis-
sion life by reducing excessive shifting and heat buildup.
If the transmission temperature exceeds normal operating
limits, the powertrain controller will modify the transmis-
sion shift schedule and expand the range of torque con-
verter clutch engagement. This is done to prevent trans-
mission damage due to overheating.
If the transmission becomes extremely hot or is in danger
of overheating, the “Transmission Temperature Warning
Light” may illuminate and the transmission may operate
differently until the transmission cools down.
NOTE:Use caution when operating a heavily loaded
vehicle at low speeds (such as towing a trailer up a steep
grade, or in stop-and-go traffic) during hot weather. In
these conditions, torque converter slip can impose a sig-
nificant additional heat load on the cooling system. Down-
shifting the transmission to the lowest possible gear (when
climbing a grade), or shifting to NEUTRAL (when stopped
in heavy traffic) can help to reduce this excess heat
generation. During cold temperatures, transmission operation may be
modified depending on engine and transmission tempera-
ture as well as vehicle speed. This feature improves warm
up time of the engine and transmission to achieve maxi-
mum efficiency. Engagement of both the torque converter
clutch and the top overdrive gear are inhibited until the
transmission fluid is warm (refer to the “Note” under
“Torque Converter Clutch” in this section). During ex-
tremely cold temperatures (-16°F [-27°C] or below), opera-
tion may briefly be limited to first and direct gears only.
Normal operation will resume once the transmission tem-
perature has risen to a suitable level.
Transmission Limp Home Mode
Transmission function is monitored electronically for ab-
normal conditions. If a condition is detected that could
result in transmission damage, Transmission Limp Home
Mode is activated. In this mode, the transmission remains
in fourth gear regardless of which forward gear is selected.
PARK, REVERSE, and NEUTRAL will continue to operate.
The Malfunction Indicator Light (MIL) may be illuminated.
Limp Home Mode allows the vehicle to be driven to an
authorized dealer for service without damaging the trans-
mission.
5
STARTING AND OPERATING 409
Page 412 of 734
In the event of a momentary problem, the transmission can
be reset to regain all forward gears by performing the
following steps:
1. Stop the vehicle.
2. Shift the transmission into PARK.
3. Turn the ignition to the OFF position.
4. Wait approximately 10 seconds.
5. Restart the engine.
6. Shift into the desired gear range. If the problem is nolonger detected, the transmission will return to normal
operation.
NOTE: Even if the transmission can be reset, we recom-
mend that you visit your authorized dealer at your earliest
possible convenience. Your authorized dealer has diagnos-
tic equipment to determine if the problem could recur.
If the transmission cannot be reset, authorized dealer
service is required.Electronic Range Select (ERS) Operation
The Electronic Range Select (ERS) shift control allows the
driver to limit the highest available gear when the trans-
mission is in DRIVE. For example, if you set the transmis-
sion gear limit to 4 (fourth gear), the transmission will not
shift above fourth gear, but will shift through the lower
gears normally.
You can switch between DRIVE and ERS mode at any
vehicle speed. When the gear selector is in the DRIVE
position, the transmission will operate automatically, shift-
ing between all available gears. Tapping the ERS (-) switch
will activate ERS mode, display the current gear in the
instrument cluster, and set that gear as the top available
gear. Once in ERS mode, tapping (-) or (+) will change the
top available gear.
410 STARTING AND OPERATING
Page 414 of 734
Overdrive Operation
The automatic transmission includes an electronically con-
trolled Overdrive (fifth and sixth gears). The transmission
will automatically shift into Overdrive if the following
conditions are present:
•The gear selector is in the DRIVE position.
• The transmission fluid has reached an adequate tem-
perature.
• The engine coolant has reached an adequate tempera-
ture.
• Vehicle speed is sufficiently high.
• The TOW/HAUL switch has not been activated.
• The driver is not heavily pressing the accelerator.
When To Use TOW/HAUL Mode
When driving in hilly areas, towing a trailer, carrying a
heavy load, etc., and frequent transmission shifting occurs,
push the TOW/HAUL switch to activate TOW/HAUL
mode. This will improve performance and reduce the
potential for transmission overheating or failure due to
excessive shifting. When operating in TOW/HAUL mode,
transmission upshifts are delayed, and the transmission will automatically downshift (for engine braking) when the
throttle is closed and/or during steady braking maneu-
vers.
The “TOW/HAUL Indicator Light” will illuminate in the
instrument cluster to indicate that TOW/HAUL mode has
been activated. Pushing the switch a second time restores
normal operation. Normal operation is always the default
at engine start-up. If TOW/HAUL mode is desired, the
switch must be pushed each time the engine is started.
TOW/HAUL Switch
412 STARTING AND OPERATING
Page 425 of 734
4WD LOW
Four-Wheel Drive Low Range — This range provides low
speed four-wheel drive. It maximizes torque to the front
driveshaft, forcing the front and rear wheels to rotate at the
same speed. This range provides additional traction and
maximum pulling power for loose, slippery road surfaces
only. Do not exceed 25 mph (40 km/h).
NEUTRAL (N)
Neutral — This range disengages both the front and rear
driveshafts from the powertrain. To be used for flat towing
behind another vehicle. Refer to “Recreational Towing” in
“Starting And Operating” for further information.
This electronically shifted transfer case is designed to be
driven in the two-wheel drive position (2WD) or four-
wheel drive position (4WD AUTO) for normal street and
highway conditions on dry hard surfaced roads). Driving
the vehicle in 2WD will have greater fuel economy benefits
as the front axle is not engaged in 2WD.
For variable driving conditions, the 4WD AUTO mode can
be used. In this mode, the front axle is engaged, but the
vehicle’s power is sent to the rear wheels. Four-wheel drive
will be automatically engaged when the vehicle senses aloss of traction. Because the front axle is engaged, this
mode will result in lower fuel economy than the 2WD
mode.
When additional traction is required, the transfer case 4WD
LOCK and 4WD LOW positions can be used to maximize
torque to the front driveshaft, forcing the front and rear
wheels to rotate at the same speed. This is accomplished by
rotating the 4WD Control Switch to the desired position.
Refer to “Shifting Procedure” in this section for specific
shifting instructions.
The 4WD LOCK and 4WD LOW positions are designed for
loose, slippery road surfaces only. Driving in the 4WD
LOCK and 4WD LOW positions on dry hard surfaced
roads may cause increased tire wear and damage to the
driveline components.
NOTE:
The transfer case NEUTRAL button is located on
the lower left hand corner of the 4WD Control Switch. The
transfer case NEUTRAL position is to be used for recre-
ational towing only. Refer to “Recreational Towing” in
“Starting And Operating” for further information.
5
STARTING AND OPERATING 423
Page 430 of 734
For additional information on the appropriate use of each
transfer case mode position, see the information below:
2WD
Rear-Wheel Drive High Range — This range is for normal
street and highway driving on dry hard surfaced roads.
4WD LOCK
Four-Wheel Drive Lock High Range — This range maxi-
mizes torque to the front driveshaft, forcing the front and
rear wheels to rotate at the same speed. Additional traction
for loose, slippery road surfaces only.
4WD LOW
Four-Wheel Drive Low Range — This range provides low
speed four-wheel drive. It maximizes torque to the front
driveshaft, forcing the front and rear wheels to rotate at the
same speed. This range provides additional traction and
maximum pulling power for loose, slippery road surfaces
only. Do not exceed 25 mph (40 km/h).
NEUTRAL (N)
Neutral — This range disengages both the front and rear
driveshafts from the powertrain. To be used for flat towing
behind another vehicle. Refer to “Recreational Towing” in
“Starting And Operating” for further information.This electronically shifted transfer case is designed to be
driven in the two–wheel drive position (2WD) for normal
street and highway conditions on dry hard surfaced roads).
Driving the vehicle in 2WD will have greater fuel economy
benefits as the front axle is not engaged in 2WD.
When additional traction is required, the transfer case 4WD
LOCK and 4WD LOW positions can be used to maximize
torque to the front driveshaft, forcing the front and rear
wheels to rotate at the same speed. This is accomplished by
pushing the desired position on the 4WD control switch.
Refer to “Shifting Procedure” in this section for specific
shifting instructions.
The 4WD LOCK and 4WD LOW positions are designed for
loose, slippery road surfaces only. Driving in the 4WD
LOCK and 4WD LOW positions on dry hard surfaced
roads may cause increased tire wear and damage to the
driveline components.
NOTE:
The transfer case NEUTRAL button is located in
the center of the 4WD Control Switch and is pushed by
using a ballpoint pen or similar object. The transfer case
NEUTRAL position is to be used for recreational towing
only. Refer to “Recreational Towing” in “Starting And
Operating” for further information.
428 STARTING AND OPERATING
Page 435 of 734
For additional information on the appropriate use of each
transfer case mode position, see the information below:
2WD
Rear-Wheel Drive High Range — This range is for normal
street and highway driving on dry hard surfaced roads.
4WD AUTO
Four-Wheel Drive Auto High Range — This range sends
power to the front wheels. The four–wheel drive system
will be automatically engaged when the vehicle senses a
loss of traction. Additional traction for varying road con-
ditions.
4WD LOCK
Four-Wheel Drive Lock High Range — This range maxi-
mizes torque to the front driveshaft, forcing the front and
rear wheels to rotate at the same speed. Additional traction
for loose, slippery road surfaces only.
4WD LOW
Four-Wheel Drive Low Range — This range provides low
speed four-wheel drive. It maximizes torque to the front
driveshaft, forcing the front and rear wheels to rotate at thesame speed. This range provides additional traction and
maximum pulling power for loose, slippery road surfaces
only. Do not exceed 25 mph (40 km/h).
NEUTRAL (N)
Neutral — This range disengages both the front and rear
driveshafts from the powertrain. To be used for flat towing
behind another vehicle. Refer to “Recreational Towing” in
“Starting And Operating” for further information.
This electronically shifted transfer case is designed to be
driven in the two–wheel drive position (2WD) or four-
wheel drive position (4WD AUTO) for normal street and
highway conditions on dry hard surfaced roads). Driving
the vehicle in 2WD will have greater fuel economy benefits
as the front axle is not engaged in 2WD.
For variable driving conditions, the 4WD AUTO mode can
be used. In this mode, the front axle is engaged, but the
vehicle’s power is sent to the rear wheels. Four-wheel drive
will be automatically engaged when the vehicle senses a
loss of traction. Because the front axle is engaged, this
mode will result in lower fuel economy than the 2WD
mode.
5
STARTING AND OPERATING 433
Page 440 of 734

AIR SUSPENSION SYSTEM (1500 MODELS) —
IF EQUIPPED
Description
The air suspension system provides full time load leveling
capability along with the benefit of being able to adjust
vehicle height by the push of a button.
1 — Up Button
2 — Down Button
3 — Entry/Exit Mode Indicator (Customer selectable)
4 — Normal Ride Height Indicator (Customer selectable)
5 — Off-Road 1 Indicator (Customer selectable)
6 — Off-Road 2 Indicator (Customer selectable)
NOTE:The vehicle will automatically enter Aero Mode
when the vehicle speed remains between 62 mph (100 km/h)
and 66 mph (106 km/h) for greater than 20 seconds or if the
vehicle speed exceeds 66 mph (106 km/h).
• Normal Ride Height (NRH) – This is the standard
position of the suspension and is meant for normal
driving.
• Off-Road 1 (OR1) (Raises the vehicle approximately 1
in [26 mm]) – This position should be the primary
position for all off-road driving until Off Road 2 (OR2) is
needed. A smoother and more comfortable ride will
result. To enter OR1, push the “Up” button once from
the NRH position while the vehicle speed is below
35 mph (56 km/h). When in the OR1 position, if the
vehicle speed remains between 40 mph (64 km/h) and
50 mph (80 km/h) for greater than 20 seconds or if the
vehicle speed exceeds 50 mph (80 km/h), the vehicle
will be automatically lowered to NRH. Off-Road 1 may
not be available due to vehicle payload, an instrument
cluster message will be displayed when this occurs.
Refer to “Instrument Cluster Display” in “Understand-
ing Your Instrument Panel” for further information.
Air Suspension Switch
438 STARTING AND OPERATING
Page 441 of 734
![Ram 2500 2017 Service Manual •Off-Road 2 (OR2) (Raises the vehicle approximately
2 in [51 mm]) –
This position is intended for off-roading
use only where maximum ground clearance is required.
To enter OR2, push the “Up” b Ram 2500 2017 Service Manual •Off-Road 2 (OR2) (Raises the vehicle approximately
2 in [51 mm]) –
This position is intended for off-roading
use only where maximum ground clearance is required.
To enter OR2, push the “Up” b](/img/34/12560/w960_12560-440.png)
•Off-Road 2 (OR2) (Raises the vehicle approximately
2 in [51 mm]) –
This position is intended for off-roading
use only where maximum ground clearance is required.
To enter OR2, push the “Up” button twice from the NRH
position or once from the OR1 position while vehicle
speed is below 20 mph (32 km/h). While in OR2, if the
vehicle speed exceeds 25 mph (40 km/h) the vehicle
height will be automatically lowered to OR1. Off-Road 2
may not be available due to vehicle payload, an instru-
ment cluster message will be displayed when this occurs.
Refer to “Instrument Cluster Display” in “Understanding
Your Instrument Panel” for further information.
CAUTION!
If the vehicle is in OFFROAD1 or OFFROAD2 setting,
be aware of your surroundings, you may not have the
clearance required for certain areas and vehicle dam-
age may occur.
• Aero Mode (Lowers the vehicle approximately .6 in
[15 mm]) –
This position provides improved aerodynam-
ics by lowering the vehicle. The vehicle will automatically
enter Aero Mode when the vehicle speed remains between
62 mph (100 km/h) and 66 mph (106 km/h) for greater
than 20 seconds or if the vehicle speed exceeds 66 mph (106 km/h). The vehicle will return to NRH from Aero
Mode if the vehicle speed remains between 30 mph
(48 km/h) and 35 mph (56 km/h) for greater than 20 sec-
onds or if the vehicle speed falls below 30 mph (48 km/h).
NOTE:
Automatic Aero Mode may be disabled through
vehicle settings in the instrument cluster display when
equipped with Uconnect 3.0, or your Uconnect Radio when
equipped with Uconnect 5.0, 8.4A, or 8.4AN. Refer to
“Instrument Cluster Display” in “Understanding Your
Instrument Panel” or “Uconnect Settings” in “Understand-
ing Your Instrument Panel” for further information.
• Entry/Exit Mode (Lowers the vehicle approximately
2 in [51 mm]) – This position lowers the vehicle for
easier passenger entry and exit as well as lowering the
rear of the vehicle for easier loading and unloading of
cargo. To enter Entry/Exit Mode, push the “Down”
button once from the NRH while the vehicle speed is
below 33 mph (53 km/h). Once the vehicle speed goes
below 15 mph (24 km/h) the vehicle height will begin to
lower. If the vehicle speed remains between 15 mph
(24 km/h) and 25 mph (40 km/h) for greater than
60 seconds, or the vehicle speed exceeds 25 mph
(40 km/h) the Entry/Exit change will be cancelled. To
return to Normal Height Mode, push the “Up” button
5
STARTING AND OPERATING 439