instrument panel Ram 2500 2018 Quick Reference Guide
[x] Cancel search | Manufacturer: RAM, Model Year: 2018, Model line: 2500, Model: Ram 2500 2018Pages: 20, PDF Size: 0.98 MB
Page 2 of 20

Automatic High Beam —
If Equipped
The Automatic High Beam system provides
increased forward lighting at night by automat-
ing high beam control through the use of a
digital camera mounted above the inside rear-
view mirror. This camera detects vehicle spe-
cific light and automatically switches from high
beams to low beams until the approaching
vehicle is out of view. This feature is program-
mable through the Uconnect system.
NOTE:
For further information, and applicable warnings
and cautions, please refer to the Owner’s Manual
at
www.mopar.com/en-us/care/owners-manual.html
(U.S. Residents) orwww.owners.mopar.ca(Cana-
dian Residents).
Parkview Rear Back-Up Camera —
If Equipped
You can see an on-screen image of the rear of
your vehicle whenever the transmission is
shifted into REVERSE. The ParkView Rear
Back-Up Camera image will be displayed on the
Uconnect Display, located on the center stack
of the instrument panel.
For further information, and applicable warnings
and cautions, please refer to the Owner’s Manual
atwww.mopar.com/en-us/care/owners-manual.html
(U.S. Residents) orwww.owners.mopar.ca(Cana-
dian Residents).
Cargo Light With Bed Lights —
If Equipped
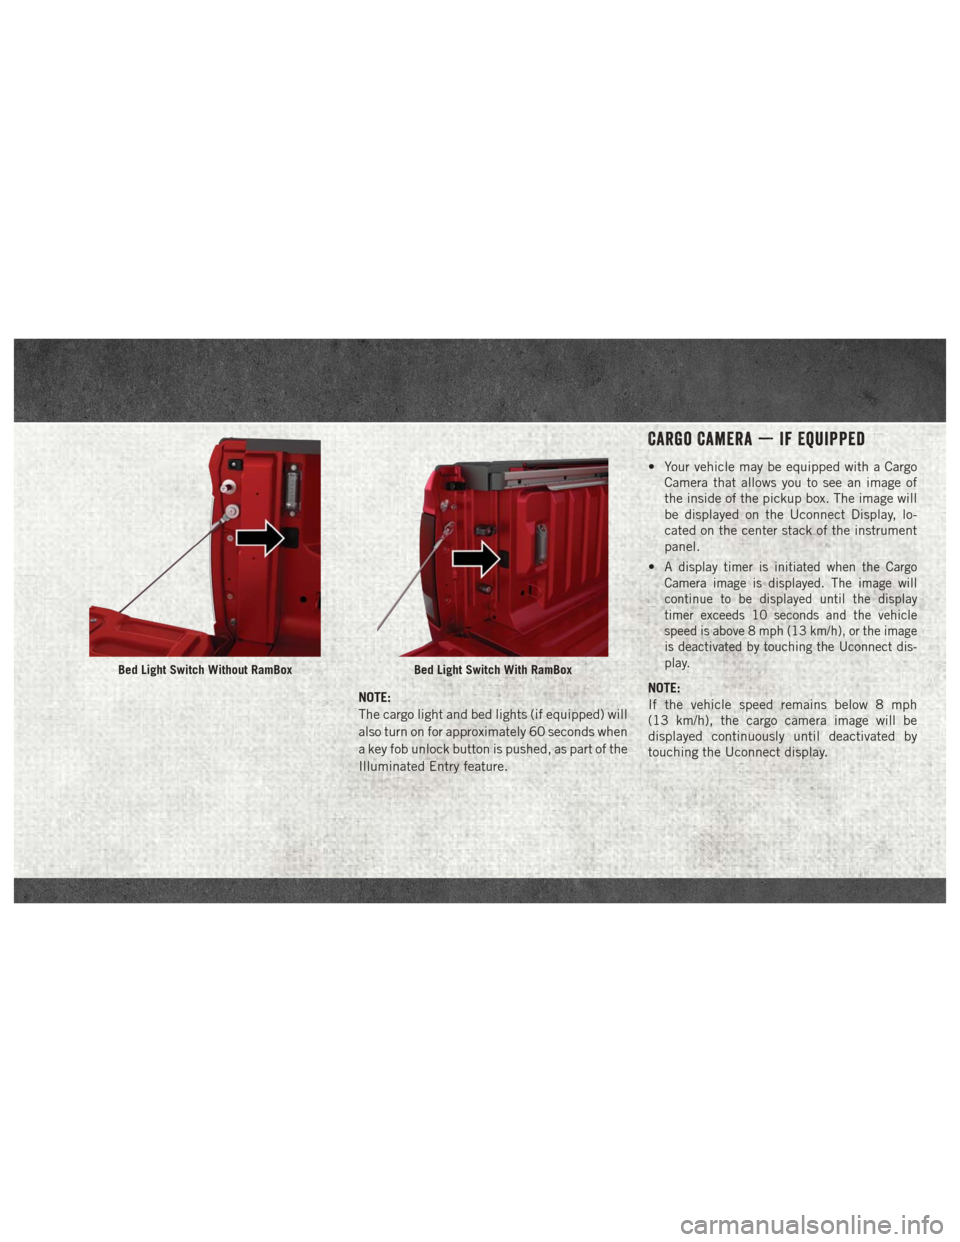
• The cargo light and bed lights (if equipped)
are turned on by pushing on the cargo lights
button located under the headlight switch.
• If the vehicle’s speed is 0 mph (0 km/h), these lights can also be turned on using the
switch located just inside the pickup box.
A telltale will illuminate in the instrument
cluster display when this lights are on. Push-
ing the switch a second time will turn the
lights off.
LIGHTS PARKVIEW CARGO FEATURES
Page 3 of 20

NOTE:
The cargo light and bed lights (if equipped) will
also turn on for approximately 60 seconds when
a key fob unlock button is pushed, as part of the
Illuminated Entry feature.
Cargo Camera — If Equipped
• Your vehicle may be equipped with a CargoCamera that allows you to see an image of
the inside of the pickup box. The image will
be displayed on the Uconnect Display, lo-
cated on the center stack of the instrument
panel.
•
A display timer is initiated when the Cargo
Camera image is displayed. The image will
continue to be displayed until the display
timer exceeds 10 seconds and the vehicle
speed is above 8 mph (13 km/h), or the image
is deactivated by touching the Uconnect dis-
play.
NOTE:
If the vehicle speed remains below 8 mph
(13 km/h), the cargo camera image will be
displayed continuously until deactivated by
touching the Uconnect display.
Bed Light Switch Without RamBoxBed Light Switch With RamBox
Page 9 of 20

• By simply driving your vehicle at highwayspeeds for as little as 45 minutes, you
can remedy the condition in the particu-
late filter system and allow your diesel
engine and exhaust after-treatment sys-
tem to remove the trapped PM and re-
store the system to normal operating con-
dition.
• Exhaust System — Regeneration In Process
Exhaust Filter XX% Full
— Indicates that the
Diesel Particulate Filter (DPF) is self-
cleaning. Maintain your current driving condi-
tion until regeneration is completed.
• Exhaust System — Regeneration Completed —
This message indicates that the Diesel Par-
ticulate Filter (DPF) self-cleaning is com-
pleted. If this message is displayed, you will
hear one chime to assist in alerting you of
this condition. •
Exhaust Service Required — See Dealer Now
— This message indicates regeneration has
been disabled due to a system malfunction.
At this point the engine Powertrain Control
Module (PCM) will register a fault code, the
instrument panel will display a MIL light.
• Exhaust Filter Full — Power Reduced See
Dealer — This message indicates the PCM
has derated the engine to limit the likelihood
of permanent damage to the after-treatment
system. If this condition is not corrected and
a dealer service is not performed, extensive
exhaust after-treatment damage can occur.
To correct this condition it will be necessary
to have your vehicle serviced by your local
authorized dealer.
VISIT THE RAM BRAND SITE FOR
FURTHER INFORMATION
Download a FREE electronic copy of the Owner’s
Manual, Diesel Supplement, or Warranty Booklet
by visiting:
www.mopar.com/en-us/care/owners-manual.html
(U.S. Residents);
www.owners.mopar.ca (Canadian Residents).
Page 12 of 20

• There is an electric heater inside the DEFtank that automatically works when neces-
sary. And if the DEF supply does freeze, the
truck will operate normally until it thaws.
• Ensure the DEF cap is reinstalled prior to filling vehicle with diesel fuel to avoid spill-
ing diesel fuel into the DEF Filler.
AUXILIARY SWITCHES
There can be up to five auxiliary switches located
in the lower switch bank of the instrument panel,
which can all be used to power various electronic
devices and PTO (Power Take Off) – if equipped.
Connections to the switches are found under the
hood in the connectors attached to the auxiliary
Power Distribution Center.
The system has the ability to configure the
functionality of the auxiliary switches via the
Instrument Cluster Display. All switches can
now be configured for ignition or battery power,
saving or not saving the state across a key cycle,
and momentary or latching switch operation. For further information on using the auxiliary
switches, please refer to the Ram Body Builders
Guide by accessing
www.rambodybuilder.com
and choosing the appropriate links.
For general questions on upfitting commercial
vehicles, including:
• Loose rear park assist installation
• Programmable auxiliary switches
• PTO (Power Take Off) system
• Wiring diagrams
• Vehicle dimensions
• Snow plow installation
• Weight charts and trailer towing
Please consult the Body Builders Guide at
www.rambodybuilder.com.For further information, and applicable warnings
and cautions, please refer to the Owner’s Manual at
www.mopar.com/en-us/care/owners-manual.html
(U.S. Residents) or www.owners.mopar.ca (Cana-
dian Residents).
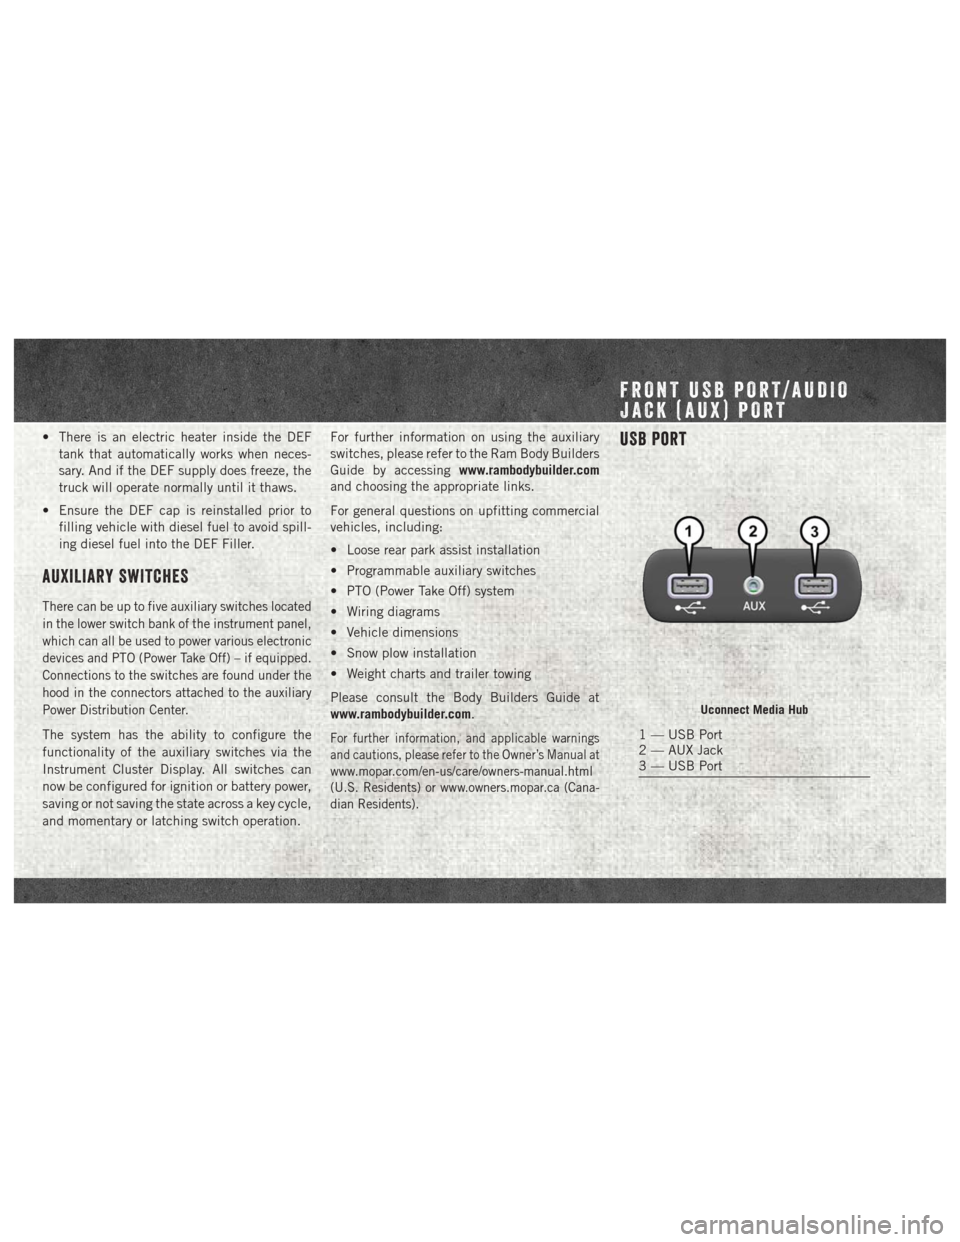
USB Port
Uconnect Media Hub
1 — USB Port
2 — AUX Jack
3 — USB Port
FRONT USB PORT/AUDIO
JACK (AUX) PORT