ignition Ram 2500 2018 Service Manual
[x] Cancel search | Manufacturer: RAM, Model Year: 2018, Model line: 2500, Model: Ram 2500 2018Pages: 372, PDF Size: 7.1 MB
Page 150 of 372

ignition from OFF or ACC to RUN, and will
illuminate the "Wait To Start" telltale. The
engine will not immediately crank, this is
normal operation.
2. The “Wait To Start" telltale will remain on for a period of time that varies depending
on the engine temperature.
3. While the "Wait to Start" telltale is on, the instrument cluster will additionally dis-
play a gauge or bar whose initial length
represents the full "Wait to Start" time
period. Its length will decrease until it
disappears when the "Wait to Start" time
has elapsed.
CAUTION!
If the “Water in Fuel Indicator Light” re-
mains on, DO NOT START engine before
you drain the water from the fuel filters to
avoid engine damage. Refer to “Draining
Fuel/Water Separator Filter” in “Dealer
Service” under “Servicing And Mainte-
nance” for further information. 4. After the engine “Wait To Start” telltale
goes off, the engine will automatically
crank.
CAUTION!
Do not crank engine for more than 15 sec-
onds at a time or starter motor damage
may result. Turn the ignition switch to the
OFF position and wait at least two minutes
for the starter to cool before repeating start
procedure.
5. After engine start-up, check to see that there is oil pressure.
6. Allow the engine to idle about three min- utes until the manifold heaters have com-
pleted the post-heat cycle.
7. Release the parking brake and drive.
NOTE:
• Engine idle speed will automatically in- crease to 1,000 RPM and engage the Vari-
able Geometry Turbocharger at low coolant
temperatures to improve engine warm-up. • The engine may not automatically crank
after the engine "Wait To Start" telltale goes
off if a door or the hood is ajar.
• If the engine stalls, or if the ignition switch is left ON for more than two minutes after
the “Wait To Start Light” goes out, reset the
grid heaters by turning the ignition switch
to the OFF position for at least five seconds
and then back ON. Repeat steps 1 through
7 of “Keyless Enter-N-Go Starting Proce-
dure – Engine Manifold Air Temperature
Below 66° F (19° C).”
Extreme Cold Weather
The Cummins diesel engine is equipped with
several features designed to assist cold
weather starting and operation:
• The engine block heater is a resistance
heater installed in the water jacket of the
engine just above and behind the oil filter.
It requires a 110–115 Volt AC electrical
outlet with a grounded, three-wire exten-
sion cord.STARTING AND OPERATING
148
Page 157 of 372

AUTOMATIC TRANSMISSION
WARNING!
• It is dangerous to shift out of PARK orNEUTRAL if the engine speed is higher
than idle speed. If your foot is not firmly
pressing the brake pedal, the vehicle
could accelerate quickly forward or in
reverse. You could lose control of the
vehicle and hit someone or something.
Only shift into gear when the engine is
idling normally and your foot is firmly
pressing the brake pedal.
• Unintended movement of a vehicle
could injure those in or near the vehicle.
As with all vehicles, you should never
exit a vehicle while the engine is run-
ning. Before exiting a vehicle, always
come to a complete stop, then apply the
parking brake, shift the transmission
into PARK, turn the engine OFF, and
remove the key fob. When the ignition is
in the LOCK/OFF (key removal) position,
(or, with Keyless Enter-N-Go, when the
ignition is in the OFF mode) the trans-
WARNING!
mission is locked in PARK, securing the
vehicle against unwanted movement.
• When leaving the vehicle, always make
sure the ignition is in the OFF mode,
remove the key fob from the vehicle, and
lock the vehicle.
• Never use the PARK position as a sub-
stitute for the parking brake. Always ap-
ply the parking brake fully when exiting
the vehicle to guard against vehicle
movement and possible injury or dam-
age.
• Your vehicle could move and injure you
and others if it is not in PARK. Check by
trying to move the gear selector out of
PARK with the brake pedal released.
Make sure the transmission is in PARK
before exiting the vehicle.
• Never leave children alone in a vehicle,
or with access to an unlocked vehicle.
Allowing children to be in a vehicle un-
attended is dangerous for a number of
reasons. A child or others could be seri-
ously or fatally injured. Children should
be warned not to touch the parking
WARNING!
brake, brake pedal or the transmission
gear selector.
• Do not leave the key fob in or near the
vehicle (or in a location accessible to
children), and do not leave the ignition
(in a vehicle equipped with Keyless
Enter-N-Go) in the ACC or ON/RUN
mode. A child could operate power win-
dows, other controls, or move the ve-
hicle.
CAUTION!
Damage to the transmission may occur if
the following precautions are not ob-
served:
• Shift into or out of PARK or REVERSEonly after the vehicle has come to a
complete stop.
• Do not shift between PARK, REVERSE,
NEUTRAL, or DRIVE when the engine is
above idle speed.
• Before shifting into any gear, make sure
your foot is firmly pressing the brake
pedal.
155
Page 158 of 372
NOTE:
You must press and hold the brake pedal
while shifting out of PARK.
Key Ignition Park Interlock
This vehicle is equipped with a Key Ignition
Park Interlock which requires the transmis-
sion to be in PARK before the ignition can be
turned to the LOCK/OFF (key removal) posi-
tion. The key fob can only be removed from
the ignition when the ignition is in the LOCK/
OFF position, and the transmission is locked
in PARK whenever the ignition is in the
LOCK/OFF position.
NOTE:
If a malfunction occurs, the system will trap
the key fob in the ignition to warn you that
this safety feature is inoperable. The engine
can be started and stopped but the key fob
cannot be removed until you obtain service.
Brake/Transmission Shift
Interlock System
This vehicle is equipped with a Brake Trans-
mission Shift Interlock System (BTSI) that
holds the transmission gear selector in PARKunless the brakes are applied. To shift the
transmission out of PARK, the ignition must
be turned to the ON/RUN mode (engine run-
ning, for vehicles with eight-speed transmis-
sion) and the brake pedal must be pressed.
In 8-speed vehicles, the brake pedal must
also be pressed to shift from NEUTRAL into
DRIVE or REVERSE when the vehicle is
stopped or moving at low speeds.
Eight-Speed Automatic
Transmission — If Equipped
The transmission is controlled using a rotary
electronic gear selector located on the instru-
ment panel. The transmission gear range
(PRND) is displayed both above the gear
selector and in the instrument cluster. To
select a gear range, simply rotate the gear
selector. You must press the brake pedal to
shift the transmission out of PARK (or NEU-
TRAL, when the vehicle is stopped or moving
at low speeds). To shift past multiple gear
ranges at once (such as PARK to DRIVE),
simply rotate the gear selector to the appro-
priate detent. Select the DRIVE range for
normal driving. NOTE:
In the event of a mismatch between the gear
selector position and the actual transmission
gear (for example, driver selects PARK while
driving), the position indicator will blink con-
tinuously until the selector is returned to the
proper position, or the requested shift can be
completed.
The electronically-controlled transmission
adapts its shift schedule based on driver
inputs, along with environmental and road
conditions. The transmission electronics are
self-calibrating; therefore, the first few shifts
on a new vehicle may be somewhat abrupt.
This is a normal condition, and precision
shifts will develop within a few hundred miles
(kilometers).
Only shift from DRIVE to PARK or REVERSE
when the accelerator pedal is released and
the vehicle is stopped. Be sure to keep your
foot on the brake pedal when shifting be-
tween these gears.
The transmission gear selector has only
PARK, REVERSE, NEUTRAL, and DRIVE po-
sitions. Manual downshifts can be made us-
ing the Electronic Range Select (ERS) shiftSTARTING AND OPERATING
156
Page 159 of 372

control. Pressing the GEAR-/GEAR+ switches
(on the steering wheel) while in the DRIVE
position will select the highest available
transmission gear, and will display that gear
limit in the instrument cluster as 1, 2, 3, etc.
Refer to “Electronic Range Select (ERS) Op-
eration” in this section for further informa-
tion. Some models will display both the se-
lected gear limit, and the actual current gear,
while in ERS mode.Transmission Limp Home Mode
Transmission function is monitored electroni-
cally for abnormal conditions. If a condition
is detected that could result in transmission
damage, Transmission Limp Home Mode is
activated. In this mode, the transmission may
operate only in certain gears, or may not shift
at all. Vehicle performance may be severely
degraded and the engine may stall. In some
situations, the transmission may not re-
engage if the engine is turned off and re-
started. The Malfunction Indicator Light
(MIL) may be illuminated. A message in the
instrument cluster will inform the driver of
the more serious conditions, and indicate
what actions may be necessary.
In the event of a momentary problem, the
transmission can be reset to regain all for-
ward gears by performing the following steps:
NOTE:
In cases where the instrument cluster mes-
sage indicates the transmission may not re-
engage after engine shutdown, perform this
procedure only in a desired location (prefer-
ably, at your authorized dealer).1. Stop the vehicle.
2. Shift the transmission into PARK, if pos-
sible. If not, shift the transmission to
NEUTRAL.
3. Turn the ignition to the OFF position. On vehicles with Keyless Enter-N-Go, push
and hold the ignition switch until the
engine turns OFF.
4. Wait approximately 30 seconds.
5. Restart the engine.
6. Shift into the desired gear range. If the problem is no longer detected, the trans-
mission will return to normal operation.
NOTE:
Even if the transmission can be reset, we
recommend that you visit your authorized
dealer at your earliest possible convenience.
Your authorized dealer has diagnostic equip-
ment to assess the condition of your trans-
mission.
If the transmission cannot be reset, autho-
rized dealer service is required.
Electronic Transmission Gear Selector
157
Page 161 of 372
Only shift from DRIVE to PARK or REVERSE
when the accelerator pedal is released and
the vehicle is stopped. Be sure to keep your
foot on the brake pedal when shifting be-
tween these gears.
The transmission gear selector has only
PARK, REVERSE, NEUTRAL, and DRIVE
shift positions. Manual downshifts can be
made using the Electronic Range Select
(ERS) shift control. Pressing the ERS (-/+)
switches (column shift) or moving the gear
selector to the left or right (-/+) (console shift)
while in the DRIVE position will select the
highest available transmission gear, and will
display that gear limit in the instrument clus-
ter as 1, 2, 3, etc. Refer to "Electronic Range
Select (ERS) Operation" in this section for
further information. Some models will dis-
play both the selected gear limit, and the
actual current gear, while in ERS mode.Transmission Limp Home Mode
Transmission function is monitored electroni-
cally for abnormal conditions. If a condition is
detected that could result in transmission
damage, Transmission Limp Home Mode is
activated. In this mode, the transmission re-
mains in direct gear regardless of which for-
ward gear is selected. PARK, REVERSE, and
NEUTRAL will continue to operate. The Mal-
function Indicator Light (MIL) may be illumi-
nated. Limp Home Mode allows the vehicle to
be driven to an authorized dealer for service
without damaging the transmission.
In the event of a momentary problem, the
transmission can be reset to regain all for-
ward gears by performing the following steps:
1. Stop the vehicle.
2. Shift the transmission into PARK.
3. Turn the ignition OFF.
4. Wait approximately 10 seconds.
5. Restart the engine.
6. Shift into the desired gear range. If theproblem is no longer detected, the trans-
mission will return to normal operation. NOTE:
Even if the transmission can be reset, we
recommend that you visit your authorized
dealer at your earliest possible convenience.
Your authorized dealer has diagnostic equip-
ment to assess the condition of your trans-
mission.
If the transmission cannot be reset, autho-
rized dealer service is required.
Electronic Range Select (ERS) Operation —
Six-Speed Transmission (1500 Models
Only)
The Electronic Range Select (ERS) shift con-
trol allows the driver to limit the highest
available gear when the transmission is in
DRIVE. For example, if you set the transmis-
sion gear limit to 4 (fourth gear), the trans-
mission will not shift above fourth gear, but
will shift through the lower gears normally.
Use of ERS (or TOW/HAUL mode) also en-
ables an additional underdrive gear which is
not normally used during through-gear accel-
erations. This additional gear can improve
vehicle performance and cooling capability
when towing a trailer on certain grades. In
159
Page 163 of 372
drive, move the gear selector from PARK or
NEUTRAL to the DRIVE position. Pull the
gear selector toward you when shifting into
REVERSE or PARK, or when shifting out of
PARK.
The electronically-controlled transmission
provides a precise shift schedule. The trans-
mission electronics are self-calibrating;
therefore, the first few shifts on a new vehicle
may be somewhat abrupt. This is a normal
condition, and precision shifts will develop
within a few hundred miles (kilometers).
Only shift from DRIVE to PARK or REVERSE
when the accelerator pedal is released and
the vehicle is stopped. Be sure to keep your
foot on the brake pedal when shifting be-
tween these gears.
The transmission gear selector has only
PARK, REVERSE, NEUTRAL, and DRIVE
shift positions. Manual downshifts can be
made using the Electronic Range Select
(ERS) shift control. Pressing the ERS (-/+)
switches (on the gear selector) while in the
DRIVE position will select the highest avail-
able transmission gear, and will display that
gear limit in the instrument cluster as 1, 2, 3,etc. Refer to "Electronic Range Select (ERS)
Operation" in this section for further informa-
tion. Some models will display both the se-
lected gear limit, and the actual current gear,
while in ERS mode.
Transmission Limp Home Mode
Transmission function is monitored electroni-
cally for abnormal conditions. If a condition
is detected that could result in transmission
damage, Transmission Limp Home Mode is
activated. In this mode, the transmission
remains in fourth gear regardless of which
forward gear is selected. PARK, REVERSE,
and NEUTRAL will continue to operate. The
Malfunction Indicator Light (MIL) may be
illuminated. Limp Home Mode allows the
vehicle to be driven to an authorized dealer
for service without damaging the transmis-
sion.
In the event of a momentary problem, the
transmission can be reset to regain all for-
ward gears by performing the following steps:
1. Stop the vehicle.
2. Shift the transmission into PARK.
3. Turn the ignition OFF.4. Wait approximately 10 seconds.
5. Restart the engine.
6. Shift into the desired gear range. If the
problem is no longer detected, the trans-
mission will return to normal operation.
NOTE:
Even if the transmission can be reset, we
recommend that you visit your authorized
dealer at your earliest possible convenience.
Your authorized dealer has diagnostic equip-
ment to assess the condition of your trans-
mission.
If the transmission cannot be reset, autho-
rized dealer service is required.
Electronic Range Select (ERS) Operation
The Electronic Range Select (ERS) shift con-
trol allows the driver to limit the highest
available gear when the transmission is in
DRIVE. For example, if you set the transmis-
sion gear limit to 4 (fourth gear), the trans-
mission will not shift above fourth gear, but
will shift through the lower gears normally.
161
Page 176 of 372
to “Instrument Cluster Display” in “Getting
To Know Your Instrument Panel” in the Own-
er’s Manual for further information.
NOTE:
This mode is intended to be enabled with
engine running.
Tire/Jack Mode
To assist with changing a tire, the air suspen-
sion system has a feature which allows the
automatic leveling to be disabled. Refer to
“Instrument Cluster Display” in “Getting To
Know Your Instrument Panel” in the Owner’s
Manual for further information.
NOTE:
This mode is intended to be enabled with
engine running.
Transport Mode
For towing your vehicle with four wheels off
the ground, the air suspension system has a
feature which will put the vehicle into Entry/
Exit height and disable the automatic loadleveling system. Refer to “Instrument Cluster
Display” in “Getting To Know Your Instru-
ment Panel” in the Owner’s Manual for fur-
ther information.
NOTE:
This mode is intended to be enabled with
engine running.
Wheel Alignment Mode
Before performing a wheel alignment, this
mode must be enabled. Refer to “Instrument
Cluster Display” in “Getting To Know Your
Instrument Panel” in the Owner’s Manual for
further information.
NOTE:
This mode is intended to be enabled with
engine running.
Protection Strategy
In order to “protect” the air suspension sys-
tem, the vehicle will disable load leveling as
required (suspension overloaded, battery
charge low, etc.). Load leveling will automati-
cally resume as soon as system operation
requirements are met. See your authorized
dealer if system does not resume. NOTE:
If towing with air suspension refer to “Trailer
Towing” in “Starting And Operating” for fur-
ther information.
AIR SUSPENSION SYSTEM
(2500/3500 MODELS) — IF
EQUIPPED
Description
This air suspension system is a rear leveling
ride height system. The main purpose of this
system is to maintain the truck’s rear ride
height level. There are two selectable heights
that can be chosen based on your operating
conditions.
The system requires that the ignition be in
ON/RUN position or the engine running with
zero vehicle speed for all user requested
changes and load leveling.
STARTING AND OPERATING
174
Page 177 of 372
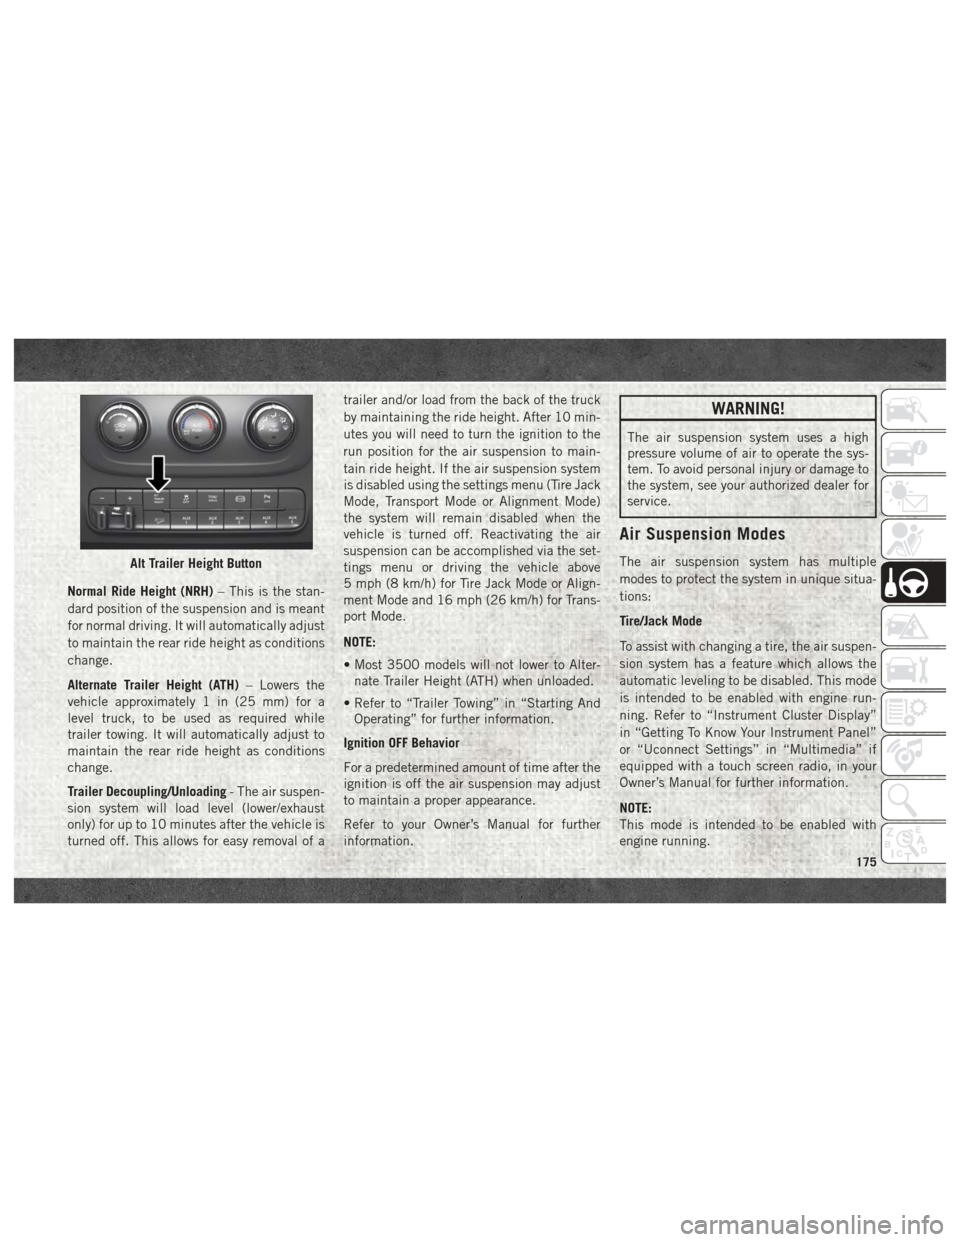
Normal Ride Height (NRH)– This is the stan-
dard position of the suspension and is meant
for normal driving. It will automatically adjust
to maintain the rear ride height as conditions
change.
Alternate Trailer Height (ATH) – Lowers the
vehicle approximately 1 in (25 mm) for a
level truck, to be used as required while
trailer towing. It will automatically adjust to
maintain the rear ride height as conditions
change.
Trailer Decoupling/Unloading - The air suspen-
sion system will load level (lower/exhaust
only) for up to 10 minutes after the vehicle is
turned off. This allows for easy removal of a trailer and/or load from the back of the truck
by maintaining the ride height. After 10 min-
utes you will need to turn the ignition to the
run position for the air suspension to main-
tain ride height. If the air suspension system
is disabled using the settings menu (Tire Jack
Mode, Transport Mode or Alignment Mode)
the system will remain disabled when the
vehicle is turned off. Reactivating the air
suspension can be accomplished via the set-
tings menu or driving the vehicle above
5 mph (8 km/h) for Tire Jack Mode or Align-
ment Mode and 16 mph (26 km/h) for Trans-
port Mode.
NOTE:
• Most 3500 models will not lower to Alter-
nate Trailer Height (ATH) when unloaded.
• Refer to “Trailer Towing” in “Starting And Operating” for further information.
Ignition OFF Behavior
For a predetermined amount of time after the
ignition is off the air suspension may adjust
to maintain a proper appearance.
Refer to your Owner’s Manual for further
information.
WARNING!
The air suspension system uses a high
pressure volume of air to operate the sys-
tem. To avoid personal injury or damage to
the system, see your authorized dealer for
service.
Air Suspension Modes
The air suspension system has multiple
modes to protect the system in unique situa-
tions:
Tire/Jack Mode
To assist with changing a tire, the air suspen-
sion system has a feature which allows the
automatic leveling to be disabled. This mode
is intended to be enabled with engine run-
ning. Refer to “Instrument Cluster Display”
in “Getting To Know Your Instrument Panel”
or “Uconnect Settings” in “Multimedia” if
equipped with a touch screen radio, in your
Owner’s Manual for further information.
NOTE:
This mode is intended to be enabled with
engine running.Alt Trailer Height Button
175
Page 180 of 372

To Decrease Speed
When the Speed Control is set, you can de-
crease speed by pushing the SET (-) button.
The driver’s preferred units can be selected
through the instrument panel settings if
equipped. Refer to “Getting To Know Your
Instrument Panel” in the Owner’s Manual for
more information. The speed increment
shown is dependent on the selected speed
unit of U.S. (mph) or Metric (km/h):
U.S. Speed (mph)
• Pushing the SET (-) button once will resultin a 1 mph decrease in set speed. Each
subsequent tap of the button results in a
decrease of 1 mph.
• If the button is continually pushed, the set speed will continue to decrease until the
button is released, then the new set speed
will be established.
Metric Speed (km/h)
• Pushing the SET (-) button once will result in a 1 km/h decrease in set speed. Each
subsequent tap of the button results in a
decrease of 1 km/h. • If the button is continually pushed, the set
speed will continue to decrease until the
button is released, then the new set speed
will be established.
To Accelerate For Passing
Press the accelerator as you would normally.
When the pedal is released, the vehicle will
return to the set speed.
Using Speed Control On Hills
The transmission may downshift on hills to
maintain the vehicle set speed.
NOTE:
The Speed Control system maintains speed
up and down hills. A slight speed change on
moderate hills is normal.
On steep hills, a greater speed loss or gain
may occur so it may be preferable to drive
without Speed Control.
WARNING!
Speed Control can be dangerous where the
system cannot maintain a constant speed.
Your vehicle could go too fast for the con-
WARNING!
ditions, and you could lose control and
have an accident. Do not use Speed Con-
trol in heavy traffic or on roads that are
winding, icy, snow-covered or slippery.
To Resume Speed
To resume a previously set speed, push the
RES (+) button and release. Resume can be
used at any speed above 20 mph (32 km/h).
To Deactivate
A soft tap on the brake pedal, pushing the
CANCEL button, or normal brake pressure
while slowing the vehicle will deactivate the
Speed Control without erasing the set speed
from memory.
Pushing the ON/OFF button or turning the
ignition switch OFF erases the set speed from
memory.STARTING AND OPERATING
178
Page 181 of 372
PARKSENSE FRONT AND REAR PARK
ASSIST — IF EQUIPPED
The ParkSense Park Assist system provides
visual and audible indications of the distance
between the rear and/or front fascia and a
detected obstacle when backing up or moving
forward, e.g. during a parking maneuver. Re-
fer to “ParkSense System Usage Precau-
tions” in the Owner’s Manual for limitations
of this system and recommendations.
ParkSense will retain the last system state
(enabled or disabled) from the last ignition
cycle when the ignition is changed to the
ON/RUN position.
ParkSense can be active only when the gear
selector is in REVERSE or DRIVE. If
ParkSense is enabled at one of these gear
selector positions, the system will remain
active until the vehicle speed is increased to
approximately 7 mph (11 km/h) or above. A
warning will appear in the instrument cluster
display indicating the vehicle is aboveParkSense operating speed. The system will
become active again if the vehicle speed is
decreased to speeds less than approximately
6 mph (9 km/h).
Cleaning The ParkSense System
Clean the ParkSense sensors with water, car
wash soap and a soft cloth. Do not use rough
or hard cloths. Do not scratch or poke the
sensors. Otherwise, you could damage the
sensors.
PARKVIEW REAR BACK UP CAMERA —
IF EQUIPPED
Your vehicle may be equipped with the
ParkView Rear Back Up Camera that allows
you to see a image of the rear surroundings of
your vehicle whenever the gear selector is put
into REVERSE or whenever it is initiated
through the "Backup Camera" button in the
"Controls" menu. Whenever the gear selector
is put into REVERSE, the image will be dis-
played in the rearview mirror display (if
equipped) or Uconnect screen (if equipped)along with a caution note to “check entire
surroundings” across the top of the screen.
After five seconds this note will disappear.
The ParkView Camera is located to the left of
the tailgate handle.
When the vehicle is shifted out of REVERSE
(with Camera delay turned off), the rear Cam-
era mode is exited and the navigation or audio
screen appears again.
When the vehicle is shifted out of REVERSE
(with Camera delay turned on), the rear Cam-
era image will be displayed for up to 10 sec-
onds after shifting out of REVERSE unless
the forward vehicle speed exceeds 8 mph
(13 km/h), the transmission is shifted into
PARK or the ignition is switched to the OFF
position.
Whenever the Rear View Camera image is
activated through the "Backup Camera" but-
ton in the "Controls" menu, a display timer for
the image is initiated. The image will con-
tinue to be displayed until the display timer
exceeds 10 seconds and the vehicle speed is
above 8 mph (13 km/h) or the touchscreen
button "X" to disable display of the Rear View
Camera image is pressed.
179