ECO mode Ram 2500 2020 Manual PDF
[x] Cancel search | Manufacturer: RAM, Model Year: 2020, Model line: 2500, Model: Ram 2500 2020Pages: 553, PDF Size: 21.99 MB
Page 255 of 553

STARTING AND OPERATING253
The locking axles are controlled by the axle
locker switch.
Under normal driving conditions, the switch
should be left in the AXLE UNLOCK position.
NOTE:
Even when the axles are in the AXLE UNLOCK
position, the limited slip differential in the rear
axle still provides torque biasing capability for
moderate low traction environments.
During the command to lock the axle, the indi -
cator light will flash until the axle is locked. After
the lock command has been successfully
executed, the light will remain on solid.
To lock the rear axle, place the vehicle in 4WD
LOW, 4WD HIGH or 2WD. Refer to “Four Wheel
Drive Operation” in “Starting And Operating” for
further information. Push the REAR LOCK
button while traveling less than 10 mph (16 km/h). The RR indicator light will remain on
when the rear axle is locked.
NOTE:
Left to right wheel speed difference may be
necessary to allow the axle to fully lock. If the
indicator light is flashing after placing the switch
in the REAR LOCK or FRONT/REAR LOCK posi
-
tion, drive the vehicle in a turn or on loose gravel
to expedite the locking action.
To lock the front axle, push the FRONT/REAR
LOCK button while traveling less than 10 mph
(16 km/h) in 4WD LOW. The indicator light will
be solid when the front axle is locked.
NOTE:
The rear axle must be locked before the front
axle will lock. When both the axles are locked, to unlock the
front axle, push the REAR LOCK button while in
4WD LOW. The FRONT/REAR LOCK indicator
light will go out when the axle is unlocked.
NOTE:
The axle lockers could be torque locked due to
side to side loads on the axle. Driving slowly
while turning the steering wheel from a left
hand turn to a right hand turn or driving in
REVERSE for a short distance may be required
to release the torque lock and unlock the axles.
To unlock the rear axle, push the AXLE UNLOCK
button. The REAR LOCK indicator light will go
out when the rear axle is unlocked.
STABILIZER/SWAY BAR SYSTEM — POWER
WAGON ONLY
Your vehicle is equipped with an electronic
disconnecting stabilizer/sway bar. This system
allows greater front suspension travel in
off-road situations.
Due to the use of taller springs, this vehicle has
an increased ride height of approximately
1.9 inches (48.3 mm) in the front and
1.5 inches (38.1 mm) in the rear. A major
Do not try to lock the rear axle if the vehicle
is stuck and the tires are spinning. You can
damage drivetrain components. Lock the
rear axle before attempting situations or
navigating terrain, which could possibly
cause the vehicle to become stuck.
CAUTION! (Continued)
WARNING!
Do not use the locked axle position for normal
driving. A locked front axle is intended for
off-road driving only. Locking the front axle
during on-road driving will reduce the steering
ability. This could cause a collision and you
may be seriously injured.5
20_DJD2_OM_EN_USC_t.book Page 253
Page 256 of 553

254STARTING AND OPERATING
advantage to increasing ride height is the posi -
tive effect it has on approach/departure and
break over angles.
This system is controlled by the electronic
control sway bar switch located below the
instrument panel.
Sway Bar Disconnect Button
Push the SWAY BAR switch to activate the
system. Push the switch again to deactivate the
system. The “Sway Bar Indicator Light” (located
in the instrument cluster) will illuminate when
the bar is disconnected. The “Sway Bar Indi -
cator Light” will flash during activation transi -
tion, or when activation conditions are not met.
The stabilizer/sway bar should remain in
on-road mode during normal driving conditions. To disconnect the stabilizer/sway bar, shift to
either 4WD HIGH or 4WD LOW and push the
SWAY BAR button to obtain the Off-Road posi
-
tion. Refer to “Four Wheel Drive Operation” in
“Starting And Operating” for further informa -
tion. The “Sway Bar Indicator Light” will flash
until the stabilizer/sway bar has been fully
disconnected. NOTE:
The stabilizer/sway bar may be torque locked
due to left and right suspension height differ
-
ences. This condition is due to driving surface
differences or vehicle loading. In order for the
stabilizer/sway bar to disconnect/reconnect,
the right and left halves of the bar must be
aligned. This alignment may require that the
vehicle be driven onto level ground or rocked
from side to side.
To return to the On-Road mode, push the SWAY
BAR button again.WARNING!
Do not disconnect the stabilizer bar and drive
on hard surfaced roads or at speeds above
18 mph (29 km/h), you may lose control of
the vehicle, which could result in serious
injury or death. The front stabilizer bar
enhances vehicle stability and assists in
maintaining control of the vehicle. The system
monitors vehicle speed and will attempt to
reconnect the stabilizer bar at speeds over
18 mph (29 km/h). This is indicated by a
flashing off road light and solid on road light.
Once vehicle speed is reduced below 14 mph
(22 km/h), the system will attempt to return
to the Off-Road mode.
WARNING!
If the stabilizer/sway bar will not return to
On-Road mode, vehicle stability is reduced.
Do not attempt to drive the vehicle over
18 mph (29 km/h). Driving faster than
18 mph (29 km/h) may cause loss of control
of the vehicle, which could result in serious
injury or death. Contact your local service
center for assistance.
20_DJD2_OM_EN_USC_t.book Page 254
Page 278 of 553
276STARTING AND OPERATING
(Continued)
(Continued)
NOTE:
If the sensor does not detect a vehicle ahead
of you, ACC will maintain a fixed set speed.
If the ACC sensor detects a vehicle ahead,
ACC will apply limited braking or accelerate
(not to exceed the original set speed) auto -
matically to maintain a preset following
distance, while matching the speed of the
vehicle ahead.
The Cruise Control system has two control
modes:
Adaptive Cruise Control mode for main -
taining an appropriate distance between
vehicles.
Normal (Fixed Speed) Cruise Control mode
for cruising at a constant preset speed. For
additional information, refer to “Normal
(Fixed Speed) Cruise Control Mode” in this
section.
NOTE:
Normal (Fixed Speed) Cruise Control will not
react to preceding vehicles. Always be aware of
the mode selected. You can change the mode by using the Cruise
Control buttons. The two control modes func
-
tion differently. Always confirm which mode is
selected.
WARNING!
Adaptive Cruise Control (ACC) is a conve -
nience system. It is not a substitute for
active driving involvement. It is always the
driver’s responsibility to be attentive of
road, traffic, and weather conditions,
vehicle speed, distance to the vehicle
ahead; and, most importantly, brake opera -
tion to ensure safe operation of the vehicle
under all road conditions. Your complete
attention is always required while driving to
maintain safe control of your vehicle.
Failure to follow these warnings can result
in a collision and death or serious personal
injury.
The ACC system:
Does not react to pedestrians,
oncoming vehicles, and stationary
objects (e.g., a stopped vehicle in a
traffic jam or a disabled vehicle).
Cannot take street, traffic, and weather conditions into account, and may be
limited upon adverse sight distance
conditions.
Does not always fully recognize complex driving conditions, which can
result in wrong or missing distance
warnings.
Will bring the vehicle to a complete stop while following a target vehicle and hold
the vehicle for approximately two
seconds in the stop position. At this
point, there will be an “ACC may cancel
soon” chime and warning to the driver.
When ACC is cancelled, the system will
release the brakes and the driver must
take over braking. The system can be
resumed when the target vehicle drives
off by releasing the brake and pushing
the resume button on the steering
wheel.
WARNING! (Continued)
20_DJD2_OM_EN_USC_t.book Page 276
Page 281 of 553

STARTING AND OPERATING279
To Cancel
The following conditions cancel the system:
The brake pedal is applied.
The CANCEL button is pushed.
An Anti-Lock Brake System (ABS) event
occurs.
The gear selector is removed from the DRIVE
position.
The Electronic Stability Control/Traction
Control System (ESC/TCS) activates.
The vehicle parking brake is applied.
Driver seatbelt is unbuckled at low speeds.
Driver door is opened at low speeds.
A Trailer Sway Control (TSC) event occurs.
The driver switches ESC to Full Off mode.
The braking temperature exceeds normal
range (overheated).
The trailer brake is applied manually (if
equipped).
To Turn Off
The system will turn off and clear the set speed
in memory if:
The Adaptive Cruise Control (ACC) on/off
button is pushed.
The Normal (Fixed Speed) Cruise Control on/
off button is pushed.
The ignition is placed in the OFF position.
You switch to Four-Wheel Drive Low.
To Resume
If there is a set speed in memory push the RES
(+) button and then remove your foot from the
accelerator pedal. The instrument cluster
display will display the last set speed.
NOTE:
If your vehicle stays at standstill for longer
than two seconds, the driver will have to push
the RES (+) button to reengage the ACC to the
existing set speed.
ACC cannot be resumed if there is a
stationary vehicle in front of your vehicle in
close proximity.
To Vary The Speed Setting
To Increase Speed
While ACC is set, you can increase the set speed
by pushing the RES (+) button.
The speed increment shown is dependent on
the chosen speed unit of U.S. (mph) or Metric
(km/h):
U.S. Speed (mph)
Pushing the RES (+) button once will result in
a 1 mph increase in set speed. Each subse -
quent tap of the button results in an increase
of 1 mph.
If the button is continually pushed, the set
speed will continue to increase in 5 mph
increments until the button is released. The
WARNING!
The Resume function should only be used if
traffic and road conditions permit. Resuming
a set speed that is too high or too low for
prevailing traffic and road conditions could
cause the vehicle to accelerate or decelerate
too sharply for safe operation. Failure to
follow these warnings can result in a collision
and death or serious personal injury.
5
20_DJD2_OM_EN_USC_t.book Page 279
Page 282 of 553
280STARTING AND OPERATING
increase in set speed is reflected in the
instrument cluster display.
Metric Speed (km/h)
Pushing the RES (+) button once will result in
a 1 km/h increase in set speed. Each subse -
quent tap of the button results in an increase
of 1 km/h.
If the button is continually pushed, the set
speed will continue to increase in 10 km/h
increments until the button is released. The
increase in set speed is reflected in the
instrument cluster display.
To Decrease Speed
While ACC is set, the set speed can be
decreased by pushing the SET (-) button.
The speed decrement shown is dependent on
the chosen speed unit of U.S. (mph) or Metric
(km/h):
U.S. Speed (mph)
Pushing the SET (-) button once will result in
a 1 mph decrease in set speed. Each subse -
quent tap of the button results in a decrease
of 1 mph.
If the button is continually pushed, the set
speed will continue to decrease in 5 mph decrements until the button is released. The
decrease in set speed is reflected in the
instrument cluster display.
Metric Speed (km/h)
Pushing the SET (-) button once will result in
a 1 km/h decrease in set speed. Each subse -
quent tap of the button results in a decrease
of 1 km/h.
If the button is continually pushed, the set
speed will continue to decrease in 10 km/h
decrements until the button is released. The
decrease in set speed is reflected in the
instrument cluster display.
NOTE:
When you override and push the RES (+)
button or SET (-) buttons, the new set speed
will be the current speed of the vehicle.
When you use the SET (-) button to decel -
erate, if the engine’s braking power does not
slow the vehicle sufficiently to reach the set
speed, the brake system will automatically
slow the vehicle.
The ACC system decelerates the vehicle to a
full stop when following a target vehicle. If an
ACC host vehicle follows a target vehicle to a standstill, after two seconds the driver will
either have to push the RES (+) button, or
apply the accelerator pedal to reengage the
ACC to the existing set speed.
The ACC system maintains set speed when
driving uphill and downhill. However, a slight
speed change on moderate hills is normal. In
addition, downshifting may occur while
climbing uphill or descending downhill. This
is normal operation and necessary to main
-
tain set speed. When driving uphill and down -
hill, the ACC system will cancel if the braking
temperature exceeds normal range (over -
heated).
Setting The Following Distance In ACC
The specified following distance for ACC can be
set by varying the distance setting between four
bars (longest), three bars (long), two bars
(medium) and one bar (short). Using this
distance setting and the vehicle speed, ACC
calculates and sets the distance to the vehicle
ahead. This distance setting displays in the
instrument cluster display.
20_DJD2_OM_EN_USC_t.book Page 280
Page 285 of 553
STARTING AND OPERATING283
Push the Adaptive Cruise Control (ACC) on/off
button (located on the steering wheel) until one
of the following appears in the instrument
cluster display:
Adaptive Cruise Control Off
When ACC is deactivated, the display will read
“Adaptive Cruise Control Off.”
Adaptive Cruise Control Ready
When ACC is activated, but the vehicle speed
setting has not been selected, the display will
read “Adaptive Cruise Control Ready.”
Adaptive Cruise Control Set
When the RES (+) or the SET(-) button (located
on the steering wheel) is pushed, the display will
read “ACC SET.”
When ACC is set, the set speed will show in the
instrument cluster display.
The ACC screen may display once again if any
ACC activity occurs, which may include any of
the following:
System Cancel
Driver Override
System Off
ACC Proximity Warning
ACC Unavailable Warning
The instrument cluster display will return to
the last display selected after five seconds of
no ACC display activity
Display Warnings And Maintenance
“Wipe Front Radar Sensor In Front Of
Vehicle” Warning
The “ACC/FCW Unavailable Wipe Front Radar
Sensor” warning will display and also a chime
will indicate when conditions temporarily limit
system performance.
This most often occurs at times of poor visibility,
such as in snow or heavy rain. The ACC system
may also become temporarily blinded due to
obstructions, such as mud, dirt or ice. In these
cases, the instrument cluster display will display
“ACC/FCW Unavailable Wipe Front Radar
Sensor” and the system will deactivate.
The “ACC/FCW Unavailable Wipe Front Radar
Sensor” message can sometimes be displayed
while driving in highly reflective areas (i.e.
tunnels with reflective tiles, or ice and snow).
The ACC system will recover after the vehicle has left these areas. Under rare conditions,
when the radar is not tracking any vehicles or
objects in its path this warning may temporarily
occur.
NOTE:
If the “ACC/FCW Unavailable Wipe Front Radar
Sensor” warning is active Normal (Fixed Speed)
Cruise Control is still available. For additional
information refer to “Normal (Fixed Speed)
Cruise Control Mode” in this section.
If weather conditions are not a factor, the driver
should examine the sensor. It may require
cleaning or removal of an obstruction. The
sensor is located in the camera in the center of
the windshield, on the forward side of the rear
-
view mirror.
To keep the ACC System operating properly, it is
important to note the following maintenance
items:
Always keep the sensor clean. Carefully clear
the windshield.
Do not remove any screws from the sensor.
Doing so could cause an ACC system
5
20_DJD2_OM_EN_USC_t.book Page 283
Page 289 of 553
STARTING AND OPERATING287
Stationary Objects And Vehicles
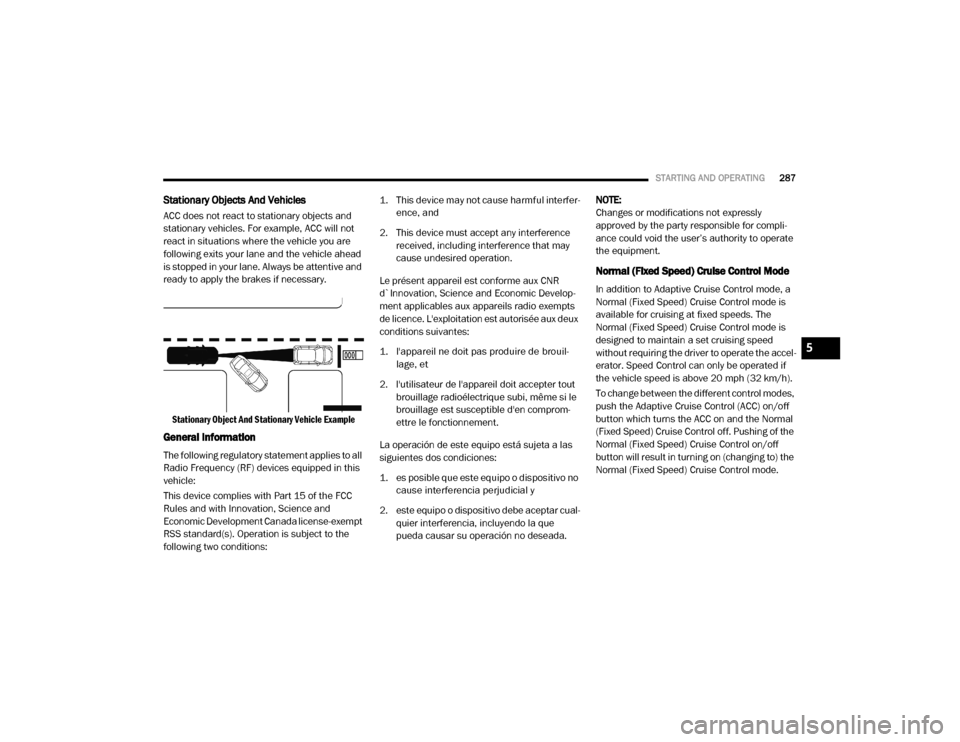
ACC does not react to stationary objects and
stationary vehicles. For example, ACC will not
react in situations where the vehicle you are
following exits your lane and the vehicle ahead
is stopped in your lane. Always be attentive and
ready to apply the brakes if necessary.
Stationary Object And Stationary Vehicle Example
General Information
The following regulatory statement applies to all
Radio Frequency (RF) devices equipped in this
vehicle:
This device complies with Part 15 of the FCC
Rules and with Innovation, Science and
Economic Development Canada license-exempt
RSS standard(s). Operation is subject to the
following two conditions:
1. This device may not cause harmful interfer
-
ence, and
2. This device must accept any interference received, including interference that may
cause undesired operation.
Le présent appareil est conforme aux CNR
d`Innovation, Science and Economic Develop -
ment applicables aux appareils radio exempts
de licence. L'exploitation est autorisée aux deux
conditions suivantes:
1. l'appareil ne doit pas produire de brouil -
lage, et
2. l'utilisateur de l'appareil doit accepter tout brouillage radioélectrique subi, même si le
brouillage est susceptible d'en comprom -
ettre le fonctionnement.
La operación de este equipo está sujeta a las
siguientes dos condiciones:
1. es posible que este equipo o dispositivo no cause interferencia perjudicial y
2. este equipo o dispositivo debe aceptar cual -
quier interferencia, incluyendo la que
pueda causar su operación no deseada. NOTE:
Changes or modifications not expressly
approved by the party responsible for compli
-
ance could void the user’s authority to operate
the equipment.
Normal (Fixed Speed) Cruise Control Mode
In addition to Adaptive Cruise Control mode, a
Normal (Fixed Speed) Cruise Control mode is
available for cruising at fixed speeds. The
Normal (Fixed Speed) Cruise Control mode is
designed to maintain a set cruising speed
without requiring the driver to operate the accel -
erator. Speed Control can only be operated if
the vehicle speed is above 20 mph (32 km/h).
To change between the different control modes,
push the Adaptive Cruise Control (ACC) on/off
button which turns the ACC on and the Normal
(Fixed Speed) Cruise Control off. Pushing of the
Normal (Fixed Speed) Cruise Control on/off
button will result in turning on (changing to) the
Normal (Fixed Speed) Cruise Control mode.
5
20_DJD2_OM_EN_USC_t.book Page 287
Page 291 of 553
STARTING AND OPERATING289
quent tap of the button results in a decrease
of 1 mph.
If the button is continually pushed, the set
speed will continue to decrease in 5 mph
decrements until the button is released. The
decrease in set speed is reflected in the
instrument cluster display.
Metric Speed (km/h)
Pushing the SET (-) button once will result in
a 1 km/h decrease in set speed. Each subse -
quent tap of the button results in a decrease
of 1 km/h.
If the button is continually pushed, the set
speed will continue to decrease in 10 km/h
decrements until the button is released. The
decrease in set speed is reflected in the
instrument cluster display.
To Cancel
The following conditions will cancel the Normal
(Fixed Speed) Cruise Control without clearing
the memory:
The brake pedal is applied.
The CANCEL button is pushed.
The Electronic Stability Control/Traction
Control System (ESC/TCS) activates.
The vehicle parking brake is applied.
The braking temperature exceeds normal
range (overheated).
The gear selector is removed from the DRIVE
position.
The driver switches ESC to Full Off mode.
To Resume Speed
To resume a previously set speed, push the RES
(+) button and release. Resume can be used at
any speed above 20 mph (32 km/h).
To Turn Off
The system will turn off and erase the set speed
in memory if:
The Normal (Fixed Speed) Cruise Control on/
off button is pushed.
The ignition is placed in the OFF position.
You engage Four-Wheel Drive Low.
The Adaptive Cruise Control (ACC) on/off
button is pushed.
PARKSENSE REAR PARK ASSIST — IF
EQUIPPED
The ParkSense Rear Park Assist system
provides visual and audible indications of the
distance between the rear fascia and a
detected obstacle when backing up (e.g. during
a parking maneuver). Refer to “ParkSense
System Usage Precautions” in this section for
limitations of this system and recommenda -
tions.
ParkSense will retain the system state (enabled
or disabled) from the previous ignition cycle
when the ignition is placed in the ON/RUN posi -
tion.
ParkSense can be active only when the gear
selector is in REVERSE. If ParkSense is enabled
at this gear selector position, the system will
remain active until the vehicle speed is
increased to approximately 7 mph (11 km/h) or
above. When in REVERSE and above the
system's operating speed, a warning will appear
within the instrument cluster display indicating
the vehicle speed is too fast. The system will
become active again if the vehicle speed is
decreased to speeds less than approximately
6 mph (9 km/h).
5
20_DJD2_OM_EN_USC_t.book Page 289
Page 304 of 553
302STARTING AND OPERATING
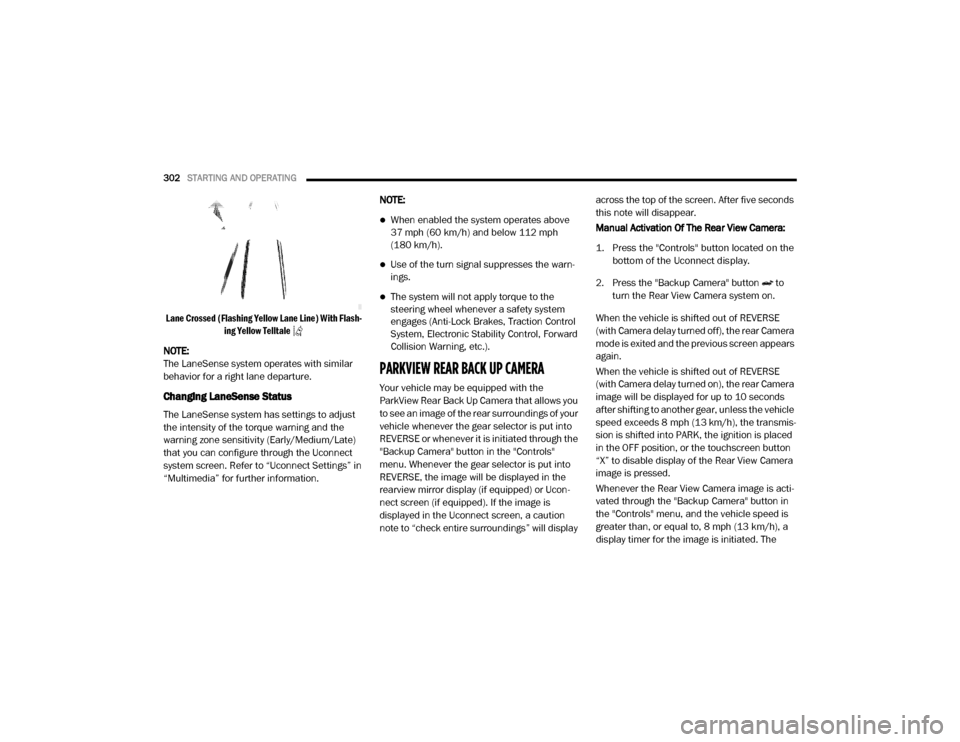
Lane Crossed (Flashing Yellow Lane Line) With Flash -
ing Yellow Telltale
NOTE:
The LaneSense system operates with similar
behavior for a right lane departure.
Changing LaneSense Status
The LaneSense system has settings to adjust
the intensity of the torque warning and the
warning zone sensitivity (Early/Medium/Late)
that you can configure through the Uconnect
system screen. Refer to “Uconnect Settings” in
“Multimedia” for further information. NOTE:
When enabled the system operates above
37 mph (60 km/h) and below 112 mph
(180 km/h).
Use of the turn signal suppresses the warn
-
ings.
The system will not apply torque to the
steering wheel whenever a safety system
engages (Anti-Lock Brakes, Traction Control
System, Electronic Stability Control, Forward
Collision Warning, etc.).
PARKVIEW REAR BACK UP CAMERA
Your vehicle may be equipped with the
ParkView Rear Back Up Camera that allows you
to see an image of the rear surroundings of your
vehicle whenever the gear selector is put into
REVERSE or whenever it is initiated through the
"Backup Camera" button in the "Controls"
menu. Whenever the gear selector is put into
REVERSE, the image will be displayed in the
rearview mirror display (if equipped) or Ucon -
nect screen (if equipped). If the image is
displayed in the Uconnect screen, a caution
note to “check entire surroundings” will display across the top of the screen. After five seconds
this note will disappear.
Manual Activation Of The Rear View Camera:
1. Press the "Controls" button located on the
bottom of the Uconnect display.
2. Press the "Backup Camera" button to turn the Rear View Camera system on.
When the vehicle is shifted out of REVERSE
(with Camera delay turned off), the rear Camera
mode is exited and the previous screen appears
again.
When the vehicle is shifted out of REVERSE
(with Camera delay turned on), the rear Camera
image will be displayed for up to 10 seconds
after shifting to another gear, unless the vehicle
speed exceeds 8 mph (13 km/h), the transmis- sion is shifted into PARK, the ignition is placed
in the OFF position, or the touchscreen button
“X” to disable display of the Rear View Camera
image is pressed.
Whenever the Rear View Camera image is acti -
vated through the "Backup Camera" button in
the "Controls" menu, and the vehicle speed is
greater than, or equal to, 8 mph (13 km/h), a display timer for the image is initiated. The
20_DJD2_OM_EN_USC_t.book Page 302
Page 307 of 553
STARTING AND OPERATING305
Deactivation
The AUX Camera is deactivated by pressing the
“X” in the upper right corner of the touchscreen.
This will return the display back to the previ -
ously displayed screen.
NOTE:
If the AUX button is pressed and no AUX
Camera is connected, the touchscreen will
display a blue screen along with the message
“Camera System Unavailable.” The screen
can be exited out by pressing the “X” in the
upper right hand corner. This will return the
display back to the previously displayed
screen.
Zoom View is not available with the AUX
Camera feature.
The display will always default to the Trailer
Camera display (AUX 1).
SURROUND VIEW CAMERA SYSTEM — IF
EQUIPPED
Your vehicle may be equipped with the
Surround View Camera System that allows you
to see an on-screen image of the surroundings
and top view of your vehicle whenever the gear selector is put into REVERSE or manually acti
-
vated via the Uconnect system. The top view of
the vehicle will show which doors are open. The
image will be displayed on the touchscreen
display along with a caution note “Check Entire
Surroundings” across the top of the screen.
After five seconds, this note will disappear. The
Surround View Camera System is comprised of
four sequential cameras located in the front
grille, rear tailgate and side mirrors.
NOTE:
The Surround View Camera System has
programmable settings that may be selected
through the Uconnect System. Refer to “Ucon -
nect Settings” in “Multimedia” for further infor -
mation.
When the vehicle is shifted into REVERSE, the
rear camera view and top view is the default
view of the system (Automatic Activation).
When the vehicle is shifted out of REVERSE
(with camera delay turned on), the camera
image will continue to be displayed for up to 10
seconds after shifting out of REVERSE unless
the vehicle speed exceeds 8 mph (13 km/h),
the vehicle is shifted into PARK or the ignition is
placed in the OFF position. There is a touch -screen button “X” to disable the display of the
camera image.
When the vehicle is shifted out of REVERSE
(with camera delay turned off), the surround
view camera mode is exited and the last known
screen appears again.
While the “Rear View” camera is displayed and
guidelines are enabled, active guidelines are
overlaid on the image to illustrate the width of
the vehicle, including the side view mirrors and
its projected backup path based on the steering
wheel position.
Different colored zones indicate the distance to
the rear of the vehicle.
The following table shows the approximate
distances for each zone:
Zone Distance To The Rear
Of The Vehicle
Red 0 - 1 ft (0 - 30 cm)
Yellow 1 ft - 6.5 ft
(30 cm - 2 m)
Green 6.5 ft or greater
(2 m or greater)
5
20_DJD2_OM_EN_USC_t.book Page 305