auxiliary switch Ram 2500 2020 Owner's Manual
[x] Cancel search | Manufacturer: RAM, Model Year: 2020, Model line: 2500, Model: Ram 2500 2020Pages: 553, PDF Size: 21.99 MB
Page 7 of 553

5
STARTING AND OPERATING
STARTING THE ENGINE — GAS ENGINE ......... 211Automatic Transmission ............................211
Tip Start Feature .......................................211
Keyless Enter-N-Go — Ignition ...................211
Normal Starting Using ENGINE START/
STOP Button ...............................................212 Cold Weather Operation (Below –22°F Or
−30°C) ......................................................215 After Starting ..............................................215
STARTING THE ENGINE — DIESEL ENGINE..... 215
Automatic Transmission ............................215
Keyless Enter-N-Go — Ignition ...................216
Extreme Cold Weather...............................218
Normal Starting Procedure — Engine
Manifold Air Temperature Above 66° F
(19° C)........................................................ 218 Starting Procedure — Engine Manifold Air
Temperature 0°F To 66°F (–18°C to
19°C) ..........................................................219 Starting Procedure — Engine Manifold Air
Temperature Below 0°F (-18°C) ..............220 Starting Fluids ............................................221 NORMAL OPERATION — DIESEL ENGINE ........221
Cold Weather Precautions ........................ 222
Engine Idling ............................................. 224
Noise........................................................... 225
Stopping The Engine ................................. 225
Idle Shutdown ............................................ 226
Programmable Maximum Vehicle
Speed ......................................................... 226 Operating Precautions............................... 226
Cooling System Tips .................................. 226
ENGINE BLOCK HEATER — GAS ENGINE (IF
EQUIPPED) ..........................................................227
ENGINE BLOCK HEATER — DIESEL ENGINE (IF
EQUIPPED) ......................................................... 227
Block Heater Usage ................................... 228
ENGINE BREAK-IN RECOMMENDATIONS — GAS
ENGINE ................................................................ 228
ENGINE BREAK-IN RECOMMENDATIONS —
DIESEL ENGINE...................................................228
PARKING BRAKE ............................................... 229
DIESEL EXHAUST BRAKE — ENGINE BRAKING
(IF EQUIPPED) ....................................................230
AUTOMATIC TRANSMISSION ........................... 231
Ignition Park Interlock ............................... 232
Brake/Transmission Shift Interlock
System ....................................................... 232 Eight-Speed Automatic Transmission — If
Equipped .................................................... 233 Six-Speed Automatic Transmission — If
Equipped .................................................... 237
AUXILIARY SWITCHES — IF EQUIPPED ........... 243
ACTIVE NOISE CANCELLATION ........................ 243
FOUR-WHEEL DRIVE OPERATION —
IF EQUIPPED ...................................................... 244
Four-Position Electronically Shifted Transfer
Case — If Equipped ................................... 244
Manually Shifted Transfer Case —
If Equipped ................................................. 247
AIR SUSPENSION SYSTEM — IF EQUIPPED.... 250
Description ................................................. 250
Air Suspension Modes .............................. 251
Instrument Cluster Display Messages ..... 251
Operation ................................................... 251
AXLE LOCKER SYSTEM — POWER WAGON
MODELS ONLY (IF EQUIPPED) ......................... 252
STABILIZER/SWAY BAR SYSTEM — POWER
WAGON ONLY .................................................... 253
20_DJD2_OM_EN_USC_t.book Page 5
Page 139 of 553

GETTING TO KNOW YOUR INSTRUMENT PANEL137
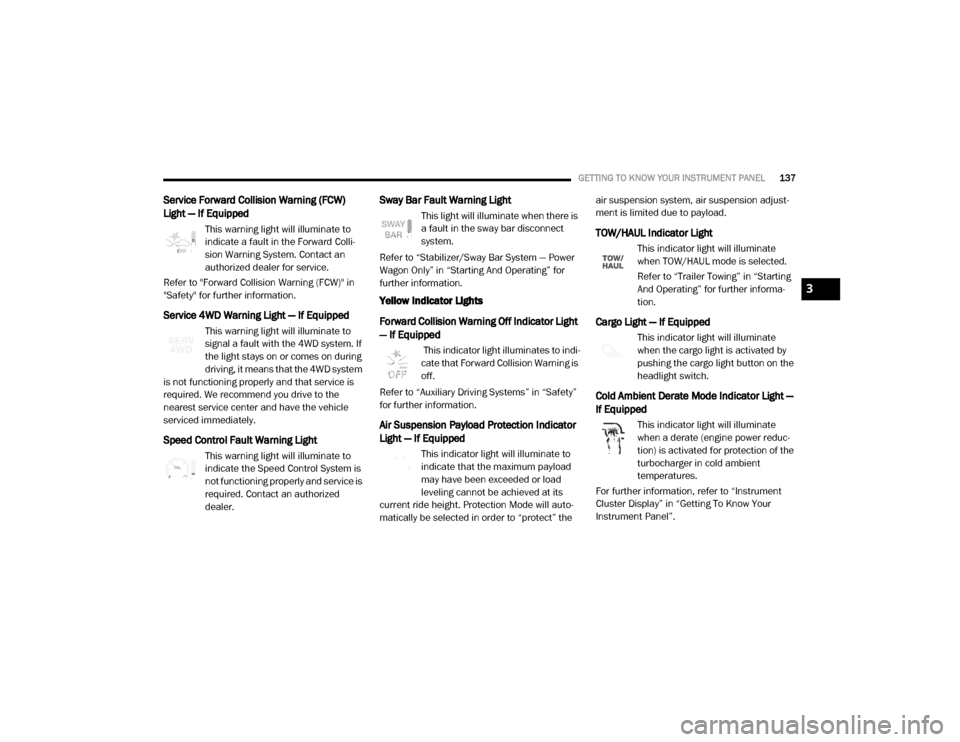
Service Forward Collision Warning (FCW)
Light — If Equipped
This warning light will illuminate to
indicate a fault in the Forward Colli-
sion Warning System. Contact an
authorized dealer for service.
Refer to "Forward Collision Warning (FCW)" in
"Safety" for further information.
Service 4WD Warning Light — If Equipped
This warning light will illuminate to
signal a fault with the 4WD system. If
the light stays on or comes on during
driving, it means that the 4WD system
is not functioning properly and that service is
required. We recommend you drive to the
nearest service center and have the vehicle
serviced immediately.
Speed Control Fault Warning Light
This warning light will illuminate to
indicate the Speed Control System is
not functioning properly and service is
required. Contact an authorized
dealer.
Sway Bar Fault Warning Light
This light will illuminate when there is
a fault in the sway bar disconnect
system.
Refer to “Stabilizer/Sway Bar System — Power
Wagon Only” in “Starting And Operating” for
further information.
Yellow Indicator Lights
Forward Collision Warning Off Indicator Light
— If Equipped
This indicator light illuminates to indi -
cate that Forward Collision Warning is
off.
Refer to “Auxiliary Driving Systems” in “Safety”
for further information.
Air Suspension Payload Protection Indicator
Light — If Equipped
This indicator light will illuminate to
indicate that the maximum payload
may have been exceeded or load
leveling cannot be achieved at its
current ride height. Protection Mode will auto -
matically be selected in order to “protect” the air suspension system, air suspension adjust
-
ment is limited due to payload.
TOW/HAUL Indicator Light
This indicator light will illuminate
when TOW/HAUL mode is selected.
Refer to “Trailer Towing” in “Starting
And Operating” for further informa -
tion.
Cargo Light — If Equipped
This indicator light will illuminate
when the cargo light is activated by
pushing the cargo light button on the
headlight switch.
Cold Ambient Derate Mode Indicator Light —
If Equipped
This indicator light will illuminate
when a derate (engine power reduc -
tion) is activated for protection of the
turbocharger in cold ambient
temperatures.
For further information, refer to “Instrument
Cluster Display” in “Getting To Know Your
Instrument Panel”.
3
20_DJD2_OM_EN_USC_t.book Page 137
Page 245 of 553

STARTING AND OPERATING243
Torque Converter Clutch
A feature designed to improve fuel economy
has been included in the automatic transmis -
sion on your vehicle. A clutch within the torque
converter engages automatically at calibrated
speeds. This may result in a slightly different
feeling or response during normal operation in
the upper gears. When the vehicle speed drops
or during some accelerations, the clutch auto -
matically disengages.
NOTE:
The torque converter clutch will not engage,
until the transmission fluid and engine
coolant are warm [usually after 1 to 3 miles
(2 to 5 km) of driving]. Because engine speed
is higher when the torque converter clutch is
not engaged, it may seem as if the transmis -
sion is not shifting properly when cold. This is normal. Using the Electronic Range Select
(ERS) shift control, when the transmission is
sufficiently warm, will demonstrate that the
transmission is able to shift into and out of
Overdrive.
If the vehicle has not been driven for several
days, the first few seconds of operation after
shifting the transmission into gear may seem
sluggish. This is due to the fluid partially
draining from the torque converter into the
transmission. This condition is normal and
will not cause damage to the transmission.
The torque converter will refill within five
seconds after starting the engine.
AUXILIARY SWITCHES — IF EQUIPPED
There can be up to six auxiliary switches located
in the lower switch bank of the instrument panel
which can be used to power various electronic
devices and PTO (Power Take Off) – If Equipped.
If Power Take Off is equipped, it will take the
place of the sixth Auxiliary switch. Connections
to the switches are found under the hood in the
connectors attached to the auxiliary Power
Distribution Center.
You have the ability to configure the function
-
ality of the auxiliary switches via the instrument cluster display. All switches can now be config
-
ured for setting the switch type operation to
latching or momentary, power source of either
battery or ignition, and ability to hold last state
across key cycles.
NOTE:
Holding last state conditions are met when
switch type is set to latching and power source
is set to ignition.
For further information on using the auxiliary
switches, please refer to the Ram Body Builders
Guide by accessing www.rambodybuilder.com
and choosing the appropriate links.
ACTIVE NOISE CANCELLATION
Your vehicle is equipped with an Active Noise
Cancellation system that cannot be turned off.
This system is designed to address exhaust and
engine noise. The system relies on four micro -
phones embedded in the headliner, which
monitor exhaust and engine noise, and assists
an onboard frequency generator, which creates
counteracting sound waves in the audio
system’s speakers. This helps keep the vehicle
quiet at idle and during drive. The system is
deactivated when the windows are rolled down.
WARNING!
Do not use the “TOW/HAUL” feature when
driving in icy or slippery conditions. The
increased engine braking can cause the rear
wheels to slide, and the vehicle to swing
around with the possible loss of vehicle
control, which may cause an accident
possibly resulting in personal injury or death.
5
20_DJD2_OM_EN_USC_t.book Page 243
Page 520 of 553

518MULTIMEDIA
Bluetooth® Mode
Bluetooth® Streaming Audio (BTSA) or Blue -
tooth® Mode is entered by pairing a Bluetooth®
device containing music to the Uconnect
system.
Before proceeding, the Bluetooth® device must
be paired with the Uconnect Phone to communi -
cate with the Uconnect system.
Refer to Phone Mode chapter in this manual for
pairing procedure.
Once the Bluetooth® device is paired to the
Uconnect system, push the MEDIA button
located on the faceplate. Once in Media Mode,
press the Source button on the touchscreen
and select the Bluetooth® button.
NOTE:
For mobile phone compatibility and pairing
instructions, please visit UconnectPhone.com.
AUX Mode
AUX Mode is entered by inserting a AUX device
using a stereo cable with a 3.5 mm audio jack
into the AUX port or by pushing the MEDIA button located on the faceplate. Once in Media
Mode, press the Source button on the touch
-
screen, and select the AUX button.
Inserting Auxiliary Device
Gently insert the Auxiliary device cable into the
AUX Port. If you insert an Auxiliary device with
the ignition on, the unit will switch to AUX mode
and begin to play when you insert the device
cable.
Controlling The Auxiliary Device
The control of the Auxiliary device (e.g.,
selecting playlists, play, fast forward, etc.)
cannot be provided by the radio; use the device
controls instead. Adjust the volume with the
VOLUME rotary knob or with the volume of the
attached device.
The radio unit is acting as the amplifier for audio
output from the Auxiliary device. Therefore, if
the volume control on the Auxiliary device is set
too low, there will be insufficient audio signal for
the radio unit to play the music on the device.
Phone Mode
Operating Phone Mode
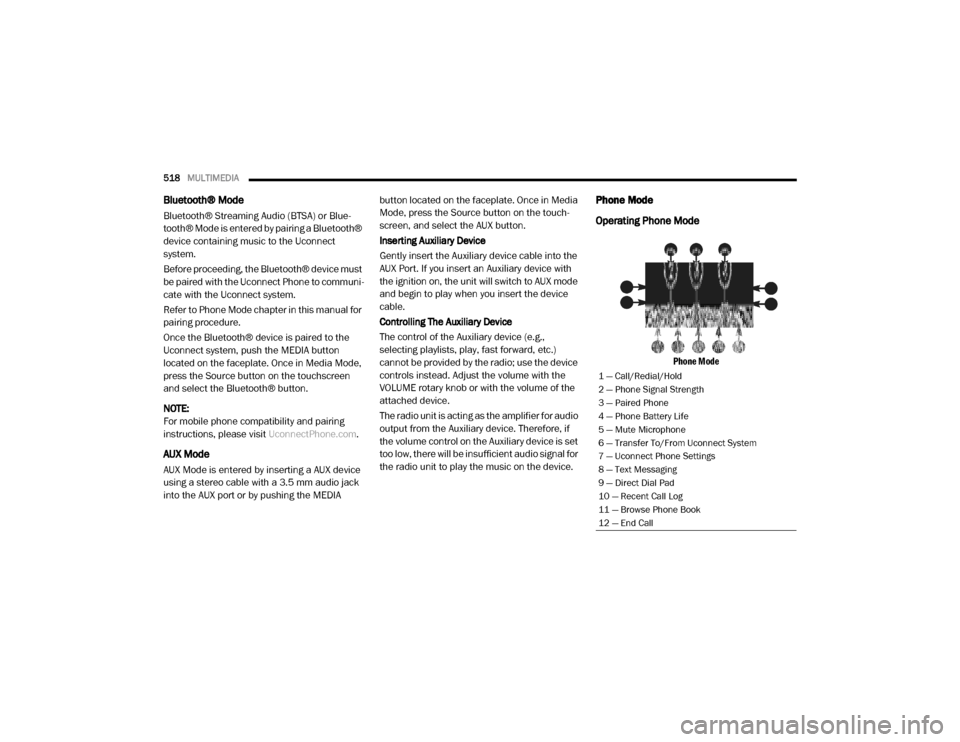
Phone Mode
1 — Call/Redial/Hold
2 — Phone Signal Strength
3 — Paired Phone
4 — Phone Battery Life
5 — Mute Microphone
6 — Transfer To/From Uconnect System
7 — Uconnect Phone Settings
8 — Text Messaging
9 — Direct Dial Pad
10 — Recent Call Log
11 — Browse Phone Book
12 — End Call
20_DJD2_OM_EN_USC_t.book Page 518
Page 547 of 553

545
Manual Park Release
............................................. 366
Service...................................................... 539
Media Hub..................................................... 525
Memory Seat................................................... 35
Methanol....................................................... 446
Mirrors............................................................. 43Electric Powered......................................... 45
Heated........................................................ 47
Memory....................................................... 35Outside........................................................ 45
Rearview..................................... 43, 44, 338
Trailer Towing.............................................. 46
Modifications/AlterationsVehicle
........................................................ 12Monitor, Tire Pressure System....................... 163
Mopar Parts................................................... 538
MP3 Control.................................................. 525
Multi-Function Control Lever............................ 49
N
Navigation System (Uconnect GPS)
............... 302
New Vehicle Break-In Period.......................... 228
Noise ControlMaintenance............................................. 419
Tampering Prohibited................................ 420
Noise Emission Warranty..................... 419, 420
O
Occupant Restraints
..................................... 171
Octane Rating, Gasoline (Fuel)..................... 446
Off-Pavement Driving (Off-Road).......... 255, 336
Off-Road Driving (Off-Pavement).......... 255, 336
Oil Change Indicator..................................... 385
Oil Filter, Change.......................................... 398Oil Filter, Selection........................................ 398
Oil Pressure Light.......................................... 132
Oil Reset....................................................... 119Oil, Engine................................... 396, 452, 454
Capacity.................................................... 451
Change Interval........................................ 396
Dipstick.................................................... 394
Disposal................................................... 398Filter....................................... 398, 452, 454
Filter Disposal........................................... 398
Identification Logo........................... 396, 397
Materials Added To.................................. 398Pressure Warning Light............................ 132
Recommendation............................ 396, 451
Synthetic.................................................. 398
Viscosity.......................................... 397, 451
Onboard Diagnostic System.......................... 141
Operating Precautions.................................. 141
Operator ManualOwner's Manual
..................................12, 539
Outside Rearview Mirrors.................................45
Overdrive....................................................... 242
Overdrive OFF Switch.................................... 242
Overheating, Engine...................................... 367
P
Paint Care
..................................................... 439
Panic Alarm......................................................15
Parking Brake............................................... 229
ParkSense System, Rear...................... 289, 294Passive Entry....................................................28
Pedals, Adjustable...........................................43
Perform Service Indicator, Reset.................. 385
Pets............................................................... 208
Pickup Box................................................92, 94
Pinch Protection...............................................74
Placard, Tire And Loading Information.......... 426
PowerDistribution Center (Fuses)
....................... 354
Door Locks...................................................27
Mirrors.........................................................45
Outlet (Auxiliary Electrical Outlet)..........88, 90
Seats...........................................................34
Side Steps...................................................28Sliding Rear Window....................................72
Steering.......................................................45
Sunroof........................................................72
Windows......................................................7011
20_DJD2_OM_EN_USC_t.book Page 545