warning Ram 3500 2018 Owner's Manual
[x] Cancel search | Manufacturer: RAM, Model Year: 2018, Model line: 3500, Model: Ram 3500 2018Pages: 372, PDF Size: 7.1 MB
Page 51 of 372

POWER SUNROOF — IF EQUIPPED
The power sunroof switch is located on the
overhead console between the courtesy/
reading lights.
WARNING!
• Never leave children unattended in avehicle, or with access to an unlocked
vehicle. Never leave the key fob in or
near the vehicle, or in a location acces-
sible to children. Do not leave the igni-
tion of a vehicle equipped with Keyless
Enter-N-Go in the ACC or ON/RUN
mode. Occupants, particularly unat-
tended children, can become entrapped
by the power sunroof while operating the
power sunroof switch. Such entrapment
may result in serious injury or death.
• In a collision, there is a greater risk of
being thrown from a vehicle with an
open sunroof. You could also be seri-
ously injured or killed. Always fasten
your seat belt properly and make sure all
passengers are also properly secured.
• Do not allow small children to operate
the sunroof. Never allow your fingers,
other body parts, or any object, to proj-
ect through the sunroof opening. Injury
may result.
Opening Sunroof
Express
Push the switch rearward and release it
within one-half second and the sunroof will
open automatically from any position. The
sunroof will open fully and stop automati-
cally. This is called “Express Open”. During
Express Open operation, any other actuation
of the sunroof switch will stop the sunroof.
Manual
To open the sunroof, push and hold the
switch rearward to full open. Any release of
the switch will stop the movement. The sun-
roof and sunshade will remain in a partially
opened condition until the sunroof switch is
pushed again.
Closing Sunroof
Express
Push the switch forward and release it within
one-half second and the sunroof will close
automatically from any position. The sunroof
Power Sunroof Switch
1 — Opening Sunroof
2 — Venting Sunroof
3 — Closing Sunroof
49
Page 53 of 372

2. Reach into the opening beneath the cen-ter of the hood and push the safety latch
lever to the left to release it, before raising
the hood.
To Close The Hood
Lower the hood to approximately 12 inches
(30 cm) from the engine compartment and
drop it. Make sure that the hood is completely
closed.
WARNING!
Be sure the hood is fully latched before
driving your vehicle. If the hood is not fully
latched, it could open when the vehicle is
in motion and block your vision. Failure to
follow this warning could result in serious
injury or death.
CAUTION!
To prevent possible damage, do not slam
the hood to close it. Use a firm downward
push at the front center of the hood to
ensure that both latches engage.
UNIVERSAL GARAGE DOOR OPENER
(HOMELINK)
• HomeLink replaces up to three hand-heldtransmitters that operate devices such as
garage door openers, motorized gates,
lighting or home security systems. The
HomeLink unit is powered by your vehicles
12 Volt battery. • The HomeLink buttons that are located in
the overhead console or sunvisor designate
the three different HomeLink channels.
• To operate HomeLink, push and release any of the programmed HomeLink buttons.
These buttons will activate the devices they
are programmed to with each press of the
corresponding HomeLink button.
Before You Begin Programming
HomeLink
For efficient programming and accurate
transmission of the radio-frequency signal, it
is recommended that a new battery be placed
in the hand-held transmitter of the device
that is being programmed to the HomeLink
system. Make sure your hand-held transmit-
ter is programmed to activate the device you
are trying to program your HomeLink button
to.
Ensure that your vehicle is parked outside of
the garage before you begin programming.
It is recommended that you erase all the
channels of your HomeLink before you use it
for the first time.
HomeLink Buttons
51
Page 56 of 372

WARNING!
• Your motorized door or gate will openand close while you are programming
the universal transceiver. Do not pro-
gram the transceiver if people or pets are
in the path of the door or gate.
• Do not run your vehicle in a closed
garage or confined area while program-
ming the transceiver. Exhaust gas from
your vehicle contains Carbon Monoxide
(CO) which is odorless and colorless.
Carbon Monoxide is poisonous when in-
haled and can cause you and others to
be severely injured or killed.
Programming HomeLink To A
Miscellaneous Device
Refer to “Programming HomeLink To A Ga-
rage Door Opener” for the procedure on how
to program HomeLink to a miscellaneous
device, as it follows the same procedure. Be
sure to determine if the device has a rolling
code, or non-rolling code before beginning
the programming process. NOTE:
Canadian radio frequency laws require trans-
mitter signals to time-out (or quit) after sev-
eral seconds of transmission, which may not
be long enough for HomeLink to pick up the
signal during programming. Similar to this
Canadian law, some U.S. gate operators are
designed to time-out in the same manner.
The procedure may need to be preformed
multiple times to successfully pair the device
to your HomeLink buttons.
Reprogramming A Single
HomeLink Button
To reprogram a single HomeLink button that
has been previously trained, without erasing
all the channels, follow the procedure below.
Be sure to determine whether the new device
you want to program the HomeLink button to
has a Rolling Code, or Non-rolling Code.
1. Cycle the ignition to the ON/RUN
position. NOTE:
For vehicle’s equipped with Keyless
Enter-N-Go, place the ignition in the RUN
position with the Engine ON. Make sure to
program HomeLink with the vehicle out-
side of the garage, or with the garage door
open at all times.
2. Push and hold the desired HomeLink but- ton until the instrument cluster display
shows the “CHANNEL # TRAINING”
message. Do not release the button.
3. Without releasing the button, proceed with
Step 2 in “Programming HomeLink To A
Garage Door Opener” and follow all re-
maining steps.
General Information
The following regulatory statement applies to
all Radio Frequency (RF) devices equipped in
this vehicle:
This device complies with Part 15 of the FCC
Rules and with Industry Canada license-
exempt RSS standard(s). Operation is sub-
ject to the following two conditions:
1. This device may not cause harmful inter- ference, andGETTING TO KNOW YOUR VEHICLE
54
Page 58 of 372
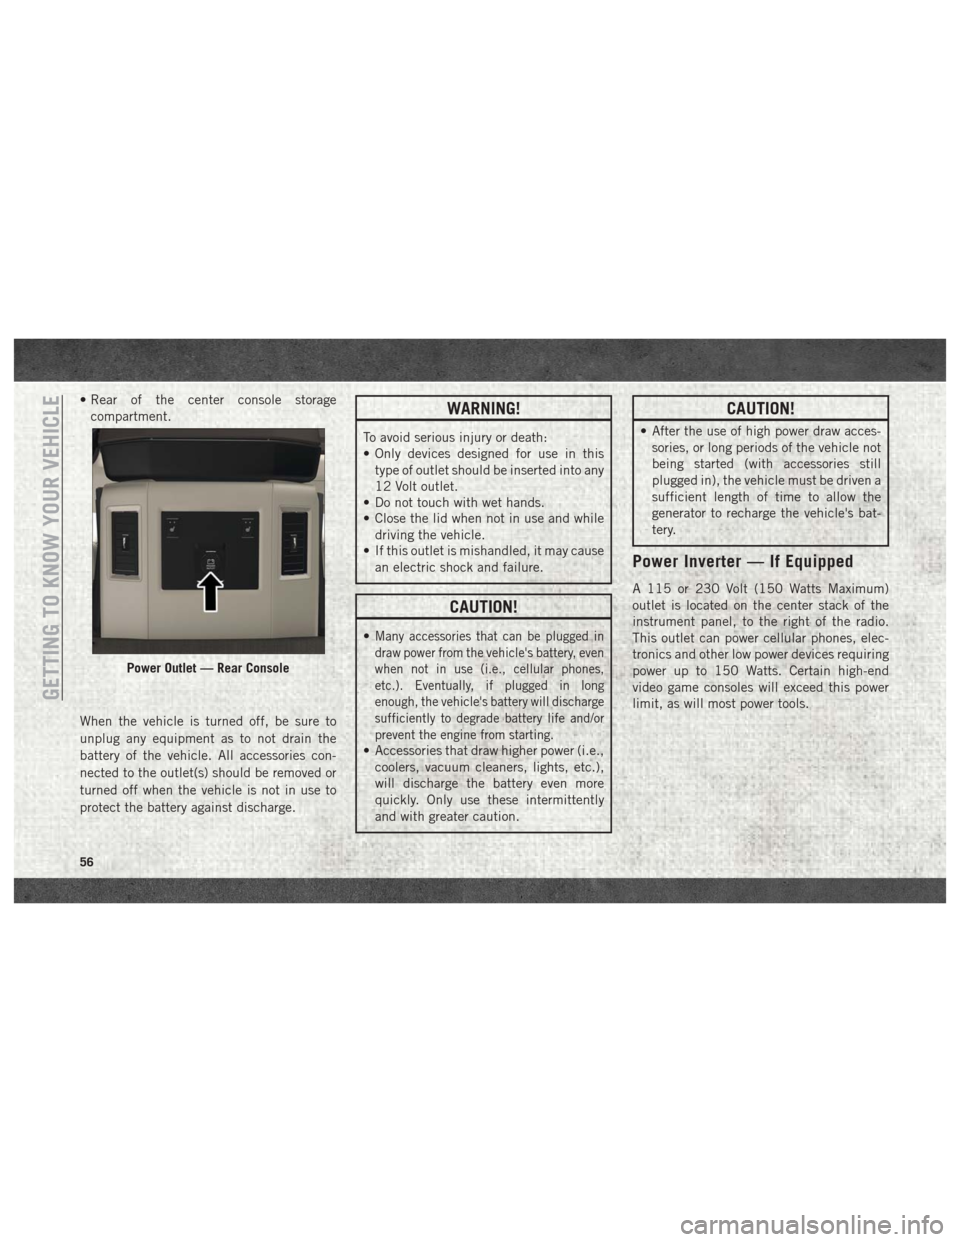
• Rear of the center console storagecompartment.
When the vehicle is turned off, be sure to
unplug any equipment as to not drain the
battery of the vehicle. All accessories con-
nected to the outlet(s) should be removed or
turned off when the vehicle is not in use to
protect the battery against discharge.WARNING!
To avoid serious injury or death:
• Only devices designed for use in this type of outlet should be inserted into any
12 Volt outlet.
• Do not touch with wet hands.
• Close the lid when not in use and while
driving the vehicle.
• If this outlet is mishandled, it may cause
an electric shock and failure.
CAUTION!
•Many accessories that can be plugged in
draw power from the vehicle's battery, even
when not in use (i.e., cellular phones,
etc.). Eventually, if plugged in long
enough, the vehicle's battery will discharge
sufficiently to degrade battery life and/or
prevent the engine from starting.
• Accessories that draw higher power (i.e.,coolers, vacuum cleaners, lights, etc.),
will discharge the battery even more
quickly. Only use these intermittently
and with greater caution.
CAUTION!
• After the use of high power draw acces-sories, or long periods of the vehicle not
being started (with accessories still
plugged in), the vehicle must be driven a
sufficient length of time to allow the
generator to recharge the vehicle's bat-
tery.
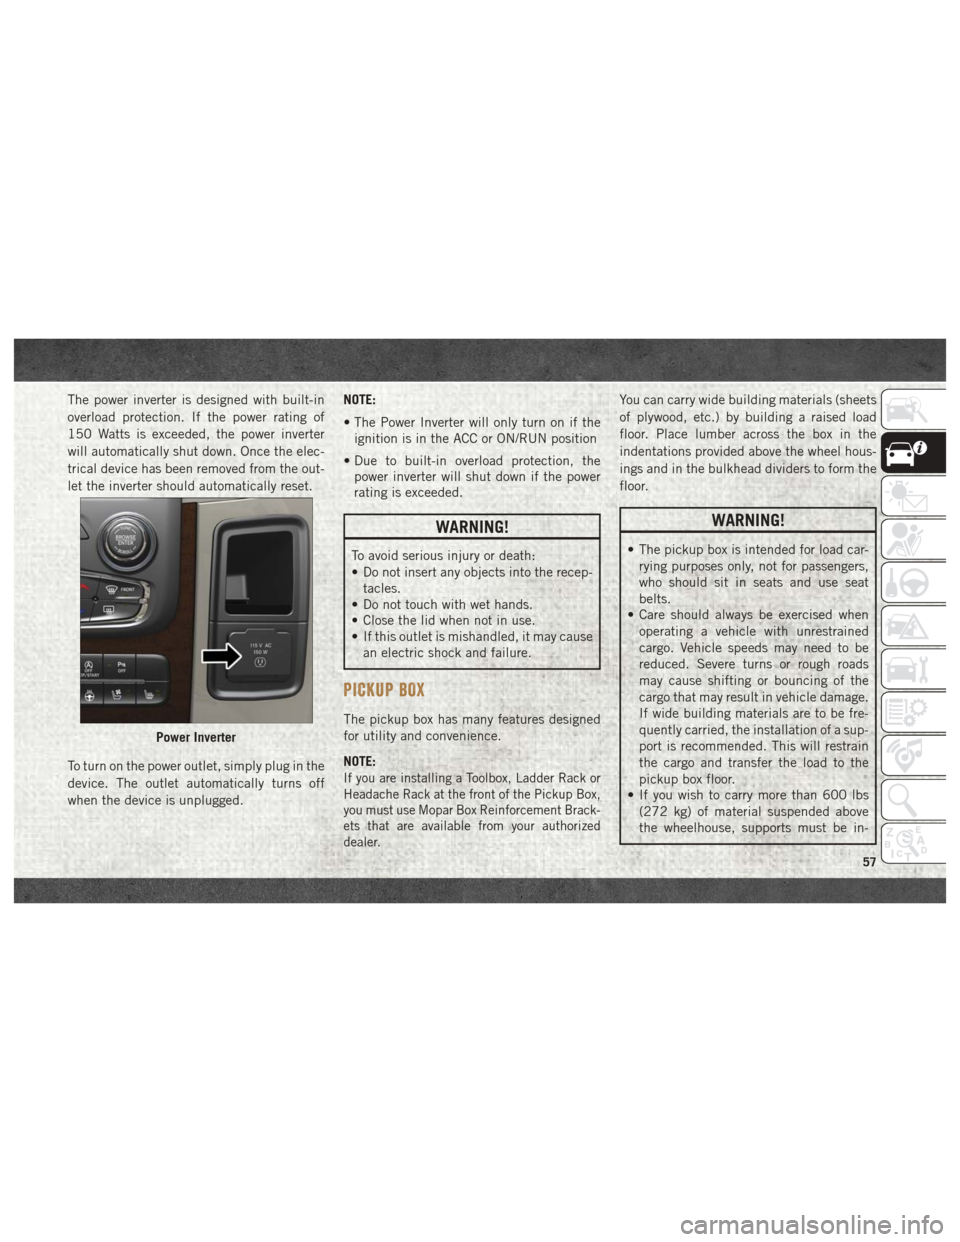
Power Inverter — If Equipped
A 115 or 230 Volt (150 Watts Maximum)
outlet is located on the center stack of the
instrument panel, to the right of the radio.
This outlet can power cellular phones, elec-
tronics and other low power devices requiring
power up to 150 Watts. Certain high-end
video game consoles will exceed this power
limit, as will most power tools.
Power Outlet — Rear Console
GETTING TO KNOW YOUR VEHICLE
56
Page 59 of 372
The power inverter is designed with built-in
overload protection. If the power rating of
150 Watts is exceeded, the power inverter
will automatically shut down. Once the elec-
trical device has been removed from the out-
let the inverter should automatically reset.
To turn on the power outlet, simply plug in the
device. The outlet automatically turns off
when the device is unplugged.NOTE:
• The Power Inverter will only turn on if the
ignition is in the ACC or ON/RUN position
• Due to built-in overload protection, the power inverter will shut down if the power
rating is exceeded.
WARNING!
To avoid serious injury or death:
• Do not insert any objects into the recep-
tacles.
• Do not touch with wet hands.
• Close the lid when not in use.
• If this outlet is mishandled, it may cause
an electric shock and failure.
PICKUP BOX
The pickup box has many features designed
for utility and convenience.
NOTE:
If you are installing a Toolbox, Ladder Rack or
Headache Rack at the front of the Pickup Box,
you must use Mopar Box Reinforcement Brack-
ets that are available from your authorized
dealer.
You can carry wide building materials (sheets
of plywood, etc.) by building a raised load
floor. Place lumber across the box in the
indentations provided above the wheel hous-
ings and in the bulkhead dividers to form the
floor.
WARNING!
• The pickup box is intended for load car-rying purposes only, not for passengers,
who should sit in seats and use seat
belts.
• Care should always be exercised when
operating a vehicle with unrestrained
cargo. Vehicle speeds may need to be
reduced. Severe turns or rough roads
may cause shifting or bouncing of the
cargo that may result in vehicle damage.
If wide building materials are to be fre-
quently carried, the installation of a sup-
port is recommended. This will restrain
the cargo and transfer the load to the
pickup box floor.
• If you wish to carry more than 600 lbs
(272 kg) of material suspended above
the wheelhouse, supports must be in-
Power Inverter
57
Page 60 of 372

WARNING!
stalled to transfer the weight of the load
to the pickup box floor or vehicle dam-
age may result. The use of proper sup-
ports will permit loading up to the rated
payload.
• Unrestrained cargo may be thrown for-
ward in an accident causing serious or
fatal injury.
There are stampings in the sheet metal on the
inner side bulkheads of the box in front of
and behind both wheel housings. Place
wooden boards across the box from side to
side to create separate load compartments in
the pickup box.
There are four tie-down cleats bolted to the
lower sides of the pickup box that can sustain
loads up to 1000 lbs (450 kg) total.
Cargo Camera — If Equipped
Your vehicle may be equipped with the Cargo
Camera that allows you to see an image of the
inside of the pickup box. The image will be
displayed in the Uconnect screen. The Cargo Camera is located in the bottom
center area of the center high-mounted sto-
plamp (CHMSL).
A touchscreen button
to indicate the
current active camera image being displayed
is made available whenever the Cargo Cam-
era image is displayed.
Also, a touchscreen button
to switch
the display to rear view camera image is
made available whenever the Cargo Camera
image is displayed.
A touchscreen button "X" to disable display of
the camera image is made available when the
vehicle is not in REVERSE gear.
A display timer is initiated when the Cargo
Camera image is displayed. The image will
continue to be displayed until the display
timer exceeds 10 seconds and the vehicle
speed is above 8 mph (13 km/h) or the
touchscreen button "X" to disable display of
the Cargo Camera image is pressed. NOTE:
• If the vehicle speed remains below 8 mph
(13 km/h), the Cargo Camera image will be
displayed continuously until the touch-
screen button "X" to disable display of the
Cargo Camera image is pressed.
• If snow, ice, mud, or any foreign substance builds up on the camera lens, clean the
lens, rinse with water, and dry with a soft
cloth. Do not cover the lens.
Turning Cargo Camera On Or Off — With
Uconnect 4C/4C NAV
1. Press the “Controls” button located on
the bottom of the Uconnect display.
2. Press the “Cargo Camera” button
to
turn the Cargo Camera system on.
GETTING TO KNOW YOUR VEHICLE
58
Page 62 of 372
CAUTION!
Leaving the lid open for extended periods
of time could cause the vehicle battery to
discharge. If the lid is required to stay
open for extended periods of time, it is
recommended that the bin lights be
turned off manually using the on/off
switch.
The interior of the RamBox will automatically
illuminate when the lid is opened. In addition
to the automatic illumination switch, there is
a manual on/off switch located at the rear of
each storage bin. Pushing the switch once
will turn off the bin lights, pushing the switch
again will turn the lights back on.
Cargo bins feature two removable drain plugs
(to allow water to drain from bins). To remove
plug, pull up on the edge. To install push plug
downward into drain hole.
NOTE:
Provisions are provided in the bins for cargo
dividers and shelf supports. These accesso-
ries (in addition to other RamBox accesso-
ries) are available from Mopar.
Locking And Unlocking RamBox
Push and release the lock or unlock button on
the key fob to lock and unlock all doors, the
tailgate and the RamBox (if equipped). Refer
to “Keys” in “Getting To Know Your Vehicle”
in the Owner’s Manual for further details. The
RamBox storage bins can be locked using the
vehicle key. To lock and unlock the storage
bin, insert the key into the keyhole on the
push button and turn clockwise to lock or
counterclockwise to unlock. Always return
the key to the upright (vertical) position be-
fore removing the key from the push button.
CAUTION!
• Ensure cargo bin lids are closed and latched before moving or driving vehicle.
• Loads applied to the top of the bin lid
should be minimized to prevent damage
to the lid and latching/hinging mecha-
nisms.
• Damage to the RamBox bin may occur
due to heavy/sharp objects placed in bin
that shift due to vehicle motion. In order
to minimize potential for damage, se-
CAUTION!
cure all cargo to prevent movement and
protect inside surfaces of bin from
heavy/sharp objects with appropriate
padding.
RamBox Safety Warning
Carefully follow these warnings to help pre-
vent personal injury or damage to your
vehicle:
WARNING!
• Always close the storage bin coverswhen your vehicle is unattended.
• Do not allow children to have access to
the storage bins. Once in the storage
bin, young children may not be able to
escape. If trapped in the storage bin,
children can die from suffocation or heat
stroke.
• In an accident, serious injury could re-
sult if the storage bin covers are not
properly latched.
GETTING TO KNOW YOUR VEHICLE
60
Page 63 of 372

WARNING!
• Do not drive the vehicle with the storagebin covers open.
• Keep the storage bin covers closed and
latched while the vehicle is in motion.
• Do not use a storage bin latch as a tie
down.
RamBox Storage Bin Cover Emergency Re-
lease Lever — If Equipped
As a security measure, a Storage Bin Cover
Emergency Release is built into the storage
bin cover latching mechanism.
NOTE:
In the event of an individual being locked
inside the storage bin, the storage bin cover
can be opened from inside of the bin by
pulling on the glow-in-the-dark lever at-
tached to the storage bin cover latching
mechanism.
Bed Extender — If Equipped
The bed extender has three functional posi-
tions:
• Storage Position • Divider Position
• Extender Position
Storage Position
The storage position for the bed extender is at
the front of the truck bed which maximizes
the bed cargo area when not in use.
To install the bed extender into the storage
position, perform the following:
1. Make sure the center handle is unlocked
using the vehicle key and rotate the center
handle vertically to release the extender
side gates.
2. With the side gates open, position the extender fully forward in the bed against
the front panel.
3. Rotate the side gates closed allowing the outboard ends to be positioned in front of
the cargo tie down loops.
4. Rotate the center handle horizontally to secure the side gates in the closed
position.
5. Lock the center handle using the vehicle key to secure the panel into place.
Divider Position
The divider position is intended for managing
your cargo and assisting in keeping cargo
from moving around the bed. There are 11 di-
vider slots along the bed inner panels which
allow for various positions to assist in manag-
ing your cargo.
To install the bed extender into a divider
position, perform the following:
1. Make sure the center handle is unlocked
using the vehicle key and rotate the center
handle vertically to release the extender
side gates.
2. With the side gates open, position the extender so the outboard ends align with
the intended slots in the sides of the bed.
3. Rotate the side gates closed so that the outboard ends are secured into the in-
tended slots of the bed.
4. Rotate the center handle horizontally to secure the side gates in the closed
position.
5. Lock the center handle to secure the panel into place.
61
Page 64 of 372
Extender Position
The extender position allows you to load the
bed of the truck beyond the tail gate. The bed
extender will add an additional 15 inches
(38 cm) in the back of the truck when addi-
tional cargo room is needed. The extender
position utilizes a locating pin and rotating
handle located on both sides of the truck bed
near the tailgate.
To install the bed extender into the extender
position, perform the following:
1. Lower the tailgate.
2. Make sure the center handle is unlockedand rotate the center handle vertically in
order to release the extender side gates.
3. Fit the end of the side gate ends onto the pin and handle.
4. Rotate the handles to the horizontal posi- tion to secure into place.WARNING!
To reduce the risk of potential injury or
property damage:
• Cargo must be secured.
• Do not exceed cargo load rating of yourvehicle.
• Secure all loads to truck utilizing cargo
tie downs.
• Extender should not be used as cargo tie
down.
• When vehicle is in motion do not exceed
150 lbs (68 kg) load on the tailgate.
• The bed extender is not intended for off
road use.
• When not in use, the extender/divider
should be in stowed or divider position
with the tailgate closed.
• When in use all handles are to be in the
locked position.
Bed Rail Tie-Down System
CAUTION!
The maximum load per cleat should not
exceed 250 lbs (113 kg) and the angle of
CAUTION!
the load on each cleat should not exceed
45 degrees above horizontal, or damage to
the cleat or cleat rail may occur.
There are two adjustable cleats on each side
of the bed that can be used to assist in
securing cargo.
Each cleat must be located and tightened
down in one of the detents, along either rail,
in order to keep cargo properly secure.
To move the cleat to any position on the rail,
turn the nut counterclockwise, approximately
three turns. Then pull out on the cleat and
slide it to the detent nearest the desired
location. Make sure the cleat is seated in the
detent and tighten the nut.
To remove the cleats from the utility rail,
remove the end cap screw located in the
center of the end cap, using a #T30 Torx
head driver. Remove the end cap and slide
the cleat off the end of the rail.
GETTING TO KNOW YOUR VEHICLE
62
Page 67 of 372
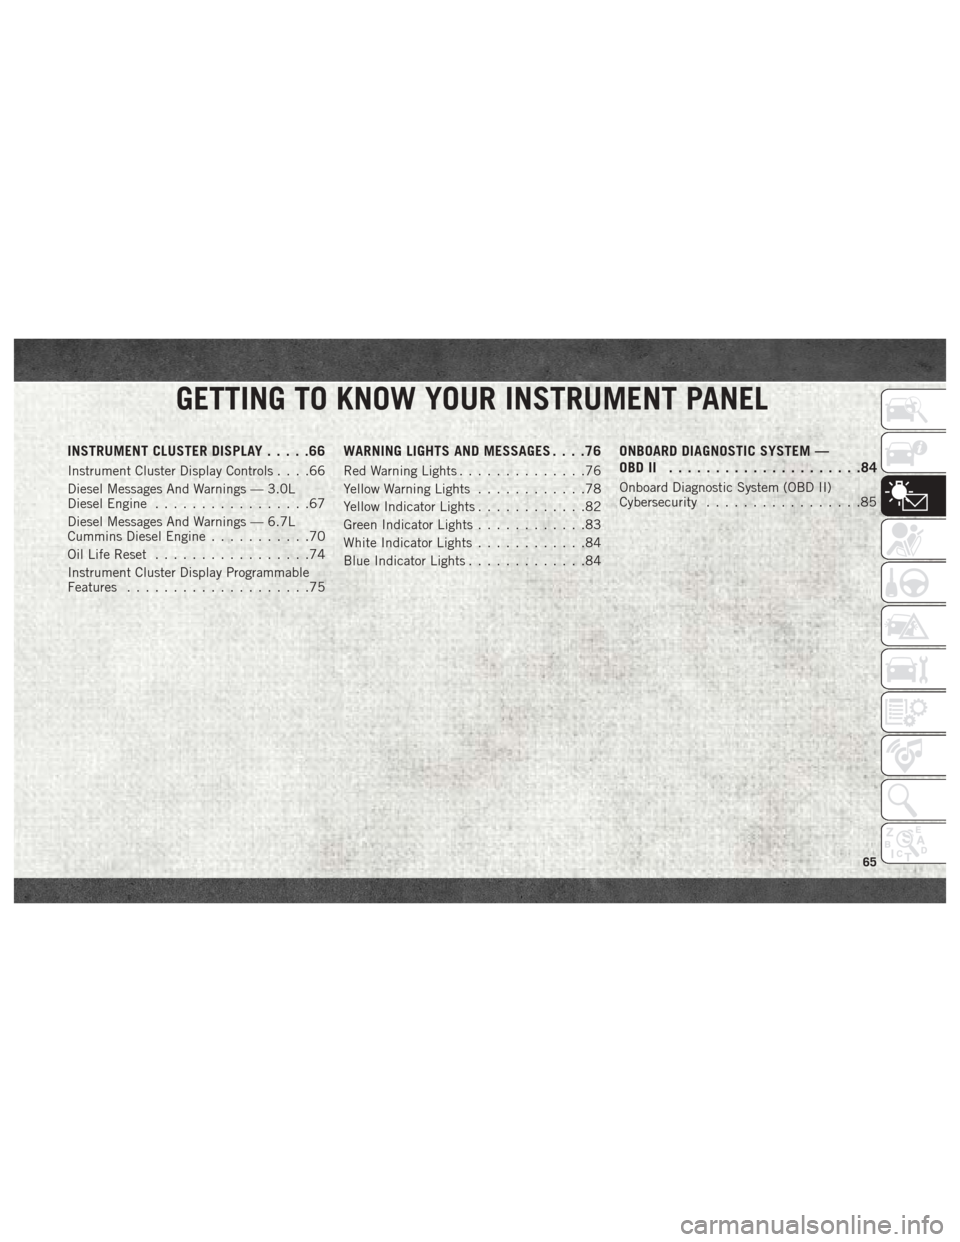
GETTING TO KNOW YOUR INSTRUMENT PANEL
INSTRUMENT CLUSTER DISPLAY.....66
Instrument Cluster Display Controls ....66
Diesel Messages And Warnings — 3.0L
Diesel Engine .................67
Diesel Messages And Warnings — 6.7L
Cummins Diesel Engine ...........70
Oil Life Reset .................74
Instrument Cluster Display Programmable
Features ....................75
WARNING LIGHTS AND MESSAGES ....76
Red Warning Lights..............76
Yellow Warning Lights ............78
Yellow Indicator Lights ............82
Green Indicator Lights ............83
White Indicator Lights ............84
Blue Indicator Lights .............84
ONBOARD DIAGNOSTIC SYSTEM —
OBDII .....................84
Onboard Diagnostic System (OBD II)
Cybersecurity.................85
GETTING TO KNOW YOUR INSTRUMENT PANEL
65