key battery Ram 3500 2018 User Guide
[x] Cancel search | Manufacturer: RAM, Model Year: 2018, Model line: 3500, Model: Ram 3500 2018Pages: 372, PDF Size: 7.1 MB
Page 15 of 372
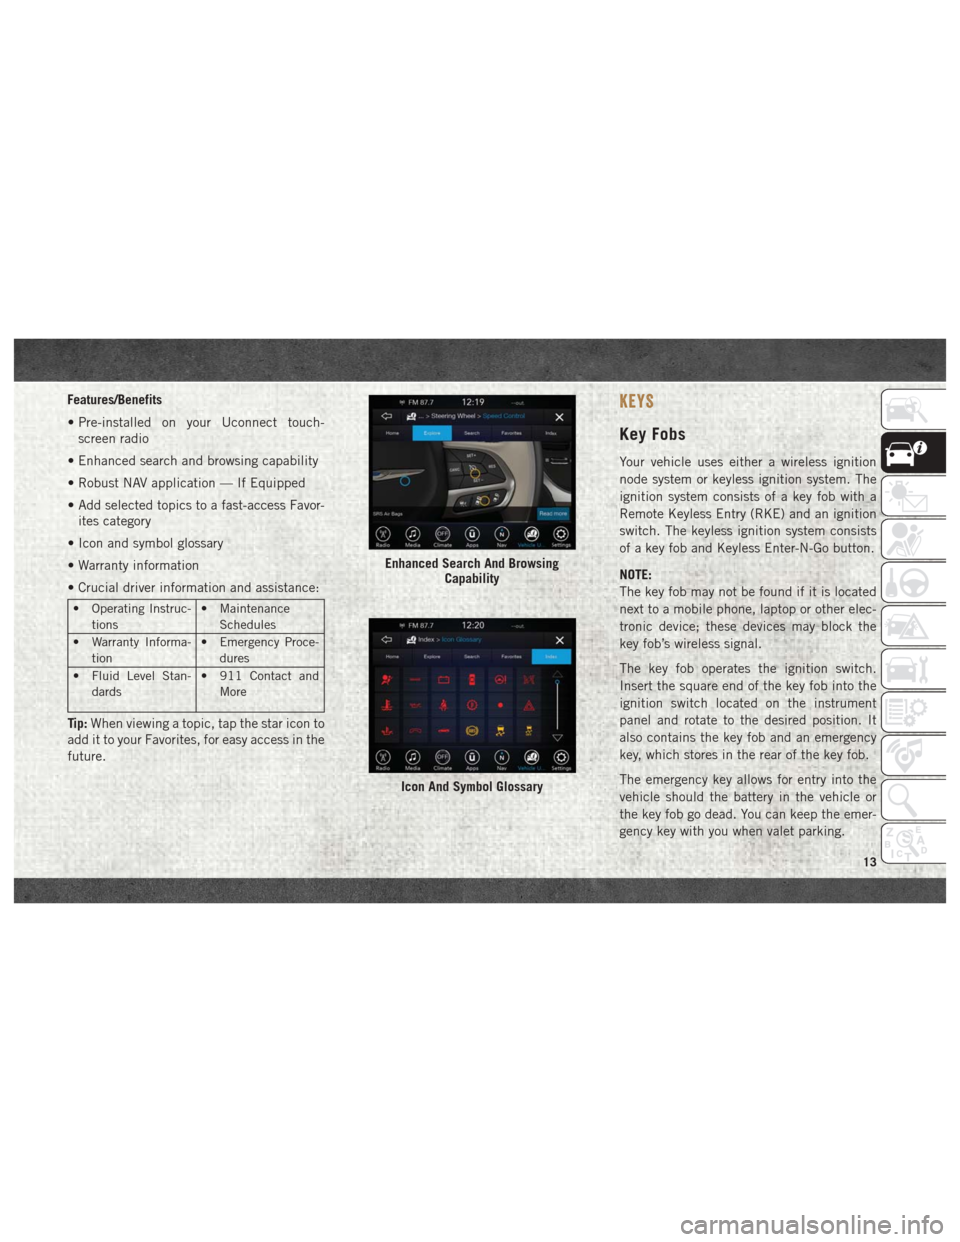
Features/Benefits
• Pre-installed on your Uconnect touch-screen radio
• Enhanced search and browsing capability
• Robust NAV application — If Equipped
• Add selected topics to a fast-access Favor- ites category
• Icon and symbol glossary
• Warranty information
• Crucial driver information and assistance:
• Operating Instruc- tions • Maintenance
Schedules
• Warranty Informa- tion • Emergency Proce-
dures
• Fluid Level Stan- dards • 911 Contact and
More
Tip: When viewing a topic, tap the star icon to
add it to your Favorites, for easy access in the
future.
KEYS
Key Fobs
Your vehicle uses either a wireless ignition
node system or keyless ignition system. The
ignition system consists of a key fob with a
Remote Keyless Entry (RKE) and an ignition
switch. The keyless ignition system consists
of a key fob and Keyless Enter-N-Go button.
NOTE:
The key fob may not be found if it is located
next to a mobile phone, laptop or other elec-
tronic device; these devices may block the
key fob’s wireless signal.
The key fob operates the ignition switch.
Insert the square end of the key fob into the
ignition switch located on the instrument
panel and rotate to the desired position. It
also contains the key fob and an emergency
key, which stores in the rear of the key fob.
The emergency key allows for entry into the
vehicle should the battery in the vehicle or
the key fob go dead. You can keep the emer-
gency key with you when valet parking.
Enhanced Search And Browsing Capability
Icon And Symbol Glossary
13
Page 16 of 372
To remove the emergency key, slide the me-
chanical latch at the top of the key fob
sideways with your thumb and then pull the
key out with your other hand.
NOTE:
When using the emergency key to gain access
to your vehicle, be aware that the security
alarm may be triggered. Insert the key into
the ignition and place the ignition in the
ON/RUN mode to disarm the security system.
This Keyless Push Button Ignition key fob
allows the driver to operate the ignition
switch with the push of a button, as long as
the key fob is in the passenger compartment.
The Keyless Push Button Ignition has four
operating positions, three of which are la-
beled and will illuminate when in position.
The three positions are OFF, ACC, and ON/
RUN. The fourth position is START, during
start RUN will illuminate. It also contains the
key fob and an emergency key, which stores
in the rear of the key fob.The emergency key allows for entry into the
vehicle should the battery in the vehicle or
the key fob go dead. You can keep the emer-
gency key with you when valet parking.
To remove the emergency key, slide the me-
chanical latch on the backside of the key fob
sideways with your thumb and then pull the
key out with your other hand.
NOTE:
• When using the emergency key to gain
access to your vehicle, be aware that the
security alarm may be triggered. Put the
nose side (side opposite of the emergency
key) of the key fob against the ENGINE
START/STOP button and push to disarm
the security system.
• You can insert the double-sided emergency key into the door lock cylinder with either
side up. The Remote Keyless Entry system allows you
to lock or unlock all doors, tailgate, and the
RamBox (if equipped) as well as activate the
Panic Alarm from distances up to approxi-
mately 66 ft (20 m) using a key fob with
integrated key. The key fob does not need to
be pointed at the vehicle to activate the
system. Push and release the lock button on
the key fob to lock all doors, the tailgate and
the RamBox (if equipped). The turn signal
lights will flash and the horn will chirp to
acknowledge the signal.
NOTE:
Inserting the key fob with integrated key into
the ignition switch disables the system from
responding to any button pushes from that
key fob. Driving at speeds 5 mph (8 km/h)
and above disables the system from respond-
ing to all key fob buttons for all key fobs.
GETTING TO KNOW YOUR VEHICLE
14
Page 18 of 372
NOTE:
• The interior lights will turn off if you placethe ignition in the ACC or ON/RUN position
while the Panic Alarm is activated. How-
ever, the exterior lights and horn will remain
on.
• You may need to be less than 35 ft (11 m) from the vehicle when using the key fob to
turn off the Panic Alarm due to the radio
frequency noises emitted by the system.
Air Suspension (Remote Lowering Of The
Vehicle) — If Equipped
For easy entry and loading, your
vehicle can be lowered by push-
ing the key fob air suspension
lowering button two times. When
key fob lowering is requested,
the vehicle will send a series of chirps and
flashes to alert the customer that the opera-
tion has begun and will continue these alerts
until it successfully lowers. The following conditions must be met for the
vehicle to lower remotely:
• The vehicle must not already be in Entry/
Exit (Park) ride height.
• The vehicle battery must be fully charged.
• All doors must be closed.
• The key fob must be out of the vehicle.
Canceling Remote Lowering
Vehicle lowering can be cancelled at any-
time. When vehicle lowering is canceled, the
vehicle will raise up to the next defined level
and lock out the remote lowering feature until
the ignition has been cycled ON/OFF.
To cancel vehicle lowering, push the key fob
air suspension lowering button one time dur-
ing the lowering process. When vehicle low-
ering is canceled, the horn will chirp two
times and the turn signal lamps will flash four
times. Once raising is completed, the horn
will chirp one time.
NOTE:
Refer to “Air Suspension System” in “Start-
ing And Operating” for further information.
General Information
The following regulatory statement applies to
all radio frequency (RF) devices equipped in
this vehicle:
This device complies with Part 15 of the FCC
Rules and with Industry Canada license-
exempt RSS standard(s). Operation is sub-
ject to the following two conditions:
1. This device may not cause harmful inter- ference, and
2. This device must accept any interference received, including interference that may
cause undesired operation.
NOTE:
Changes or modifications not expressly ap-
proved by the party responsible for compli-
ance could void the user’s authority to oper-
ate the equipment.
GETTING TO KNOW YOUR VEHICLE
16
Page 19 of 372
IGNITION SWITCH
Wireless Ignition Node (WIN) —
If Equipped
The Wireless Ignition Node (WIN) operates
similar to an ignition switch. It has four
operating positions, three with detents and
one that is spring-loaded. The detent posi-
tions are OFF, ACC, and ON/RUN. The START
position is a spring-loaded momentary con-
tact position. When released from the START
position, the switch automatically returns to
the ON/RUN position.
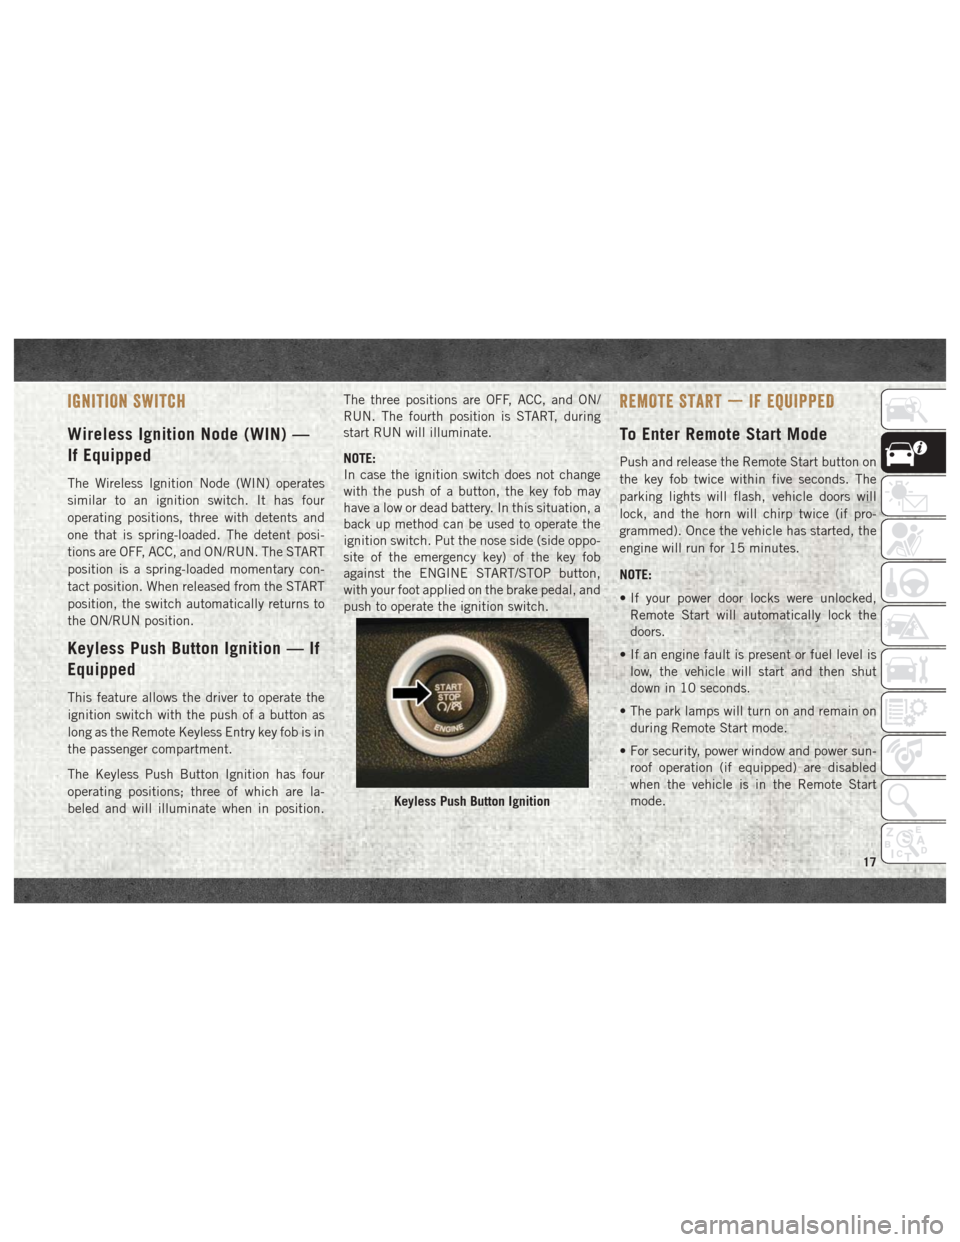
Keyless Push Button Ignition — If
Equipped
This feature allows the driver to operate the
ignition switch with the push of a button as
long as the Remote Keyless Entry key fob is in
the passenger compartment.
The Keyless Push Button Ignition has four
operating positions; three of which are la-
beled and will illuminate when in position.The three positions are OFF, ACC, and ON/
RUN. The fourth position is START, during
start RUN will illuminate.
NOTE:
In case the ignition switch does not change
with the push of a button, the key fob may
have a low or dead battery. In this situation, a
back up method can be used to operate the
ignition switch. Put the nose side (side oppo-
site of the emergency key) of the key fob
against the ENGINE START/STOP button,
with your foot applied on the brake pedal, and
push to operate the ignition switch.
REMOTE START — IF EQUIPPED
To Enter Remote Start Mode
Push and release the Remote Start button on
the key fob twice within five seconds. The
parking lights will flash, vehicle doors will
lock, and the horn will chirp twice (if pro-
grammed). Once the vehicle has started, the
engine will run for 15 minutes.
NOTE:
• If your power door locks were unlocked,
Remote Start will automatically lock the
doors.
• If an engine fault is present or fuel level is low, the vehicle will start and then shut
down in 10 seconds.
• The park lamps will turn on and remain on during Remote Start mode.
• For security, power window and power sun- roof operation (if equipped) are disabled
when the vehicle is in the Remote Start
mode.
Keyless Push Button Ignition
17
Page 21 of 372
2. Perform one of the following methods tolock the vehicle:
• Push lock button on the interior power door lock switch with the driver and/or
passenger door open.
• Push the lock button on the exterior Passive Entry Door Handle with a valid
key fob available in the same exterior
zone (refer to "Keyless Enter- N-Go —
Passive Entry" in "Getting To Know Your
Vehicle" for further information).
• Push the lock button on the key fob.
3. If any doors are open, close them.
The vehicle security alarm will set when you
use the power door locks, or use the key fob to
lock the doors. After all the doors are locked
and closed, the vehicle security light, in the
instrument panel cluster, will flash rapidly for
about 16 seconds to indicate that the alarm
is being set. After the alarm is set, the vehicle
security light will flash at a slower rate to
indicate that the system is armed.To Disarm The System
The vehicle security alarm can be disarmed
using any of the following methods:
1. Push the unlock button on the key fob.
2. Grasp the Passive Entry Unlock Door Handle with a valid key fob within 5 ft
(1.5 m) of the passive entry door handle.
If equipped, refer to "Keyless Enter-N-Go
— Passive Entry" in "Getting To Know Your
Vehicle" for further information.
3. Cycle the ignition out of the OFF position.
• For vehicles equipped with KeylessEnter-N-Go — Ignition, push the Key-
less Ignition START/STOP button (re-
quires at least one valid key fob in the
vehicle).
• For vehicles not equipped with Keyless Enter-N-Go, insert a valid key into the
ignition switch and turn the key to the
ON position.
The vehicle security alarm is designed to
protect your vehicle. However, you can create
conditions where the system will give you a
false alarm. If one of the previously described arming sequences has occurred, the vehicle
security alarm will arm regardless of whether
you are in the vehicle or not. If you remain in
the vehicle and open a door, the alarm will
sound. If this occurs, disarm the vehicle
security alarm.
If the vehicle security alarm is armed and the
battery becomes disconnected, the vehicle
security alarm will remain armed when the
battery is reconnected; the exterior lights will
flash, and the horn will sound. If this occurs,
disarm the vehicle security alarm.
DOORS
Keyless Enter-N-Go — Passive
Entry
The Passive Entry system is an enhancement
to the vehicle’s Remote Keyless Entry system
and a feature of Keyless Enter-N-Go. This
feature allows you to lock and unlock the
vehicle’s door(s) without having to push the
key fob lock or unlock buttons.
19
Page 23 of 372
Preventing Inadvertent Locking Of Passive Entry
Key Fob In Vehicle:
To minimize the possibility of unintentionally
locking a Passive Entry key fob inside your
vehicle, the Passive Entry system is equipped
with an automatic door unlock feature which
will function if the ignition switch is in the
OFF position.
If one of the vehicle doors is open and the
door panel switch is used to lock the vehicle,
once all open doors have been closed the
vehicle checks the inside and outside of the
vehicle for any valid Passive Entry key fobs. If
one of the vehicle's Passive Entry key fobs is
detected inside the vehicle, and no other
valid Passive Entry key fobs are detected
outside the vehicle, the Passive Entry System
automatically unlocks all vehicle doors and
chirps the horn three times (on the third
attempt ALL doors will lock and the Passive
Entry key fob can be locked in the vehicle).
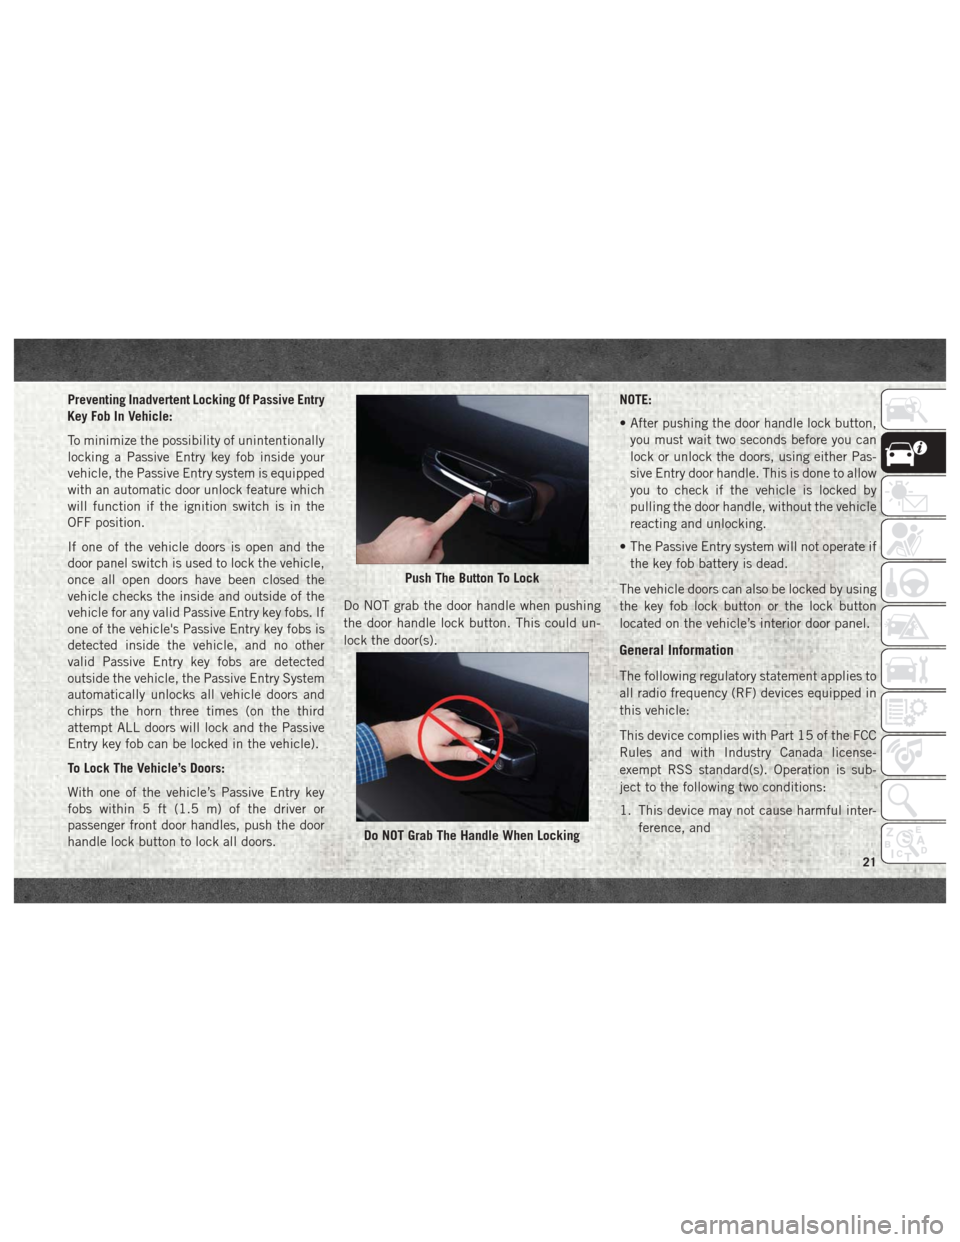
To Lock The Vehicle’s Doors:
With one of the vehicle’s Passive Entry key
fobs within 5 ft (1.5 m) of the driver or
passenger front door handles, push the door
handle lock button to lock all doors.Do NOT grab the door handle when pushing
the door handle lock button. This could un-
lock the door(s).NOTE:
• After pushing the door handle lock button,
you must wait two seconds before you can
lock or unlock the doors, using either Pas-
sive Entry door handle. This is done to allow
you to check if the vehicle is locked by
pulling the door handle, without the vehicle
reacting and unlocking.
• The Passive Entry system will not operate if the key fob battery is dead.
The vehicle doors can also be locked by using
the key fob lock button or the lock button
located on the vehicle’s interior door panel.
General Information
The following regulatory statement applies to
all radio frequency (RF) devices equipped in
this vehicle:
This device complies with Part 15 of the FCC
Rules and with Industry Canada license-
exempt RSS standard(s). Operation is sub-
ject to the following two conditions:
1. This device may not cause harmful inter- ference, and
Push The Button To Lock
Do NOT Grab The Handle When Locking
21
Page 57 of 372
2. This device must accept any interferencereceived, including interference that may
cause undesired operation.
NOTE:
Changes or modifications not expressly ap-
proved by the party responsible for compli-
ance could void the user’s authority to oper-
ate the equipment.
INTERNAL EQUIPMENT
Electrical Power Outlets
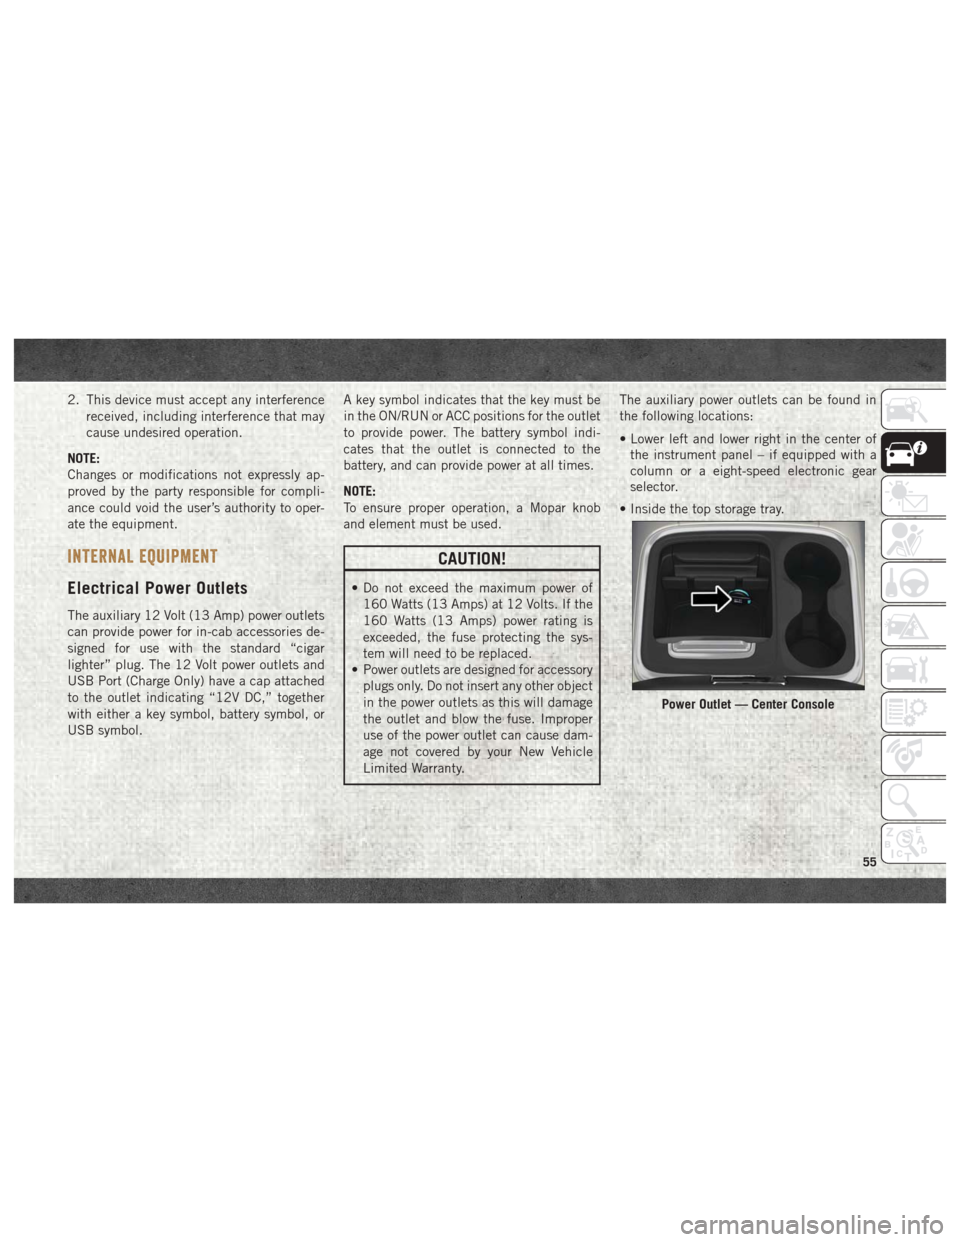
The auxiliary 12 Volt (13 Amp) power outlets
can provide power for in-cab accessories de-
signed for use with the standard “cigar
lighter” plug. The 12 Volt power outlets and
USB Port (Charge Only) have a cap attached
to the outlet indicating “12V DC,” together
with either a key symbol, battery symbol, or
USB symbol. A key symbol indicates that the key must be
in the ON/RUN or ACC positions for the outlet
to provide power. The battery symbol indi-
cates that the outlet is connected to the
battery, and can provide power at all times.
NOTE:
To ensure proper operation, a Mopar knob
and element must be used.
CAUTION!
• Do not exceed the maximum power of
160 Watts (13 Amps) at 12 Volts. If the
160 Watts (13 Amps) power rating is
exceeded, the fuse protecting the sys-
tem will need to be replaced.
• Power outlets are designed for accessory
plugs only. Do not insert any other object
in the power outlets as this will damage
the outlet and blow the fuse. Improper
use of the power outlet can cause dam-
age not covered by your New Vehicle
Limited Warranty. The auxiliary power outlets can be found in
the following locations:
• Lower left and lower right in the center of
the instrument panel – if equipped with a
column or a eight-speed electronic gear
selector.
• Inside the top storage tray.
Power Outlet — Center Console
55
Page 62 of 372
CAUTION!
Leaving the lid open for extended periods
of time could cause the vehicle battery to
discharge. If the lid is required to stay
open for extended periods of time, it is
recommended that the bin lights be
turned off manually using the on/off
switch.
The interior of the RamBox will automatically
illuminate when the lid is opened. In addition
to the automatic illumination switch, there is
a manual on/off switch located at the rear of
each storage bin. Pushing the switch once
will turn off the bin lights, pushing the switch
again will turn the lights back on.
Cargo bins feature two removable drain plugs
(to allow water to drain from bins). To remove
plug, pull up on the edge. To install push plug
downward into drain hole.
NOTE:
Provisions are provided in the bins for cargo
dividers and shelf supports. These accesso-
ries (in addition to other RamBox accesso-
ries) are available from Mopar.
Locking And Unlocking RamBox
Push and release the lock or unlock button on
the key fob to lock and unlock all doors, the
tailgate and the RamBox (if equipped). Refer
to “Keys” in “Getting To Know Your Vehicle”
in the Owner’s Manual for further details. The
RamBox storage bins can be locked using the
vehicle key. To lock and unlock the storage
bin, insert the key into the keyhole on the
push button and turn clockwise to lock or
counterclockwise to unlock. Always return
the key to the upright (vertical) position be-
fore removing the key from the push button.
CAUTION!
• Ensure cargo bin lids are closed and latched before moving or driving vehicle.
• Loads applied to the top of the bin lid
should be minimized to prevent damage
to the lid and latching/hinging mecha-
nisms.
• Damage to the RamBox bin may occur
due to heavy/sharp objects placed in bin
that shift due to vehicle motion. In order
to minimize potential for damage, se-
CAUTION!
cure all cargo to prevent movement and
protect inside surfaces of bin from
heavy/sharp objects with appropriate
padding.
RamBox Safety Warning
Carefully follow these warnings to help pre-
vent personal injury or damage to your
vehicle:
WARNING!
• Always close the storage bin coverswhen your vehicle is unattended.
• Do not allow children to have access to
the storage bins. Once in the storage
bin, young children may not be able to
escape. If trapped in the storage bin,
children can die from suffocation or heat
stroke.
• In an accident, serious injury could re-
sult if the storage bin covers are not
properly latched.
GETTING TO KNOW YOUR VEHICLE
60
Page 342 of 372
Helpful Tips And Common
Questions To Improve Bluetooth
Performance With Your Uconnect
System
Mobile Phone won’t reconnect to system after
pairing:
• Set mobile phone to auto-connect ortrusted device in mobile phone Bluetooth
settings (Blackberry devices).
• Perform a factory reset on your mobile phone. Refer to your mobile phone manu-
facturer or cellular provider for instruc-
tions.
• Many mobile phones do not automatically reconnect after being restarted (hard re-
boot). Your mobile phone can still be con-
nected manually. Close all applications
that may be operating (refer to mobile
phone manufacturer’s instructions), and
follow “Pairing (Wirelessly Connecting)
Your Mobile Phone To The Uconnect
System”. Mobile Phone won’t pair to system:
• Perform a hard reset in the mobile phone by
removing the battery (if removable — see
your mobile phone’s owner manual).
• Delete pairing history in mobile phone and Uconnect system; usually found in phone’s
Bluetooth connection settings.
• Verify you are selecting “Uconnect” in the discovered Bluetooth devices on your mo-
bile phone.
• If your vehicle system generates a pin code the default is 0000.
Mobile Phonebook didn’t download:
• Check “Do not ask again,” then accept the “phonebook download” request on your
mobile phone.
• Up to 5,000 contact names with four num- bers per contact will transfer to the
Uconnect 4C/4C NAV system phonebook.
Can’t make a conference call:
• CDMA (Code-Division Multiple Access) car- riers do not support conference calling.
Refer to your mobile phone user’s manual
for further information. Making calls while connected to AUX:
• Plugging in your mobile phone to AUX while
connected to Bluetooth will disable Hands-
Free Calling. Do not make calls while your
mobile phone is plugged into the AUX jack.
UCONNECT VOICE RECOGNITION
QUICK TIPS
Introducing Uconnect
Start using Uconnect Voice Recognition with
these helpful quick tips. It provides the key
Voice Commands and tips you need to know
to control your Uconnect system.
If you see the NAV icon on the bottom bar, or
in the Apps menus, of your touchscreen, you
have the Uconnect 4C NAV system. If not,
you have a Uconnect 4C system.
Get Started
1. U.S. residents can visit
UconnectPhone.com to check device and
feature compatibility and to find device
pairing instructions.
MULTIMEDIA
340