check transmission fluid Ram 3500 2020 Owner's Manual
[x] Cancel search | Manufacturer: RAM, Model Year: 2020, Model line: 3500, Model: Ram 3500 2020Pages: 568
Page 7 of 568
5
SAFETY
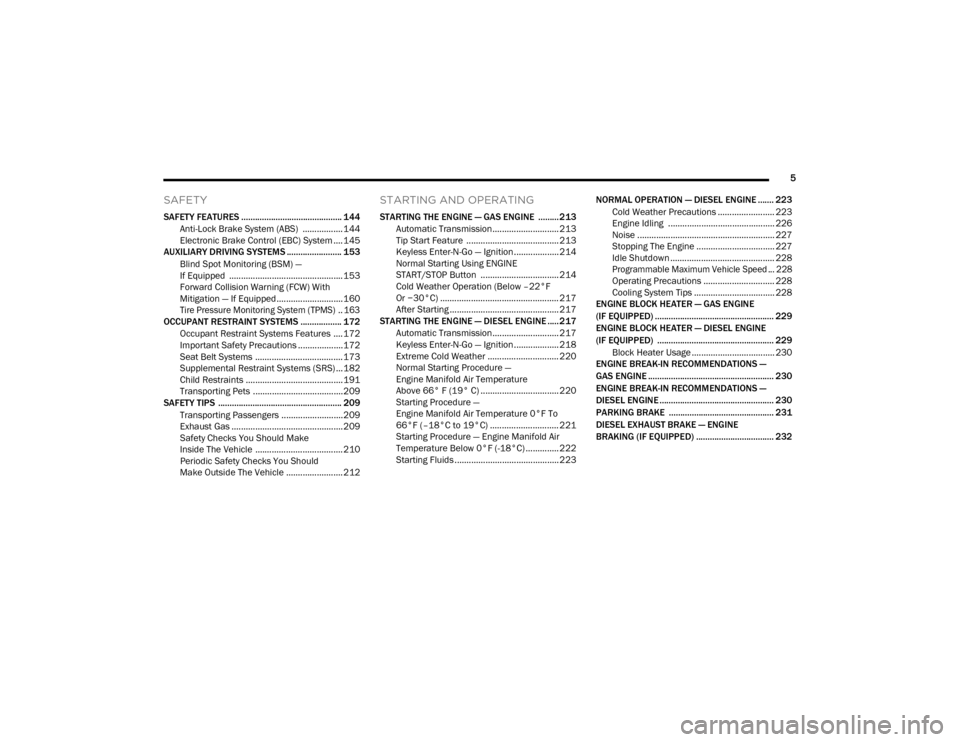
SAFETY FEATURES ............................................ 144Anti-Lock Brake System (ABS) ................. 144
Electronic Brake Control (EBC) System ....145
AUXILIARY DRIVING SYSTEMS ........................ 153
Blind Spot Monitoring (BSM) —
If Equipped ................................................153 Forward Collision Warning (FCW) With
Mitigation — If Equipped............................160
Tire Pressure Monitoring System (TPMS) .. 163
OCCUPANT RESTRAINT SYSTEMS .................. 172
Occupant Restraint Systems Features ....172
Important Safety Precautions ...................172Seat Belt Systems ..................................... 173Supplemental Restraint Systems (SRS) ...182Child Restraints .........................................191
Transporting Pets ......................................209
SAFETY TIPS ...................................................... 209
Transporting Passengers ..........................209
Exhaust Gas ...............................................209Safety Checks You Should Make
Inside The Vehicle ..................................... 210 Periodic Safety Checks You Should
Make Outside The Vehicle ........................ 212
STARTING AND OPERATING
STARTING THE ENGINE — GAS ENGINE .........213
Automatic Transmission............................ 213
Tip Start Feature ....................................... 213Keyless Enter-N-Go — Ignition ................... 214
Normal Starting Using ENGINE
START/STOP Button ................................. 214 Cold Weather Operation (Below –22°F
Or −30°C) .................................................. 217 After Starting .............................................. 217
STARTING THE ENGINE — DIESEL ENGINE ..... 217
Automatic Transmission............................ 217
Keyless Enter-N-Go — Ignition ................... 218
Extreme Cold Weather .............................. 220
Normal Starting Procedure —
Engine Manifold Air Temperature
Above 66° F (19° C) ................................. 220 Starting Procedure —
Engine Manifold Air Temperature 0°F To
66°F (–18°C to 19°C) ............................. 221 Starting Procedure — Engine Manifold Air
Temperature Below 0°F (-18°C) .............. 222 Starting Fluids ............................................ 223 NORMAL OPERATION — DIESEL ENGINE ....... 223
Cold Weather Precautions ........................ 223
Engine Idling ............................................. 226
Noise .......................................................... 227
Stopping The Engine ................................. 227Idle Shutdown ............................................ 228
Programmable Maximum Vehicle Speed ... 228
Operating Precautions .............................. 228
Cooling System Tips .................................. 228
ENGINE BLOCK HEATER — GAS ENGINE
(IF EQUIPPED) .................................................... 229
ENGINE BLOCK HEATER — DIESEL ENGINE
(IF EQUIPPED) ................................................... 229
Block Heater Usage ................................... 230
ENGINE BREAK-IN RECOMMENDATIONS —
GAS ENGINE ....................................................... 230
ENGINE BREAK-IN RECOMMENDATIONS —
DIESEL ENGINE .................................................. 230
PARKING BRAKE .............................................. 231
DIESEL EXHAUST BRAKE — ENGINE
BRAKING (IF EQUIPPED) .................................. 232
20_DJD2_OM_EN_USC_t.book Page 5
Page 10 of 568

8
BULB REPLACEMENT ....................................... 351 Replacement Bulbs ..................................351Replacing Exterior Bulbs ...........................353
FUSES .................................................................. 358
Power Distribution Center .........................358
JACKING AND TIRE CHANGING ...................... 365
Jack Location .............................................365Removal Of Jack And Tools .......................365
Removing The Spare Tire ..........................367
Preparations For Jacking...........................368
Jacking Instructions ...................................368
To Stow The Flat Or Spare ........................ 372Reinstalling The Jack And Tools ...............373
Hub Caps/Wheel Covers — If Equipped ...374
JUMP STARTING ................................................ 375
Preparations For Jump Start .....................375Jump Starting Procedure...........................376
GEAR SELECTOR OVERRIDE — 6–SPEED
TRANSMISSION ................................................ 377
MANUAL PARK RELEASE — 8 – SPEED
TRANSMISSION ................................................ 378
IF YOUR ENGINE OVERHEATS ......................... 379
FREEING A STUCK VEHICLE ............................ 380 TOWING A DISABLED VEHICLE .......................381
Two-Wheel Drive Models ........................... 382
Four-Wheel Drive Models .......................... 383Emergency Tow Hooks — If Equipped ...... 384
ENHANCED ACCIDENT RESPONSE
SYSTEM (EARS) ................................................. 384
EVENT DATA RECORDER (EDR) .......................384
SERVICING AND MAINTENANCE
SCHEDULED SERVICING — GAS ENGINE .......385
Maintenance Plan — Gasoline Engine...... 386
Heavy Duty Use Of The Vehicle................. 389
SCHEDULED SERVICING— DIESEL ENGINE .... 389
Oil Change Indicator System —
Cummins Diesel......................................... 390 Perform Service Indicator —
Cummins Diesel ........................................ 390 Maintenance Plan — Cummins Diesel
Engine ........................................................ 391
ENGINE COMPARTMENT .................................. 396
6.4L Engine ................................................ 396
6.7L Diesel Engine — Six-Speed 68RFE ... 397
6.7L Diesel Engine — Six-Speed AISIN
(AS69RC HD) .............................................. 398 Checking Oil Level — Gas Engine ............. 399
Checking Oil Level — Diesel Engine .......... 399
Adding Washer Fluid ................................. 399Maintenance-Free Battery ....................... 400Pressure Washing...................................... 400
DEALER SERVICE .............................................. 401
Engine Oil .................................................. 401
Engine Oil Filter ......................................... 403Engine Air Cleaner Filter ........................... 403
Air Conditioner Maintenance ................... 405
Accessory Drive Belt Inspection ............... 408Draining Fuel/Water Separator Filter —
Diesel Engine ............................................ 409 Engine Mounted Fuel Filter
Replacement — Diesel Engine .................. 410 Underbody Mounted Fuel Filter
Replacement — Diesel Engine .................. 412 Priming If The Engine Has Run Out Of
Fuel — Diesel Engine ................................. 412 Intervention Regeneration Strategy —
Message Process Flow ............................. 413 Diesel Exhaust Fluid .................................. 414
Body Lubrication ........................................ 414
20_DJD2_OM_EN_USC_t.book Page 8
Page 135 of 568
GETTING TO KNOW YOUR INSTRUMENT PANEL133
NOTE:
This light may turn on if the accelerator and
brake pedals are pressed at the same time.
If the light continues to flash when the vehicle is
running, immediate service is required and you
may experience reduced performance, an
elevated/rough idle, or engine stall and your
vehicle may require towing. The light will come
on when the ignition is placed in the ON/RUN or
ACC/ON/RUN position and remain on briefly as
a bulb check. If the light does not come on
during starting, have the system checked by an
authorized dealer.
Trailer Brake Disconnected Warning Light
This warning light will illuminate when
the Trailer Brake has been
disconnected.
Refer to “Trailer Towing” in “Starting And
Operating” for further information.
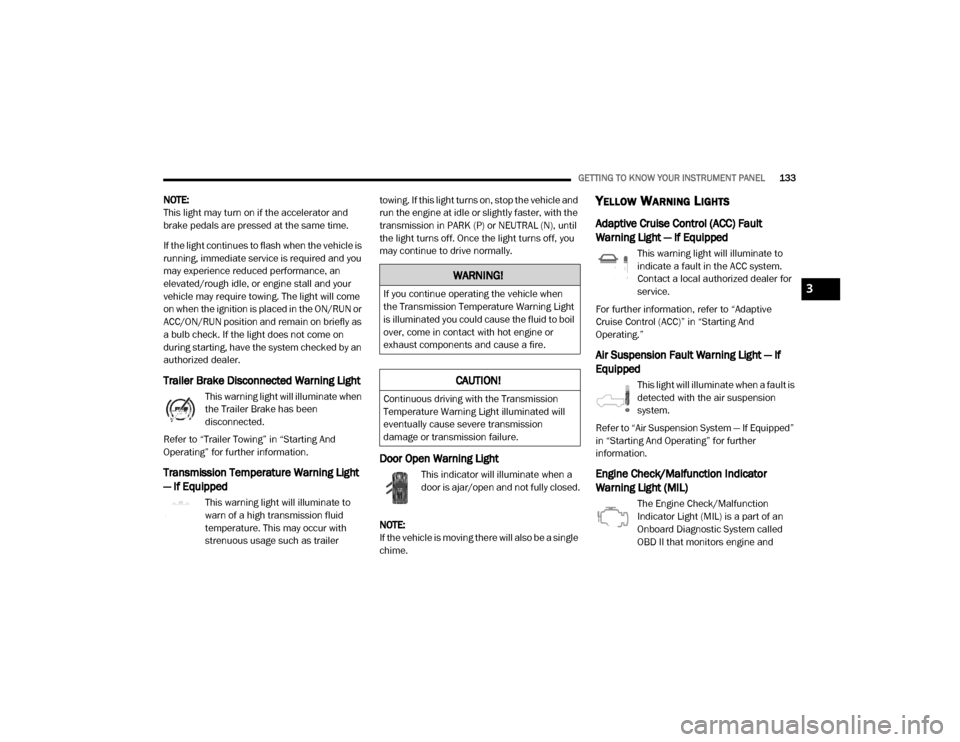
Transmission Temperature Warning Light
— If Equipped
This warning light will illuminate to
warn of a high transmission fluid
temperature. This may occur with
strenuous usage such as trailer towing. If this light turns on, stop the vehicle and
run the engine at idle or slightly faster, with the
transmission in PARK (P) or NEUTRAL (N), until
the light turns off. Once the light turns off, you
may continue to drive normally.
Door Open Warning Light
This indicator will illuminate when a
door is ajar/open and not fully closed.
NOTE:
If the vehicle is moving there will also be a single
chime.
YELLOW WARNING LIGHTS
Adaptive Cruise Control (ACC) Fault
Warning Light — If Equipped
This warning light will illuminate to
indicate a fault in the ACC system.
Contact a local authorized dealer for
service.
For further information, refer to “Adaptive
Cruise Control (ACC)” in “Starting And
Operating.”
Air Suspension Fault Warning Light — If
Equipped
This light will illuminate when a fault is
detected with the air suspension
system.
Refer to “Air Suspension System — If Equipped”
in “Starting And Operating” for further
information.
Engine Check/Malfunction Indicator
Warning Light (MIL)
The Engine Check/Malfunction
Indicator Light (MIL) is a part of an
Onboard Diagnostic System called
OBD II that monitors engine and
WARNING!
If you continue operating the vehicle when
the Transmission Temperature Warning Light
is illuminated you could cause the fluid to boil
over, come in contact with hot engine or
exhaust components and cause a fire.
CAUTION!
Continuous driving with the Transmission
Temperature Warning Light illuminated will
eventually cause severe transmission
damage or transmission failure.
3
20_DJD2_OM_EN_USC_t.book Page 133
Page 232 of 568
230STARTING AND OPERATING
NOTE:
The block heater will require 110 Volts AC and
6.5 Amps to activate the heater element.
BLOCK HEATER USAGE
For ambient temperatures below 0°F (-18°C),
engine block heater usage is recommended.
For ambient temperatures below –20°F
(-29°C), engine block heater usage is required.
ENGINE BREAK-IN RECOMMENDATIONS —
GAS ENGINE
A long break-in period is not required for the
engine and drivetrain (transmission and axle) in
your vehicle.
Drive moderately during the first 300 miles
(500 km). After the initial 60 miles (100 km),
speeds up to 50 or 55 mph (80 or 90 km/h) are
desirable.
While cruising, brief full-throttle acceleration
within the limits of local traffic laws contributes
to a good break-in. Wide-open throttle
acceleration in low gear can be detrimental and
should be avoided. The engine oil installed in the engine at the
factory is a high-quality energy conserving type
lubricant. Oil changes should be consistent with
anticipated climate conditions under which
vehicle operations will occur. For the
recommended viscosity and quality grades,
refer to “Fluids And Lubricants” in “Technical
Specifications”.
NOTE:
A new engine may consume some oil during its
first few thousand miles (kilometers) of opera
-
tion. This should be considered a normal part of
the break-in and not interpreted as a problem.
Please check your oil level with the engine oil
indicator often during the break in period. Add
oil as required.
ENGINE BREAK-IN RECOMMENDATIONS —
DIESEL ENGINE
The Cummins® Turbo Diesel engine does not
require a break-in period due to its construction.
Normal operation is allowed, providing the
following recommendations are followed:
Warm up the engine before placing it under
load.
Do not operate the engine at idle for
prolonged periods.
Use the appropriate transmission gear to
prevent engine lugging.
Observe vehicle oil pressure and tempera -
ture indicators.
Check the coolant and oil levels frequently.
Vary throttle position at highway speeds
when carrying or towing significant weight.
CAUTION!
Never use Non-Detergent Oil or Straight
Mineral Oil in the engine or damage may
result.
20_DJD2_OM_EN_USC_t.book Page 230
Page 268 of 568

266STARTING AND OPERATING
If You Stall Or Begin To Lose Headway – If you
stall or begin to lose headway while climbing
a steep hill, allow your vehicle to come to a
stop and immediately apply the brake.
Restart the engine and shift into REVERSE.
Back slowly down the hill allowing the
compression braking of the engine and trans -
mission to help regulate your speed. If the
brakes are required to control vehicle speed,
apply them lightly and avoid locking or skid-
ding the tires.DRIVING THROUGH WATER
Extreme care should be taken crossing any type
of water. Water crossings should be avoided if
possible and only be attempted when
necessary, in a safe responsible manner. You
should only drive through areas which are
designated and approved. You should tread
lightly and avoid damage to the environment.
You should know your vehicle's abilities and be
able to recover it if something goes wrong. You
should never stop or shut a vehicle off when
crossing deep water unless you ingested water
into the engine air intake. If the engine stalls do
not attempt to restart it. Determine if it has
ingested water first. The key to any crossing is
low and slow. You want to use FIRST gear in
4WD LOW and proceed very slowly with a
constant slow speed (3-5 mph [5–8 km/h]
maximum) and light throttle. Keep the vehicle
moving; do not try to accelerate through the
crossing. After crossing any water higher than
the bottom of the axle differentials, you should
inspect all of the vehicle fluids for signs of water
ingestion.
Before You Cross Any Type Of Water – As you
approach any type of water you need to
determine if you can cross it safely and
responsibly. If necessary, get out and walk
through the water or probe it with a stick. You
need to be sure of its depth, approach angle,
current and bottom condition. Be careful of
murky or muddy waters, check for hidden
obstacles. Make sure you will not be
intruding on any wildlife and you can recover
the vehicle if necessary. The key to a safe
crossing is the water depth, current and
bottom conditions. On soft bottoms the
vehicle will sink in, effectively increasing the
water level on the vehicle. Be sure to
consider this when determining the depth
and the ability to safely cross.
WARNING!
If the engine stalls or you lose headway or
cannot make it to the top of a steep hill or
grade, never attempt to turn around. To do so
may result in tipping and rolling the vehicle,
which may result in severe injury. Always back
carefully straight down a hill in REVERSE.
Never back down a hill in NEUTRAL using only
the vehicle brakes. Never drive diagonally
across a hill, always drive straight up or down.
CAUTION!
Water ingestion into the axles, transmission,
transfer case, engine or vehicle interior can
occur if you drive too fast or through too deep
of water. Water can cause permanent
damage to engine, driveline or other vehicle
components and your brakes will be less
effective once wet and/or muddy.
20_DJD2_OM_EN_USC_t.book Page 266
Page 346 of 568
344STARTING AND OPERATING
(Continued)
OFF-ROAD DRIVING TIPS
Care should be taken when attempting to climb
steep hills or driving diagonally across a hill or
slope. If natural obstacles force you to travel
diagonally up or down a hill, choose a mild angle
and keep as little side tilt as possible. Keep the
vehicle moving and make turns slowly and
cautiously.
If you must back down a hill, back straight down
using REVERSE gear. Never back down in
NEUTRAL or diagonally across the hill.
When driving over sand, mud, and other soft
terrain, shift to low gear and drive steadily.
Apply the accelerator slowly to avoid spinning
the wheels.
Do not reduce the tire pressures for this type of
driving.Driving through standing water limits your
vehicle’s braking capabilities, which
increases stopping distances. Therefore,
after driving through standing water, drive
slowly and lightly press on the brake pedal
several times to dry the brakes.
Failure to follow these warnings may result
in injuries that are serious or fatal to you,
your passengers, and others around you.
CAUTION!
Always check the depth of the standing
water before driving through it. Never drive
through standing water that is deeper than
the bottom of the tire rims mounted on the
vehicle.
Determine the condition of the road or the
path that is under water and if there are any
obstacles in the way before driving through
the standing water.
WARNING! (Continued)
Do not exceed 5 mph (8 km/h) when
driving through standing water. This will
minimize wave effects.
Driving through standing water may cause
damage to your vehicle’s drivetrain compo -
nents. Always inspect your vehicle’s fluids
(i.e., engine oil, transmission, axle, etc.) for
signs of contamination (i.e., fluid that is
milky or foamy in appearance) after driving
through standing water. Do not continue to
operate the vehicle if any fluid appears
contaminated, as this may result in further
damage. Such damage is not covered by
the New Vehicle Limited Warranty.
Getting water inside your vehicle’s engine
can cause it to lock up and stall out, and
cause serious internal damage to the
engine. Such damage is not covered by the
New Vehicle Limited Warranty.
CAUTION! (Continued)
20_DJD2_OM_EN_USC_t.book Page 344
Page 387 of 568
385
SERVICING AND MAINTENANCE
SCHEDULED SERVICING — GAS ENGINE
Your vehicle is equipped with an automatic oil
change indicator system. The oil change
indicator system will remind you that it is time to
take your vehicle in for scheduled maintenance.
Based on engine operation conditions, the oil
change indicator message will illuminate. This
means that service is required for your vehicle.
Operating conditions such as frequent
short-trips, trailer tow, extremely hot or cold
ambient temperatures, and E85 fuel usage will
influence when the “Oil Change Required”
message is displayed. Severe Operating
Conditions can cause the change oil message to
illuminate as early as 3,500 miles (5,600 km)
since last reset. Have your vehicle serviced as
soon as possible, within the next 500 miles
(805 km).
An authorized dealer will reset the oil change
indicator message after completing the
scheduled oil change.If a scheduled oil change is performed by
someone other than an authorized dealer, the
message can be reset by referring to the steps
described under “Instrument Cluster Display” in
“Getting To Know Your Instrument Panel”.
NOTE:
Under no circumstances should oil change
intervals exceed 8,000 miles (13,000 km),
12 months or 350 hours of engine run time,
whichever comes first. The 350 hours of engine
run or idle time is generally only a concern for
fleet customers.
Severe Duty All Models
NOTE:
Change Engine Oil at 4,000 miles (6,500 km) or
350 hours of engine run time if the vehicle is
operated in a dusty and off road environment or
is operated predominantly at idle, or only very
low engine RPM. This type of vehicle use is
considered Severe Duty.
Once A Month Or Before A Long Trip:Check engine oil level
Check windshield washer fluid level
Check tire pressure and look for unusual
wear or damage. Rotate tires at the first sign
of irregular wear, even if it occurs before the
oil indicator system turns on.
Check the fluid levels of the coolant reservoir,
brake master cylinder, power steering and
automatic transmission (six-speed only) and
fill as needed
Check function of all interior and exterior
lights7
20_DJD2_OM_EN_USC_t.book Page 385
Page 424 of 568
422SERVICING AND MAINTENANCE
AUTOMATIC TRANSMISSION
Selection Of Lubricant
It is important to use the proper transmission
fluid to ensure optimum transmission
performance and life. Use only the
manufacturer’s specified transmission fluid.
Refer to “Fluids And Lubricants” in “Technical
Specifications”. It is important to maintain the
transmission fluid at the correct level using the
recommended fluid. No chemical flushes
should be used in any transmission; only the
approved lubricant should be used.
Special Additives
The manufacturer strongly recommends
against using any special additives in the
transmission. Automatic Transmission Fluid
(ATF) is an engineered product and its
performance may be impaired by supplemental
additives. Therefore, do not add any fluid
additives to the transmission. The only
exception to this policy is the use of special dyes
for diagnosing fluid leaks in six-speed
transmissions. Avoid using transmission
sealers as they may adversely affect seals.
Fluid Level Check — Eight-Speed
Transmission
The fluid level is preset at the factory and does
not require adjustment under normal operating
conditions. Routine fluid level checks are not
required, therefore the transmission has no
dipstick. An authorized dealer can check your
transmission fluid level using special service
tools.
If you notice fluid leakage or transmission
malfunction, visit an authorized dealer
immediately to have the transmission fluid level
checked. Operating the vehicle with an
improper fluid level can cause severe
transmission damage.
Overfilling the brake fluid reservoir can
result in spilling brake fluid on hot engine
parts, causing the brake fluid to catch fire.
Brake fluid can also damage painted and
vinyl surfaces, care should be taken to
avoid its contact with these surfaces.
Do not allow petroleum based fluid to
contaminate the brake fluid. Brake seal
components could be damaged, causing
partial or complete brake failure. This could
result in a collision.
WARNING! (Continued)CAUTION!
Using a transmission fluid other than the
manufacturer’s recommended fluid may
cause deterioration in transmission shift
quality and/or torque converter shudder, and
(for six-speed transmissions) will require
more frequent fluid and filter changes. Refer
to “Fluids And Lubricants” in “Technical
Specifications” for fluid specifications.
CAUTION!
Do not use chemical flushes in your
transmission as the chemicals can damage
your transmission components. Such damage
is not covered by the New Vehicle Limited
Warranty.
20_DJD2_OM_EN_USC_t.book Page 422
Page 425 of 568

SERVICING AND MAINTENANCE423
Fluid Level Check — Six-Speed
Transmission
It is best to check the fluid level when the
transmission is at normal operating
temperature (158-176°F / 70-80°C). This
normally occurs after at least 15 miles (25 km)
of driving. At normal operating temperature the
fluid cannot be held comfortably between the
fingertips. You can read the transmission sump
temperature in the instrument cluster screen
refer to “Instrument Cluster Display” in “Getting
To Know Your Instrument Panel” for further
information.
Use the following procedure to check the
transmission fluid level properly:
1. Monitor the transmission temperature using the instrument cluster display, and
operate the vehicle as required to reach
the normal operating temperature. If the transmission is not functioning properly, or
the vehicle cannot be driven, see the NOTE
and CAUTION below about checking the
fluid level at colder temperatures.
2. Park the vehicle on level ground.
3. Run the engine at normal idle speed for at least 60 seconds, and leave the engine
running for the rest of this procedure.
4. Fully apply the parking brake, and press the brake pedal.
5. Place the gear selector momentarily into each gear position (allowing time for the
transmission to fully engage in each
position), ending with the transmission in
PARK.
6. Remove the dipstick, wipe it clean and reinsert it until seated.
7. Remove the dipstick again and note the fluid level on both sides. The fluid level
reading is only valid if there is a solid
coating of oil on both sides of the dipstick.
Note that the holes in the dipstick will be full
of fluid if the actual level is at or above the
hole. The fluid level should be between the
“HOT” (upper) reference holes on the dipstick at normal operating temperature. If
the fluid level is low, add fluid through the
dipstick tube to bring it to the proper level.
Do not overfill.
Use ONLY the specified fluid
refer to "Fluids And Lubricants" in
“Technical Specifications” for fluid specifi -
cations. After adding any quantity of oil
through the dipstick tube, wait a minimum
of two minutes for the oil to fully drain into
the transmission before rechecking the
fluid level.
NOTE:
If it is necessary to check the transmission
below the operating temperature, the fluid level
should be between the two “COLD” (lower)
holes on the dipstick with the fluid at 60-70°F /
16-21°C. Only use the COLD region of the
dipstick as a rough reference when setting the
fluid level after a transmission service or fluid
change. Re-check the fluid level, and adjust as
required, once the transmission reaches
normal operating temperature.
CAUTION!
If a transmission fluid leak occurs, visit an
authorized dealer immediately. Severe
transmission damage may occur. An
authorized dealer has the proper tools to
adjust the fluid level accurately.
7
20_DJD2_OM_EN_USC_t.book Page 423
Page 426 of 568

424SERVICING AND MAINTENANCE
8. Reinsert the dipstick. Check for leaks.
Release the parking brake.
NOTE:
If it is necessary to check the transmission
below the operating temperature, the fluid level
should be between the two COLD (lower) holes
on the dipstick with the fluid at 68-86°F /
20-30°C. Only use the COLD region of the
dipstick as a rough reference when setting the
fluid level after a transmission service or fluid
change. Re-check the fluid level, and adjust as
required, once the transmission reaches
normal operating temperature.
Fluid And Filter Changes — Eight-Speed
Transmission
Under normal operating conditions, the fluid
installed at the factory will provide satisfactory
lubrication for the life of the vehicle.
Routine fluid and filter changes are not
required. However, change the fluid and filter if
the fluid becomes contaminated (with water,
etc.), or if the transmission is disassembled for
any reason.
Fluid And Filter Changes — Six Speed
Transmission
Refer to the “Maintenance Plan” for the proper
maintenance intervals.
In addition, change the fluid and filters if the
fluid becomes contaminated (with water, etc.),
or if the transmission is disassembled for any
reason.
REAR AXLE AND 4X4 FRONT DRIVING
A
XLE FLUID LEVEL
For normal service, periodic fluid level checks
are not required. When the vehicle is serviced
for other reasons the exterior surfaces of the
axle assembly should be inspected. If gear oil
leakage is suspected inspect the fluid level. Refer to “Fluids And Lubricants” in “Technical
Specifications” for further information. This
inspection should be made with the vehicle in a
level position.
For all 2500/3500 Model axles, the fluid level
should be 1/4 in ± 1/4 in (6.4 mm ± 6.4 mm)
below the fill hole on the 9.25 in front, 11.5 in
rear axle, and 12.0 in rear axle.
Drain And Refill
Refer to the “Maintenance Plan” for the proper
maintenance intervals.
Lubricant Selection
Refer to “Fluids And Lubricants” in “Technical
Specifications” for further information.
NOTE:
The presence of water in the gear lubricant will
result in corrosion and possible failure of differ -
ential components. Operation of the vehicle in
water, as may be encountered in some
off-highway types of service, will require
draining and refilling the axle to avoid damage.
Limited-Slip Differentials DO REQUIRE limited
slip oil additive (friction modifiers).
CAUTION!
If the fluid temperature is below 50°F (10°C)
it may not register on the dipstick. Do not add
fluid until the temperature is elevated enough
to produce an accurate reading. Run the
engine at idle, in PARK, to warm the fluid.
CAUTION!
If the fluid temperature is below 50°F (10°C)
it may not register on the dipstick. Do not add
fluid until the temperature is elevated enough
to produce an accurate reading. Run the
engine at idle, in PARK, to warm the fluid.
20_DJD2_OM_EN_USC_t.book Page 424