ECU Ram 3500 Chassis Cab 2019 User Guide
[x] Cancel search | Manufacturer: RAM, Model Year: 2019, Model line: 3500 Chassis Cab, Model: Ram 3500 Chassis Cab 2019Pages: 607, PDF Size: 10.72 MB
Page 33 of 607

GETTING TO KNOW YOUR VEHICLE 31
3. If any doors are open, close them.
The vehicle security alarm will set when you use the power
door locks, or use the key fob to lock the doors. After all the
doors are locked and closed, the vehicle security light, in the
instrument panel cluster, will flash rapidly for about 16
seconds to indicate that the alarm is being set. After the
alarm is set, the vehicle security light will flash at a slower
rate to indicate that the system is armed.
To Disarm The System
The vehicle security alarm can be disarmed using any of the
following methods:
1. Push the unlock button on the key fob.
2. Grasp the Passive Entry Unlock Door Handle with a validkey fob within 5 ft (1.5 m) of the passive entry door
handle. If equipped, refer to "Keyless Enter-N-Go —
Passive Entry" in "Getting To Know Your Vehicle" for
further information.
3. Place the ignition out of the “OFF” position. The vehicle security alarm is designed to protect your
vehicle. However, you can create conditions where the
system will give you a false alarm. If one of the previously
described arming sequences has occurred, the vehicle secu-
rity alarm will arm regardless of whether you are in the
vehicle or not. If you remain in the vehicle and open a door,
the alarm will sound. If this occurs, disarm the vehicle secu-
rity alarm.
If the vehicle security alarm is armed and the battery
becomes disconnected, the vehicle security alarm will
remain armed when the battery is reconnected; the exterior
lights will flash, and the horn will sound. If this occurs,
disarm the vehicle security alarm.
Rearming Of The System
If something triggers the alarm, and no action is taken to
disarm it, the vehicle security alarm will turn the horn off
after 29 seconds, 5 seconds between cycles, up to 8 cycles if
the trigger remains active and then the vehicle security alarm
will rearm itself.
2
Page 34 of 607
32 GETTING TO KNOW YOUR VEHICLE
(Continued)
Security System Manual Override
The vehicle security alarm will not arm/disarm if you lock/
unlock the doors using the manual door lock plunger.
DOORS
Manual Door Locks
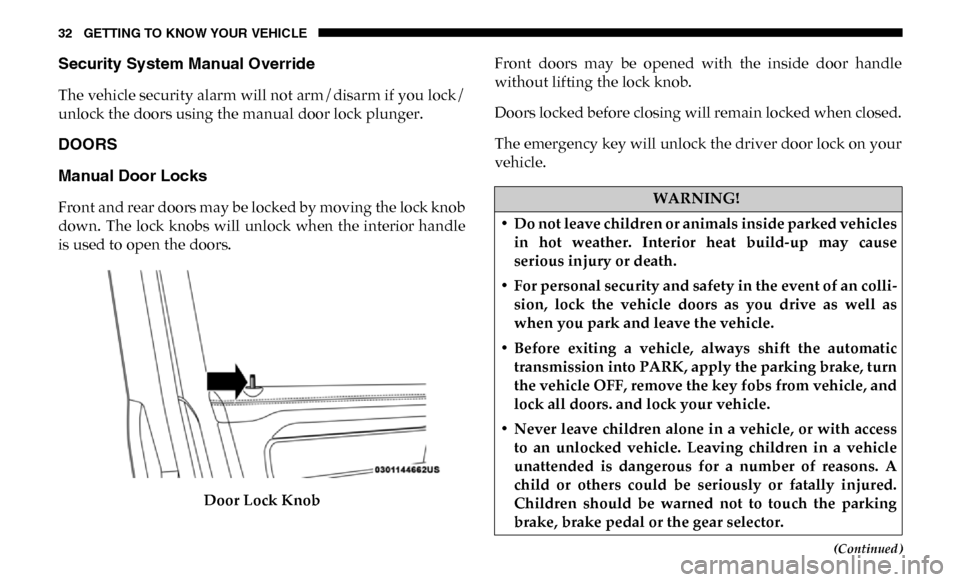
Front and rear doors may be locked by moving the lock knob
down. The lock knobs will unlock when the interior handle
is used to open the doors.Door Lock Knob Front doors may be opened with the inside door handle
without lifting the lock knob.
Doors locked before closing will remain locked when closed.
The emergency key will unlock the driver door lock on your
vehicle.WARNING!
• Do not leave children or animals inside parked vehicles in hot weather. Interior heat build-up may cause
serious injury or death.
• For personal security and safety in the event of an colli -
sion, lock the vehicle doors as you drive as well as
when you park and leave the vehicle.
• Before exiting a vehicle, always shift the automatic transmission into PARK, apply the parking brake, turn
the vehicle OFF, remove the key fobs from vehicle, and
lock all doors. and lock your vehicle.
• Never leave children alone in a vehicle, or with access to an unlocked vehicle. Leaving children in a vehicle
unattended is dangerous for a number of reasons. A
child or others could be seriously or fatally injured.
Children should be warned not to touch the parking
brake, brake pedal or the gear selector.
Page 36 of 607
34 GETTING TO KNOW YOUR VEHICLE
Keyless Enter-N-Go — Passive Entry
The Passive Entry system is an enhancement to the vehicle’s
Remote Keyless Entry system and a feature of Keyless
Enter-N-Go. This feature allows you to lock and unlock the
vehicle’s door(s) without having to push the key fob lock or
unlock buttons.
NOTE:
• Passive Entry may be programmed ON/OFF. Refer to“Uconnect Settings” in “Multimedia” for further informa -
tion.
• If wearing gloves on your hands, or if it has been raining/ snowing on the Passive Entry door handle, the unlock sensi -
tivity can be affected, resulting in a slower response time.
• If the vehicle is unlocked by Passive Entry and no door is opened within 60 seconds, the vehicle will re-lock and if
equipped will arm the security alarm.
• The vehicles security alarm can be armed/disarmed by pushing the passive entry key fob lock/unlock buttons (if equipped).
• The key fob may not be able to be detected by the vehicle passive entry system if it is located next to a mobile phone,
laptop or other electronic device; these devices may block
the key fob's wireless signal and prevent the passive entry
handle from locking/unlocking the vehicle. To Unlock From The Driver's Side:
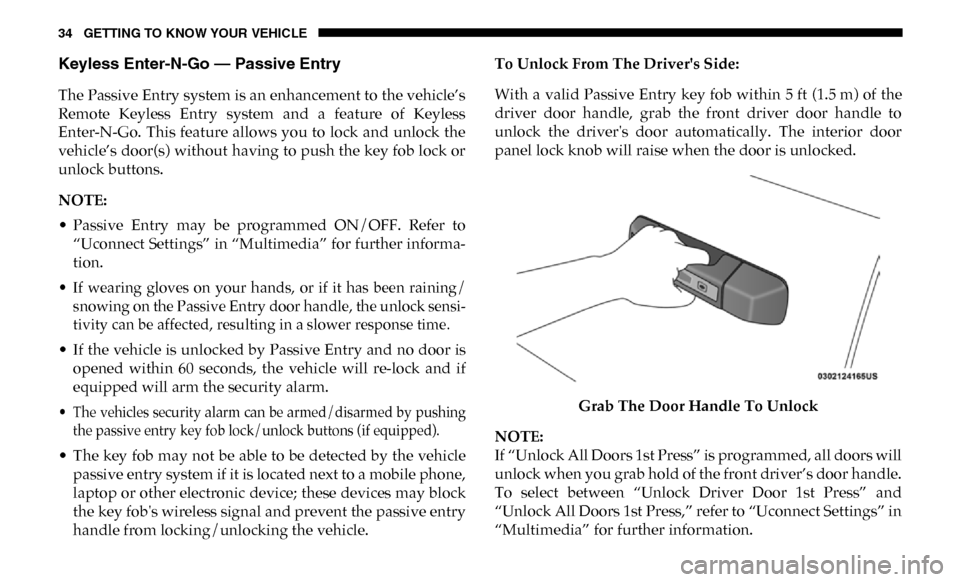
With a valid Passive Entry key fob within 5 ft (1.5 m) of the
driver door handle, grab the front driver door handle to
unlock the driver's door automatically. The interior door
panel lock knob will raise when the door is unlocked.
Grab The Door Handle To Unlock
NOTE:
If “Unlock All Doors 1st Press” is programmed, all doors will
unlock when you grab hold of the front driver’s door handle.
To select between “Unlock Driver Door 1st Press” and
“Unlock All Doors 1st Press,” refer to “Uconnect Settings” in
“Multimedia” for further information.
Page 55 of 607

GETTING TO KNOW YOUR VEHICLE 53
Rear Head Restraint Removal
To remove the head restraint, push the adjustment button
and the release button while pulling upward on the whole
assembly. To reinstall the head restraint, put the head
restraint posts into the holes and adjust it to the appropriate
height.
NOTE:
To remove outboard restraints, the rear seat bottom must be
folded up.
STEERING WHEEL
Tilt Steering Column
This feature allows you to tilt the steering column upward or
downward. The tilt lever is located on the steering column,
below the multifunction lever.
Pull the lever toward the steering wheel to unlock the
steering column. With one hand firmly on the steering
wheel, move the steering column up or down, as desired.
Release the lever to lock the steering column firmly in place.Tilt Steering Lever
WARNING!
• A loose head restraint thrown forward in a collision or hard stop could cause serious injury or death to occu -
pants of the vehicle. Always securely stow removed
head restraints in a location outside the occupant
compartment.
• ALL the head restraints MUST be reinstalled in the vehicle to properly protect the occupants. Follow the
re-installation instructions above prior to operating the
vehicle or occupying a seat.
2
Page 99 of 607
GETTING TO KNOW YOUR VEHICLE 97
GARAGE DOOR OPENER — IF EQUIPPED
HomeLink replaces up to three hand-held transmitters that
operate devices such as garage door openers, motorized
gates, lighting or home security systems. The HomeLink unit
is powered by your vehicles 12 Volt battery.
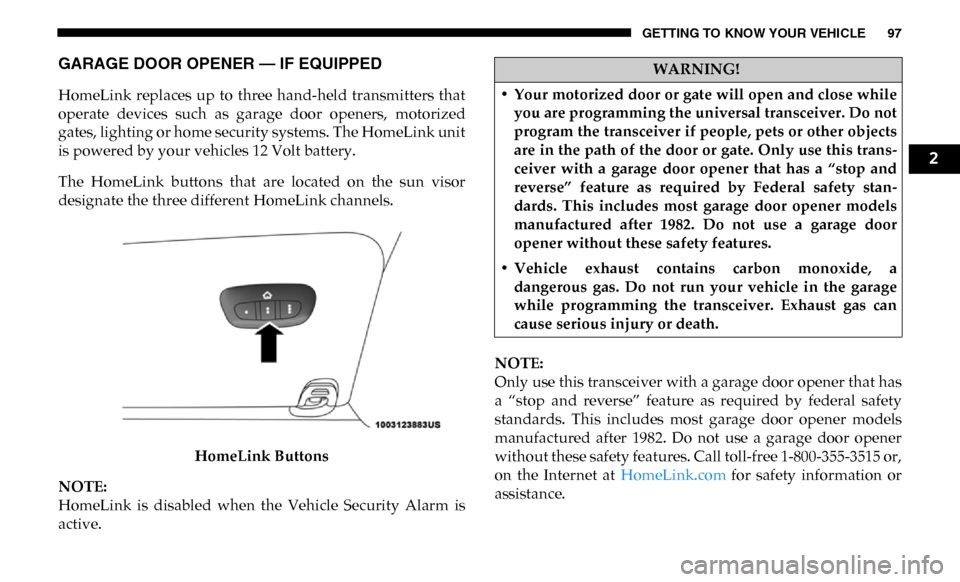
The HomeLink buttons that are located on the sun visor
designate the three different HomeLink channels.HomeLink Buttons
NOTE:
HomeLink is disabled when the Vehicle Security Alarm is
active. NOTE:
Only use this transceiver with a garage door opener that has
a “stop and reverse” feature as required by federal safety
standards. This includes most garage door opener models
manufactured after 1982. Do not use a garage door opener
without these safety features. Call toll-free 1-800-355-3515 or,
on the Internet at HomeLink.com for safety information or
assistance.
WARNING!
• Your motorized door or gate will open and close while you are programming the universal transceiver. Do not
program the transceiver if people, pets or other objects
are in the path of the door or gate. Only use this trans -
ceiver with a garage door opener that has a “stop and
reverse” feature as required by Federal safety stan -
dards. This includes most garage door opener models
manufactured after 1982. Do not use a garage door
opener without these safety features.
• Vehicle exhaust contains carbon monoxide, a dangerous gas. Do not run your vehicle in the garage
while programming the transceiver. Exhaust gas can
cause serious injury or death.
2
Page 104 of 607

102 GETTING TO KNOW YOUR VEHICLE
3. Continue to press and hold the HomeLink button, whileyou press and release (“cycle”) your hand-held trans-
mitter every two seconds until HomeLink has success-
fully accepted the frequency signal. The indicator light
will flash slowly and then rapidly when fully trained.
4. Watch for the HomeLink indicator to change flash rates. When it changes, it is programmed. It may take up to 30
seconds or longer in rare cases. The garage door may
open and close while you are programming.
5. Press and hold the programmed HomeLink button and observe the indicator light.
NOTE: • If the indicator light stays on constantly, programmingis complete and the garage door/device should acti -
vate when the HomeLink button is pressed.
• To program the two remaining HomeLink buttons, repeat each step for each remaining button. DO NOT
erase the channels.
If you unplugged the garage door opener/device for
programming, plug it back in at this time. Reprogramming A Single HomeLink Button (Canadian/
Gate Operator)
To reprogram a channel that has been previously trained,
follow these steps:
1. Cycle the ignition to the ON/RUN position.
2. Press and hold the desired HomeLink button until the
indicator light begins to flash after 20 seconds. Do not
release the button.
3. Without releasing the button, proceed with “Canadian/ Gate Operator Programming” step 2 and follow all
remaining steps.
Using HomeLink
To operate, push and release the programmed HomeLink
button. Activation will now occur for the programmed
device (i.e. garage door opener, gate operator, security
system, entry door lock, home/office lighting, etc.) The
hand-held transmitter of the device may also be used at any
time.
Page 105 of 607

GETTING TO KNOW YOUR VEHICLE 103
Security
It is advised to erase all channels before you sell or turn in
your vehicle.
To do this, push and hold the two outside buttons for 20
seconds until the orange indicator flashes. Note that all chan-
nels will be erased. Individual channels cannot be erased.
The HomeLink Universal Transceiver is disabled when the
Vehicle Security Alarm is active.
Troubleshooting Tips
If you are having trouble programming HomeLink, here are
some of the most common solutions:
• Replace the battery in the Garage Door Opener hand-held transmitter.
• Push the LEARN button on the Garage Door Opener to complete the training for a Rolling Code.
• Did you unplug the device for programming and remember to plug it back in?
If you have any problems, or require assistance, please call
toll-free 1-800-355-3515 or, on the Internet at HomeLink.com
for information or assistance.
General Information
The following regulatory statement applies to all Radio
Frequency (RF) devices equipped in this vehicle:
This device complies with Part 15 of the FCC Rules and with
Innovation, Science and Economic Development Canada
license-exempt RSS standard(s). Operation is subject to the
following two conditions:
1. This device may not cause harmful interference, and
2. This device must accept any interference received, including interference that may cause undesired opera -
tion.
NOTE:
Changes or modifications not expressly approved by the
party responsible for compliance could void the user’s
authority to operate the equipment.
2
Page 113 of 607
GETTING TO KNOW YOUR VEHICLE 111
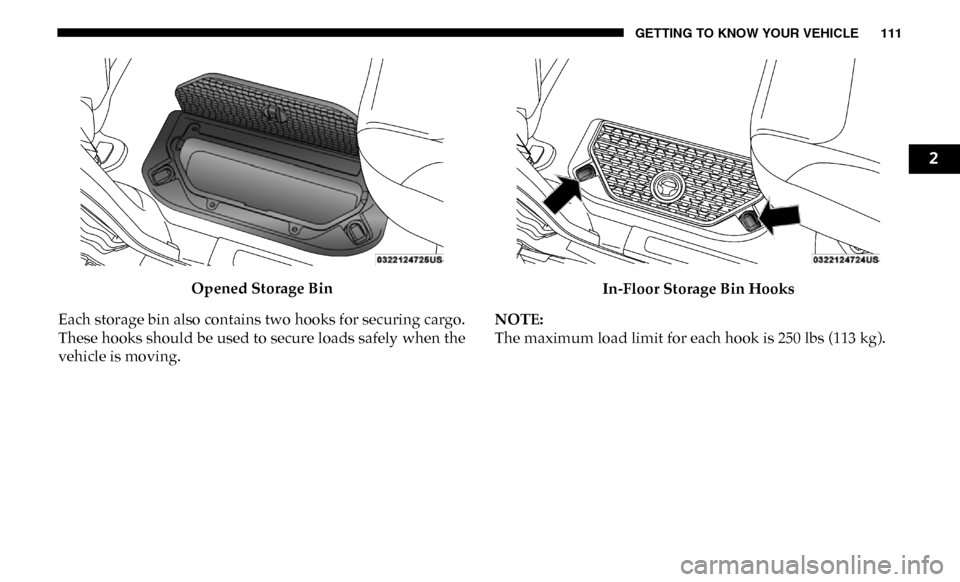
Opened Storage Bin
Each storage bin also contains two hooks for securing cargo.
These hooks should be used to secure loads safely when the
vehicle is moving. In-Floor Storage Bin Hooks
NOTE:
The maximum load limit for each hook is 250 lbs (113 kg).
2
Page 116 of 607
114 GETTING TO KNOW YOUR VEHICLE
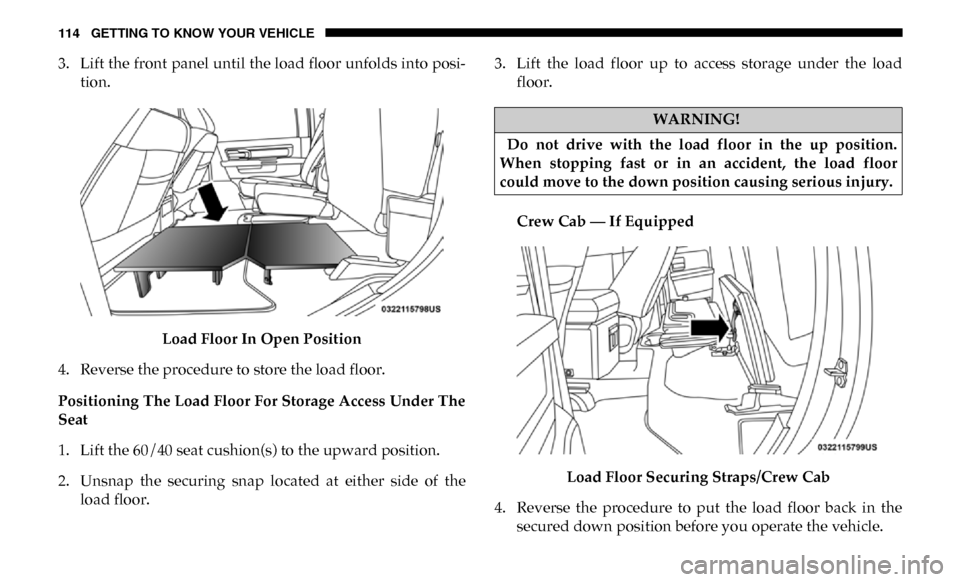
3. Lift the front panel until the load floor unfolds into posi-
tion.
Load Floor In Open Position
4. Reverse the procedure to store the load floor.
Positioning The Load Floor For Storage Access Under The
Seat
1. Lift the 60/40 seat cushion(s) to the upward position.
2. Unsnap the securing snap located at either side of the load floor. 3. Lift the load floor up to access storage under the load
floor.
Crew Cab — If Equipped
Load Floor Securing Straps/Crew Cab
4. Reverse the procedure to put the load floor back in the secured down position before you operate the vehicle.
WARNING!
Do not drive with the load floor in the up position.
When stopping fast or in an accident, the load floor
could move to the down position causing serious injury.
Page 117 of 607
GETTING TO KNOW YOUR VEHICLE 115
Below Rear Seat Storage (Crew Cab)
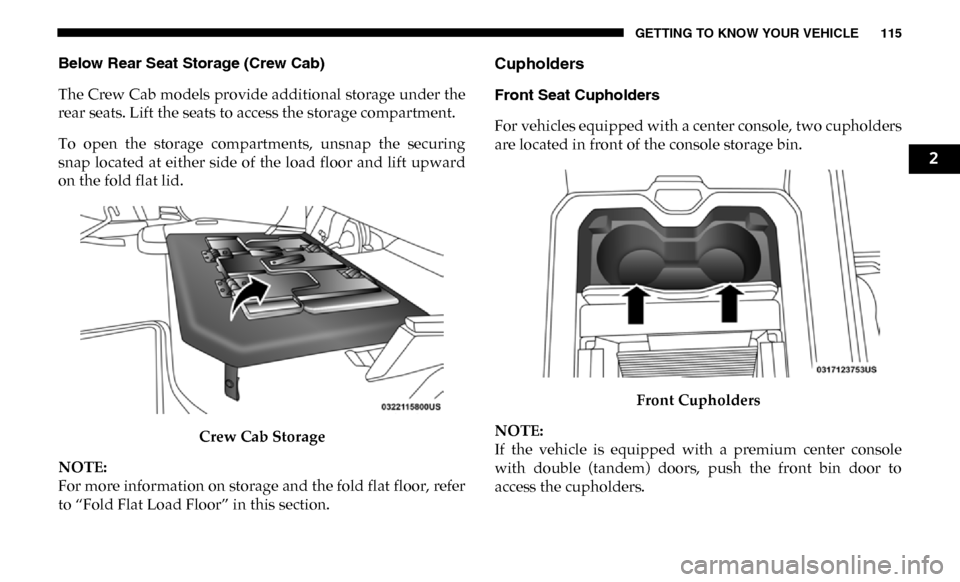
The Crew Cab models provide additional storage under the
rear seats. Lift the seats to access the storage compartment.
To open the storage compartments, unsnap the securing
snap located at either side of the load floor and lift upward
on the fold flat lid.Crew Cab Storage
NOTE:
For more information on storage and the fold flat floor, refer
to “Fold Flat Load Floor” in this section.Cupholders
Front Seat Cupholders
For vehicles equipped with a center console, two cupholders
are located in front of the console storage bin.
Front Cupholders
NOTE:
If the vehicle is equipped with a premium center console
with double (tandem) doors, push the front bin door to
access the cupholders.
2