rear view mirror Ram 4500 Chassis Cab 2018 User Guide
[x] Cancel search | Manufacturer: RAM, Model Year: 2018, Model line: 4500 Chassis Cab, Model: Ram 4500 Chassis Cab 2018Pages: 298, PDF Size: 5.88 MB
Page 34 of 298
breakage than glass lights. Plastic is not as
scratch resistant as glass and therefore dif-
ferent lens cleaning procedures must be fol-
lowed.
To minimize the possibility of scratching the
lenses and reducing light output, avoid wip-
ing with a dry cloth. To remove road dirt, wash
with a mild soap solution followed by rinsing.
NOTE:
If your vehicle is equipped with illuminated
approach lights under the outside mirrors,
they can be turned off through the instrument
cluster or the Uconnect radio. For further
information, refer to the Owner’s Manual at
www.mopar.com/en-us/care/owners-manual.html
(U.S. Residents) or www.owners.mopar.ca
(Canadian Residents) for further information.
CAUTION!
Do not use abrasive cleaning components,
solvents, steel wool or other abrasive ma-
terials to clean the lenses.
Headlights
To turn on the headlights, rotate the head-
light switch clockwise to the headlight posi-
tion. When the headlight switch is on, the
parking lights, taillights, license plate light
and instrument panel lights are also turned
on. To turn off the headlights, rotate the
headlight switch back to the O (off) position.
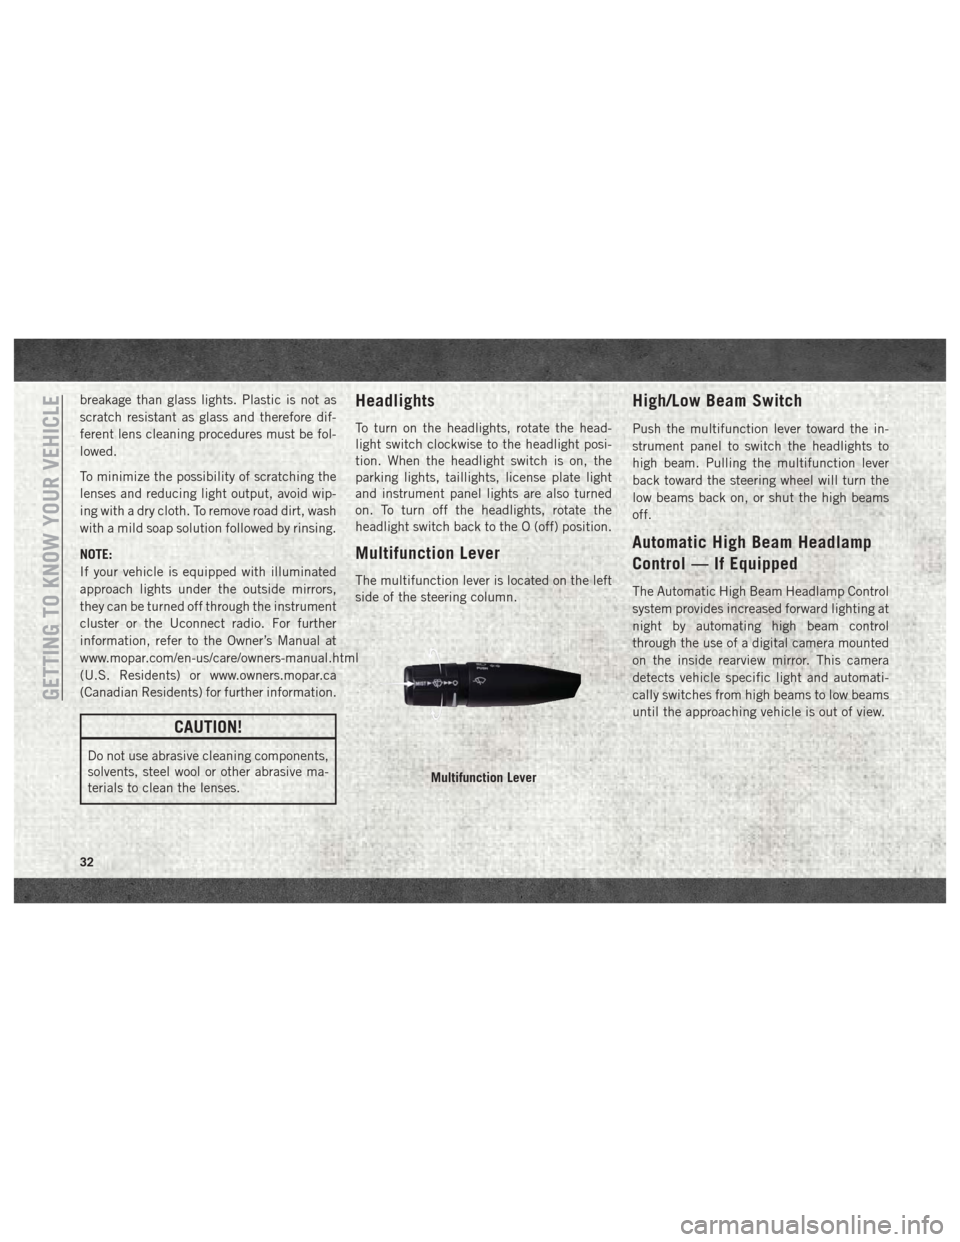
Multifunction Lever
The multifunction lever is located on the left
side of the steering column.
High/Low Beam Switch
Push the multifunction lever toward the in-
strument panel to switch the headlights to
high beam. Pulling the multifunction lever
back toward the steering wheel will turn the
low beams back on, or shut the high beams
off.
Automatic High Beam Headlamp
Control — If Equipped
The Automatic High Beam Headlamp Control
system provides increased forward lighting at
night by automating high beam control
through the use of a digital camera mounted
on the inside rearview mirror. This camera
detects vehicle specific light and automati-
cally switches from high beams to low beams
until the approaching vehicle is out of view.
Multifunction Lever
GETTING TO KNOW YOUR VEHICLE
32
Page 35 of 298
NOTE:
• The Automatic High Beam Headlamp Con-trol can be turned on or off by selecting
“ON” under “Auto High Beam” within your
Uconnect settings, as well as turning the
headlight switch to the AUTO position. Re-
fer to “Uconnect Settings” in “Multimedia”
in the Owner’s Manual at
www.mopar.com/en-us/care/owners-manual.html
(U.S. Residents) or www.owners.mopar.ca
(Canadian Residents) for further informa-
tion.
• Broken, muddy, or obstructed headlights and taillights of vehicles in the field of view
will cause headlights to remain on longer
(closer to the vehicle). Also, dirt, film, and
other obstructions on the windshield or
camera lens will cause the system to func-
tion improperly.
If the windshield or Automatic High Beam
Headlamp Control mirror is replaced, the
mirror must be re-aimed to ensure proper
performance. See a local authorized dealer.To Activate
1. The Automatic High Beams are enabled through the Uconnect system. Refer to
“Uconnect Settings” in “Multimedia” in
the Owner’s Manual at
www.mopar.com/en-us/care/owners-manual.html
(U.S. Residents) or www.owners.mopar.ca
(Canadian Residents) for further
information.
2. Turn the headlight switch to the AUTO headlight position.
3. Push the multifunction lever away from you (toward front of vehicle) to engage the
high beam mode.
NOTE:
This system will not activate until the vehicle
is at or above 20 mph (32 km/h).
To Deactivate
1. Pull the multifunction lever toward you (or rearward in vehicle) to manually deacti-
vate the system (normal operation of low
beams).
2. Push back on the multifunction lever to reactivate the system.
Automatic Headlights —
If Equipped
This system automatically turns the head-
lights on or off according to ambient light
levels. To turn the system on, rotate the
headlight switch counterclockwise to the
AUTO position. When the system is on, the
headlight time delay feature is also on. This
means the headlights will stay on for up to
90 seconds after you place the ignition into
the OFF position. The headlight time delay
can be programmed 0/30/60/90 seconds.
Refer to “Uconnect Settings” in “Multime-
dia” in the Owner’s Manual at
www.mopar.com/en-us/care/owners-manual.html
(U.S. Residents) or www.owners.mopar.ca
(Canadian Residents) for further information.
To turn the automatic system off, move the
headlight switch out of the AUTO position.
NOTE:
The engine must be running before the head-
lights will turn on in the Automatic Mode.
33
Page 62 of 298
Instrument Cluster Display Programmable Features
The instrument cluster display can be used to view or change the following settings. Push theupordown arrow button until System Setup
displays, then push the rightarrow button. Scroll through the settings using the upordown arrow button. Push the rightarrow button to change
the setting. Push the leftarrow button to scroll back to a previous menu or sub menu.
• Language Select • Remote Start Comfort System
• Units • Easy Exit Seat
• ParkSense • Key Off Power Delay
• Tilt Mirror In Reverse • Commercial Settings
• Rain Sensing Wipers • Air Suspension Display Alerts
• Hill Start Assist • Aero Ride Height Mode
• Headlights Off Delay • Tire/Jack Mode
• Illuminated Approach • Transport Mode
• Headlights On With Wipers • Wheel Alignment Mode
• Automatic Highbeams • Horn With Remote Lower
• Flash Lights With Lock • Lights With Remote Lower
• Auto Lock Doors • Trailer Select
• Auto Unlock Doors • Brake Type
• Sound Horn With Remote Start • Trailer Name
• Sound Horn With Remote Lock • Compass Variance
• Remote Unlock Sequence • Calibrate Compass
• Key Fob Linked To Memory • Fuel Saver Display
• Passive Entry • Park Assist Front Chime Volume
• Park Assist Rear Chime Volume
GETTING TO KNOW YOUR INSTRUMENT PANEL
60
Page 138 of 298
PARKSENSE FRONT AND REAR PARK
ASSIST — IF EQUIPPED
The ParkSense Park Assist system provides
visual and audible indications of the distance
between the rear and/or front fascia and a
detected obstacle when backing up or mov-
ing forward, e.g. during a parking maneuver.
Refer to “ParkSense System Usage
Precautions” in the Owner’s Manual at
www.mopar.com/en-us/care/
owners-manual.html (U.S. Residents) or
www.owners.mopar.ca (Canadian Residents)
for limitations of this system and recommen-
dations.
ParkSense will retain the last system state
(enabled or disabled) from the last ignition
cycle when the ignition is changed to the
ON/RUN position.
ParkSense can be active only when the gear
selector is in REVERSE or DRIVE. If
ParkSense is enabled at one of these gear
selector positions, the system will remain
active until the vehicle speed is increased to
approximately 7 mph (11 km/h) or above. A
warning will appear in the instrument clusterdisplay indicating the vehicle is above
ParkSense operating speed. The system will
become active again if the vehicle speed is
decreased to speeds less than approximately
6 mph (9 km/h).
ParkSense Sensors
For the 3500, 4500 and 5500 Chassis Cab
vehicles, the rear ParkSense sensors are
shipped loose. Please refer to the Ram Body
Builders Guide for more information.
Cleaning The ParkSense System
Clean the ParkSense sensors with water, car
wash soap and a soft cloth. Do not use rough
or hard cloths. Do not scratch or poke the
sensors. Otherwise, you could damage the
sensors.
PARKVIEW REAR BACK UP CAMERA
— IF EQUIPPED
Your vehicle may be equipped with the
ParkView Rear Back Up Camera that allows
you to see a image of the rear surroundings of
your vehicle whenever the gear selector is put
into REVERSE or whenever it is initiated through the "Backup Camera" button in the
"Controls" menu. Whenever the gear selector
is put into REVERSE, the image will be
displayed in the rearview mirror display (if
equipped) or Uconnect screen (if equipped)
along with a caution note to “check entire
surroundings” across the top of the screen.
After five seconds this note will disappear.
NOTE:
For the 3500, 4500 and 5500 Chassis Cab
vehicles, the Rear Backup Camera is shipped
loose and not installed. Please refer to the
Ram Body Builders Guide for more informa-
tion.
The ParkView Camera is located to the left of
the tailgate handle.
When the vehicle is shifted out of REVERSE
(with Camera delay turned off), the rear Cam-
era mode is exited and the navigation or
audio screen appears again.
When the vehicle is shifted out of REVERSE
(with Camera delay turned on), the rear Cam-
era image will be displayed for up to 10 sec-
onds after shifting out of REVERSE unless
STARTING AND OPERATING
136
Page 250 of 298
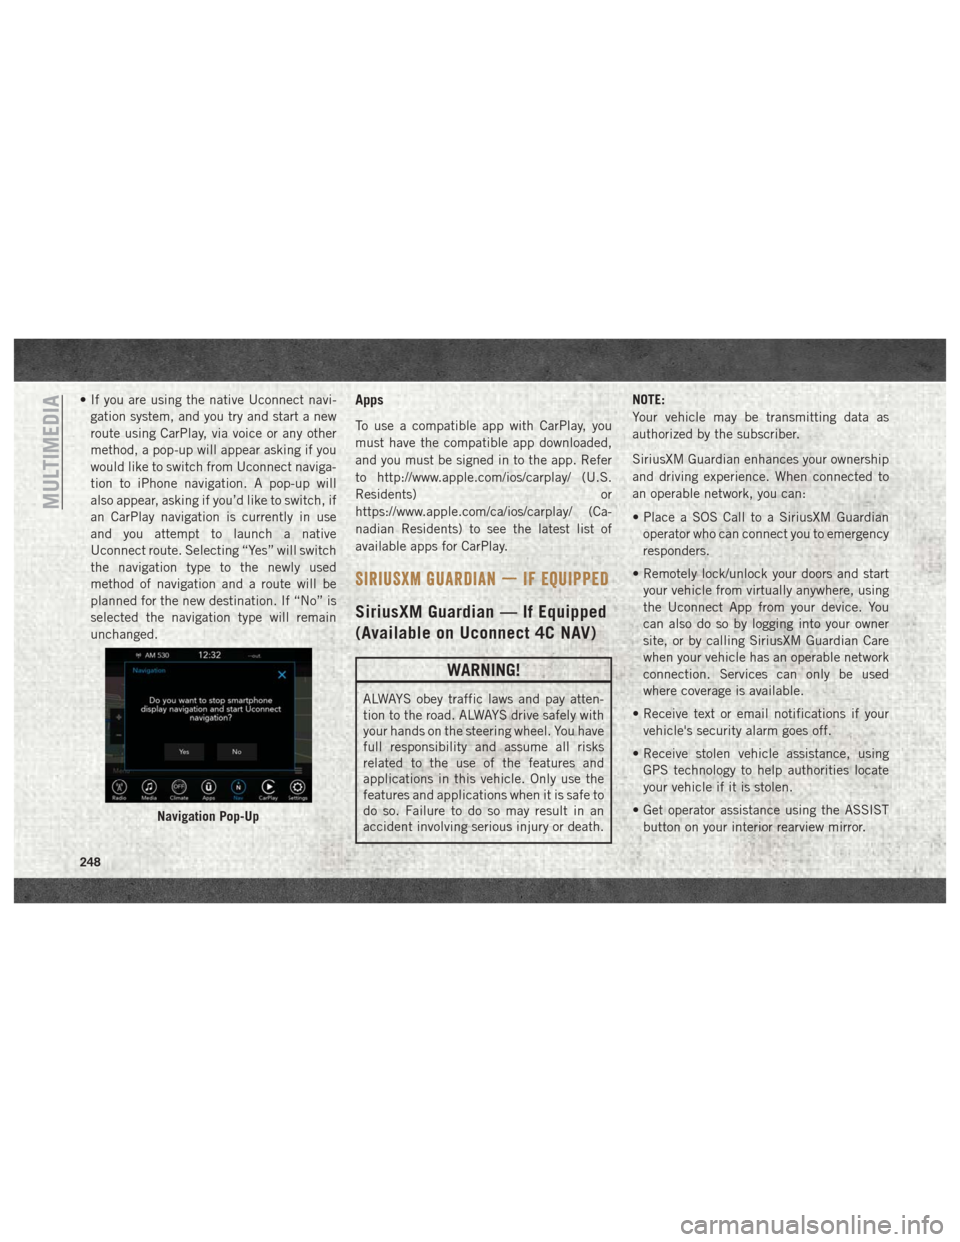
• If you are using the native Uconnect navi-gation system, and you try and start a new
route using CarPlay, via voice or any other
method, a pop-up will appear asking if you
would like to switch from Uconnect naviga-
tion to iPhone navigation. A pop-up will
also appear, asking if you’d like to switch, if
an CarPlay navigation is currently in use
and you attempt to launch a native
Uconnect route. Selecting “Yes” will switch
the navigation type to the newly used
method of navigation and a route will be
planned for the new destination. If “No” is
selected the navigation type will remain
unchanged.Apps
To use a compatible app with CarPlay, you
must have the compatible app downloaded,
and you must be signed in to the app. Refer
to http://www.apple.com/ios/carplay/ (U.S.
Residents) or
https://www.apple.com/ca/ios/carplay/ (Ca-
nadian Residents) to see the latest list of
available apps for CarPlay.
SIRIUSXM GUARDIAN — IF EQUIPPED
SiriusXM Guardian — If Equipped
(Available on Uconnect 4C NAV)
WARNING!
ALWAYS obey traffic laws and pay atten-
tion to the road. ALWAYS drive safely with
your hands on the steering wheel. You have
full responsibility and assume all risks
related to the use of the features and
applications in this vehicle. Only use the
features and applications when it is safe to
do so. Failure to do so may result in an
accident involving serious injury or death. NOTE:
Your vehicle may be transmitting data as
authorized by the subscriber.
SiriusXM Guardian enhances your ownership
and driving experience. When connected to
an operable network, you can:
• Place a SOS Call to a SiriusXM Guardian
operator who can connect you to emergency
responders.
• Remotely lock/unlock your doors and start your vehicle from virtually anywhere, using
the Uconnect App from your device. You
can also do so by logging into your owner
site, or by calling SiriusXM Guardian Care
when your vehicle has an operable network
connection. Services can only be used
where coverage is available.
• Receive text or email notifications if your vehicle's security alarm goes off.
• Receive stolen vehicle assistance, using GPS technology to help authorities locate
your vehicle if it is stolen.
• Get operator assistance using the ASSIST button on your interior rearview mirror.
Navigation Pop-Up
MULTIMEDIA
248
Page 251 of 298
Before you drive, familiarize yourself with the
easy-to-use SiriusXM Guardian services.
1. The ASSIST and SOS Call buttons arelocated on your rearview mirror. The AS-
SIST button is used for contacting Road-
side Assistance, Vehicle Care, SiriusXM
Guardian Care, and Uconnect Care. The
SOS Call button connects you to a
SiriusXM Guardian Care Agent, who can
connect you to emergency services.
2. The Uconnect “Apps
” button is lo-
cated in the center of the menu bar of the
radio touchscreen. This is where you can
manage your Apps.
3. The Uconnect Voice Command and Uconnect Phone buttons are located on
the left side of your steering wheel. These
buttons let you use your voice to give
commands, make phone calls, send and
receive text messages hands-free, enter
navigation destinations, and control your
radio and media devices. Included Trial Period For New Vehicles
Your new vehicle may come with an included
trial period for use of the SiriusXM Guardian
services starting at the date of vehicle pur-
chase (date based on vehicle sales notifica-
tion from your dealer).
To activate the trial, you
must first register with SiriusXM Guardian.
After the trial period, if you wish to continue
your SiriusXM Guardian services you can
choose to purchase a subscription.SiriusXM Guardian Activation
To unlock the full potential of SiriusXM
Guardian in your vehicle, you must activate
your SiriusXM Guardian services.
1. Press the Apps icon on the bottom of your in-vehicle touchscreen.
2. Select the Activate Services icon from your list of apps.
3. Select “Customer Care” to speak with a SiriusXM Guardian Customer Care agent
who will activate services in your vehicle,
or select “Enter Email” to activate on the
web. Why sign up for SiriusXM Guardian?
Here are
just a few examples of things you’ll be able to
do:
• Know that help, if you need it, is only a button press away with Assist.
• Lock and unlock your vehicle doors from hundreds of miles away.
• Find your vehicle, no matter where you parked, using the convenient Vehicle
Finder function.
• Use Send & Go to send a navigation route from your mobile phone to your vehicle’s
navigation system.
For further information:.
• U.S. residents visit: www.siriusxm.com/guardian
• Canadian residents visit: www.siriusxm.com/guardian/ca
249
Page 252 of 298
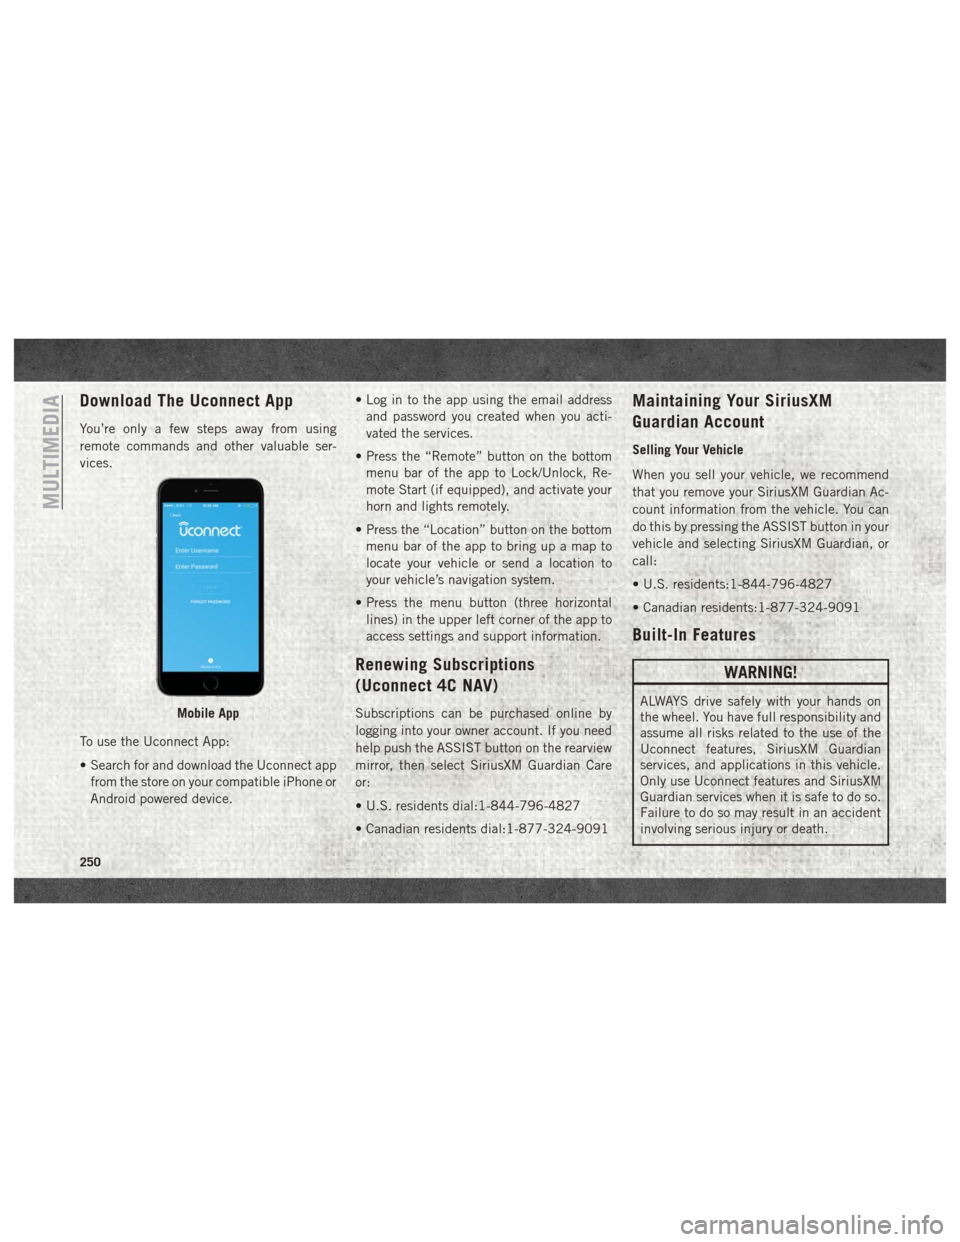
Download The Uconnect App
You’re only a few steps away from using
remote commands and other valuable ser-
vices.
To use the Uconnect App:
• Search for and download the Uconnect appfrom the store on your compatible iPhone or
Android powered device. • Log in to the app using the email address
and password you created when you acti-
vated the services.
• Press the “Remote” button on the bottom menu bar of the app to Lock/Unlock, Re-
mote Start (if equipped), and activate your
horn and lights remotely.
• Press the “Location” button on the bottom menu bar of the app to bring up a map to
locate your vehicle or send a location to
your vehicle’s navigation system.
• Press the menu button (three horizontal lines) in the upper left corner of the app to
access settings and support information.
Renewing Subscriptions
(Uconnect 4C NAV)
Subscriptions can be purchased online by
logging into your owner account. If you need
help push the ASSIST button on the rearview
mirror, then select SiriusXM Guardian Care
or:
• U.S. residents dial:1-844-796-4827
• Canadian residents dial:1-877-324-9091
Maintaining Your SiriusXM
Guardian Account
Selling Your Vehicle
When you sell your vehicle, we recommend
that you remove your SiriusXM Guardian Ac-
count information from the vehicle. You can
do this by pressing the ASSIST button in your
vehicle and selecting SiriusXM Guardian, or
call:
• U.S. residents:1-844-796-4827
• Canadian residents:1-877-324-9091
Built-In Features
WARNING!
ALWAYS drive safely with your hands on
the wheel. You have full responsibility and
assume all risks related to the use of the
Uconnect features, SiriusXM Guardian
services, and applications in this vehicle.
Only use Uconnect features and SiriusXM
Guardian services when it is safe to do so.
Failure to do so may result in an accident
involving serious injury or death.Mobile App
MULTIMEDIA
250
Page 253 of 298
WARNING!
• ALWAYS obey traffic laws and pay atten-tion to the road. Some features are lim-
ited while the vehicle is in motion. Some
services, including SOS, will NOT work
without a subscription and an operable
network connection.
• Ignoring the rearview mirror light could
mean you may not have SOS Call service
if needed. If the rearview mirror light is
illuminated, have an authorized dealer
service the SOS Call system immedi-
ately.
• The Occupant Restraint Controller
(ORC) turns on the Air Bag Warning
Light on the instrument panel if a mal-
function is detected in any part of the
airbag system. If the Air Bag Warning
Light is illuminated, the air bag system
may not be working properly and the
SOS Call system may not send a signal to
a SOS Call operator if an air bag is
deployed. If the Air Bag Warning Light is
illuminated, have an authorized dealer
service your vehicle immediately.
WARNING!
• If anyone in the vehicle could be indanger (e.g., fire or smoke is visible,
dangerous road conditions or location),
do not wait for voice contact from a SOS
Call operator. All occupants should exit
the vehicle immediately and move to a
safe location.
• The SOS Call system is embedded into
the vehicle’s electrical system. Do not
add aftermarket electrical equipment to
the vehicle’s electrical system. This may
prevent your vehicle from sending a sig-
nal to initiate an emergency call. To
avoid interference that can cause the
SOS Call system to fail, never add after-
market equipment (e.g., two-way mobile
radio, CB radio, data recorder, etc.) to
your vehicle’s electrical system or
modify the antennas on your vehicle.
• IF YOUR VEHICLE LOSES BATTERY
POWER FOR ANY REASON (INCLUD-
ING DURING OR AFTER AN ACCI-
DENT), the Uconnect features, apps,
and SiriusXM Guardian services, among
others, will not operate. NOTE:
Your vehicle may be transmitting data as
authorized by the subscriber.
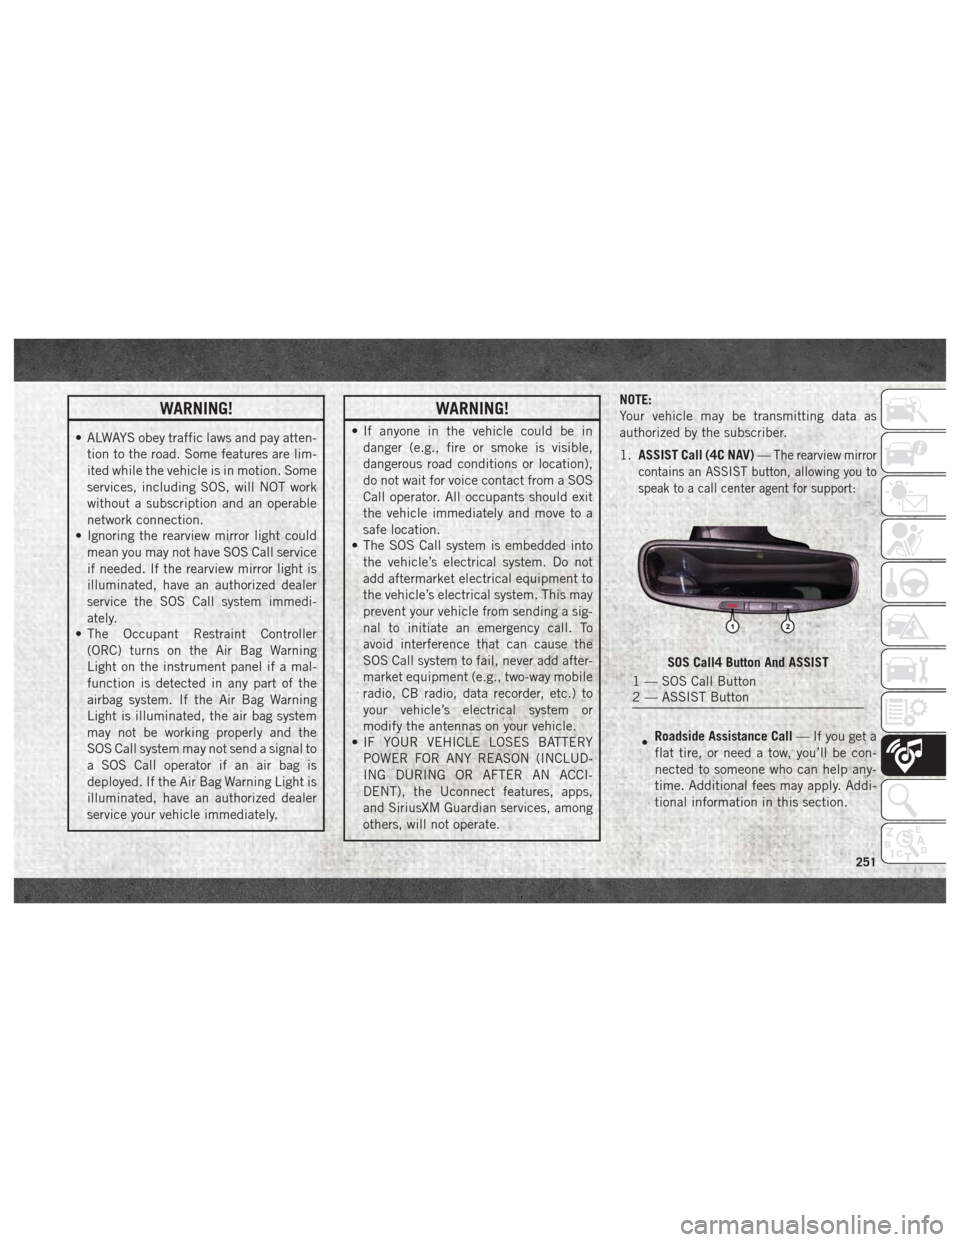
1.
ASSIST Call (4C NAV) —
The rearview mirror
contains an ASSIST button, allowing you to
speak to a call center agent for support:
• Roadside Assistance Call
— If you get a
flat tire, or need a tow, you’ll be con-
nected to someone who can help any-
time. Additional fees may apply. Addi-
tional information in this section.
SOS Call4 Button And ASSIST
1 — SOS Call Button
2 — ASSIST Button
251
Page 254 of 298
•Uconnect Care — In vehicle support for
Uconnect Apps and Features.
• SiriusXM Guardian Care — In vehicle
support for SiriusXM Guardian ser-
vices.
• Vehicle Care — Total support for your
FCA US LLC vehicle.
NOTE:
In order to provide SiriusXM Guardian Ser-
vices to you, we may record and monitor your
conversations with Roadside Assistance,
Uconnect Care, SiriusXM Guardian Care, or
Vehicle Care, whether such conversations are
initiated through the SiriusXM Guardian ser-
vices in your vehicle, your device, or via a
landline device, and may share information
obtained through such recording and moni-
toring in accordance with regulatory require-
ments. You acknowledge, agree, and consent
to any recording, monitoring or sharing of
information obtained through any such call
recordings. 2.
Emergency SOS Call (If Equipped) — The
rearview mirror contains a SOS Call but-
ton that, when pressed, may place a call
from your vehicle to a SiriusXM Guardian
Care operator, who can connect you to
emergency service operators, to request
help from local police, fire or ambulance
personnel. If this button is accidentally
pressed, you will have ten seconds to stop
the call. To cancel, press the SOS Call
button again or press the “Cancel” button
shown on the touchscreen. After ten sec-
onds has passed, the SOS call will be
placed and only the SOS Call operator can
cancel it. The LED light on the rearview
mirror will turn green once a connection to
a SOS Call operator has been made. The
green LED light will turn off once the SOS
Call is terminated. Have an authorized
dealer service the vehicle if the rearview
mirror light is continuously red. On
equipped vehicles, this feature requires a
functioning electrical system, a subscrip-
tion, and an operable network connection. If a connection is made between a SOS Call
operator and your vehicle, you understand
and agree that SOS Call operators will stay
on the line, even after you connect with
emergency services. The Emergency ser-
vices operator may, like any other emer-
gency call, record conversations and
sounds in and near your vehicle upon
connection.
3. Theft Alarm Notification — The Theft Alarm
Notification feature notifies you via email
or text (SMS) message when the vehicle’s
factory-installed security alarm system
has been set-off. There are a number of
reasons why your alarm may have been
triggered, one of which could be that your
vehicle was stolen. If so, please see the
details of the Stolen Vehicle Assistance
service below. When you activate, Theft
Alarm Notification is automatically set to
send you an email at the email address
you provide should the alarm go off. You
may also opt to have a text message sent
to your device.
MULTIMEDIA
252