light RAM CHASSIS CAB 2009 Owner's Manual
[x] Cancel search | Manufacturer: RAM, Model Year: 2009, Model line: CHASSIS CAB, Model: RAM CHASSIS CAB 2009Pages: 429, PDF Size: 3.51 MB
Page 80 of 429

\2Seats .............................. 114
\4 40-20-40 Front Seat ................... 115
\4 Reclining Seats ...................... 116
\4 Adjustable Head Restraints ............. 117
\4 Manual Rotary Lumbar Support
Adjustment — If Equipped ............. 118
\4 Power Seats — If Equipped ............. 118
\4 Heated Seats — If Equipped ............ 120
\2 To Open And Close The Hood ............ 121
\2 Lights ............................. 123
\4 Interior Lights ...................... 123
\4 Battery Saver ....................... 124
\4 Headlight Delay ..................... 124 \4
Headlights, Parking Lights And
Panel Lights ........................ 125
\4 Daytime Running Lights — If Equipped .... 126
\4 Lights-On Reminder .................. 126
\4 Fog Lights — If Equipped .............. 126
\4 Multifunction Lever .................. 126
\2 Windshield Wipers And Washers .......... 129
\4 Intermittent Wiper System .............. 129
\4 Windshield Washers .................. 130
\2 Tilt Steering Column ................... 130
\2 Driver Adjustable Pedals — If Equipped ..... 131
\4 Adjustment ........................ 132
78 UNDERSTANDING THE FEATURES OF YOUR VEHICLE
Page 81 of 429

\2Electronic Speed Control — If Equipped ..... 133
\4 To Activate ......................... 134
\4 To Set At A Desired Speed .............. 134
\4 To Deactivate ....................... 134
\4 To Resume Speed .................... 135
\4 To Vary The Speed Setting .............. 135
\4 To Accelerate For Passing .............. 135
\2 Overhead Console With Compass/Temperature
Mini-Trip Computer — If Equipped ......... 136
\4 US/M Button ....................... 137
\4 Reset Button ........................ 137
\4 Step Button ........................ 138
\4 Average Fuel Economy (AVG ECO) ....... 138\4
Distance To Empty (DTE) .............. 139
\4 Trip Odometer (ODO) ................. 139
\4 Elapsed Time (ET) ................... 140
\4 C/T Button ........................ 140
\4 Global Reset ........................ 141
\4 Automatic Compass Calibration .......... 141
\4 Manual Compass Calibration ............ 142
\4 Recalibrating The Compass ............. 142
\4 Outside Temperature .................. 143
\2 Electrical Power Outlets ................. 144
\2 Cigar Lighter And Ash Receiver ........... 145
UNDERSTANDING THE FEATURES OF YOUR VEHICLE 79
3
Page 83 of 429

MIRRORS
Inside Day/Night Mirror
Headlight glare can be reduced by moving the small
control under the mirror to the night position (toward the
rear of the vehicle). The mirror should be adjusted while
set in the day position (toward the windshield). The
mirror should be adjusted to center on the view through
the rear window.
Adjusting Rearview Mirror
UNDERSTANDING THE FEATURES OF YOUR VEHICLE 81
3
Page 84 of 429

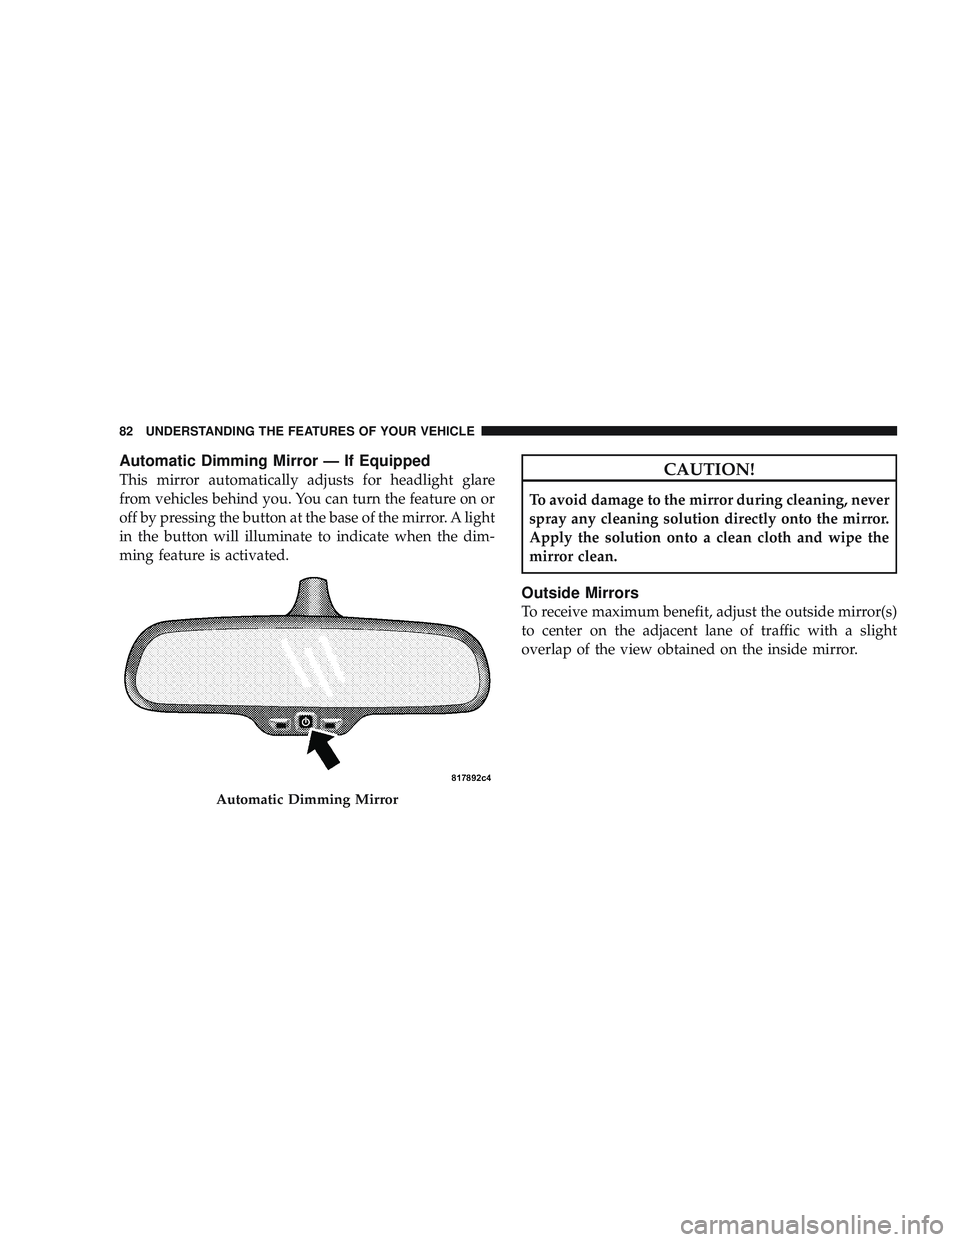
Automatic Dimming Mirror — If Equipped
This mirror automatically adjusts for headlight glare
from vehicles behind you. You can turn the feature on or
off by pressing the button at the base of the mirror. A light
in the button will illuminate to indicate when the dim-
ming feature is activated.CAUTION!
To avoid damage to the mirror during cleaning, never
spray any cleaning solution directly onto the mirror.
Apply the solution onto a clean cloth and wipe the
mirror clean.
Outside Mirrors
To receive maximum benefit, adjust the outside mirror(s)
to center on the adjacent lane of traffic with a slight
overlap of the view obtained on the inside mirror.
Automatic Dimming Mirror
82 UNDERSTANDING THE FEATURES OF YOUR VEHICLE
Page 102 of 429

•After the\6Ready\6prompt and the following beep, say
\6Emergency\6 and the UConnect\3 system will instruct
the paired cellular phone to call the emergency num-
ber. This feature is supported in the U.S., Canada, and
Mexico.
NOTE:
•The emergency number dialed is based on the country
where the vehicle is purchased (911 for the U.S. and
Canada and 060 for Mexico). The number dialed may
not be applicable with the available cellular service
and area.
•If supported, this number may be programmable on
some systems. To do this, press the PHONE button
and say ‘Setup’, followed by ‘Emergency’.
•The UConnect\3 system does slightly lower your
chances of successfully making a phone call as to that
for the cell phone directly.
WARNING!
Your phone must be turned on and paired to the
UConnect\3 system to allow use of this vehicle feature
in emergency situations, when the cell phone has
network coverage and stays paired to the UConnect \3
system.
Towing Assistance
If you need towing assistance:
•Press the PHONE button to begin.
•After the \6Ready\6prompt and the following beep, say
\6Towing Assistance.\6
100 UNDERSTANDING THE FEATURES OF YOUR VEHICLE
Page 123 of 429

Low is selected just the lower light will illuminate.
Flashing indicator lights on the switch indicate that the
heated seat system needs servicing. See your authorized
dealer.
WARNING!
•Persons who are unable to feel pain to the skin
because of advanced age, chronic illness, diabetes,
spinal cord injury, medication, alcohol use, ex-
haustion or other physical condition must exercise
care when using the seat heater. It may cause burns
even at low temperatures, especially if used for
long periods of time.
•Do not place anything on the seat that insulates
against heat, such as a blanket or cushion. This
may cause the seat heater to overheat.
TO OPEN AND CLOSE THE HOOD
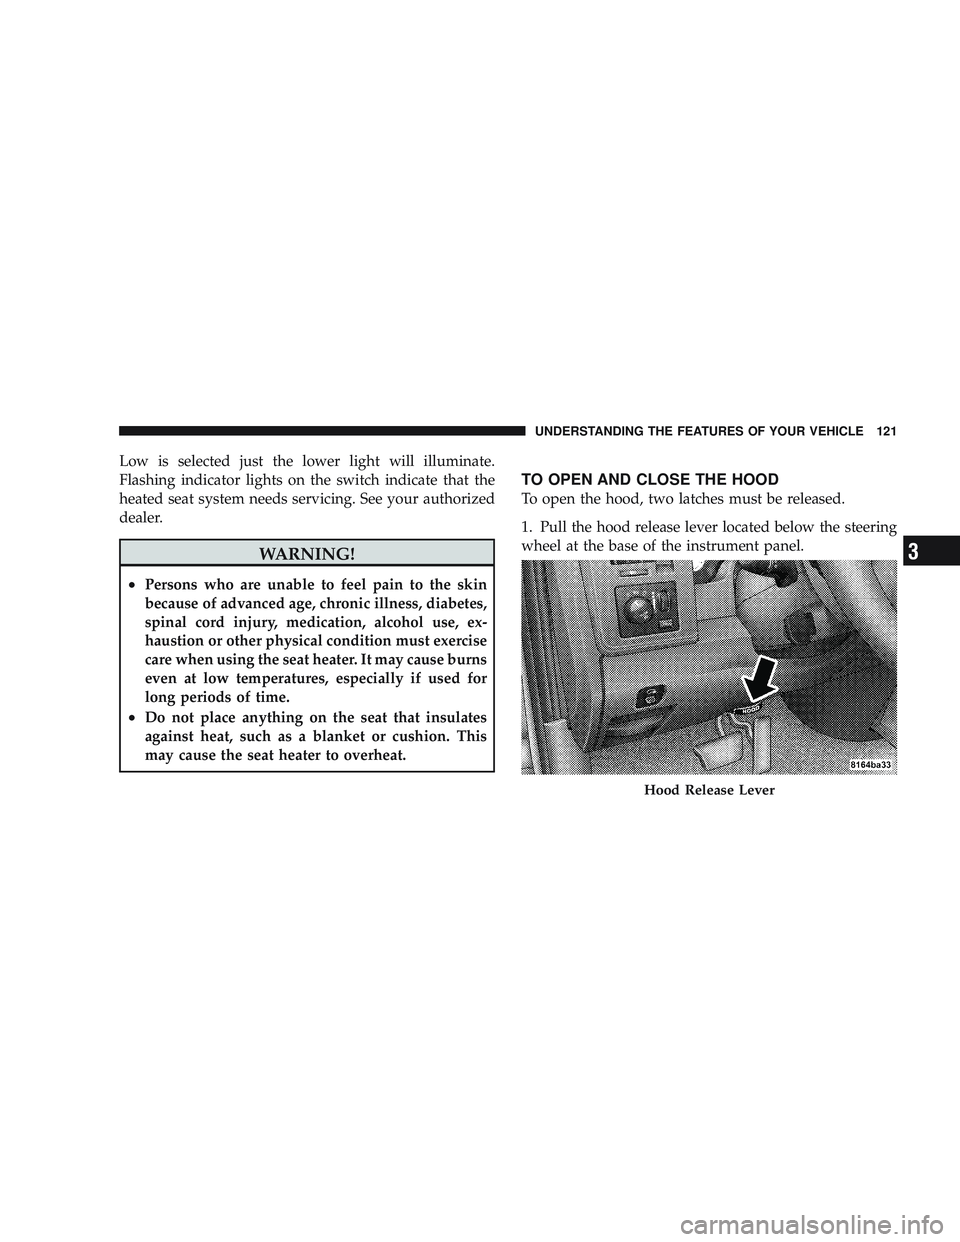
To open the hood, two latches must be released.
1. Pull the hood release lever located below the steering
wheel at the base of the instrument panel.
Hood Release Lever
UNDERSTANDING THE FEATURES OF YOUR VEHICLE 121
3
Page 125 of 429

LIGHTS
The headlight switch is located on the left side of the
instrument panel next to the steering wheel.
Interior Lights
Courtesy and dome lights are turned on when the front
doors are opened, when the dimmer control (rotatingwheel on the right side of the switch) is rotated to the
upward detent position, or if equipped, when the UN-
LOCK button is pressed on the Remote Keyless Entry
(RKE) transmitter. When a door is open and the interior
lights are on, rotating the dimmer control all the way
down to the OFF detent will cause all the interior lights to
go out. This is also known as the
\6Party\6mode because it
allows the doors to stay open for extended periods of
time without discharging the vehicle’s battery.
The brightness of the instrument panel lighting can be
regulated by rotating the dimmer control up (brighter) or
down (dimmer). When the headlights are on you can
supplement the brightness of the odometer, trip odom-
eter, radio and overhead console by rotating the control
up until you hear a click. This feature is termed the
“Parade” mode and is useful when headlights are re-
quired during the day.
Headlight Switch Location
UNDERSTANDING THE FEATURES OF YOUR VEHICLE 123
3
Page 126 of 429

NOTE:Quad Cab\3 models may have an optional
switched dome lamp that may be operated by pressing
the lens.
Battery Saver
To protect the life of your vehicle’s battery, load shedding
is provided for both the interior and exterior lights. If the ignition is OFF and any door is left ajar for
10 minutes or the dimmer control is rotated upwards for
10 minutes, the interior lights will automatically turn off.
If the headlights remain on while the ignition is cycled
OFF, the exterior lights will automatically turn off after
eight minutes.
NOTE:
Battery saver mode is cancelled if the ignition is
ON.
Headlight Delay
To aid in your exit, your vehicle is equipped with a
headlight delay that will leave the headlights on for
90 seconds. This delay is initiated when the ignition is
turned OFF while the headlight switch is on, and then the
headlight switch is cycled off. Headlight delay can be
cancelled by either turning the headlight switch on then
off, or by turning the ignition ON.
Dimmer Control
124 UNDERSTANDING THE FEATURES OF YOUR VEHICLE
Page 127 of 429

The headlight delay time is programmable on vehicles
equipped with the Electronic Vehicle Information Center
(EVIC). For details, refer to “Personal Settings
(Customer-Programmable Features)” under “Overhead
Console with Electronic Vehicle Information Center
(EVIC) – If Equipped” in Section 3.
Headlights, Parking Lights and Panel Lights
When the headlight switch is rotated to the first
position, the parking lights, tail lights, side
marker lights, license plate light and instrument
panel lights are all turned on. The headlights will turn on
when the switch is rotated to the second position.
Your vehicle is equipped with plastic headlight lenses
that are lighter and less susceptible to stone breakage
than glass headlights.
Plastic is not as scratch resistant as glass and therefore
different lens cleaning procedures must be followed.
Light Switch Rotation
UNDERSTANDING THE FEATURES OF YOUR VEHICLE 125
3
Page 128 of 429

To minimize the possibility of scratching the lenses and
reducing light output, avoid wiping with a dry cloth. To
remove road dirt, wash with a mild soap solution fol-
lowed by rinsing.
Do not use abrasive cleaning components, solvents, steel
wool or other abrasive materials to clean the lenses.
Daytime Running Lights — If Equipped
The headlights on your vehicle will illuminate when the
engine is started and the transmission is in any gear
except PARK. This provides a constant\6lights on\6condi-
tion until the ignition is turned OFF. The lights illuminate
at less than 50% of normal intensity. If the parking brake
is applied the Daytime Running Lights (DRL) will turn
OFF. Also, if a turn signal is activated, the DRL lamp on
the same side of the vehicle will turn off for the duration
of the turn signal activation. Once the turn signal is no
longer active, the DRL lamp will illuminate.
Lights-on Reminder
If the headlights, parking lights, or cargo lights are left on
after the ignition is turned OFF, a chime will sound when
the driver’s door is opened.
Fog Lights — If Equipped
The fog lights are turned on by placing the head-
light rotary control in the parking light or head-
light position and pushing in the headlight rotary
control. The fog lights will operate only when the parking
lights are on or when the vehicle headlights are on Low
beam. An indicator light located in the instrument cluster
will illuminate when the fog lights are on. The fog lights
will turn off when the switch is pushed a second time,
when the headlight switch is rotated to the off position,
or the High beam is selected.
Multifunction Lever
The multifunction lever is located on the left side of the
steering column.
126 UNDERSTANDING THE FEATURES OF YOUR VEHICLE