key RAM CHASSIS CAB 2023 Workshop Manual
[x] Cancel search | Manufacturer: RAM, Model Year: 2023, Model line: CHASSIS CAB, Model: RAM CHASSIS CAB 2023Pages: 444, PDF Size: 20.51 MB
Page 198 of 444
196STARTING AND OPERATING
Shifting Into N (Neutral)
Use the following procedure to prepare your
vehicle for recreational towing.
1. Bring the vehicle to a complete stop on level
ground, with the engine running. Firmly apply
the parking brake.
2. Shift the transmission to NEUTRAL.
3. Press and hold the brake pedal. 4. Shift the transfer case into N (Neutral):With manual shift transfer case, shift the
transfer case lever into N (Neutral).
With electronically shifted transfer case,
push and hold the transfer case N (Neutral)
button. Some models have a small,
recessed "N" button (at the center of the
transfer case switches) that must be
pressed using a ballpoint pen or similar
object. Other models have a rectangular N
(Neutral) switch, below the rotary transfer
case control knob. The N (Neutral) indicator
light will blink while the shift is in progress.
The light will stop blinking (stay on solid)
when the shift to N (Neutral) is complete.
After the shift is completed and the N
(Neutral) light stays on, release the N
(Neutral) button.
5. Release the parking brake.
6. Shift the transmission into REVERSE.
7. Release the brake pedal for five seconds and ensure that there is no vehicle movement.
8. Repeat steps 6 and 7 with automatic transmission in DRIVE.
9. Shift the transmission to NEUTRAL. Firmly apply the parking brake. Turn off the engine.
For vehicles with Keyless Enter ‘n Go™, push
and hold the ENGINE START/STOP button until
the engine shuts off. 10. Shift the transmission into PARK.
11. Place the ignition in the OFF position, and
remove the key fob.
12. Attach the vehicle to the tow vehicle using a suitable tow bar.
13. Release the parking brake.
NOTE:With electronically shifted transfer case:
Steps 2 through 3 are requirements that must
be met before pushing the N (Neutral) button,
and must continue to be met until the shift has
been completed. If any of these requirements
are not met before pushing the N (Neutral)
button or are no longer met during the shift, the
N (Neutral) indicator light will flash continuously
until all requirements are met or until the N
(Neutral) button is released.
The ignition must be in the ON/RUN position for
a shift to take place and for the position indi -
cator lights to be operable. If the ignition is not
in the ON/RUN position, the shift will not take
place and no position indicator lights will be on
or flashing.
A flashing N (Neutral) position indicator light
indicates that shift requirements have not been
met.
WARNING!
You or others could be injured or killed if you
leave the vehicle unattended with the transfer
case in the N (Neutral) position without first fully
engaging the parking brake. The transfer case N
(Neutral) position disengages both the front and
rear driveshafts from the powertrain, and will
allow the vehicle to roll, even if the automatic
transmission is in PARK. The parking brake
should always be applied when the driver is not
in the vehicle.
CAUTION!
It is necessary to follow these steps to be certain
that the transfer case is fully in N (Neutral)
before recreational towing to prevent damage to
internal parts.
23_DPF_OM_EN_USC_t.book Page 196
Page 204 of 444
202MULTIMEDIA
My Profile
Theme Mode This setting will allow you to adjust the brightness of your theme. Setting
options are “Light”, “Dark” and “Auto”. Select to show themes in Light or Dark
mode. “Auto” changes the theme with the headlights.
Keyboard This setting will change the keyboard type on the display. The selectable
keyboards are “ABCDEF Keyboard”, “QWERTY Keyboard”, and “AZERTY
Keyboard”.
Touchscreen Beep This setting will allow you to turn the touchscreen beep on or off.
Show Main Category Bar Labels
This setting will allow you to turn the bottom main category bar labels on or off.
Control Screen Timeout This setting allows you to set the Control Screen to turn off automatically after
five seconds or stay open until manually closed.
Navigation Next Turn Pop-ups Displayed in Cluster This setting will display navigation prompts in the Instrument Cluster Display.
Phone Pop-ups Displayed In Cluster This setting will display incoming calls in the Instrument Cluster Display.
Fuel Saver Display This setting will enable fuel saver mode in the Instrument Cluster Display.
Ready To Drive Pop-ups This setting will enable the Ready To Drive Pop-ups in the Instrument Cluster
Display.
Setting Name
Description
When the My Profile button is pressed on the touchscreen, the system displays options related to the vehicle’s profiles.
NOTE:Depending on the vehicle’s options, feature settings may vary.
Setting NameDescription
Language
This setting will change the language of the Uconnect system and Instrument Cluster
Display. The available languages are English, Français, Italiano, and Español.
23_DPF_OM_EN_USC_t.book Page 202
Page 215 of 444
MULTIMEDIA213
Brakes
Headlight Illumination On Approach This setting will allow you to set the amount of time it takes for the headlights
to shut off after the vehicle is unlocked. The available settings are “0 sec”,
“30 sec”, “60 sec”, and “90 sec”.
Headlights with Wipers This setting will turn the headlights on when the wipers are activated.
Daytime Running Lights This setting will allow you to turn the Daytime Running Lights on or off.
Flash Lights With Lock This setting will allow you to turn the flashing of the lights when the Lock
button is pushed on the key fob on or off.
Auto Dim High Beams This setting will allow you to turn the Auto Dim High Beams on or off.
Steering Directed Lights This setting will turn the headlights with the steering wheel. The available
options are “On” and “Off”.
Setting Name
Description
After pressing the Brakes button on the touchscreen, the following setting will be available:
NOTE:Depending on the vehicle’s options, feature settings may vary.
Setting NameDescription
Brake Service This setting will allow you to retract the brakes for servicing.
5
23_DPF_OM_EN_USC_t.book Page 213
Page 216 of 444
214MULTIMEDIA
Doors & Locks
When the Doors & Locks button is pressed on the touchscreen, the system displays the options related to locking and unlocking the vehicle’s doors.
NOTE:Depending on the vehicle’s options, feature settings may vary.
Setting Name Description
Auto Door Locks This setting will allow you to change if the doors lock automatically when the
vehicle reaches 15 mph (24 km/h).
Auto Unlock On Exit This setting will unlock the doors when any of the doors are opened from the
inside.
Flash Lights With Lock This setting will allow you to turn the flashing of the lights when the Lock
button is pushed on the key fob on or off.
Sound Horn With Lock
This setting will sound the horn when the Lock button is pushed on the key fob.
The “Off” setting will not sound the horn when the Lock button is pushed. The “1st
Press” setting will sound the horn when the Lock button is pushed once. The “2nd
Press” setting will sound the horn when the Lock button is pushed twice.
Sound Horn With Remote Start This setting will sound the horn when the remote start is activated from the
key fob.
Remote Door Unlock, Door Lock/1st Press Of Key Fob Unlocks This setting will change how many pushes of the Unlock button on the key fob
are needed to unlock all the doors. The “Driver Door” setting will only unlock
the driver door on the first push on the Unlock button. The “All Doors” setting
will unlock all doors with only one push of the Unlock button.
Passive Entry This setting will allow you to turn the Passive Entry feature (Keyless
Enter ‘n Go™) on or off.
Personal Settings Linked To Key Fob This setting will recall preset radio stations and driver seat position that have
been linked to the key fob.
23_DPF_OM_EN_USC_t.book Page 214
Page 217 of 444
MULTIMEDIA215
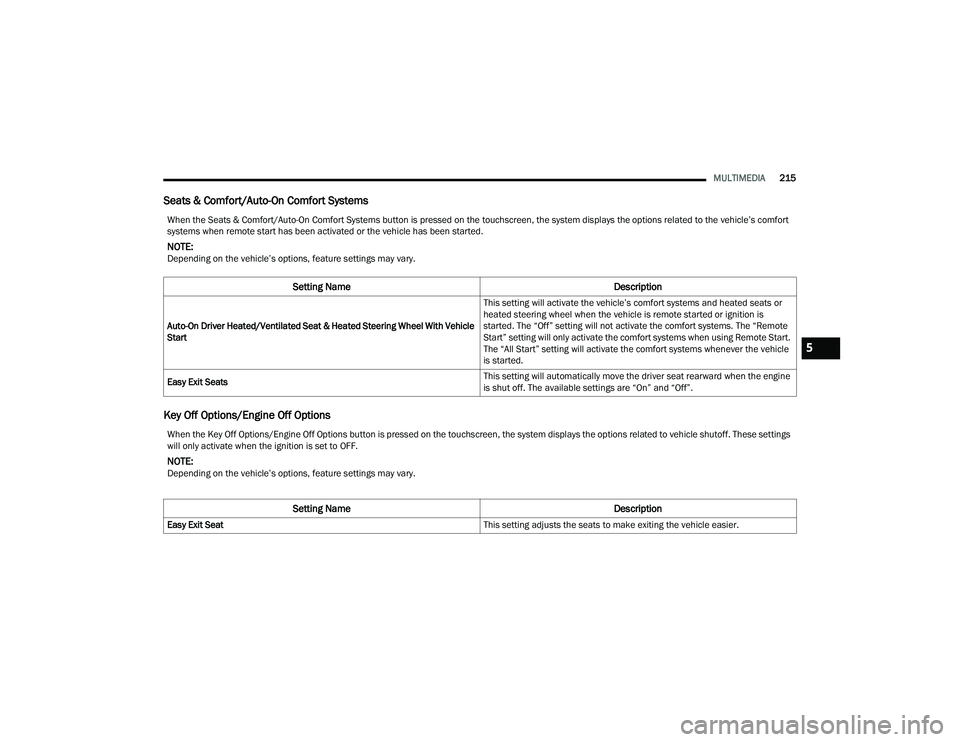
Seats & Comfort/Auto-On Comfort Systems
Key Off Options/Engine Off Options
When the Seats & Comfort/Auto-On Comfort Systems button is pressed on the touchscreen, the system displays the options related to the vehicle’s comfort
systems when remote start has been activated or the vehicle has been started.
NOTE:Depending on the vehicle’s options, feature settings may vary.
Setting Name Description
Auto-On Driver Heated/Ventilated Seat & Heated Steering Wheel With Vehicle
Start This setting will activate the vehicle’s comfort systems and heated seats or
heated steering wheel when the vehicle is remote started or ignition is
started. The “Off” setting will not activate the comfort systems. The “Remote
Start” setting will only activate the comfort systems when using Remote Start.
The “All Start” setting will activate the comfort systems whenever the vehicle
is started.
Easy Exit Seats This setting will automatically move the driver seat rearward when the engine
is shut off. The available settings are “On” and “Off”.
When the Key Off Options/Engine Off Options button is pressed on the touchscreen, the system displays the options related to vehicle shutoff. These settings
will only activate when the ignition is set to OFF.
NOTE:Depending on the vehicle’s options, feature settings may vary.
Setting Name
Description
Easy Exit Seat This setting adjusts the seats to make exiting the vehicle easier.
5
23_DPF_OM_EN_USC_t.book Page 215
Page 218 of 444
216MULTIMEDIA
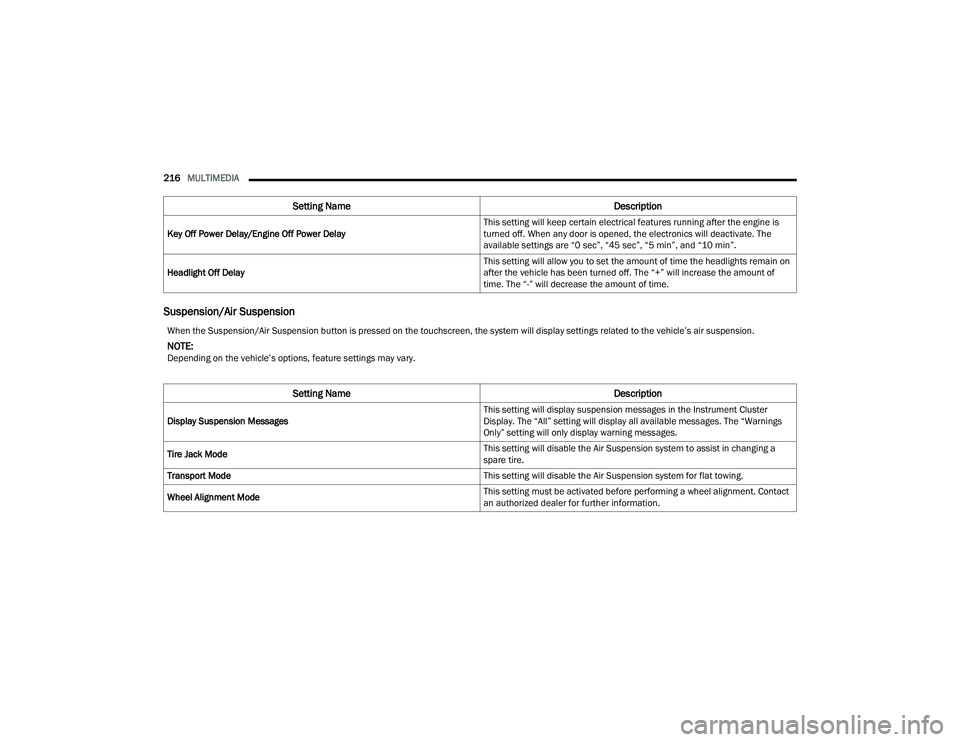
Suspension/Air Suspension
Key Off Power Delay/Engine Off Power Delay This setting will keep certain electrical features running after the engine is
turned off. When any door is opened, the electronics will deactivate. The
available settings are “0 sec”, “45 sec”, “5 min”, and “10 min”.
Headlight Off Delay This setting will allow you to set the amount of time the headlights remain on
after the vehicle has been turned off. The “+” will increase the amount of
time. The “-” will decrease the amount of time.
Setting Name
Description
When the Suspension/Air Suspension button is pressed on the touchscreen, the system will display settings related to the vehicle’s air suspension.
NOTE:Depending on the vehicle’s options, feature settings may vary.
Setting NameDescription
Display Suspension Messages This setting will display suspension messages in the Instrument Cluster
Display. The “All” setting will display all available messages. The “Warnings
Only” setting will only display warning messages.
Tire Jack Mode This setting will disable the Air Suspension system to assist in changing a
spare tire.
Transport Mode This setting will disable the Air Suspension system for flat towing.
Wheel Alignment Mode This setting must be activated before performing a wheel alignment. Contact
an authorized dealer for further information.
23_DPF_OM_EN_USC_t.book Page 216
Page 237 of 444
MULTIMEDIA235
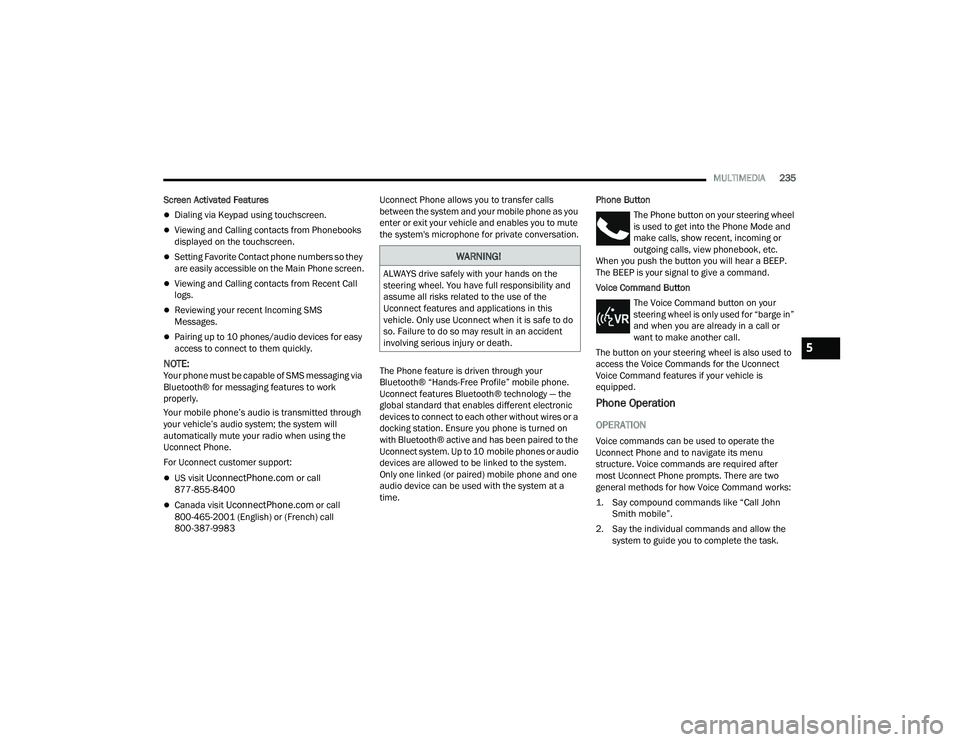
Screen Activated Features
Dialing via Keypad using touchscreen.
Viewing and Calling contacts from Phonebooks
displayed on the touchscreen.
Setting Favorite Contact phone numbers so they
are easily accessible on the Main Phone screen.
Viewing and Calling contacts from Recent Call
logs.
Reviewing your recent Incoming SMS
Messages.
Pairing up to 10 phones/audio devices for easy
access to connect to them quickly.
NOTE:Your phone must be capable of SMS messaging via
Bluetooth® for messaging features to work
properly.
Your mobile phone’s audio is transmitted through
your vehicle’s audio system; the system will
automatically mute your radio when using the
Uconnect Phone.
For Uconnect customer support:
US visit UconnectPhone.com or call
877-855-8400
Canada visit UconnectPhone.com or call
800-465-2001 (English) or (French) call
800-387-9983 Uconnect Phone allows you to transfer calls
between the system and your mobile phone as you
enter or exit your vehicle and enables you to mute
the system's microphone for private conversation.
The Phone feature is driven through your
Bluetooth® “Hands-Free Profile” mobile phone.
Uconnect features Bluetooth® technology — the
global standard that enables different electronic
devices to connect to each other without wires or a
docking station. Ensure you phone is turned on
with Bluetooth® active and has been paired to the
Uconnect system. Up to 10 mobile phones or audio
devices are allowed to be linked to the system.
Only one linked (or paired) mobile phone and one
audio device can be used with the system at a
time.
Phone Button
The Phone button on your steering wheel
is used to get into the Phone Mode and
make calls, show recent, incoming or
outgoing calls, view phonebook, etc.
When you push the button you will hear a BEEP.
The BEEP is your signal to give a command.
Voice Command Button
The Voice Command button on your
steering wheel is only used for “barge in”
and when you are already in a call or
want to make another call.
The button on your steering wheel is also used to
access the Voice Commands for the Uconnect
Voice Command features if your vehicle is
equipped.
Phone Operation
OPERATION
Voice commands can be used to operate the
Uconnect Phone and to navigate its menu
structure. Voice commands are required after
most Uconnect Phone prompts. There are two
general methods for how Voice Command works:
1. Say compound commands like “Call John Smith mobile”.
2. Say the individual commands and allow the system to guide you to complete the task.
WARNING!
ALWAYS drive safely with your hands on the
steering wheel. You have full responsibility and
assume all risks related to the use of the
Uconnect features and applications in this
vehicle. Only use Uconnect when it is safe to do
so. Failure to do so may result in an accident
involving serious injury or death.
5
23_DPF_OM_EN_USC_t.book Page 235
Page 242 of 444
240MULTIMEDIA
CALL CONTROLS
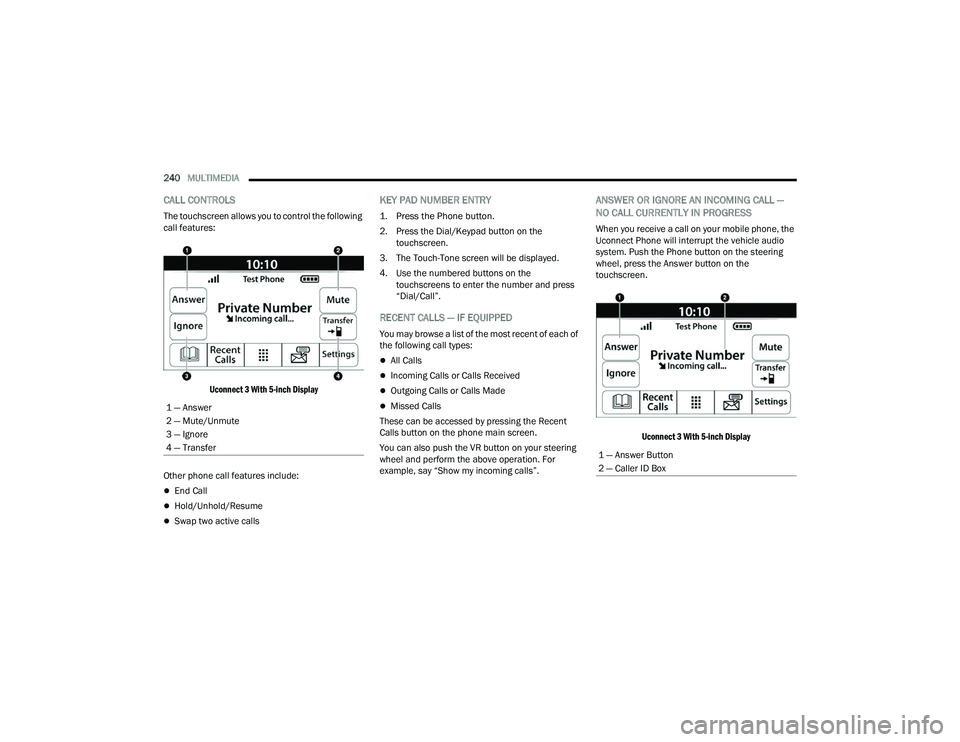
The touchscreen allows you to control the following
call features:
Uconnect 3 With 5-inch Display
Other phone call features include:
End Call
Hold/Unhold/Resume
Swap two active calls
KEY PAD NUMBER ENTRY
1. Press the Phone button.
2. Press the Dial/Keypad button on the touchscreen.
3. The Touch-Tone screen will be displayed.
4. Use the numbered buttons on the touchscreens to enter the number and press
“Dial/Call”.
RECENT CALLS — IF EQUIPPED
You may browse a list of the most recent of each of
the following call types:
All Calls
Incoming Calls or Calls Received
Outgoing Calls or Calls Made
Missed Calls
These can be accessed by pressing the Recent
Calls button on the phone main screen.
You can also push the VR button on your steering
wheel and perform the above operation. For
example, say “Show my incoming calls”.
ANSWER OR IGNORE AN INCOMING CALL —
NO CALL CURRENTLY IN PROGRESS
When you receive a call on your mobile phone, the
Uconnect Phone will interrupt the vehicle audio
system. Push the Phone button on the steering
wheel, press the Answer button on the
touchscreen.
Uconnect 3 With 5-inch Display
1 — Answer
2 — Mute/Unmute
3 — Ignore
4 — Transfer
1 — Answer Button
2 — Caller ID Box
23_DPF_OM_EN_USC_t.book Page 240
Page 243 of 444
MULTIMEDIA241
ANSWER OR IGNORE AN INCOMING CALL —
CALL CURRENTLY IN PROGRESS
If a call is currently in progress and you have
another incoming call, you will hear the same
network tones for call waiting that you normally
hear when using your mobile phone. Push the
Phone button on the steering wheel, press the
Answer button on the touchscreen, or press the
Caller ID box to place the current call on hold and
answer the incoming call.
NOTE:Phones that are compatible with the Uconnect
system in the market today do not support
rejecting an incoming call when another call is in
progress. Therefore, the user can only answer an
incoming call or ignore it.
DO NOT DISTURB
With Do Not Disturb, you can disable notifications
from incoming calls and texts, allowing you to keep
your eyes on the road and hands on the wheel. For
your convenience, there is a counter display to
keep track of your missed calls and text messages
while Do Not Disturb is active.
Do Not Disturb can automatically reply with a text
message, a call, or both when declining an
incoming call and send it to voicemail. Automatic reply messages can be:
“I am driving right now, I will get back to you
shortly”.
Create a custom auto reply message up to 160
characters.
NOTE:Only the first 25 characters can be seen on the
touchscreen while typing a custom message.
While in Do Not Disturb, “Conference Call” can be
selected so you can still place a second call
without being interrupted by incoming calls.
NOTE:
Reply with text message is not compatible with
iPhone® devices.
Auto reply with text message is only available on
phones that support Bluetooth® Message
Access Profile (MAP).
PLACE/RETRIEVE A CALL FROM HOLD
During an active call, press the Hold or Call On Hold
button on the Phone main screen.
MAKING A SECOND CALL WHILE CURRENT
CALL IS IN PROGRESS
You can place a call on hold by pressing the Hold
button on the Phone main screen, then dial a
number from the keypad (if supported by your
mobile phone), recent calls, SMS Inbox or from the
phonebooks.
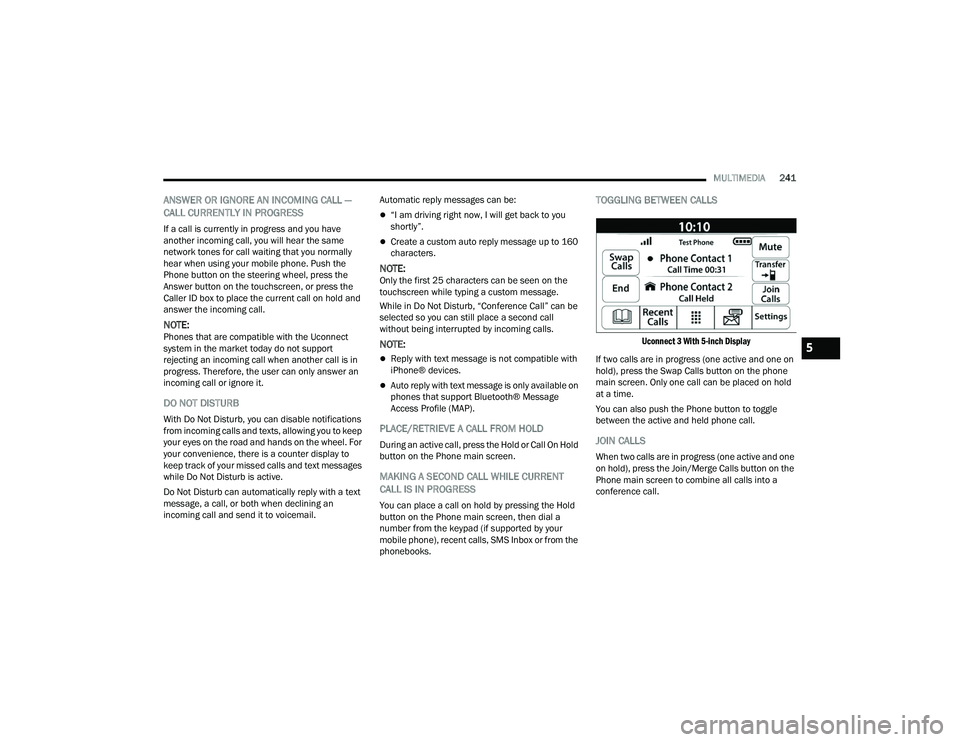
TOGGLING BETWEEN CALLS
Uconnect 3 With 5-inch Display
If two calls are in progress (one active and one on
hold), press the Swap Calls button on the phone
main screen. Only one call can be placed on hold
at a time.
You can also push the Phone button to toggle
between the active and held phone call.
JOIN CALLS
When two calls are in progress (one active and one
on hold), press the Join/Merge Calls button on the
Phone main screen to combine all calls into a
conference call.
5
23_DPF_OM_EN_USC_t.book Page 241
Page 246 of 444
244MULTIMEDIA
Did You Know: Voice Text Reply is not compatible
with iPhone®, but if your vehicle is equipped with
Siri® Eyes Free, you can use your voice to send a
text message.
Siri® Eyes Free — If Equipped
When used with your Apple® iPhone® connected
to your vehicle via Bluetooth®, Siri lets you use
your voice to send text messages, select media,
place phone calls and much more. Siri uses your
natural language to understand what you mean
and responds back to confirm your requests. The
system is designed to keep your eyes on the road
and your hands on the wheel by letting Siri help you
perform useful tasks.
To enable Siri, push and hold, then release the
Uconnect Voice Recognition (VR) button on the
steering wheel. After you hear a double beep, you
can ask Siri to play podcasts and music, get
directions, read text messages, and many other
useful requests.
BLUETOOTH® COMMUNICATION LINK
Mobile phones may lose connection to the
Uconnect Phone. When this happens, the
connection can generally be re-established by
restarting the mobile phone. Your mobile phone is
recommended to remain in Bluetooth® ON mode.
POWER-UP
After switching the ignition key from OFF to either
the ON/RUN or ACC position, or after a language
change, you must wait at least 15 seconds prior to
using the system Ú page 427.
CONNECTED VEHICLE SERVICES —
IF EQUIPPED
IS MY VEHICLE CONNECTED?
If equipped, vehicles with an ASSIST and an SOS
button are connected vehicles. These buttons will
be located on either the rearview mirror or
overhead console, depending on the vehicle. If
these buttons are present in your vehicle, you have
a connected radio and can take advantage of the
many connected vehicle features.
For further information about the ASSIST and SOS
buttons Úpage 326.
INTRODUCTION TO CONNECTED VEHICLE
S
ERVICES
One of the many benefits of your vehicle’s
Uconnect system is that you can now take
advantage of SiriusXM Guardian™ connected
services. To unlock the full potential of SiriusXM
Guardian™ in your vehicle, you first need to
activate SiriusXM Guardian™ connected services.
NOTE:SiriusXM Guardian™ involves the collection, trans -
mission and use of data from your vehicle
Ú page 263.
SiriusXM Guardian™ Contact Information
SiriusXM Guardian™/Care
US residents visit: https://www.driveucon -
nect.com/sirius-xm-guardian.html or call
1-844-796-4827
Canadian residents visit: https://www.driveu -
connect.ca/en/sirius-xm-guardian or call
1-877-324-9091
What Is SiriusXM Guardian™?
SiriusXM Guardian™ uses an embedded device in
the Uconnect system installed in your vehicle,
which receives GPS signals and communicates
with the SiriusXM Guardian™ Customer Care
center via wireless and landline communications
WARNING!
ALWAYS obey traffic laws and pay attention to
the road. Your complete attention is always
required while driving to maintain safe control of
your vehicle. Only use and interact with the
features and applications when it is safe to do
so. Failure to follow these warnings can result in
a collision and death or serious personal injury.
23_DPF_OM_EN_USC_t.book Page 244