oil type Ram ProMaster 2018 User Guide
[x] Cancel search | Manufacturer: RAM, Model Year: 2018, Model line: ProMaster, Model: Ram ProMaster 2018Pages: 204, PDF Size: 4 MB
Page 77 of 204

CAUTION!
If the “Generic Warning Light” remains on
and a “Service Fuel Filter” message dis-
plays, DO NOT START engine before you
drain the water from the fuel filter housing
to avoid engine damage. Please see your
authorized dealer for draining the fuel
filter/water separator and fuel filter re-
placement.
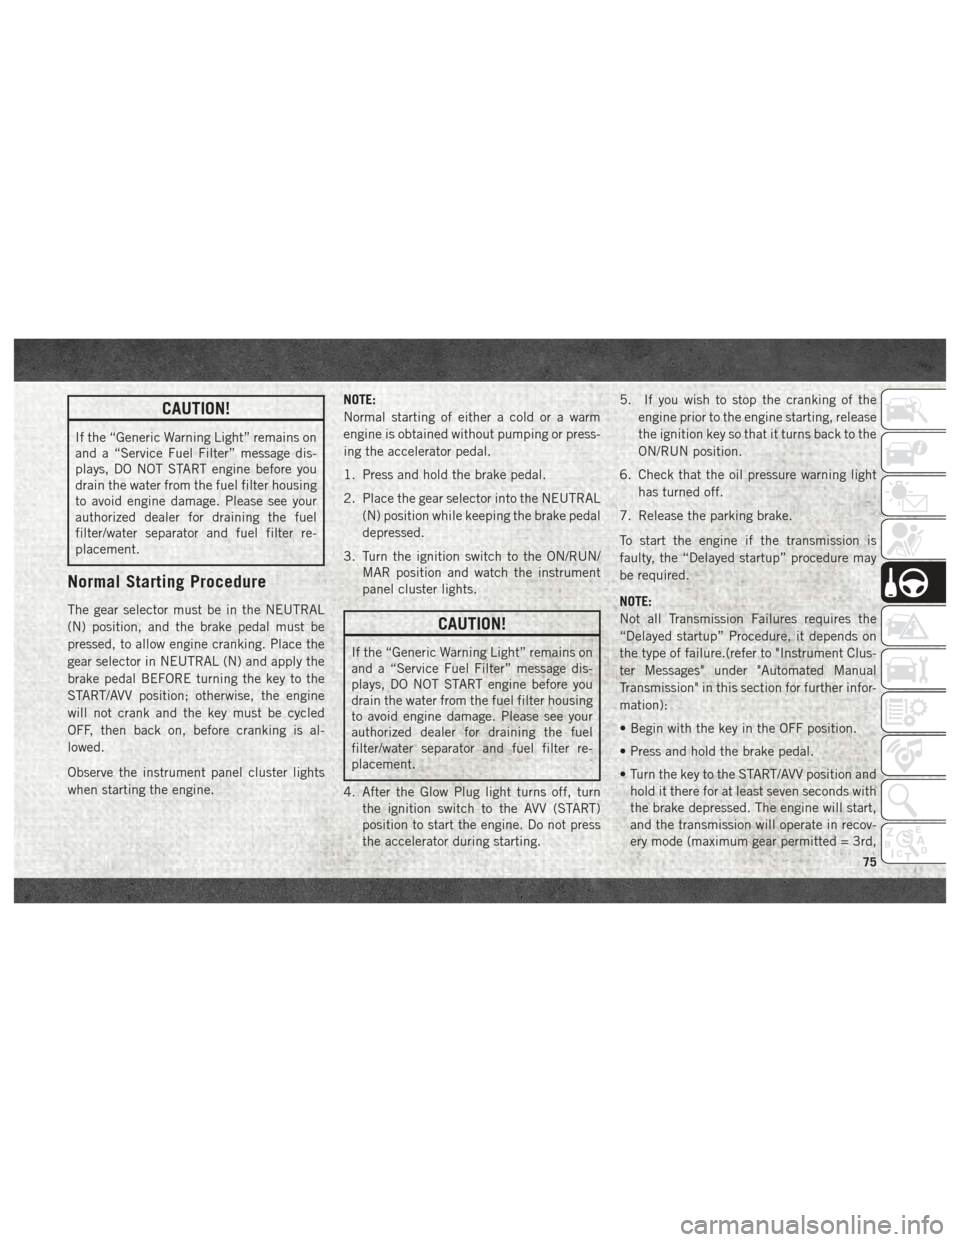
Normal Starting Procedure
The gear selector must be in the NEUTRAL
(N) position, and the brake pedal must be
pressed, to allow engine cranking. Place the
gear selector in NEUTRAL (N) and apply the
brake pedal BEFORE turning the key to the
START/AVV position; otherwise, the engine
will not crank and the key must be cycled
OFF, then back on, before cranking is al-
lowed.
Observe the instrument panel cluster lights
when starting the engine.NOTE:
Normal starting of either a cold or a warm
engine is obtained without pumping or press-
ing the accelerator pedal.
1. Press and hold the brake pedal.
2. Place the gear selector into the NEUTRAL
(N) position while keeping the brake pedal
depressed.
3. Turn the ignition switch to the ON/RUN/ MAR position and watch the instrument
panel cluster lights.CAUTION!
If the “Generic Warning Light” remains on
and a “Service Fuel Filter” message dis-
plays, DO NOT START engine before you
drain the water from the fuel filter housing
to avoid engine damage. Please see your
authorized dealer for draining the fuel
filter/water separator and fuel filter re-
placement.
4. After the Glow Plug light turns off, turn the ignition switch to the AVV (START)
position to start the engine. Do not press
the accelerator during starting. 5. If you wish to stop the cranking of the
engine prior to the engine starting, release
the ignition key so that it turns back to the
ON/RUN position.
6. Check that the oil pressure warning light has turned off.
7. Release the parking brake.
To start the engine if the transmission is
faulty, the “Delayed startup” procedure may
be required.
NOTE:
Not all Transmission Failures requires the
“Delayed startup” Procedure, it depends on
the type of failure.(refer to "Instrument Clus-
ter Messages" under "Automated Manual
Transmission" in this section for further infor-
mation):
• Begin with the key in the OFF position.
• Press and hold the brake pedal.
• Turn the key to the START/AVV position and hold it there for at least seven seconds with
the brake depressed. The engine will start,
and the transmission will operate in recov-
ery mode (maximum gear permitted = 3rd,
75
Page 79 of 204

Driving
Condition LoadTurbo-
charger
Tempera- ture Idle Time
(min.)
Before
Engine
Shutdown
Stop and Go Empty Cool Less than
One
Stop and Go Medium
One
Highway Speeds Medium Warm Two
City Traf- fic Maximum
GCWR Three
Highway Speeds Maximum
GCWR Four
Uphill Grade Maximum
GCWR Hot Five
ENGINE BREAK-IN RECOMMENDATIONS
— GASOLINE ENGINE
A long break-in period is not required for the
engine and drivetrain (transmission and axle)
in your vehicle. Drive moderately during the first 300 miles
(500 km). After the initial 60 miles
(100 km), speeds up to 50 or 55 mph (80 or
90 km/h) are desirable.
While cruising, brief full-throttle acceleration
within the limits of local traffic laws contrib-
utes to a good break-in. Wide-open throttle
acceleration in low gear can be detrimental
and should be avoided.
The engine oil installed in the engine at the
factory is a high-quality energy conserving
type lubricant. Oil changes should be consis-
tent with anticipated climate conditions un-
der which vehicle operations will occur. For
the recommended viscosity and quality
grades, refer to “Fluids And Lubricants” in
“Technical Specifications”.
CAUTION!
Never use Non-Detergent Oil or Straight
Mineral Oil in the engine or damage may
result.
NOTE:
A new engine may consume some oil during
its first few thousand miles (kilometers) of
operation. This should be considered a nor-
mal part of the break-in and not interpreted
as a problem. Please check your oil level with
the engine oil indicator often during the
break in period. Add oil as required.
ENGINE BREAK-IN RECOMMENDATIONS
– DIESEL ENGINE
The diesel engine does not require a break-in
period due to its construction. Normal opera-
tion is allowed, providing the following rec-
ommendations are followed:
• Warm up the engine before placing it under
load.
• Do not operate the engine at idle for pro- longed periods.
• Use the appropriate transmission gear to prevent engine lugging.
• Observe vehicle oil pressure and tempera- ture indicators.
• Check the coolant and oil levels frequently.
77
Page 80 of 204

• Vary accelerator pedal position at highwayspeeds when carrying or towing significant
weight.
NOTE:
Light duty operation such as light trailer
towing or no load operation will extend the
time before the engine is at full efficiency.
Reduced fuel economy and power may be
seen at this time.
The engine oil installed in the engine at the
factory is a high-quality energy conserving
type lubricant. Oil changes should be consis-
tent with anticipated climate conditions un-
der which vehicle operations will occur. The
recommended viscosity and quality grades
are shown under “Fluids And Lubricants” in
the “Technical Specifications” chapter in
this manual. NON-DETERGENT OR
STRAIGHT MINERAL OILS MUST NEVER
BE USED.ELECTRIC PARK BRAKE (EPB) —
DIESEL ONLY (IF EQUIPPED)
Your vehicle is equipped with an Electric
Park Brake System (EPB) that offers simple
operation, and some additional features that
make the park brake more convenient and
useful.
The park brake is primarily intended to pre-
vent the vehicle from rolling while parked.
Before leaving the vehicle, make sure that
the park brake is applied.
You can engage the park brake in two ways;
• Manually, by applying the park brake switch.
• Automatically, by the Auto Park Brake fea- ture whenever the vehicle speed is below
1.25 mph (2 km/h) and the ignition switch
is in the STOP/OFF position.
The park brake switch is located on the in-
strument panel to the right of the instrument
cluster. To apply the parking brake manually, pull and
tilt the top of the switch away from the
instrument panel momentarily. You may hear
a mechanical sound while the parking brake
operates; this is normal operating noise.
Once the parking brake is fully engaged, the
BRAKE warning lamp in the instrument clus-
ter and an indicator on the switch will illumi-
nate. The park brake can be applied even
Electric Park Brake SwitchSTARTING AND OPERATING
78
Page 126 of 204

SCHEDULED SERVICING — GASOLINE
ENGINE
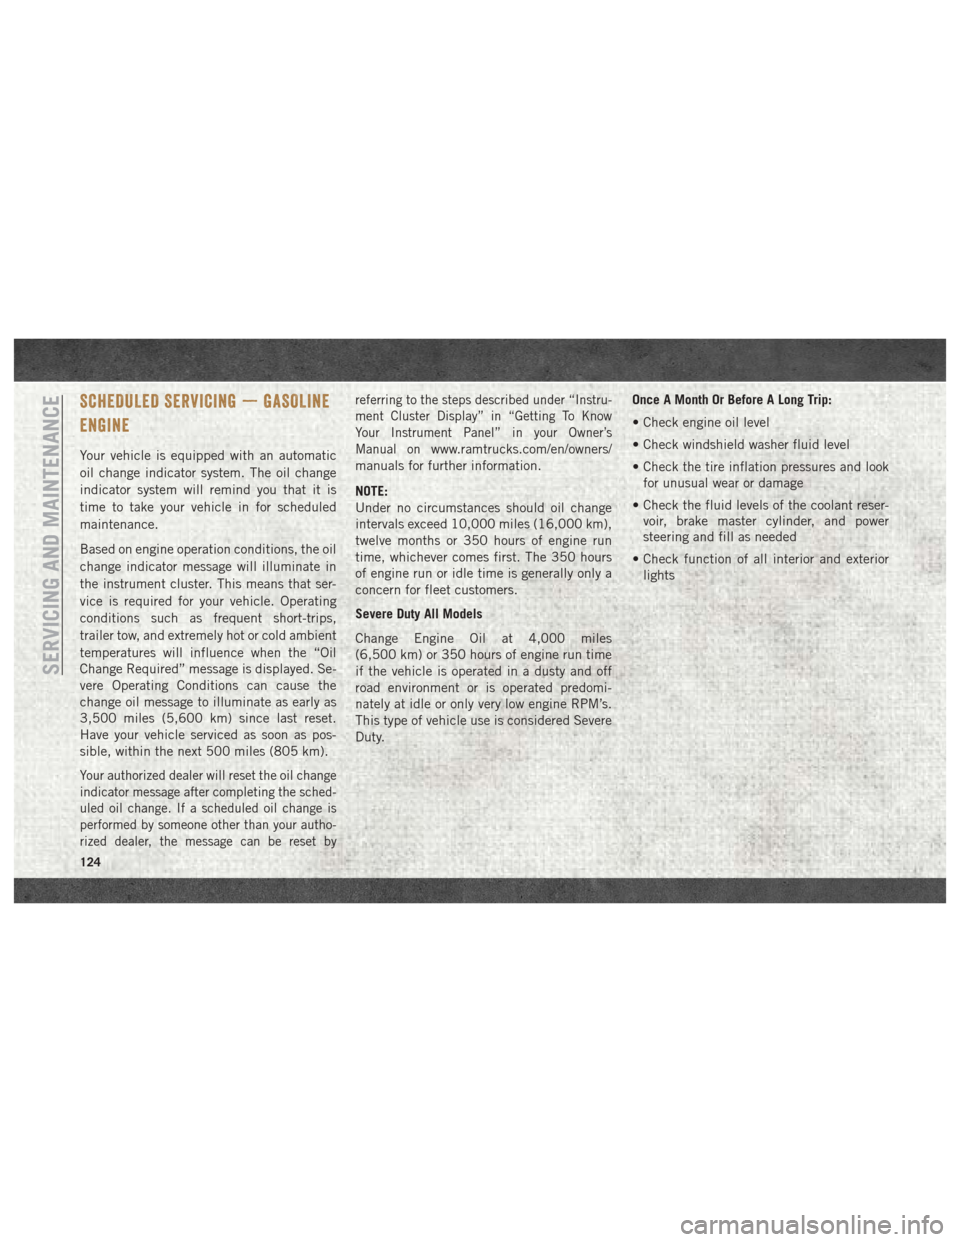
Your vehicle is equipped with an automatic
oil change indicator system. The oil change
indicator system will remind you that it is
time to take your vehicle in for scheduled
maintenance.
Based on engine operation conditions, the oil
change indicator message will illuminate in
the instrument cluster. This means that ser-
vice is required for your vehicle. Operating
conditions such as frequent short-trips,
trailer tow, and extremely hot or cold ambient
temperatures will influence when the “Oil
Change Required” message is displayed. Se-
vere Operating Conditions can cause the
change oil message to illuminate as early as
3,500 miles (5,600 km) since last reset.
Have your vehicle serviced as soon as pos-
sible, within the next 500 miles (805 km).
Your authorized dealer will reset the oil change
indicator message after completing the sched-
uled oil change. If a scheduled oil change is
performed by someone other than your autho-
rized dealer, the message can be reset byreferring to the steps described under “Instru-
ment Cluster Display” in “Getting To Know
Your Instrument Panel” in your Owner’s
Manual on
www.ramtrucks.com/en/owners/
manuals for further information.
NOTE:
Under no circumstances should oil change
intervals exceed 10,000 miles (16,000 km),
twelve months or 350 hours of engine run
time, whichever comes first. The 350 hours
of engine run or idle time is generally only a
concern for fleet customers.
Severe Duty All Models
Change Engine Oil at 4,000 miles
(6,500 km) or 350 hours of engine run time
if the vehicle is operated in a dusty and off
road environment or is operated predomi-
nately at idle or only very low engine RPM’s.
This type of vehicle use is considered Severe
Duty. Once A Month Or Before A Long Trip:
• Check engine oil level
• Check windshield washer fluid level
• Check the tire inflation pressures and look
for unusual wear or damage
• Check the fluid levels of the coolant reser- voir, brake master cylinder, and power
steering and fill as needed
• Check function of all interior and exterior lights
SERVICING AND MAINTENANCE
124
Page 130 of 204

Heavy Duty Use Of The Vehicle
Change engine oil at 4,000 miles (6,500 km)
or 350 hours of engine run time if the vehicle
is operated in a dusty and off road environ-
ment or is operated predominately at idle or
only very low engine RPM’s. This type of
vehicle use is considered Severe Duty.
SCHEDULED MAINTENANCE — DIESEL
ENGINE
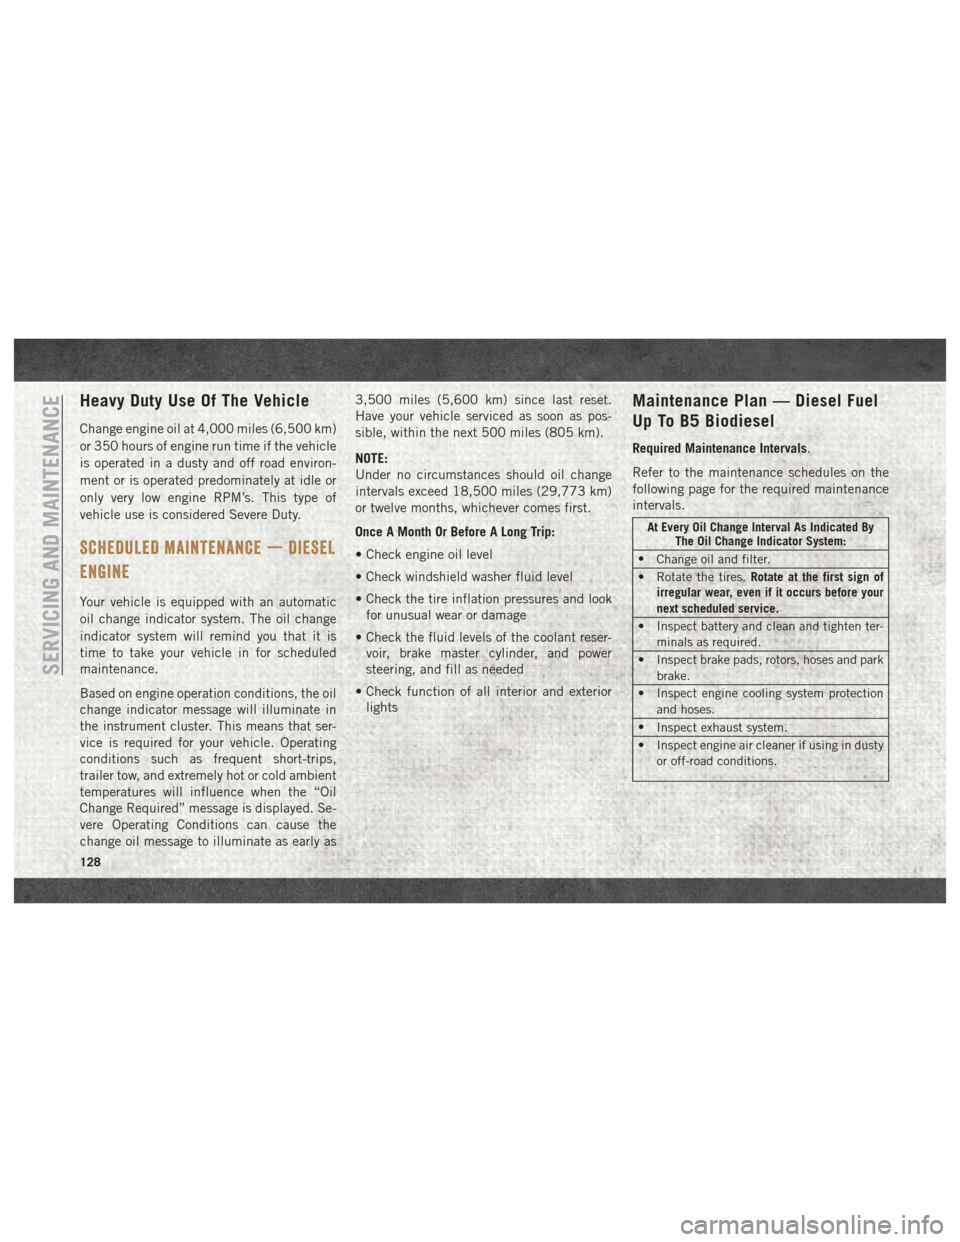
Your vehicle is equipped with an automatic
oil change indicator system. The oil change
indicator system will remind you that it is
time to take your vehicle in for scheduled
maintenance.
Based on engine operation conditions, the oil
change indicator message will illuminate in
the instrument cluster. This means that ser-
vice is required for your vehicle. Operating
conditions such as frequent short-trips,
trailer tow, and extremely hot or cold ambient
temperatures will influence when the “Oil
Change Required” message is displayed. Se-
vere Operating Conditions can cause the
change oil message to illuminate as early as3,500 miles (5,600 km) since last reset.
Have your vehicle serviced as soon as pos-
sible, within the next 500 miles (805 km).
NOTE:
Under no circumstances should oil change
intervals exceed 18,500 miles (29,773 km)
or twelve months, whichever comes first.
Once A Month Or Before A Long Trip:
• Check engine oil level
• Check windshield washer fluid level
• Check the tire inflation pressures and look
for unusual wear or damage
• Check the fluid levels of the coolant reser- voir, brake master cylinder, and power
steering, and fill as needed
• Check function of all interior and exterior lights
Maintenance Plan — Diesel Fuel
Up To B5 Biodiesel
Required Maintenance Intervals.
Refer to the maintenance schedules on the
following page for the required maintenance
intervals.
At Every Oil Change Interval As Indicated By The Oil Change Indicator System:
• Change oil and filter.
• Rotate the tires. Rotate at the first sign of
irregular wear, even if it occurs before your
next scheduled service.
• Inspect battery and clean and tighten ter- minals as required.
• Inspect brake pads, rotors, hoses and park brake.
• Inspect engine cooling system protection and hoses.
• Inspect exhaust system.
• Inspect engine air cleaner if using in dusty or off-road conditions.
SERVICING AND MAINTENANCE
128
Page 191 of 204

Accessories..................160
Mopar ...................160
Adding Fuel ..................92
Additives, Fuel ................92
AirBag .....................56 Air Bag Operation .............57
Air Bag Warning Light ..........55
Enhanced Accident Response . . . .122
Event Data Recorder (EDR) ......122
If A Deployment Occurs .........61
Maintaining Your Air Bag System . . .63
Side Air Bags ...............58
Transporting Pets ............69
Air Bag Light ............34, 55, 70
Air Bag Maintenance .............63
Air Conditioning Filter ............24
Air Conditioning, Operating Tips ......23
Air Pressure, Tires ..............143
Antifreeze (Engine Coolant) ........155
Anti-Lock Warning Light ...........39
Automated Manual Transmission ......81
Fluid Type ................159
Automatic Transmission Fluid Type ................157 Back-Up
....................91
Back-Up Camera ...............91
Battery .....................35
Charging System Light .........35
Belts, Seat ...................70
B-Pillar Location ..............139
Brake Fluid ..............157, 159
Brake System Warning Light ...............34
Bulb Replacement .............100
Bulbs, Light ...............72, 100
Camera .....................91
Capacities, Fluid ..............155
Caps, Filler Fuel ....................91
Oil (Engine) ...............132
Carbon Monoxide Warning ..........69
Changing A Flat Tire .........108, 134
Chart, Tire Sizing ..............135
Checking Your Vehicle For Safety .....69
Checks, Safety .................69
Child Restraint ................64
Child
Restraints
Booster Seats ...............66 Child Restraints
..............64
Child Seat Installation ..........68
Infants And Child Restraints ......65
Older Children And Child Restraints. .66
Cleaning Wheels ..................149
Climate Control ................19
Clock Setting .................164
Compact Spare Tire .............147
Contract, Service ..............187
Cooling System Coolant Capacity ............155
Selection Of Coolant
(Antifreeze) ........155, 156, 157
Cruise Light ..................41
Customer Assistance ............186
Customer Programmable Features . . . .169
Defroster, Windshield ............70
Diagnostic System, Onboard ........42
Diesel Exhaust Fluid (DEF) ........157
Diesel Fuel ..................157
Diesel Fuel Requirements .........157
Dimmer Switch, Headlight .........17
Disabled Vehicle Towing ..........121
INDEX
189