stop start Ram ProMaster 2020 Owner's Guide
[x] Cancel search | Manufacturer: RAM, Model Year: 2020, Model line: ProMaster, Model: Ram ProMaster 2020Pages: 264, PDF Size: 10.11 MB
Page 149 of 264
IN CASE OF EMERGENCY147
3. Disconnect the positive end (+) of the
jumper cable from the positive (+) post of
the booster battery.
4. Disconnect the opposite end of the positive (+) jumper cable from the remote positive
(+) post of the discharged vehicle.
5. Close the cover of the Front Power Distribu -
tion Center.
If frequent jump starting is required to start your
vehicle you should have the battery and
charging system inspected at an authorized
dealer.Battery Location
There are two remote jump starting posts under
the hood which is the recommended jump start
location. If access to the battery is needed, an
access panel on the driver’s side floor will allow
for battery access.
Access Panel
Battery Location
IF YOUR ENGINE OVERHEATS
In any of the following situations, you can
reduce the potential for overheating by taking
the appropriate action.
On the highways — slow down.
In city traffic — while stopped, place the trans -
mission in NEUTRAL (N), but do not increase
the engine idle speed while preventing
vehicle motion with the brakes.
NOTE:
There are steps that you can take to slow down
an impending overheat condition:
If your Air Conditioner (A/C) is on, turn it off.
The A/C system adds heat to the engine
cooling system and turning the A/C off can
help remove this heat.
You can also turn the temperature control to
maximum heat, the mode control to floor and
the blower control to high. This allows the
heater core to act as a supplement to the
radiator and aids in removing heat from the
engine cooling system.
CAUTION!
Accessories plugged into the vehicle power
outlets draw power from the vehicle’s battery,
even when not in use (i.e., cellular devices,
etc.). Eventually, if plugged in long enough
without engine operation, the vehicle’s
battery will discharge sufficiently to degrade
battery life and/or prevent the engine from
starting.
6
20_VF_OM_EN_US_t.book Page 147
Page 150 of 264
148IN CASE OF EMERGENCY
GEAR SELECTOR OVERRIDE
If a malfunction occurs and the gear selector
cannot be moved out of the PARK (P) position,
you can use the following procedure to tempo -
rarily move the gear selector:
1. Turn the engine OFF.
2. Firmly apply the parking brake.
3. Using a small screwdriver or similar tool, remove the gear selector override access
cover which is located below the gear
selector.
Gear Selector Release Cover 4. Press and maintain firm pressure on the
brake pedal.
5. Insert the screwdriver or similar tool into the access port, and push and hold the override
release lever forward.
Release Lever
6. Move the gear selector to the NEUTRAL (N) position.
7. The vehicle may then be started in NEUTRAL.
8. Reinstall the gear selector override access cover.
WARNING!
You or others can be badly burned by hot
engine coolant (antifreeze) or steam from
your radiator. If you see or hear steam coming
from under the hood, do not open the hood
until the radiator has had time to cool. Never
try to open a cooling system pressure cap
when the radiator or coolant bottle is hot.
CAUTION!
Driving with a hot cooling system could
damage your vehicle. If the temperature
gauge reads HOT (H), pull over and stop the
vehicle. Idle the vehicle with the air
conditioner turned off until the pointer drops
back into the normal range. If the pointer
remains on HOT (H), and you hear continuous
chimes, turn the engine off immediately and
call for service.
20_VF_OM_EN_US_t.book Page 148
Page 159 of 264
SERVICING AND MAINTENANCE157
Checking Oil Level — Gas Engine
To ensure proper lubrication of your vehicle's
engine, the engine oil must be maintained at
the correct level. Check the oil level at regular
intervals, such as every fuel stop. The best time
to check the engine oil level is about five
minutes after a fully warmed up engine is shut
off.
Checking the oil while the vehicle is on level
ground will improve the accuracy of the oil level
readings. Always maintain the oil level within
the SAFE zone on the dipstick. Adding one quart
of oil when the reading is at the bottom of the
SAFE zone will result in a reading at the top of
the safe zone on these engines.
Adding Washer Fluid
The fluid reservoir is located in the engine
compartment and should be checked at regular
intervals. Fill the reservoir with windshield
washer solvent (not radiator antifreeze) and
operate the system for a few seconds to flush
out any residual water.
The washer fluid reservoir will hold a full gallon
of fluid when the Low Washer Fluid Light illumi -
nates.
After the engine has warmed, operate the
defroster for a few minutes to reduce the possi -
bility of smearing or freezing the fluid on the
cold windshield. Mopar All Weather Windshield
Washer Solution or equivalent, used with water
as directed on the container, aids cleaning
action, reduces the freezing point to avoid line
clogging, and is not harmful to paint or trim.
Maintenance-Free Battery
Your vehicle is equipped with a mainte-
nance-free battery. You will never have to add
water, nor is periodic maintenance required.
CAUTION!
Overfilling or underfilling will cause oil
aeration or loss of oil pressure. This could
damage your engine.
WARNING!
Commercially available windshield washer
solvents are flammable. They could ignite and
burn you. Care must be exercised when filling
or working around the washer solution.
WARNING!
Battery fluid is a corrosive acid solution and
can burn or even blind you. Do not allow
battery fluid to contact your eyes, skin, or
clothing. Do not lean over a battery when
attaching clamps. If acid splashes in eyes
or on skin, flush the area immediately with
large amounts of water. Refer to “Jump
Starting Procedure” in “In Case Of Emer -
gency” for further information.
Battery gas is flammable and explosive.
Keep flame or sparks away from the
battery. Do not use a booster battery or any
other booster source with an output greater
than 12 Volts. Do not allow cable clamps to
touch each other.
Battery posts, terminals, and related acces -
sories contain lead and lead compounds.
Wash hands after handling.
7
20_VF_OM_EN_US_t.book Page 157
Page 165 of 264
SERVICING AND MAINTENANCE163
Under normal operating conditions, the cata-
lytic converter will not require maintenance.
However, it is important to keep the engine
properly tuned to ensure proper catalyst opera -
tion and prevent possible catalyst damage.
NOTE:
Intentional tampering with emissions control
systems can result in civil penalties being
assessed against you.
In unusual situations involving grossly malfunc -
tioning engine operation, a scorching odor may
suggest severe and abnormal catalyst over -
heating. If this occurs, stop the vehicle, turn off
the engine and allow it to cool. Service,
including a tune-up to manufacturer's specifica-
tions, should be obtained immediately.
To minimize the possibility of catalytic converter
damage:
Do not interrupt the ignition when the trans -
mission is in gear and the vehicle is in
motion.
Do not try to start the vehicle by pushing or
towing the vehicle.
Do not idle the engine with any ignition
components disconnected or removed, such
as when diagnostic testing, or for prolonged
periods during very rough idle or malfunc -
tioning operating conditions.
Cooling System
Coolant Checks
Check the engine coolant (antifreeze) protec-
tion every 12 months (before the onset of
freezing weather, where applicable). If the
engine coolant (antifreeze) is dirty, the system
should be drained, flushed, and refilled with
fresh OAT coolant (conforming to MS-12106)
only by an authorized dealer. Check the front of
the A/C condenser for any accumulation of
bugs, leaves, etc. If dirty, clean by gently
spraying water from a garden hose vertically
down the face of the condenser.
Cooling System — Drain, Flush And Refill
NOTE:
Some vehicles require special tools to add
coolant properly. Failure to fill these systems
properly could lead to severe internal engine
damage. If any coolant is needed to be added to
the system please contact an authorized
dealer.
If the engine coolant (antifreeze) is dirty or
contains visible sediment, have an authorized
dealer clean and flush with OAT coolant (anti -
freeze) (conforming to MS.90032).
Refer to the “Maintenance Plan” in this section
for the proper maintenance intervals.
WARNING!
You or others can be badly burned by hot
engine coolant (antifreeze) or steam from
your radiator. If you see or hear steam
coming from under the hood, do not open
the hood until the radiator has had time to
cool. Never open a cooling system pres -
sure cap when the radiator or coolant
bottle is hot.
Keep hands, tools, clothing, and jewelry
away from the radiator cooling fan when
the hood is raised. The fan starts automati -
cally and may start at any time, whether the
engine is running or not.
When working near the radiator cooling fan,
disconnect the fan motor lead or turn the
ignition to the OFF mode. The fan is
temperature controlled and can start at any
time the ignition is in the ON mode.
7
20_VF_OM_EN_US_t.book Page 163
Page 188 of 264
186SERVICING AND MAINTENANCE
Treadwear
The Treadwear grade is a comparative rating,
based on the wear rate of the tire when tested
under controlled conditions on a specified
government test course. For example, a tire
graded 150 would wear one and one-half times
as well on the government course as a tire
graded 100. The relative performance of tires
depends upon the actual conditions of their
use, however, and may depart significantly from
the norm due to variations in driving habits,
service practices, and differences in road char -
acteristics and climate.
Traction Grades
The Traction grades, from highest to lowest, are
AA, A, B, and C. These grades represent the
tire's ability to stop on wet pavement, as
measured under controlled conditions on spec -
ified government test surfaces of asphalt and
concrete. A tire marked C may have poor trac -
tion performance.
Temperature Grades
The Temperature grades are A (the highest), B,
and C, representing the tire's resistance to the
generation of heat and its ability to dissipate
heat, when tested under controlled conditions
on a specified indoor laboratory test wheel.
Sustained high temperature can cause the
material of the tire to degenerate and reduce
tire life, and excessive temperature can lead to
sudden tire failure. The grade C corresponds to
a level of performance, which all passenger
vehicle tires must meet under the Federal
Motor Vehicle Safety Standard No. 109. Grades
B and A represent higher levels of performance
on the laboratory test wheel, than the minimum
required by law.STORING THE VEHICLE
If you are storing your vehicle for more than 21
days, we recommend that you take the following
steps to minimize the drain on your vehicle's
battery:
Disconnect the negative cable from the
battery.
Any time you store your vehicle or keep it out
of service (i.e., vacation) for two weeks or
more, run the air conditioning system at idle
for about five minutes in the fresh air and
high blower setting prior to storing. This will
ensure adequate system lubrication to mini -
mize the possibility of compressor damage
when the system is started again.
WARNING!
The traction grade assigned to this tire is
based on straight-ahead braking traction
tests, and does not include acceleration,
cornering, hydroplaning, or peak traction
characteristics.
WARNING!
The temperature grade for this tire is
established for a tire that is properly inflated
and not overloaded. Excessive speed,
under-inflation, or excessive loading, either
separately or in combination, can cause heat
buildup and possible tire failure.
20_VF_OM_EN_US_t.book Page 186
Page 213 of 264
MULTIMEDIA211
Radio Mode
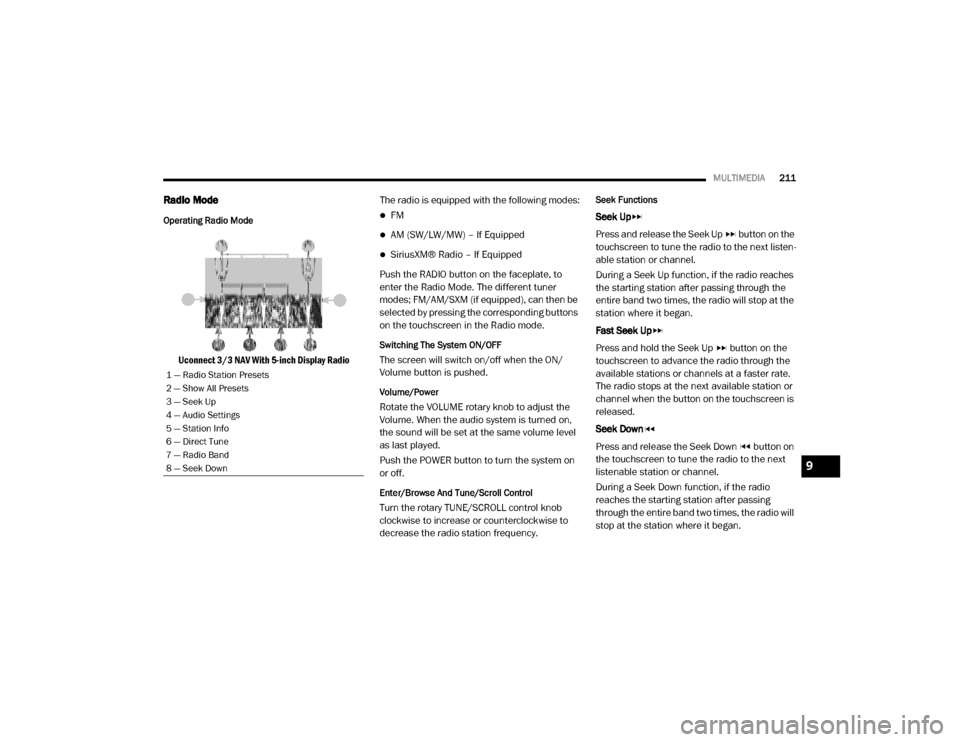
Operating Radio Mode
Uconnect 3/3 NAV With 5-inch Display Radio The radio is equipped with the following modes:
FM
AM (SW/LW/MW) – If Equipped
SiriusXM® Radio – If Equipped
Push the RADIO button on the faceplate, to
enter the Radio Mode. The different tuner
modes; FM/AM/SXM (if equipped), can then be
selected by pressing the corresponding buttons
on the touchscreen in the Radio mode.
Switching The System ON/OFF
The screen will switch on/off when the ON/
Volume button is pushed.
Volume/Power
Rotate the VOLUME rotary knob to adjust the
Volume. When the audio system is turned on,
the sound will be set at the same volume level
as last played.
Push the POWER button to turn the system on
or off.
Enter/Browse And Tune/Scroll Control
Turn the rotary TUNE/SCROLL control knob
clockwise to increase or counterclockwise to
decrease the radio station frequency.
Seek Functions
Seek Up
Press and release the Seek Up button on the
touchscreen to tune the radio to the next listen -
able station or channel.
During a Seek Up function, if the radio reaches
the starting station after passing through the
entire band two times, the radio will stop at the
station where it began.
Fast Seek Up
Press and hold the Seek Up button on the
touchscreen to advance the radio through the
available stations or channels at a faster rate.
The radio stops at the next available station or
channel when the button on the touchscreen is
released.
Seek Down
Press and release the Seek Down button on
the touchscreen to tune the radio to the next
listenable station or channel.
During a Seek Down function, if the radio
reaches the starting station after passing
through the entire band two times, the radio will
stop at the station where it began.
1 — Radio Station Presets
2 — Show All Presets
3 — Seek Up
4 — Audio Settings
5 — Station Info
6 — Direct Tune
7 — Radio Band
8 — Seek Down
9
20_VF_OM_EN_US_t.book Page 211
Page 227 of 264
MULTIMEDIA225
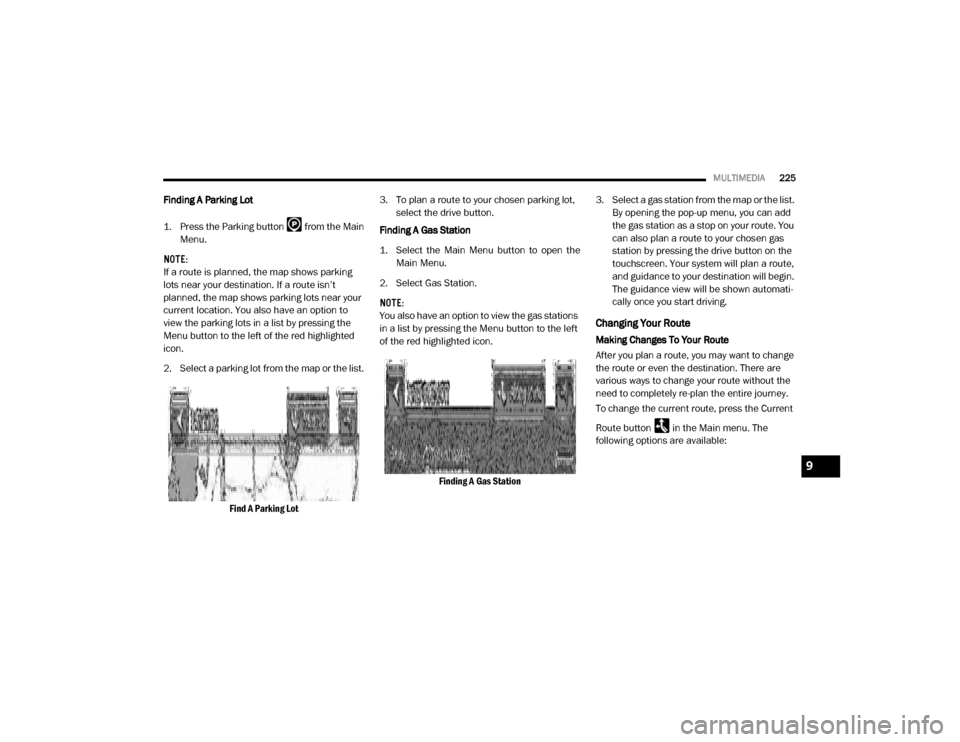
Finding A Parking Lot
1. Press the Parking button from the Main
Menu.
NOTE:
If a route is planned, the map shows parking
lots near your destination. If a route isn’t
planned, the map shows parking lots near your
current location. You also have an option to
view the parking lots in a list by pressing the
Menu button to the left of the red highlighted
icon.
2. Select a parking lot from the map or the list.
Find A Parking Lot 3. To plan a route to your chosen parking lot,
select the drive button.
Finding A Gas Station
1. Select the Main Menu button to open the Main Menu.
2. Select Gas Station.
NOTE:
You also have an option to view the gas stations
in a list by pressing the Menu button to the left
of the red highlighted icon.
Finding A Gas Station 3. Select a gas station from the map or the list.
By opening the pop-up menu, you can add
the gas station as a stop on your route. You
can also plan a route to your chosen gas
station by pressing the drive button on the
touchscreen. Your system will plan a route,
and guidance to your destination will begin.
The guidance view will be shown automati-
cally once you start driving.
Changing Your Route
Making Changes To Your Route
After you plan a route, you may want to change
the route or even the destination. There are
various ways to change your route without the
need to completely re-plan the entire journey.
To change the current route, press the Current
Route button in the Main menu. The
following options are available:
9
20_VF_OM_EN_US_t.book Page 225
Page 230 of 264
228MULTIMEDIA
The following example shows how to use voice
control to plan a journey to your Home address:
1. Push the Voice Recognition button on the
steering wheel to turn on the microphone.
A screen will pop up with examples of
commands.
NOTE:
Press the Help button in the Main menu then
press “What can I say?” to see a full list of
commands.
2. When you hear a beep, say a command of your choice. For example, you can say “Navi -
gate home”.
NOTE:
For accurate results, speak normally without
trying to articulate words in an unnatural way. If
there is excessive road noise, for example, you
may need to speak directly into the microphone.
3. If the command is correct, say “Yes”. NOTE:
If the command is incorrect, say “No” and
repeat the command after you hear the prompt
and tone again. Your navigation system plans a
route from your current location to your destina-
tion. To stop your navigation system from
listening out for further commands, say
“Cancel”.
Guidance View
About Guidance View
The guidance view is used to guide you along
the route to your destination. As soon as you
start driving, your navigation system will imme
-
diately start guiding you to your destination with
spoken instructions and visual instructions on
the touchscreen. You can also see your current
location and details along your route, including
3D buildings in some cities. The guidance view
is normally in 3D. To show a 2D map with the
map moving in your direction of travel, change
the 2D and 3D default settings. Refer to
“Settings” within this section for more informa -
tion. NOTE:
When you have planned a route and the 3D
guidance view is shown, select the switch view
button to change to the map view and use the
interactive features.
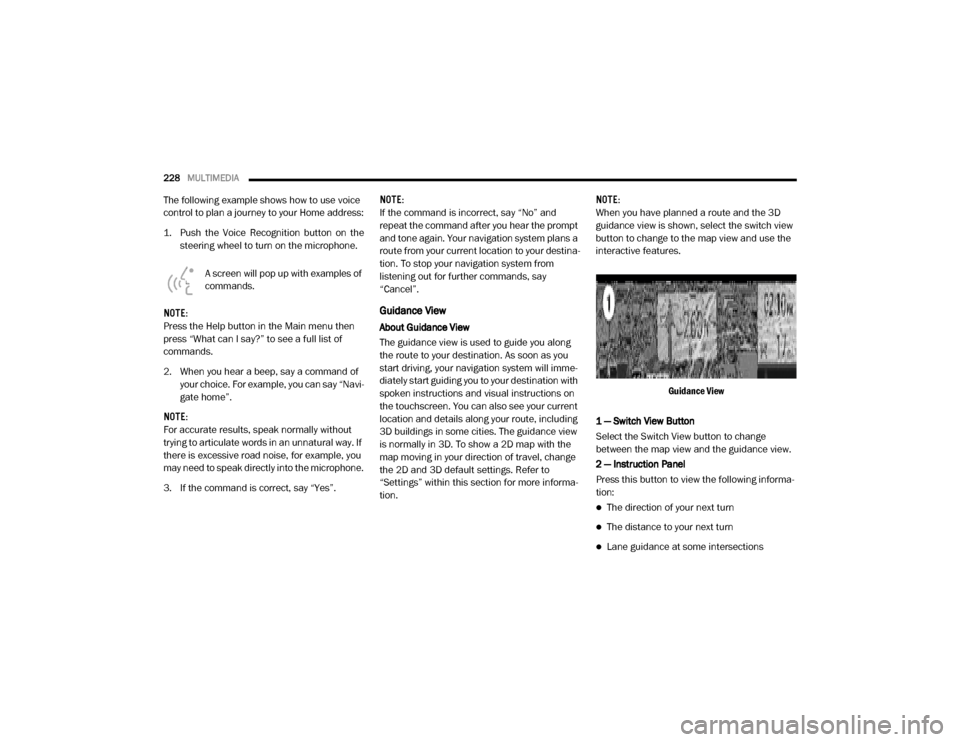
Guidance View
1 — Switch View Button
Select the Switch View button to change
between the map view and the guidance view.
2 — Instruction Panel
Press this button to view the following informa -
tion:
The direction of your next turn
The distance to your next turn
Lane guidance at some intersections
20_VF_OM_EN_US_t.book Page 228
Page 234 of 264

232MULTIMEDIA
Show Remaining Time : Select this setting to
show the remaining time left to travel in the
arrival information panel during navigation.
Switch Between Distance And Time Automat -
ically : Select this setting to control the auto -
matic switching between remaining distance
and remaining time in the arrival information
panel.
Show On Route
In the settings menu, select “Show On Route” to
see any of the following options in the route bar:
Parking : Select this setting to see parking lots
on your route.
Gas Stations: Select this setting to see gas
stations on your route.
Stops : Select this setting to see stops on your
route.
Show Previews Of Highway Exits
Select this setting to control the full screen
preview when you approach highway exits. Automatic Map View Switching
Automatic changing of views is on by default.
For example, when an alternative route is being
suggested, the map will automatically switch to
map view, and when you start driving your map
will automatically switch to guidance view. You
can turn this feature off by selecting “Automatic
Map View Switching” in the settings.
Automatic Zoom
Select this setting to control the full screen
preview when you approach highway exits.
Guidance View Style
Select this setting to choose between 3D and
2D versions of the guidance view. Both the 2D
and 3D guidance views move in your direction
of travel.
In 3D guidance view, you can choose to use the
3D car icon or an arrowhead as the current loca-
tion indicator. By default, the 3D guidance view
shows the 3D car icon.
Voices Setting
Select this setting to change how instructions
are read out loud. Refer to “Voices” in the
previous section for more information.Route Planning
Select this setting to control how your system
plans routes. The following options are avail
-
able:
Always Take the Fastest Route
You can choose whether you would like the
navigation system to always default to the
fastest route.
Ask Me So I Can Choose
You can choose whether you would like the
navigation system to allow you to pick the
route to the destination.
Don’t Ask me
You can choose whether you would like the
navigation system to select the route to the
destination.
Fastest Route
You can choose whether you would like the
navigation system to chose the fastest route
to the destination.
20_VF_OM_EN_US_t.book Page 232
Page 236 of 264
234MULTIMEDIA
Using POIs To Plan A Route
When you plan a route, you can use a POI for the
destination or as a stop along the route.
Using Search
1. Select “Search” on the Main Menu to begin
a search. The search screen will open,
displaying the keyboard. Enter the name of
your desired destination. Your search
results will be displayed in two lists.
Addresses and city matches are shown in
the list called “Addresses.” POIs, types of
POIs, and Places are shown in the list called
“Points of Interest.” You can also select a
POI category to only see POI search results
from that category.
2. Select the desired POI. The location will appear on the map. From here, you can
save the POI to “My Places,” use this POI as
a starting point, begin navigation to this
destination, or view more details about this
POI. By pressing “More Information,” you
can view the phone number and full
address of the POI.
3. If a route is already planned, you can add the location to your current route. To plan a
route to this destination, press the Drive
button on the touchscreen. Select A Route With A POI
NOTE:
Your navigation system will calculate a route,
and guidance to your destination will begin.
Guidance view will begin as soon as you start
driving. Refer to “Planning A Route” for more
information on how to search for a POI. Refer to
“My Places” for more information on how to add
a POI to your saved list of My Places.
My Places
About My Places
My Places provides an easy way to
select a location without the need to
enter the address or search for the location. You
can use My Places to create a collection of
useful or favorite addresses. The following items are always in My Places:
Home
: Your home location can be your home
address or somewhere you often visit. This
feature provides an easy way to navigate
there.
Recent Destinations: Select this button to
select your destination from a list of locations
you have recently navigated to.
Using My Places
You can use My Places as a way of navigating to
a place without having to enter the address. To
navigate to a saved destination in My Places,
follow these steps:
1. Press the touchscreen to bring up the Main menu and press “My Places”.
2. Select the desired destination. The location will appear on the map with a pop-up menu.
3. Press the Drive button to begin navigation to this destination.
NOTE:
Your navigation system immediately starts
guiding you to your destination with spoken
instructions and visual instructions on the
touchscreen.
20_VF_OM_EN_US_t.book Page 234