USB Ram ProMaster 2020 Owner's Manual
[x] Cancel search | Manufacturer: RAM, Model Year: 2020, Model line: ProMaster, Model: Ram ProMaster 2020Pages: 264, PDF Size: 10.11 MB
Page 7 of 264

5
TIRES .....................................................................168
Tire Safety Information ....................................168
Tires — General Information ........................... 176
Tire Types .......................................................... 180
Spare Tires — If Equipped ............................... 181
Wheel And Wheel Trim Care ........................... 183
Tire Chains And Traction Devices ................... 184
Tire Rotation Recommendations..................... 185
DEPARTMENT OF TRANSPORTATION
UNIFORM TIRE QUALITY GRADES .....................185
Treadwear .........................................................186
Traction Grades ................................................ 186
Temperature Grades ........................................186
STORING THE VEHICLE ........................................186
BODYWORK ...........................................................187
Protection From Atmospheric Agents.............. 187
Body And Underbody Maintenance ................. 187
Preserving The Bodywork................................. 187
INTERIORS ............................................................188
Seats And Fabric Parts ..................................... 188
Plastic And Coated Parts..................................189
Leather Parts .................................................... 190Glass Surfaces ................................................. 190
Cleaning The Instrument Panel Cupholders ...190
TECHNICAL SPECIFICATIONS
IDENTIFICATION DATA ......................................... 191
Vehicle Identification Number ........................ 191
BRAKE SYSTEM .................................................... 191
WHEEL AND TIRE TORQUE SPECIFICATIONS ... 191
Torque Specifications ...................................... 191
FUEL REQUIREMENTS.......................................... 192
3.6L Engine....................................................... 192
Reformulated Gasoline ................................... 192
Materials Added To Fuel .................................. 193
Gasoline/Oxygenate Blends ............................ 193
Do Not Use E-85 In Non-Flex Fuel Vehicles .... 193
CNG And LP Fuel System Modifications ......... 193
MMT In Gasoline .............................................. 194Fuel System Cautions ...................................... 194
Carbon Monoxide Warnings ............................ 194
FLUID CAPACITIES................................................ 195
FLUIDS AND LUBRICANTS .................................. 195
Engine ............................................................... 195Chassis ............................................................. 197
MULTIMEDIA
CYBERSECURITY .................................................. 198
UCONNECT SETTINGS ......................................... 199
Uconnect 3/3 NAV Settings............................. 199
SAFETY AND GENERAL INFORMATION ............. 208
Safety Guidelines ............................................. 208
UCONNECT 3/3 NAV WITH 5-INCH DISPLAY ....209
Introduction To The Uconnect 3/3 NAV
With 5-Inch Display System ............................. 209 Radio Mode ...................................................... 211
Media Mode ..................................................... 214
Phone Mode ..................................................... 216
Navigation Mode — If Equipped ...................... 221
STEERING WHEEL AUDIO CONTROLS ............... 238
Radio Operation ............................................... 238
Player Operation............................................... 238
IPOD®/USB/MP3 CONTROL —
IF EQUIPPED ......................................................... 238
USB Charging Port............................................ 239
RAM TELEMATICS - IF EQUIPPED ....................... 239
Ram Telematics General Information............. 239
RADIO OPERATION AND MOBILE PHONES ......240
Regulatory And Safety Information ................. 240
UCONNECT VOICE RECOGNITION ......................241
Introducing Uconnect....................................... 241
Get Started ....................................................... 241
Basic Voice Commands ................................... 242
Radio ................................................................. 242
Media ................................................................ 243
Phone................................................................ 243
Voice Text Reply ............................................... 244
General Information......................................... 245
Additional Information ..................................... 245
20_VF_OM_EN_US_t.book Page 5
Page 131 of 264
IN CASE OF EMERGENCY129
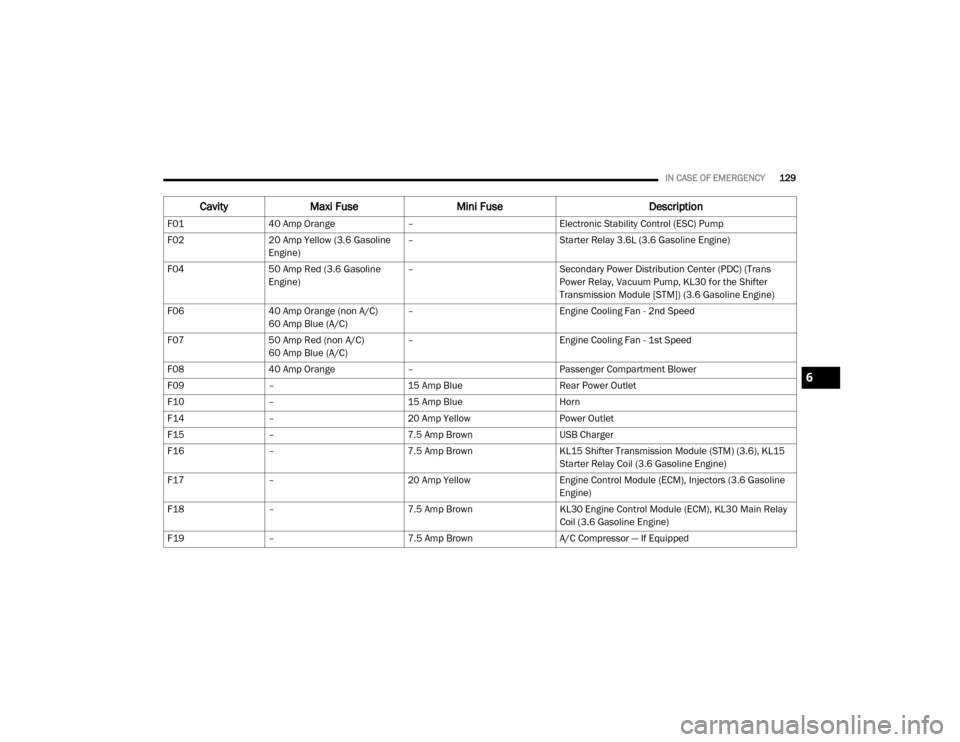
CavityMaxi Fuse Mini Fuse Description
F0140 Amp Orange – Electronic Stability Control (ESC) Pump
F02 20 Amp Yellow (3.6 Gasoline
Engine) –
Starter Relay 3.6L (3.6 Gasoline Engine)
F04 50 Amp Red (3.6 Gasoline
Engine) –
Secondary Power Distribution Center (PDC) (Trans
Power Relay, Vacuum Pump, KL30 for the Shifter
Transmission Module [STM]) (3.6 Gasoline Engine)
F06 40 Amp Orange (non A/C)
60 Amp Blue (A/C) –
Engine Cooling Fan - 2nd Speed
F07 50 Amp Red (non A/C)
60 Amp Blue (A/C) –
Engine Cooling Fan - 1st Speed
F08 40 Amp Orange – Passenger Compartment Blower
F09 – 15 Amp Blue Rear Power Outlet
F10 – 15 Amp Blue Horn
F14 – 20 Amp Yellow Power Outlet
F15 – 7.5 Amp Brown USB Charger
F16 – 7.5 Amp Brown KL15 Shifter Transmission Module (STM) (3.6), KL15
Starter Relay Coil (3.6 Gasoline Engine)
F17 – 20 Amp Yellow Engine Control Module (ECM), Injectors (3.6 Gasoline
Engine)
F18 – 7.5 Amp Brown KL30 Engine Control Module (ECM), KL30 Main Relay
Coil (3.6 Gasoline Engine)
F19 – 7.5 Amp Brown A/C Compressor — If Equipped
6
20_VF_OM_EN_US_t.book Page 129
Page 200 of 264
198
MULTIMEDIA
CYBERSECURITY
Your vehicle may be a connected vehicle and
may be equipped with both wired and wireless
networks. These networks allow your vehicle to
send and receive information. This information
allows systems and features in your vehicle to
function properly.
Your vehicle may be equipped with certain secu-
rity features to reduce the risk of unauthorized
and unlawful access to vehicle systems and
wireless communications. Vehicle software
technology continues to evolve over time and
FCA US LLC, working with its suppliers, evalu -
ates and takes appropriate steps as needed.
Similar to a computer or other devices, your
vehicle may require software updates to
improve the usability and performance of your
systems or to reduce the potential risk of unau -
thorized and unlawful access to your vehicle
systems.
The risk of unauthorized and unlawful access to
your vehicle systems may still exist, even if the
most recent version of vehicle software (such as
Uconnect software) is installed. NOTE:FCA US LLC or your dealer may contact you
directly regarding software updates.
To help further improve vehicle security and
minimize the potential risk of a security
breach, vehicle owners should:
Routinely check
www.driveucon-
nect.com/support/soft-
ware-update.html (U.S. Residents) or
www.driveuconnect.ca (Canadian Resi-
dents) to learn about available Uconnect
software updates.
Only connect and use trusted media
devices (e.g. personal mobile phones,
USBs, CDs).
Privacy of any wireless and wired communica -
tions cannot be assured. Third parties may
unlawfully intercept information and private
communications without your consent. For
further information, refer to “Onboard Diag -
nostic System (OBD II) Cybersecurity” in
“Getting To Know Your Instrument Panel”.
WARNING!
It is not possible to know or to predict all of
the possible outcomes if your vehicle’s
systems are breached. It may be possible
that vehicle systems, including safety
related systems, could be impaired or a
loss of vehicle control could occur that may
result in an accident involving serious injury
or death.
ONLY insert media (e.g., USB, SD card, or
CD) into your vehicle if it came from a
trusted source. Media of unknown origin
could possibly contain malicious software,
and if installed in your vehicle, it may
increase the possibility for vehicle systems
to be breached.
As always, if you experience unusual
vehicle behavior, take your vehicle to your
nearest authorized dealer immediately.
20_VF_OM_EN_US_t.book Page 198
Page 211 of 264
MULTIMEDIA209
Care And Maintenance
Touchscreen
Do not press the touchscreen with any hard
or sharp objects (pen, USB stick, jewelry,
etc.), which could scratch the touchscreen
surface!
Do not spray any liquid or caustic chemicals
directly on the screen! Use a clean and dry
microfiber lens cleaning cloth in order to
clean the touchscreen.
If necessary, use a lint-free cloth dampened
with a cleaning solution, such as isopropyl
alcohol or an isopropyl alcohol and water
solution ratio of 50:50. Be sure to follow the
solvent manufacturer's precautions and
directions.
UCONNECT 3/3 NAV WITH 5-INCH DISPLAY
Introduction To The Uconnect 3/3 NAV With
5-Inch Display System
There are a few quick ways for you to identify
your radio. For a more complete description,
please refer to the User Guide in your glove box
or visit DriveUconnect.com (US Residents) or
DriveUconnect.ca (Canadian Residents).
Uconnect 3/3 NAV features:
5-inch Touchscreen
Hands-free/Bluetooth®
SiriusXM® Satellite Radio — If Equipped
Navigation — If Equipped
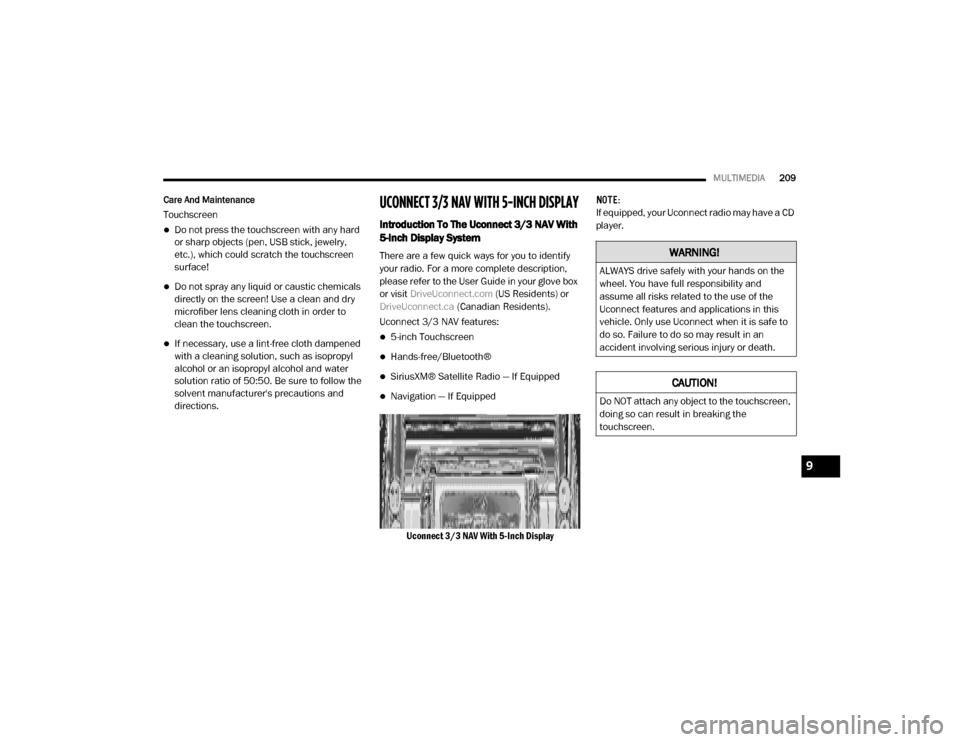
Uconnect 3/3 NAV With 5-Inch Display NOTE:
If equipped, your Uconnect radio may have a CD
player.
WARNING!
ALWAYS drive safely with your hands on the
wheel. You have full responsibility and
assume all risks related to the use of the
Uconnect features and applications in this
vehicle. Only use Uconnect when it is safe to
do so. Failure to do so may result in an
accident involving serious injury or death.
CAUTION!
Do NOT attach any object to the touchscreen,
doing so can result in breaking the
touchscreen.
9
20_VF_OM_EN_US_t.book Page 209
Page 212 of 264
210MULTIMEDIA
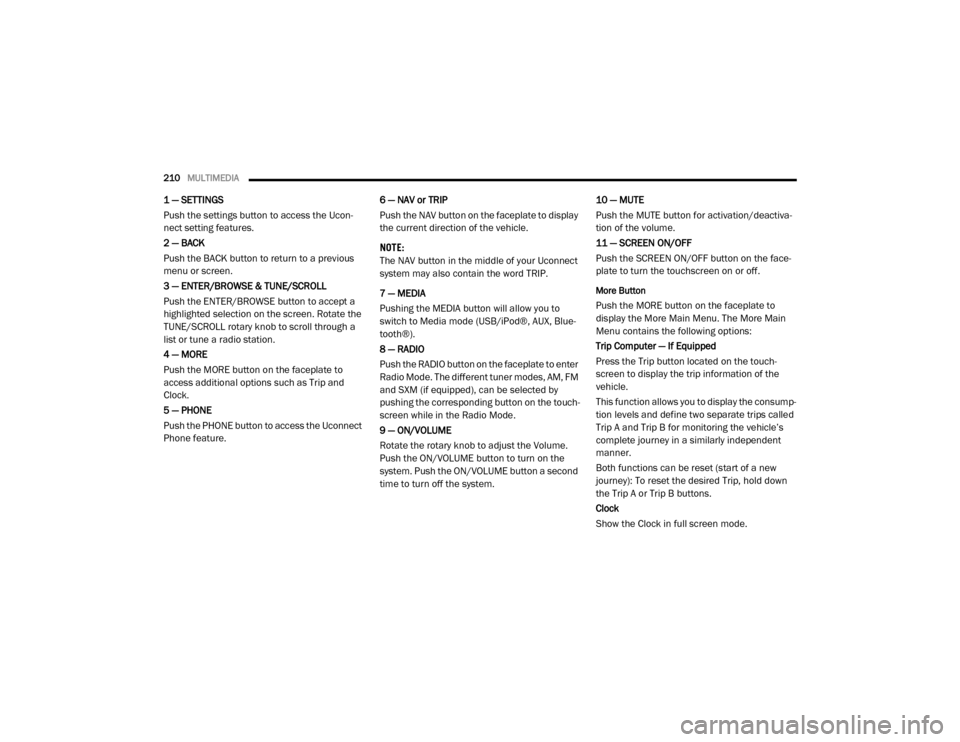
1 — SETTINGS
Push the settings button to access the Ucon -
nect setting features.
2 — BACK
Push the BACK button to return to a previous
menu or screen.
3 — ENTER/BROWSE & TUNE/SCROLL
Push the ENTER/BROWSE button to accept a
highlighted selection on the screen. Rotate the
TUNE/SCROLL rotary knob to scroll through a
list or tune a radio station.
4 — MORE
Push the MORE button on the faceplate to
access additional options such as Trip and
Clock.
5 — PHONE
Push the PHONE button to access the Uconnect
Phone feature. 6 — NAV or TRIP
Push the NAV button on the faceplate to display
the current direction of the vehicle.
NOTE:
The NAV button in the middle of your Uconnect
system may also contain the word TRIP.
7 — MEDIA
Pushing the MEDIA button will allow you to
switch to Media mode (USB/iPod®, AUX, Blue
-
tooth®).
8 — RADIO
Push the RADIO button on the faceplate to enter
Radio Mode. The different tuner modes, AM, FM
and SXM (if equipped), can be selected by
pushing the corresponding button on the touch -
screen while in the Radio Mode.
9 — ON/VOLUME
Rotate the rotary knob to adjust the Volume.
Push the ON/VOLUME button to turn on the
system. Push the ON/VOLUME button a second
time to turn off the system. 10 — MUTE
Push the MUTE button for activation/deactiva
-
tion of the volume.
11 — SCREEN ON/OFF
Push the SCREEN ON/OFF button on the face -
plate to turn the touchscreen on or off.
More Button
Push the MORE button on the faceplate to
display the More Main Menu. The More Main
Menu contains the following options:
Trip Computer — If Equipped
Press the Trip button located on the touch-
screen to display the trip information of the
vehicle.
This function allows you to display the consump -
tion levels and define two separate trips called
Trip A and Trip B for monitoring the vehicle’s
complete journey in a similarly independent
manner.
Both functions can be reset (start of a new
journey): To reset the desired Trip, hold down
the Trip A or Trip B buttons.
Clock
Show the Clock in full screen mode.
20_VF_OM_EN_US_t.book Page 210
Page 216 of 264
214MULTIMEDIA
Auto On Radio — If Equipped
Press the Auto On Radio button to set how the
radio behaves when the Ignition is switched to
ON. The options are: On, Off or Recall Last to the
last turned to stop condition. Press the back
arrow button when completed.
Radio Off Delay
Press the Radio Off Delay button to keep the
radio on for a preset amount of time after the
Ignition is switched OFF. Press the back arrow
button when completed.
AUX Volume Offset
Press the AUX Volume Offset button on the
touchscreen to activate the AUX Volume Offset
screen.
The AUX Volume Offset is adjusted by pressing
the + and - buttons. This alters the AUX input
audio volume. The level value, which spans
between plus or minus three, is displayed above
the adjustment bar.Media Mode
Operating Media Mode
Media Mode is entered by pushing the MEDIA
button located on the faceplate.
Audio Source Selection
Once in MEDIA mode, press the Source button
and the desired mode button. USB, AUX and
Bluetooth® are the Media sources available.
You can select the Browse button to be given
these options:
Now Playing
Artists
Albums
Genres
Songs
Playlists
Folders
You can select the Source button, Pause/Play
button or the Info button for artist information
on current song playing.
Seek Up/Seek Down
Seek Up /Seek Down
Press and release the Right Arrow button on
the touchscreen for the next selection. Press
and release the Left Arrow button on the
touchscreen to return to the beginning of the
current selection, or return to the beginning of
the previous selection if the track is within the
first few seconds of the current selection.
Fast Seek Up
Press and hold the Right Arrow button on the
touchscreen and the desired mode will begin to
fast forward through the current track until the
button on the touchscreen is released.
Fast Seek Down
Press and hold the Left Arrow button on the
touchscreen and the desired mode will begin to
rewind through the current track until the
button on the touchscreen is released.
Track Selection (Browse)
Rotate the Browse button on the touchscreen to
scroll through and select a desired track on the
iPod®, MP3 player, phone, or USB. Press the
Exit button on the touchscreen if you wish to
cancel the browse function.
20_VF_OM_EN_US_t.book Page 214
Page 217 of 264
MULTIMEDIA215
Repeat
Press the Repeat button on the touchscreen to
repeat the song selection. To cancel repeat,
press the Repeat button on the touchscreen a
second time.
Shuffle
Press the Shuffle button on the touchscreen to
play the selections on the USB/iPod® or Blue -
tooth® device in random order to provide an
interesting change of pace. Press the Shuffle
button on the touchscreen a second time to
turn this feature off.
Audio
Refer to “Operating Radio Mode” in this section
for the adjustable audio settings.
Info
Press the Info button to display the current
track information. Press the X button to cancel
this feature.
USB Mode
USB Mode is entered by either inserting a USB
Jump Drive cable into the USB port, or by
pushing the MEDIA button located on the face -
plate. Once in “Media Mode”, press the Source
button on the touchscreen and select “USB”. NOTE:
The system supports only FAT32 or ExFAT
formatted USB devices. The system does not
support devices with a capacity higher than
64GB. The system does not support USB hubs
connected to the USB port of the vehicle.
Connect your multimedia device directly to the
USB port, using the specific connection cable
for the device if necessary.
Inserting USB Device
Gently insert the USB/device into the USB Port.
If you insert a USB device with the ignition ON,
the unit will switch to USB mode and begin to
play when you insert the device. The display will
show the track number and index time in
minutes and seconds. Play will begin at the start
of track 1.
Browse
Press the Browse button on the touchscreen to
select Artist, Albums, Genres, Songs, Playlists or
Folders from the USB device. Once the desired
selection is made you can chose from the avail
-
able media by pressing the button on the touch -
screen. Press the Exit button on the
touchscreen if you wish to cancel the browse
function.
Bluetooth® Mode
Bluetooth® Streaming Audio (BTSA) or Blue -
tooth® Mode is entered by pairing a Bluetooth®
device containing music to the Uconnect
system.
Before proceeding, the Bluetooth® device must
be paired with the Uconnect Phone to communi -
cate with the Uconnect system.
See the pairing procedure within this manual.
Once the Bluetooth® device is paired to the
Uconnect system, push the MEDIA button
located on the faceplate. Once in Media Mode,
press the Source button on the touchscreen
and select Bluetooth®.
NOTE:
For mobile phone compatibility and pairing
instructions, please visit UconnectPhone.com.
9
20_VF_OM_EN_US_t.book Page 215
Page 240 of 264
238MULTIMEDIA
STEERING WHEEL AUDIO CONTROLS
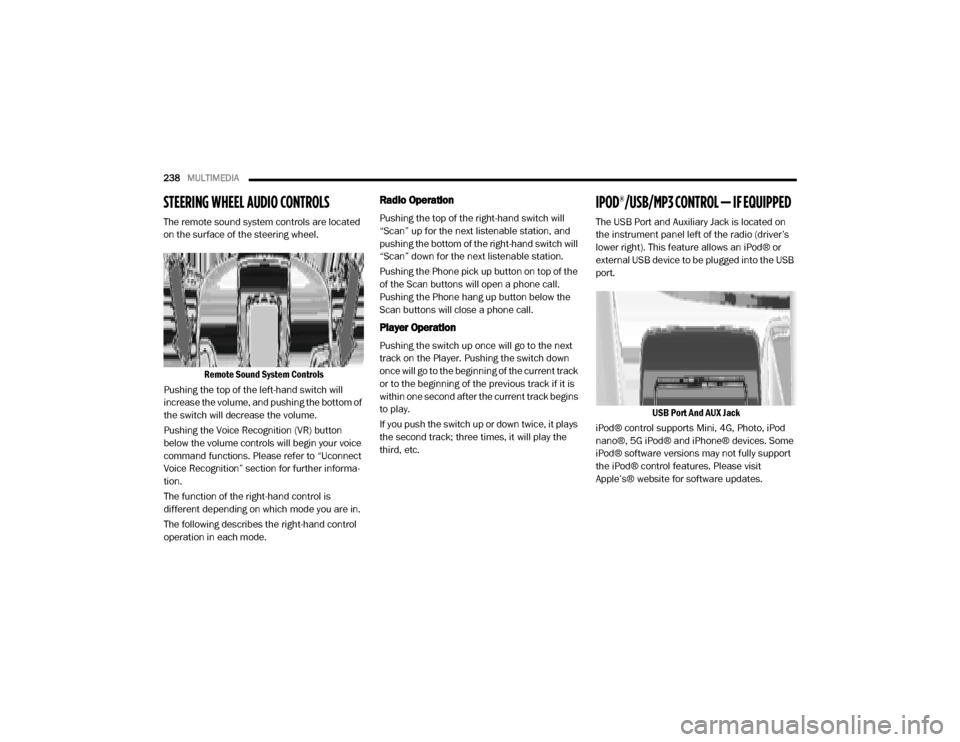
The remote sound system controls are located
on the surface of the steering wheel.
Remote Sound System Controls
Pushing the top of the left-hand switch will
increase the volume, and pushing the bottom of
the switch will decrease the volume.
Pushing the Voice Recognition (VR) button
below the volume controls will begin your voice
command functions. Please refer to “Uconnect
Voice Recognition” section for further informa -
tion.
The function of the right-hand control is
different depending on which mode you are in.
The following describes the right-hand control
operation in each mode.
Radio Operation
Pushing the top of the right-hand switch will
“Scan” up for the next listenable station, and
pushing the bottom of the right-hand switch will
“Scan” down for the next listenable station.
Pushing the Phone pick up button on top of the
of the Scan buttons will open a phone call.
Pushing the Phone hang up button below the
Scan buttons will close a phone call.
Player Operation
Pushing the switch up once will go to the next
track on the Player. Pushing the switch down
once will go to the beginning of the current track
or to the beginning of the previous track if it is
within one second after the current track begins
to play.
If you push the switch up or down twice, it plays
the second track; three times, it will play the
third, etc.
IPOD®/USB/MP3 CONTROL — IF EQUIPPED
The USB Port and Auxiliary Jack is located on
the instrument panel left of the radio (driver’s
lower right). This feature allows an iPod® or
external USB device to be plugged into the USB
port.
USB Port And AUX Jack
iPod® control supports Mini, 4G, Photo, iPod
nano®, 5G iPod® and iPhone® devices. Some
iPod® software versions may not fully support
the iPod® control features. Please visit
Apple’s® website for software updates.
20_VF_OM_EN_US_t.book Page 238
Page 241 of 264
MULTIMEDIA239
USB Charging Port
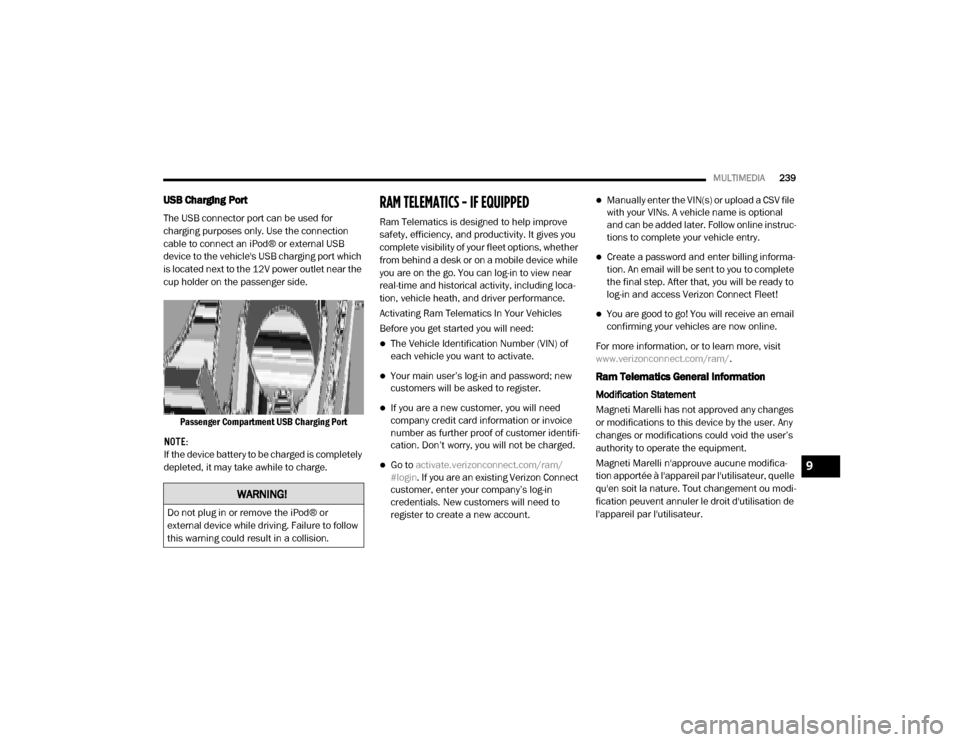
The USB connector port can be used for
charging purposes only. Use the connection
cable to connect an iPod® or external USB
device to the vehicle's USB charging port which
is located next to the 12V power outlet near the
cup holder on the passenger side.
Passenger Compartment USB Charging Port
NOTE:
If the device battery to be charged is completely
depleted, it may take awhile to charge.
RAM TELEMATICS - IF EQUIPPED
Ram Telematics is designed to help improve
safety, efficiency, and productivity. It gives you
complete visibility of your fleet options, whether
from behind a desk or on a mobile device while
you are on the go. You can log-in to view near
real-time and historical activity, including loca -
tion, vehicle heath, and driver performance.
Activating Ram Telematics In Your Vehicles
Before you get started you will need:
The Vehicle Identification Number (VIN) of
each vehicle you want to activate.
Your main user’s log-in and password; new
customers will be asked to register.
If you are a new customer, you will need
company credit card information or invoice
number as further proof of customer identifi -
cation. Don’t worry, you will not be charged.
Go to activate.verizonconnect.com/ram/
#login . If you are an existing Verizon Connect
customer, enter your company’s log-in
credentials. New customers will need to
register to create a new account.
Manually enter the VIN(s) or upload a CSV file
with your VINs. A vehicle name is optional
and can be added later. Follow online instruc -
tions to complete your vehicle entry.
Create a password and enter billing informa -
tion. An email will be sent to you to complete
the final step. After that, you will be ready to
log-in and access Verizon Connect Fleet!
You are good to go! You will receive an email
confirming your vehicles are now online.
For more information, or to learn more, visit
www.verizonconnect.com/ram/ .
Ram Telematics General Information
Modification Statement
Magneti Marelli has not approved any changes
or modifications to this device by the user. Any
changes or modifications could void the user’s
authority to operate the equipment.
Magneti Marelli n'approuve aucune modifica -
tion apportée à l'appareil par l'utilisateur, quelle
qu'en soit la nature. Tout changement ou modi -
fication peuvent annuler le droit d'utilisation de
l'appareil par l'utilisateur.
WARNING!
Do not plug in or remove the iPod® or
external device while driving. Failure to follow
this warning could result in a collision.
9
20_VF_OM_EN_US_t.book Page 239
Page 245 of 264
MULTIMEDIA243
Media
Uconnect offers connections via USB, Blue -
tooth®, and Auxiliary ports. Voice operation is
only available for connected USB and iPod®
devices.
Push the VR button on the steering wheel. After
the beep, say one of the following commands
and follow the prompts to switch your media
source or choose an artist.
“ Change source to Bluetooth®”
“Change source to iPod®”
“Change source to USB”
“Play artist Beethoven”; “ Play album
Greatest Hits”; “ Play song Moonlight
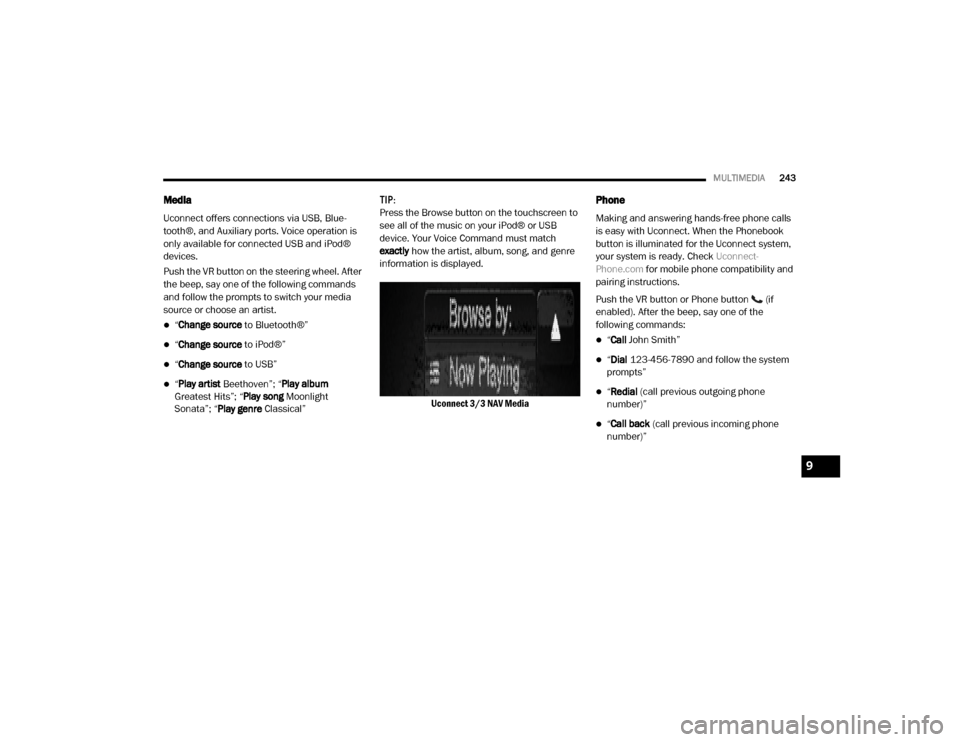
Sonata”; “ Play genre Classical” TIP:
Press the Browse button on the touchscreen to
see all of the music on your iPod® or USB
device. Your Voice Command must match
exactly
how the artist, album, song, and genre
information is displayed.
Uconnect 3/3 NAV Media
Phone
Making and answering hands-free phone calls
is easy with Uconnect. When the Phonebook
button is illuminated for the Uconnect system,
your system is ready. Check Uconnect-
Phone.com for mobile phone compatibility and
pairing instructions.
Push the VR button or Phone button (if
enabled). After the beep, say one of the
following commands:
“ Call John Smith”
“Dial 123-456-7890 and follow the system
prompts”
“ Redial (call previous outgoing phone
number)”
“ Call back (call previous incoming phone
number)”
9
20_VF_OM_EN_US_t.book Page 243