key RAM PROMASTER 2022 User Guide
[x] Cancel search | Manufacturer: RAM, Model Year: 2022, Model line: PROMASTER, Model: RAM PROMASTER 2022Pages: 268, PDF Size: 13.26 MB
Page 20 of 268
18GETTING TO KNOW YOUR VEHICLE
HOW TO USE REMOTE START
Push and release the Remote Start button on the
key fob twice within five seconds. The vehicle
doors will lock, the parking lights will flash, and the
horn will chirp twice (if programmed). Then, the
engine will start, and the vehicle will remain in the
Remote Start mode for a 15 minute cycle.
Pushing the Remote Start button a third time shuts
the engine off.
NOTE:
With Remote Start, the engine will only run for
15 minutes.
Remote Start can only be used twice.
If an engine fault is present or fuel level is low,
the vehicle will start and then shut down in
10 seconds.
The park lights will turn on and remain on during
Remote Start mode.
For security, power window is disabled when the
vehicle is in the Remote Start mode.
The ignition must be placed in the ON/RUN posi -
tion before the Remote Start sequence can be
repeated for a third cycle.
All of the following conditions must be met before
the engine will Remote Start:
Gear selector in PARK
Doors closed
Hood closed
Rear cargo doors closed
Hazard switch off
Brake switch inactive (brake pedal not pressed)
Battery at an acceptable charge level
PANIC button not pushed
Fuel meets minimum requirement
System not disabled from previous Remote
Start event
Vehicle Security system not active
Malfunction Indicator Light (MIL) is not illuminated
Ignition in OFF position
TO EXIT REMOTE START MODE
To drive the vehicle after starting the Remote Start
system, push and release the START/STOP ignition
button while pressing the brake pedal prior to the
end of the 15 minute cycle.
The Remote Start system will turn the engine off if the
Remote Start button on the key fob is pushed again, or
if the engine is allowed to run for the entire 15 minute
cycle. Once the ignition is placed in the ON/RUN
position, the climate controls will resume the previously
set operations (temperature, blower control, etc.).
NOTE:To avoid unintentional shutdowns, the system will
disable for two seconds after receiving a valid
Remote Start request.
WARNING!
Do not start or run an engine in a closed garage
or confined area. Exhaust gas contains Carbon
Monoxide (CO) which is odorless and colorless.
Carbon Monoxide is poisonous and can cause
serious injury or death when inhaled.
Keep key fobs away from children. Operation
of the Remote Start system, windows, door
locks or other controls could cause serious
injury or death.
WARNING!
Do not start or run an engine in a closed garage or
confined area. Exhaust gas contains Carbon
Monoxide (CO) which is odorless and colorless.
Carbon Monoxide is poisonous and can cause
serious injury or death when inhaled.
Keep key fobs away from children. Operation
of the Remote Start system, windows, door
locks or other controls could cause serious
injury or death.
22_VF_OM_EN_USC_t.book Page 18
Page 21 of 268
GETTING TO KNOW YOUR VEHICLE19
For vehicles equipped with the Keyless Enter ‘n
Go™ — Passive Entry feature, the message
“Remote Start Active — Push Start Button” will
display in the instrument cluster display until you
push the START/STOP ignition button.
REMOTE START DEFROST MODE
A
CTIVATION — IF EQUIPPED
When Remote Start is active, and the outside
ambient temperature is 40°F (4.5°C) or below, the
system will automatically activate rear defrost for
15 minutes or less. The time is dependent on the
ambient temperature. Once the timer expires,
the system will automatically adjust the settings
depending on ambient conditions. See “Remote
Start Comfort Systems — If Equipped” in the next
section for detailed operation.
REMOTE START COMFORT SYSTEMS —
I
F EQUIPPED
When Remote Start is activated, the rear defrost
will automatically turn on in cold weather. The
vehicle will adjust the climate control settings
depending on the outside ambient temperature. Manual Temperature Control (MTC) — If Equipped
In ambient temperatures of 40°F (4.5°C) or
below, the climate settings will default to
maximum heat, with fresh air entering the
cabin. If the front defrost timer expires, the
vehicle will enter Mix Mode.
In ambient temperatures from 40°F (4.5°C) to
78°F (26°C), the climate settings will be based
on the last settings selected by the driver.
In ambient temperatures of 78°F (26°C) or
above, the climate settings will default to MAX
A/C, Bi-Level mode, with Recirculation on.
For more information on ATC, MTC, and climate
control settings, see Ú page 39.
NOTE:These features will stay on through the duration of
Remote Start, or until the ignition is placed in the
ON/RUN position. The climate control settings will
change, and exit the automatic defaults, if
manually adjusted by the driver while the vehicle is
in Remote Start mode. This includes turning the
climate controls off using the OFF button.
REMOTE START WINDSHIELD WIPER
D
E–ICER ACTIVATION — IF EQUIPPED
When Remote Start is active and the outside
ambient temperature is less than 33°F (0.6°C),
the Windshield Wiper De-Icer will activate. Exiting
Remote Start will resume its previous operation.
If the Windshield Wiper De-Icer was active, the
timer and operation will continue.
REMOTE START ABORT MESSAGE
The following messages will display in the
instrument cluster display if the vehicle fails to
remote start or exits Remote Start prematurely:
Remote Start Cancelled — Door Open
Remote Start Cancelled — Hood Open
Remote Start Cancelled — Fuel Low
Remote Start Cancelled — Rear Cargo Door Open
Remote Start Cancelled — Too Cold
Remote Start Cancelled — Time Expired
Remote Start Cancelled — System Fault
Remote Start Disabled — Start Vehicle to Reset
The message will stay active until the ignition is
placed in the ON/RUN position.
2
22_VF_OM_EN_USC_t.book Page 19
Page 22 of 268

20GETTING TO KNOW YOUR VEHICLE
VEHICLE SECURITY SYSTEM — IF EQUIPPED
The Vehicle Security system monitors the vehicle
doors and ignition for unauthorized operation.
When the Vehicle Security system is activated,
interior switches for door locks are disabled. The
system provides both audible and visible signals.
For the first three minutes, the horn will sound, and
the turn signal lights will flash. For an additional
15 minutes, only the turn signal lights will flash.
TO ARM THE SYSTEM
Follow these steps to arm the Vehicle Security
system:
1. Make sure the vehicle’s ignition is placed in
the OFF position.
2. If any doors are open, close them.
3. Perform one of the following methods to lock the vehicle:
Push the lock button on the exterior Passive
Entry door handle with a valid key fob avail -
able in the same exterior zone Ú page 21.
Push the lock button on the key fob.
When the Vehicle Security system is armed, the
Vehicle Security Light (on the central lock\unlock
button in the dashboard) will begin to flash every
three seconds until it is disarmed.
NOTE:If a door or the hood is not properly shut, the
system will be armed.
TO DISARM THE SYSTEM
The Vehicle Security system can be disarmed using
any of the following methods:
Push the unlock button on the key fob.
Push the Passive Entry button next to the door
handle to unlock the door Ú page 21.
Cycle the ignition out of the OFF position to
disarm the system.
The Vehicle Security system is designed to protect
your vehicle. However, you can create conditions
where the system will give you a false alarm. If one
of the previously described arming sequences has
occurred, the Vehicle Security system will arm
regardless of whether you are in the vehicle or not.
If you remain in the vehicle and open a door, the
alarm will sound. If this occurs, disarm the Vehicle
Security system.
REARMING OF THE SYSTEM
If the system has not been disabled, the Vehicle
Security system will rearm itself after the
15 additional minutes of turn lamps flashing.
If the condition which initiated the alarm is still
present, the system will ignore that condition and
monitor the remaining doors and ignition.
SECURITY SYSTEM MANUAL OVERRIDE
The Vehicle Security system will not arm if you lock
the doors using the manual door lock. The Vehicle
Security system will not disarm if you unlock the
doors using the manual door unlock.
DOORS
POWER DOOR LOCKS
The central lock/unlock button has an LED that
indicates whether the doors are locked or unlocked.
Push the lock button on the instrument panel.
The indicator light will illuminate to show the doors
are locked.
Push the lock button on the instrument panel a
second time to unlock the doors.
Lock Button On Instrument Panel
22_VF_OM_EN_USC_t.book Page 20
Page 23 of 268
GETTING TO KNOW YOUR VEHICLE21
To unlock the front doors, pull the inside door
handle to the detent.
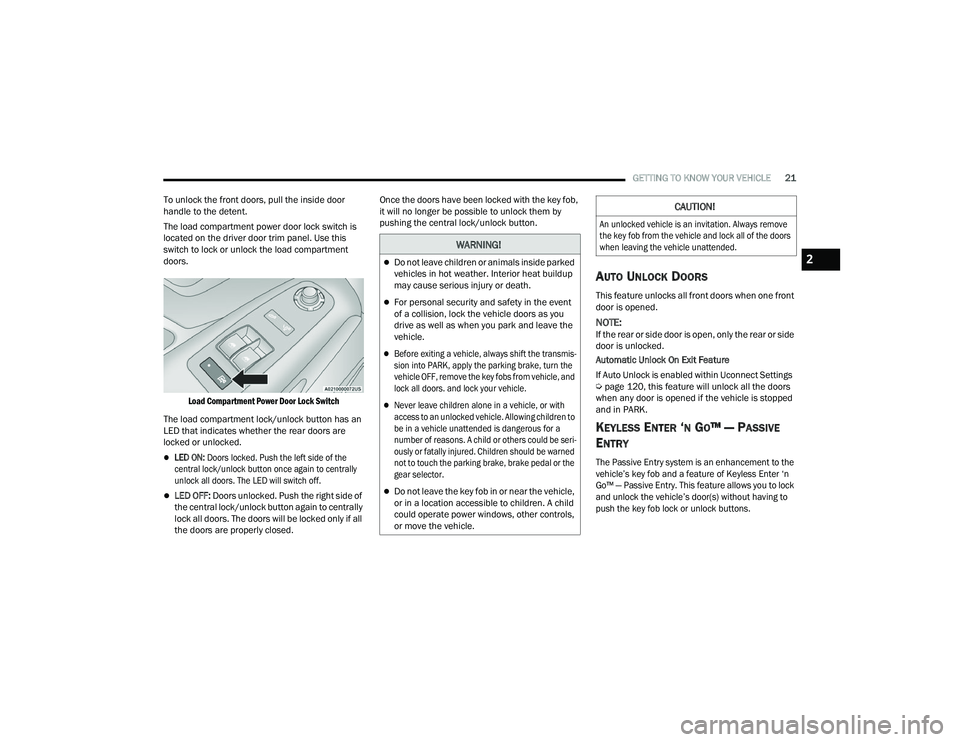
The load compartment power door lock switch is
located on the driver door trim panel. Use this
switch to lock or unlock the load compartment
doors.
Load Compartment Power Door Lock Switch
The load compartment lock/unlock button has an
LED that indicates whether the rear doors are
locked or unlocked.
LED ON: Doors locked. Push the left side of the
central lock/unlock button once again to centrally
unlock all doors. The LED will switch off.
LED OFF: Doors unlocked. Push the right side of
the central lock/unlock button again to centrally
lock all doors. The doors will be locked only if all
the doors are properly closed. Once the doors have been locked with the key fob,
it will no longer be possible to unlock them by
pushing the central lock/unlock button.
AUTO UNLOCK DOORS
This feature unlocks all front doors when one front
door is opened.
NOTE:If the rear or side door is open, only the rear or side
door is unlocked.
Automatic Unlock On Exit Feature
If Auto Unlock is enabled within Uconnect Settings
Ú
page 120, this feature will unlock all the doors
when any door is opened if the vehicle is stopped
and in PARK.
KEYLESS ENTER ‘N GO™ — PASSIVE
E
NTRY
The Passive Entry system is an enhancement to the
vehicle’s key fob and a feature of Keyless Enter ‘n
Go™ — Passive Entry. This feature allows you to lock
and unlock the vehicle’s door(s) without having to
push the key fob lock or unlock buttons.
WARNING!
Do not leave children or animals inside parked
vehicles in hot weather. Interior heat buildup
may cause serious injury or death.
For personal security and safety in the event
of a collision, lock the vehicle doors as you
drive as well as when you park and leave the
vehicle.
Before exiting a vehicle, always shift the transmis -
sion into PARK, apply the parking brake, turn the
vehicle OFF, remove the key fobs from vehicle, and
lock all doors. and lock your vehicle.
Never leave children alone in a vehicle, or with
access to an unlocked vehicle. Allowing children to
be in a vehicle unattended is dangerous for a
number of reasons. A child or others could be seri -
ously or fatally injured. Children should be warned
not to touch the parking brake, brake pedal or the
gear selector.
Do not leave the key fob in or near the vehicle,
or in a location accessible to children. A child
could operate power windows, other controls,
or move the vehicle.
CAUTION!
An unlocked vehicle is an invitation. Always remove
the key fob from the vehicle and lock all of the doors
when leaving the vehicle unattended.
2
22_VF_OM_EN_USC_t.book Page 21
Page 24 of 268
22GETTING TO KNOW YOUR VEHICLE
NOTE:
Passive Entry may be programmed on or off
within Uconnect Settings Úpage 120.
The key fob may not be detected by the vehicle
Passive Entry system if it is located next to a
mobile phone, laptop, or other electronic device;
these devices may block the key fob’s wireless
signal and prevent the Passive Entry system
from locking/unlocking the vehicle.
Passive Entry Unlock initiates illuminated
approach (low beams, license plate lamp, posi -
tion lamps) for whichever time duration is set
between 0, 30, 60 or 90 seconds. Passive Entry
Unlock also initiates two flashes of the turn
signal lamps.
If the vehicle is unlocked by Passive Entry and
no door is opened within 60 seconds, the
vehicle will relock and (if equipped) will arm the
Vehicle Security system.
To Unlock From The Driver, Passenger or Rear
Door
With a valid Passive Entry key fob within 5 ft
(1.5 m) of the door handle, push the Passive Entry
button next to the handle to unlock the vehicle.
Unlock the front doors only if the Uconnect
setting is set to "Approach" and you press the
button located next to the front handle.
Unlock the load compartment doors only if the
Uconnect setting is set to "Approach" and you
press the button located next to the rear handle.
The Passive Entry feature will be disabled if the
Uconnect setting is set to "Off".
NOTE:
Either the load compartment and cabin
compartment or all doors will unlock when you
press Passive Entry button, depending on the
selected setting in the Uconnect system
Ú page 120.
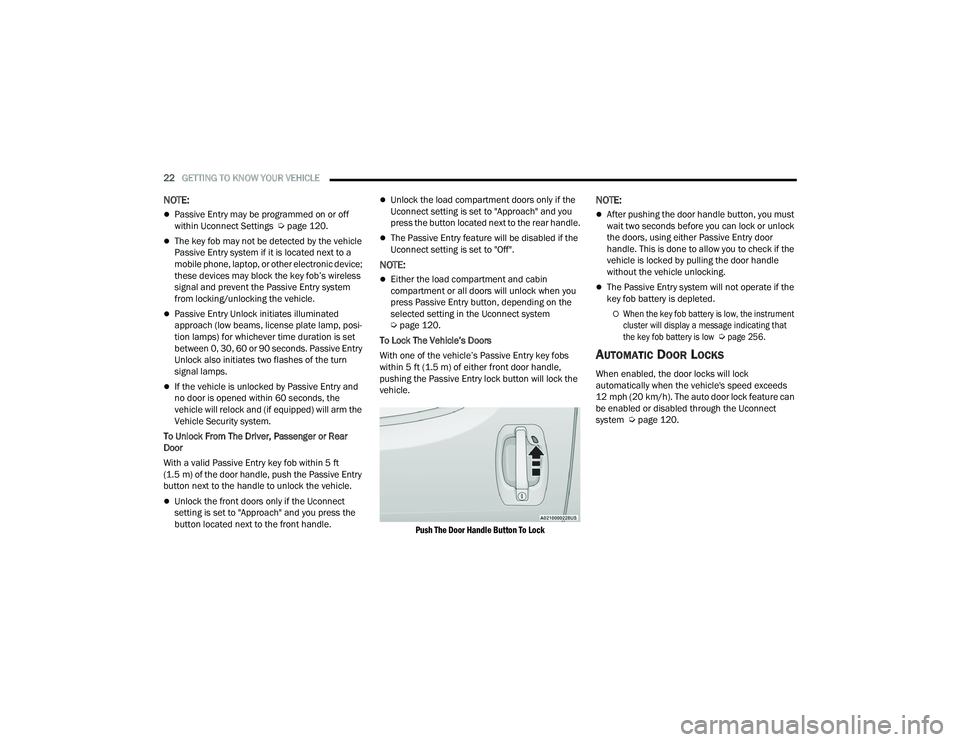
To Lock The Vehicle’s Doors
With one of the vehicle’s Passive Entry key fobs
within 5 ft (1.5 m) of either front door handle,
pushing the Passive Entry lock button will lock the
vehicle.
Push The Door Handle Button To Lock
NOTE:
After pushing the door handle button, you must
wait two seconds before you can lock or unlock
the doors, using either Passive Entry door
handle. This is done to allow you to check if the
vehicle is locked by pulling the door handle
without the vehicle unlocking.
The Passive Entry system will not operate if the
key fob battery is depleted.
When the key fob battery is low, the instrument
cluster will display a message indicating that
the key fob battery is low
Ú
page 256.
AUTOMATIC DOOR LOCKS
When enabled, the door locks will lock
automatically when the vehicle's speed exceeds
12 mph (20 km/h). The auto door lock feature can
be enabled or disabled through the Uconnect
system Ú page 120.
22_VF_OM_EN_USC_t.book Page 22
Page 28 of 268
26GETTING TO KNOW YOUR VEHICLE
(Continued)
If the driver or the passenger seats are not locked
in the facing forward position during movement
of the vehicle, a message will appear in the
instrument cluster display and an intermittent
chime will sound until key-off or until the swivel
seats are locked in the facing forward position.
Stop and move the swivel seats in the correct
position before proceeding.
If a fault is present in the system and it is not
possible to check the correct position of the swivel
seats, a message and the generic warning light
appears in the instrument cluster display to inform
about the failure. In these conditions, check the
status of the swivel seats and do not drive the
vehicle until the swivel seats are locked in the
facing forward position.
HEATED SEATS — IF EQUIPPED
On some models, the front driver and
passenger seats may be equipped with
heaters in both the seat cushions and
seatbacks. The controls for the front
heated seats are located on the lower outboard
side of the seat.
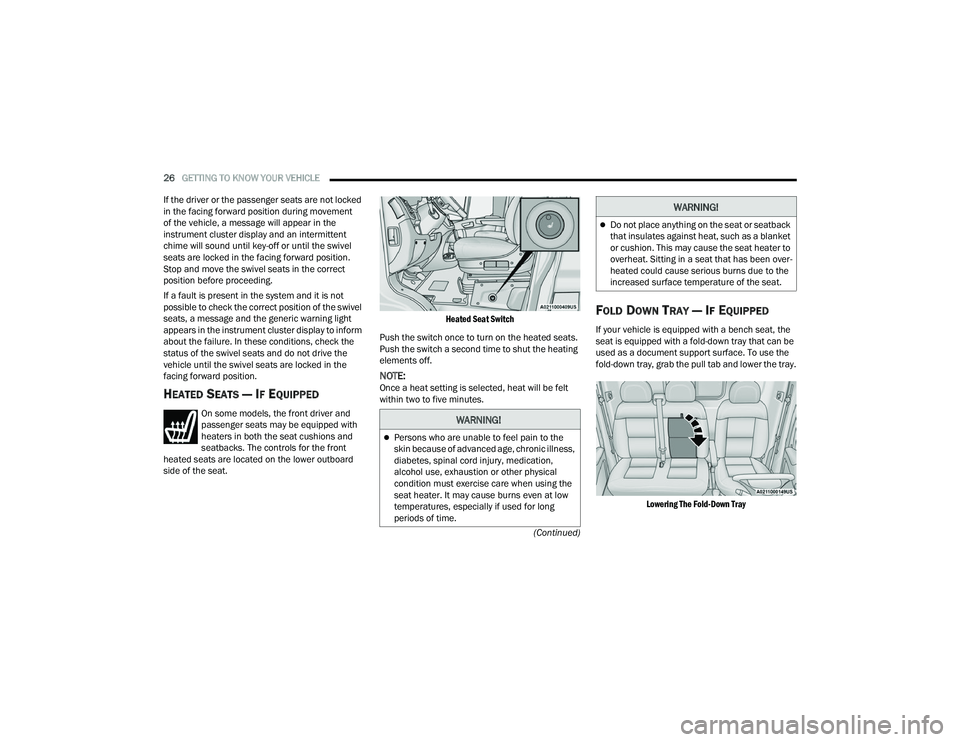
Heated Seat Switch
Push the switch once to turn on the heated seats.
Push the switch a second time to shut the heating
elements off.
NOTE:Once a heat setting is selected, heat will be felt
within two to five minutes.
FOLD DOWN TRAY — IF EQUIPPED
If your vehicle is equipped with a bench seat, the
seat is equipped with a fold-down tray that can be
used as a document support surface. To use the
fold-down tray, grab the pull tab and lower the tray.
Lowering The Fold-Down Tray
WARNING!
Persons who are unable to feel pain to the
skin because of advanced age, chronic illness,
diabetes, spinal cord injury, medication,
alcohol use, exhaustion or other physical
condition must exercise care when using the
seat heater. It may cause burns even at low
temperatures, especially if used for long
periods of time.
Do not place anything on the seat or seatback
that insulates against heat, such as a blanket
or cushion. This may cause the seat heater to
overheat. Sitting in a seat that has been over -
heated could cause serious burns due to the
increased surface temperature of the seat.
WARNING!
22_VF_OM_EN_USC_t.book Page 26
Page 30 of 268
28GETTING TO KNOW YOUR VEHICLE
Front Head Restraint Adjustment
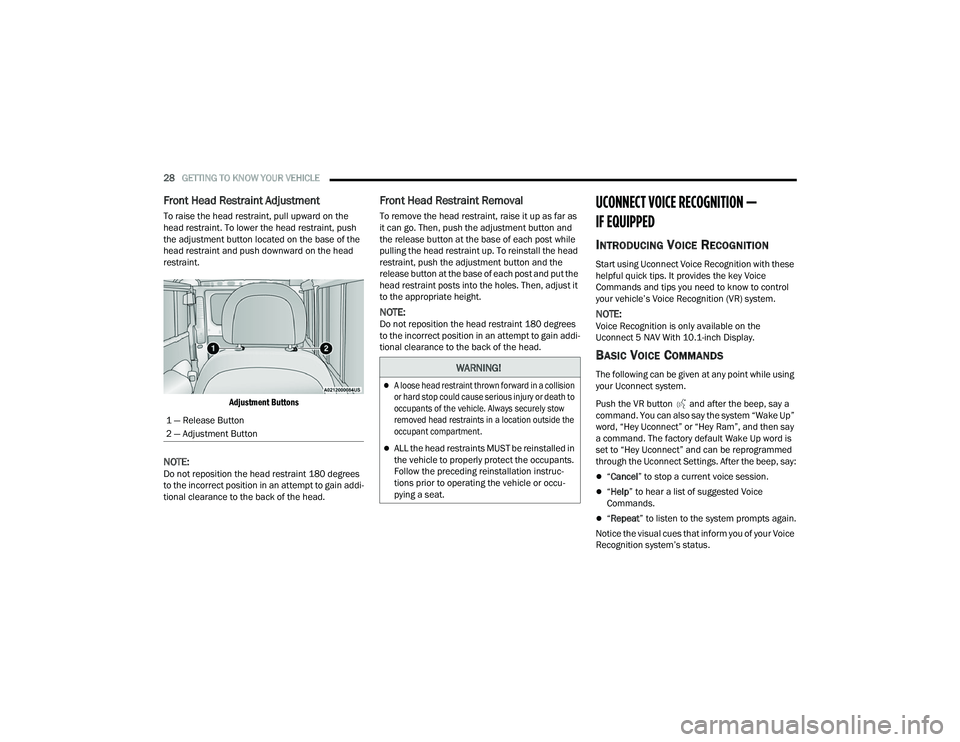
To raise the head restraint, pull upward on the
head restraint. To lower the head restraint, push
the adjustment button located on the base of the
head restraint and push downward on the head
restraint.
Adjustment Buttons
NOTE:Do not reposition the head restraint 180 degrees
to the incorrect position in an attempt to gain addi -
tional clearance to the back of the head.
Front Head Restraint Removal
To remove the head restraint, raise it up as far as
it can go. Then, push the adjustment button and
the release button at the base of each post while
pulling the head restraint up. To reinstall the head
restraint, push the adjustment button and the
release button at the base of each post and put the
head restraint posts into the holes. Then, adjust it
to the appropriate height.
NOTE:Do not reposition the head restraint 180 degrees
to the incorrect position in an attempt to gain addi -
tional clearance to the back of the head.
UCONNECT VOICE RECOGNITION —
IF EQUIPPED
INTRODUCING VOICE RECOGNITION
Start using Uconnect Voice Recognition with these
helpful quick tips. It provides the key Voice
Commands and tips you need to know to control
your vehicle’s Voice Recognition (VR) system.
NOTE:Voice Recognition is only available on the
Uconnect 5 NAV With 10.1-inch Display.
BASIC VOICE COMMANDS
The following can be given at any point while using
your Uconnect system.
Push the VR button and after the beep, say a
command. You can also say the system “Wake Up”
word, “Hey Uconnect” or “Hey Ram”, and then say
a command. The factory default Wake Up word is
set to “Hey Uconnect” and can be reprogrammed
through the Uconnect Settings. After the beep, say:
“ Cancel ” to stop a current voice session.
“Help ” to hear a list of suggested Voice
Commands.
“ Repeat ” to listen to the system prompts again.
Notice the visual cues that inform you of your Voice
Recognition system’s status.
1 — Release Button
2 — Adjustment Button
WARNING!
A loose head restraint thrown forward in a collision
or hard stop could cause serious injury or death to
occupants of the vehicle. Always securely stow
removed head restraints in a location outside the
occupant compartment.
ALL the head restraints MUST be reinstalled in
the vehicle to properly protect the occupants.
Follow the preceding reinstallation instruc
-
tions prior to operating the vehicle or occu -
pying a seat.
22_VF_OM_EN_USC_t.book Page 28
Page 39 of 268
GETTING TO KNOW YOUR VEHICLE37
Dimming Of The Uconnect Touchscreen
The brightness of the Uconnect touchscreen can be
dimmed using the instrument panel dimmer control
when the parking lights or headlights are on.
When Display Mode is set to Auto within the
Uconnect system, the brightness will automatically
adjust from daytime intensity to nighttime intensity
(and vice versa) based on ambient light levels
outside of the vehicle.
NOTE:The brightness of the Uconnect touchscreen
cannot be adjusted when the dimmer control is
at the maximum setting (interior lights on), even
when Display Mode is set to Auto within the
Uconnect Settings.
When Display Mode is set to Manual, the
brightness of the Uconnect touchscreen will adjust
to the set brightness (1 - 6) when the headlights
are either on or off. For more information on these
Uconnect Settings, see Ú page 120.
Ambient Light
The vehicle is equipped with ambient light on the
dome lamp. The ambient light will be on all the
time, with the option of dimming it with the dimmer
controls as long as the headlights are turned on.
Ambient LED Lighting — If Equipped
Your vehicle may be equipped with LED lighting in
the front footwells and center cup holders. The
brightness of the lights can be adjusted using the
dimmer controls, located on the left side of the
instrument panel, as long as the headlights are
turned on.
ILLUMINATED ENTRY
The courtesy lights will turn on when you use
the key fob to unlock the doors or open any door.
They also turn on when unlocking or opening
manually from the driver door cylinder.
The lights will fade to off after approximately
30 seconds, or they will immediately fade to off
once the ignition switch is changed to the ON/RUN
position from the OFF position.
The dome lights illuminate in the following ways:
When the doors are unlocked, the dome light
will illuminate for approximately 27 seconds.
When one of the front doors is opened, the front
dome light will illuminate for approximately
three minutes.
When one of the rear doors is opened, the rear
dome light will illuminate for approximately
three minutes.
When the front doors are closed, the front dome
light will automatically shut off after approxi -
mately 27 seconds.
When the rear doors are closed, the rear dome
light will automatically shut off after approxi -
mately 27 seconds. The timing stops once the
ignition is placed in the RUN or ON position.
The dome light will turn off under any of the
following conditions:
The dome light is disabled when the ignition is
placed in the RUN or ON position.
The dome lights will turn off automatically when
the doors are locked.
NOTE:
The front courtesy overhead console and door
courtesy lights will not turn off if the dimmer
control is in the “Dome ON” position.
The illuminated entry system will not operate if the
dimmer control is in the “Dome OFF” position.
2
22_VF_OM_EN_USC_t.book Page 37
Page 42 of 268
40GETTING TO KNOW YOUR VEHICLE
MAX A/C Button — If Equipped
Press and release the MAX A/C button on
the touchscreen to change the current
setting to the coldest output of air.
The MAX A/C indicator illuminates when
MAX A/C is on. Pressing the button again will cause
the MAX A/C operation to exit.
A/C Button — If Equipped
Push the A/C button to engage the Air
Conditioning (A/C). The A/C indicator
illuminates when A/C is on.
NOTE:
For Manual Climate Controls, if the system is in
Mix, Floor or Defrost mode, the A/C can be
turned off, but the A/C system could remain
active to prevent fogging of the windows.
If fog or mist appears on the windshield or side
glass, select Defrost mode, and increase blower
speed if needed.
If your air conditioning performance seems
lower than expected, check the front of the A/C
condenser (located in front of the radiator), for
an accumulation of dirt or insects. Clean with a
gentle water spray from the front of the radiator
and through the condenser.
Recirculation Button
Press and release this button to change the
system between recirculation mode and
outside air mode. The Recirculation indicator
and the A/C indicator illuminate when the
Recirculation button is pressed. Recirculation can be
used when outside conditions such as smoke, odors,
dust, or high humidity are present. Recirculation can be
used in all modes except for Defrost. Recirculation may
be unavailable if conditions exist that could create
fogging on the inside of the windshield. The A/C can be
deselected manually without disturbing the mode
control selection. Continuous use of the Recirculation
mode may make the inside air stuffy and window
fogging may occur. Extended use of this mode is not
recommended. Recirculation mode may automatically
adjust to optimize customer experience for warming,
cooling, dehumidification, etc.
On systems with Manual Climate Controls, if equipped,
the Recirculation mode is not allowed in Defrost mode
to improve window clearing operation. Recirculation
is disabled automatically if this mode is selected.
Attempting to use Recirculation while in this mode
causes the LED in the control button to blink and then
turns off.
MAX Defrost Button
Push the MAX Defrost button to change
the current airflow setting to Defrost
mode. The indicator illuminates when
this feature is on. Max defrost set
maximum temperature setting for best windshield
and side window defrosting and defogging. If MAX
Defrost mode is turned off, the Climate Control
system will return to the previous setting. Air
comes from the windshield and side window
demist outlets.
Rear Defrost Button — If Equipped
Push and release the Rear Defrost
Control button to turn on the rear window
defroster and the heated outside mirrors
(if equipped). The Rear Defrost indicator
illuminates when the rear window defroster is on.
The rear window defroster automatically turns off
after 10 minutes the first time it is activated after
the first key cycle. If the key cycle is engaged again,
the rear window defroster will automatically turn
off 5 minutes after it is activated.
22_VF_OM_EN_USC_t.book Page 40
Page 50 of 268
48GETTING TO KNOW YOUR VEHICLE
The wireless charging pad is equipped with an
anti-slip mat to hold your mobile phone in place,
and an LED indicator light.
LED Indicator Status:
NOTE:Using a phone case may interfere with wireless
charging.
No Light: Charging pad is idle or searching for a
device.
Blue Light: Device is detected, and is charging.
Red Light/Flashing: Internal error, or foreign
object is detected.
With a compatible mobile phone placed on the
charging pad, when the ignition is switched to the
OFF position, a phone reminder message will
appear on the instrument cluster to warn the
customer.
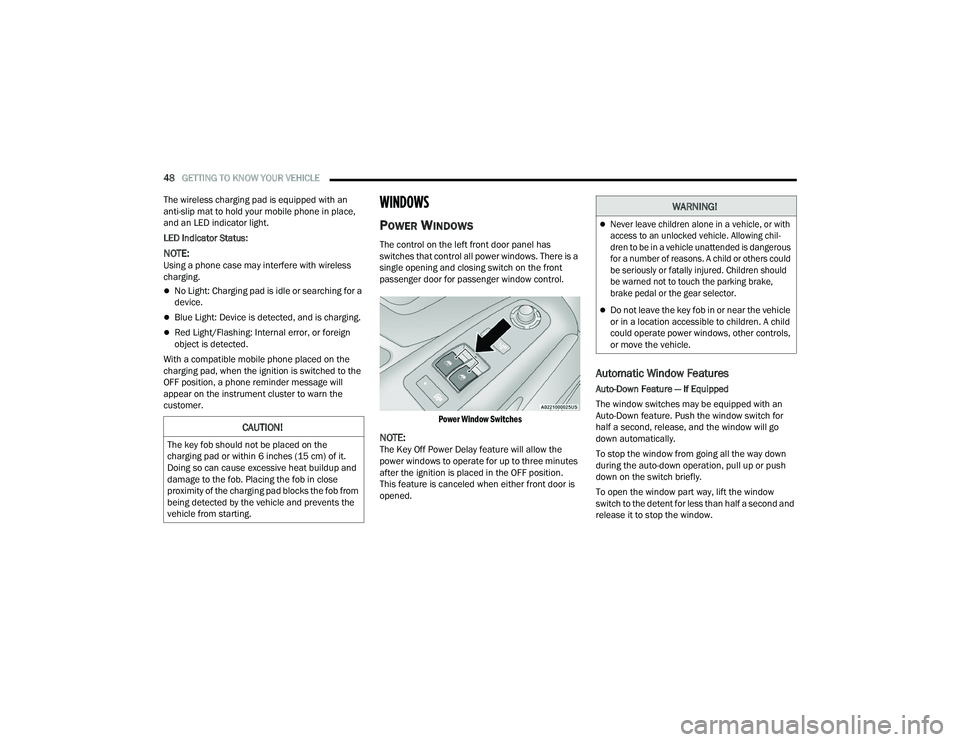
WINDOWS
POWER WINDOWS
The control on the left front door panel has
switches that control all power windows. There is a
single opening and closing switch on the front
passenger door for passenger window control.
Power Window Switches
NOTE:The Key Off Power Delay feature will allow the
power windows to operate for up to three minutes
after the ignition is placed in the OFF position.
This feature is canceled when either front door is
opened.
Automatic Window Features
Auto-Down Feature — If Equipped
The window switches may be equipped with an
Auto-Down feature. Push the window switch for
half a second, release, and the window will go
down automatically.
To stop the window from going all the way down
during the auto-down operation, pull up or push
down on the switch briefly.
To open the window part way, lift the window
switch to the detent for less than half a second and
release it to stop the window.
CAUTION!
The key fob should not be placed on the
charging pad or within 6 inches (15 cm) of it.
Doing so can cause excessive heat buildup and
damage to the fob. Placing the fob in close
proximity of the charging pad blocks the fob from
being detected by the vehicle and prevents the
vehicle from starting.
WARNING!
Never leave children alone in a vehicle, or with
access to an unlocked vehicle. Allowing chil -
dren to be in a vehicle unattended is dangerous
for a number of reasons. A child or others could
be seriously or fatally injured. Children should
be warned not to touch the parking brake,
brake pedal or the gear selector.
Do not leave the key fob in or near the vehicle
or in a location accessible to children. A child
could operate power windows, other controls,
or move the vehicle.
22_VF_OM_EN_USC_t.book Page 48