height adjustment RAM PROMASTER 2022 Owners Manual
[x] Cancel search | Manufacturer: RAM, Model Year: 2022, Model line: PROMASTER, Model: RAM PROMASTER 2022Pages: 268, PDF Size: 13.26 MB
Page 25 of 268

GETTING TO KNOW YOUR VEHICLE23
STEERING WHEEL
TELESCOPING STEERING COLUMN
This feature allows you to lengthen or shorten the
steering column. The telescoping control handle is
located below the steering wheel at the end of the
steering column.
Telescoping Control Handle
To unlock the steering column, pull the control
handle up. To lengthen or shorten the steering
column, pull the steering wheel outward or push it
inward as desired. To lock the steering column in
position, push the control handle down until fully
engaged.
SEATS
Seats are a part of the Occupant Restraint system
of the vehicle.
MANUAL ADJUSTMENTS
The driver and passenger seats can be adjusted
forward/rearward and reclined. Front and rear height
and lumbar can also be adjusted (if equipped).
Seat Adjustment (Without Swivel Seat)
WARNING!
Do not adjust the steering column while driving.
Adjusting the steering column while driving or
driving with the steering column unlocked, could
cause the driver to lose control of the vehicle.
Failure to follow this warning may result in
serious injury or death.
WARNING!
It is dangerous to ride in a cargo area, inside
or outside of a vehicle. In a collision, people
riding in these areas are more likely to be seri -
ously injured or killed.
Do not allow people to ride in any area of your
vehicle that is not equipped with seats and
seat belts. In a collision, people riding in these
areas are more likely to be seriously injured or
killed.
Be sure everyone in your vehicle is in a seat
and using a seat belt properly.
1 — Forward/Rearward Adjustment Bar
2 — Front Height Adjustment Lever
3 — Rear Height Adjustment Lever
4 — Recliner Knob
5 — Lumbar Knob
2
22_VF_OM_EN_USC_t.book Page 23
Page 26 of 268

24GETTING TO KNOW YOUR VEHICLE
(Continued)
Seat Adjustment (With Swivel Seat)
Forward And Rearward Adjustment
The adjustment bar is at the front of the seat, near
the floor. Pull the bar upward to move the seat
forward or rearward. Release the bar once the
seat is in the desired position. Then, using body
pressure, move forward and rearward on the seat
to be sure that the seat adjusters have latched.
Height Adjustment
Without Swivel Seat
The height adjustment levers are located on the
center outboard side of the seat. Lift up on the
front lever to adjust the front of the seat, or lift up
on the rear lever to adjust the rear of the seat.
To raise the front or rear of the seat, lift the
appropriate lever while none or minimal weight
is applied to the seat.
To lower the front or rear of the seat, lift the
appropriate lever while seated or applying
weight to the seat.
With Swivel Seat
The height adjustment knobs are located on the
center outboard side of the seat. Rotate the front
knob to adjust the front of the seat up or down.
Rotate the rear knob to adjust the rear of the seat
up or down.
Recliner Adjustment
Without Swivel Seat
The recliner knob is on the rear outboard side of the
seat. To recline the seatback, lean back, rotate the
knob rearward to position the seatback as desired.
To return the seatback to its normal upright position,
lean forward, rotate the knob forward until the
seatback is in the upright position.
With Swivel Seat
The recliner lever is located at the lower front
outboard side of the seat. To recline the seatback,
lean forward slightly, pull the lever outward, lean
back to the desired position and release the lever.
To return the seatback to its normal upright
position, lean forward and pull the lever outward.
Release the lever once the seatback is in the
upright position.
1 — Lumbar Knob
2 — Recline Lever
3 — Forward/Rearward Adjustment Bar
4 — Front Height Adjustment Knob
5 — Rear Height Adjustment Knob
WARNING!
Adjusting a seat while driving may be
dangerous. Moving a seat while driving could
result in loss of control which could cause a
collision and serious injury or death.
Seats should be adjusted before fastening the
seat belts and while the vehicle is parked.
Serious injury or death could result from a
poorly adjusted seat belt.
WARNING!
Adjusting a seat while the vehicle is moving is
dangerous. The sudden movement of the seat
could cause you to lose control. The seat belt
might not be adjusted properly and you could
be injured. Adjust the seat only while the
vehicle is parked.
22_VF_OM_EN_USC_t.book Page 24
Page 30 of 268

28GETTING TO KNOW YOUR VEHICLE
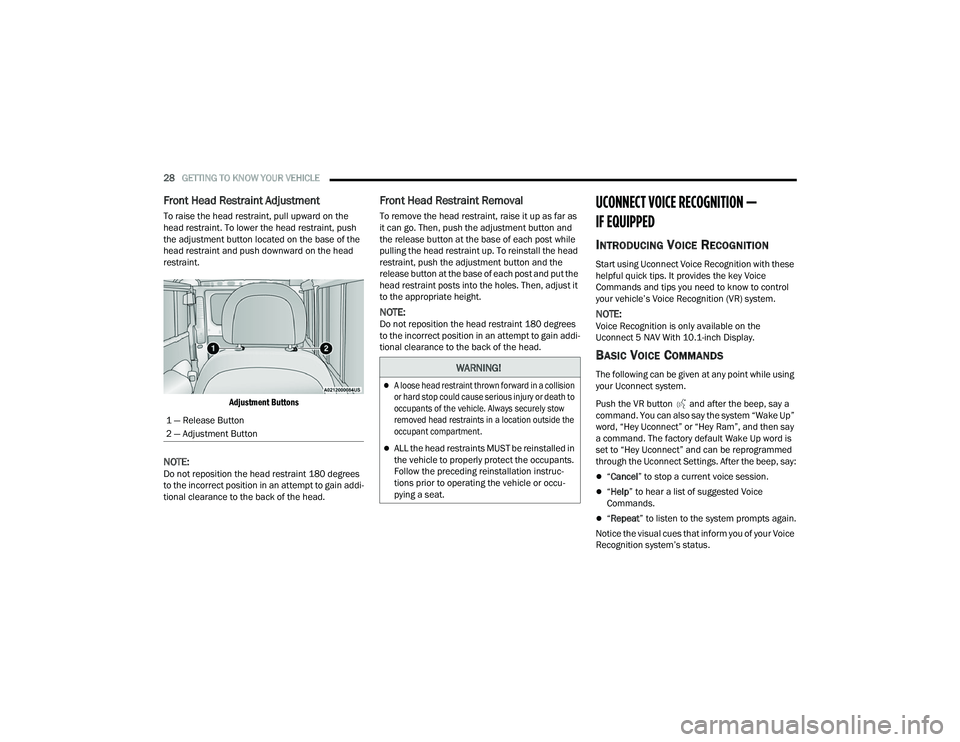
Front Head Restraint Adjustment
To raise the head restraint, pull upward on the
head restraint. To lower the head restraint, push
the adjustment button located on the base of the
head restraint and push downward on the head
restraint.
Adjustment Buttons
NOTE:Do not reposition the head restraint 180 degrees
to the incorrect position in an attempt to gain addi -
tional clearance to the back of the head.
Front Head Restraint Removal
To remove the head restraint, raise it up as far as
it can go. Then, push the adjustment button and
the release button at the base of each post while
pulling the head restraint up. To reinstall the head
restraint, push the adjustment button and the
release button at the base of each post and put the
head restraint posts into the holes. Then, adjust it
to the appropriate height.
NOTE:Do not reposition the head restraint 180 degrees
to the incorrect position in an attempt to gain addi -
tional clearance to the back of the head.
UCONNECT VOICE RECOGNITION —
IF EQUIPPED
INTRODUCING VOICE RECOGNITION
Start using Uconnect Voice Recognition with these
helpful quick tips. It provides the key Voice
Commands and tips you need to know to control
your vehicle’s Voice Recognition (VR) system.
NOTE:Voice Recognition is only available on the
Uconnect 5 NAV With 10.1-inch Display.
BASIC VOICE COMMANDS
The following can be given at any point while using
your Uconnect system.
Push the VR button and after the beep, say a
command. You can also say the system “Wake Up”
word, “Hey Uconnect” or “Hey Ram”, and then say
a command. The factory default Wake Up word is
set to “Hey Uconnect” and can be reprogrammed
through the Uconnect Settings. After the beep, say:
“ Cancel ” to stop a current voice session.
“Help ” to hear a list of suggested Voice
Commands.
“ Repeat ” to listen to the system prompts again.
Notice the visual cues that inform you of your Voice
Recognition system’s status.
1 — Release Button
2 — Adjustment Button
WARNING!
A loose head restraint thrown forward in a collision
or hard stop could cause serious injury or death to
occupants of the vehicle. Always securely stow
removed head restraints in a location outside the
occupant compartment.
ALL the head restraints MUST be reinstalled in
the vehicle to properly protect the occupants.
Follow the preceding reinstallation instruc
-
tions prior to operating the vehicle or occu -
pying a seat.
22_VF_OM_EN_USC_t.book Page 28
Page 160 of 268

158SAFETY
Lap/Shoulder Belt Untwisting Procedure
Use the following procedure to untwist a twisted
lap/shoulder belt.
1. Position the latch plate as close as possible to
the anchor point.
2. At about 6 to 12 inches (15 to 30 cm) above the latch plate, grab and twist the seat belt
webbing 180 degrees to create a fold that
begins immediately above the latch plate.
3. Slide the latch plate upward over the folded webbing. The folded webbing must enter the
slot at the top of the latch plate.
4. Continue to slide the latch plate up until it clears the folded webbing and the seat belt is
no longer twisted.
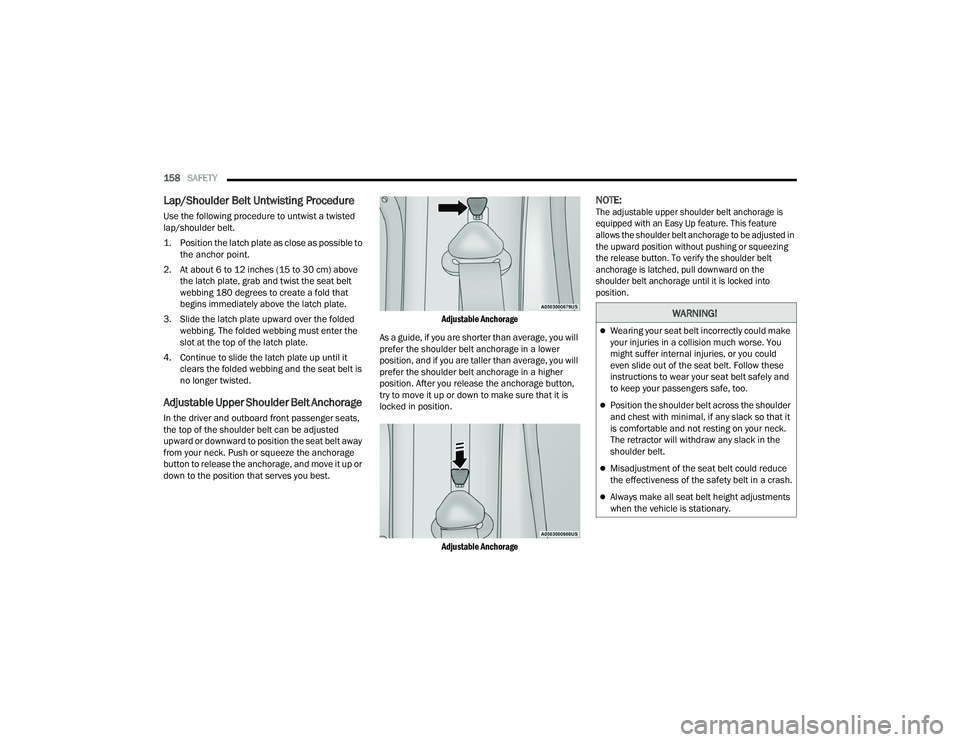
Adjustable Upper Shoulder Belt Anchorage
In the driver and outboard front passenger seats,
the top of the shoulder belt can be adjusted
upward or downward to position the seat belt away
from your neck. Push or squeeze the anchorage
button to release the anchorage, and move it up or
down to the position that serves you best.
Adjustable Anchorage
As a guide, if you are shorter than average, you will
prefer the shoulder belt anchorage in a lower
position, and if you are taller than average, you will
prefer the shoulder belt anchorage in a higher
position. After you release the anchorage button,
try to move it up or down to make sure that it is
locked in position.
Adjustable Anchorage
NOTE:
The adjustable upper shoulder belt anchorage is
equipped with an Easy Up feature. This feature
allows the shoulder belt anchorage to be adjusted in
the upward position without pushing or squeezing
the release button. To verify the shoulder belt
anchorage is latched, pull downward on the
shoulder belt anchorage until it is locked into
position.
WARNING!
Wearing your seat belt incorrectly could make
your injuries in a collision much worse. You
might suffer internal injuries, or you could
even slide out of the seat belt. Follow these
instructions to wear your seat belt safely and
to keep your passengers safe, too.
Position the shoulder belt across the shoulder
and chest with minimal, if any slack so that it
is comfortable and not resting on your neck.
The retractor will withdraw any slack in the
shoulder belt.
Misadjustment of the seat belt could reduce
the effectiveness of the safety belt in a crash.
Always make all seat belt height adjustments
when the vehicle is stationary.
22_VF_OM_EN_USC_t.book Page 158