parking brake RAM PROMASTER 2023 Owner's Guide
[x] Cancel search | Manufacturer: RAM, Model Year: 2023, Model line: PROMASTER, Model: RAM PROMASTER 2023Pages: 296, PDF Size: 12.31 MB
Page 213 of 296
IN CASE OF EMERGENCY211
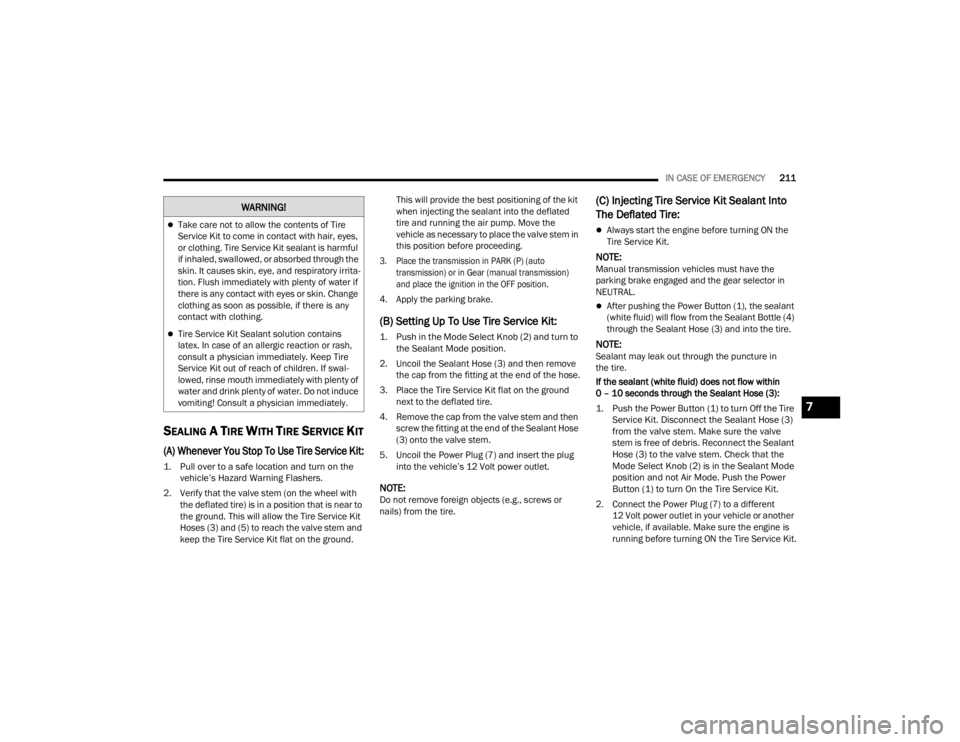
SEALING A TIRE WITH TIRE SERVICE KIT
(A) Whenever You Stop To Use Tire Service Kit:
1. Pull over to a safe location and turn on the
vehicle’s Hazard Warning Flashers.
2. Verify that the valve stem (on the wheel with the deflated tire) is in a position that is near to
the ground. This will allow the Tire Service Kit
Hoses (3) and (5) to reach the valve stem and
keep the Tire Service Kit flat on the ground. This will provide the best positioning of the kit
when injecting the sealant into the deflated
tire and running the air pump. Move the
vehicle as necessary to place the valve stem in
this position before proceeding.
3. Place the transmission in PARK (P) (auto transmission) or in Gear (manual transmission)
and place the ignition in the OFF position.
4. Apply the parking brake.
(B) Setting Up To Use Tire Service Kit:
1. Push in the Mode Select Knob (2) and turn to the Sealant Mode position.
2. Uncoil the Sealant Hose (3) and then remove the cap from the fitting at the end of the hose.
3. Place the Tire Service Kit flat on the ground next to the deflated tire.
4. Remove the cap from the valve stem and then screw the fitting at the end of the Sealant Hose
(3) onto the valve stem.
5. Uncoil the Power Plug (7) and insert the plug into the vehicle’s 12 Volt power outlet.
NOTE:Do not remove foreign objects (e.g., screws or
nails) from the tire.
(C) Injecting Tire Service Kit Sealant Into
The Deflated Tire:
Always start the engine before turning ON the
Tire Service Kit.
NOTE:Manual transmission vehicles must have the
parking brake engaged and the gear selector in
NEUTRAL.
After pushing the Power Button (1), the sealant
(white fluid) will flow from the Sealant Bottle (4)
through the Sealant Hose (3) and into the tire.
NOTE:Sealant may leak out through the puncture in
the tire.
If the sealant (white fluid) does not flow within
0 – 10 seconds through the Sealant Hose (3):
1. Push the Power Button (1) to turn Off the Tire Service Kit. Disconnect the Sealant Hose (3)
from the valve stem. Make sure the valve
stem is free of debris. Reconnect the Sealant
Hose (3) to the valve stem. Check that the
Mode Select Knob (2) is in the Sealant Mode
position and not Air Mode. Push the Power
Button (1) to turn On the Tire Service Kit.
2. Connect the Power Plug (7) to a different 12 Volt power outlet in your vehicle or another
vehicle, if available. Make sure the engine is
running before turning ON the Tire Service Kit.
Take care not to allow the contents of Tire
Service Kit to come in contact with hair, eyes,
or clothing. Tire Service Kit sealant is harmful
if inhaled, swallowed, or absorbed through the
skin. It causes skin, eye, and respiratory irrita -
tion. Flush immediately with plenty of water if
there is any contact with eyes or skin. Change
clothing as soon as possible, if there is any
contact with clothing.
Tire Service Kit Sealant solution contains
latex. In case of an allergic reaction or rash,
consult a physician immediately. Keep Tire
Service Kit out of reach of children. If swal -
lowed, rinse mouth immediately with plenty of
water and drink plenty of water. Do not induce
vomiting! Consult a physician immediately.
WARNING!
7
23_VF_OM_EN_USC_t.book Page 211
Page 216 of 296

214IN CASE OF EMERGENCY
(Continued)
JUMP STARTING
If your vehicle has a discharged battery, it can be jump
started using a set of jumper cables and a battery in
another vehicle or by using a portable battery booster
pack. Jump starting can be dangerous if done
improperly, so please follow the procedures in this
section carefully.
NOTE:When using a portable battery booster pack, follow
the manufacturer’s operating instructions and
precautions.
PREPARATIONS FOR JUMP START
The vehicle’s jump starting remote posts are located
under the hood, in the engine compartment on the
driver's side.
The Remote positive (+) Post is covered with a
protective cap located on the side of the Front
Power Distribution Center.
The Remote negative (-) Post is located on the core
support closest to the front of the vehicle.
Jump Starting Locations
See the following steps to prepare for jump
starting:
1. Apply the parking brake, shift the automatic
transmission into PARK (P) and turn the
ignition to the OFF position.
2. Turn off the heater, radio, and all electrical accessories.
3. Pull upward and remove the protective cover over the remote positive (+) battery post.
4. If using another vehicle to jump start the battery, park the vehicle within the reach of the
jumper cables, apply the parking brake and
make sure the ignition is OFF.
WARNING!
Do not attempt jump starting if the battery is
frozen. It could rupture or explode and cause
personal injury.
CAUTION!
Do not use a portable battery booster pack or
any other booster source with a system voltage
greater than 12 Volts or damage to the battery,
starter motor, alternator or electrical system
may occur.
Remote Positive (+) Post
Remote Negative (-) Post
WARNING!
Do not allow vehicles to touch each other as
this could establish a ground connection and
personal injury could result.
Take care to avoid the radiator cooling fan
whenever the hood is raised. It can start
anytime the ignition switch is ON. You can be
injured by moving fan blades.
23_VF_OM_EN_USC_t.book Page 214
Page 219 of 296

IN CASE OF EMERGENCY217
GEAR SELECTOR OVERRIDE
If a malfunction occurs and the gear selector
cannot be moved out of the PARK (P) position, you
can use the following procedure to temporarily
move the gear selector:
1. Turn the engine OFF.
2. Firmly apply the parking brake.
3. Using a small screwdriver or similar tool,
remove the shifter boot material of the gear
selector by pulling up to carefully separate the
gear selector bezel and boot assembly from
the console.
Shifter Boot And Bezel
4. Press and maintain firm pressure on the brake
pedal.
5. Insert the screwdriver or similar tool into the gear selector override release and push down
while depressing the shifter button at the
same time.
Gear Selector Override Release Lever
6. Move the gear selector to the NEUTRAL (N) position.
7. The vehicle may then be started in NEUTRAL.
8. Reinstall the shifter boot and bezel.
WARNING!
You or others can be badly burned by hot engine
coolant (antifreeze) or steam from your radiator.
If you see or hear steam coming from under the
hood, do not open the hood until the radiator
has had time to cool. Never try to open a cooling
system pressure cap when the radiator or
coolant bottle is hot.
CAUTION!
Driving with a hot cooling system could damage
your vehicle. If the temperature gauge reads
HOT (H), pull over and stop the vehicle. Idle the
vehicle with the air conditioner turned off until
the pointer drops back into the normal range.
If the pointer remains on HOT (H), and you
hear continuous chimes, turn the engine off
immediately and call for service.
7
23_VF_OM_EN_USC_t.book Page 217
Page 224 of 296

222SERVICING AND MAINTENANCE
MAINTENANCE PLAN
Refer to the maintenance plan for the required maintenance intervals. More frequent maintenance may be needed in severe conditions, such as dusty areas
and very short trip driving. In some extreme conditions, additional maintenance not specified in the maintenance schedule may be required.
At Every Oil Change Interval As Indicated By Oil Change Indicator System:
Change oil and filter.
Rotate the tires at the first sign of irregular wear, even if it occurs before the oil indicator system turns on.
Inspect battery and clean and tighten terminals as required.
Inspect the CV/Universal joints.
Inspect brake pads, shoes, rotors, drums, hoses and parking brake.
Inspect engine cooling system protection and hoses.
Inspect exhaust system.
Inspect engine air cleaner filter if using in dusty or off-road conditions.
Inspect and replace the Evaporative System Fresh Air Filter as necessary, replacement may be more frequent if vehicle is operated in extreme dusty conditions.
23_VF_OM_EN_USC_t.book Page 222
Page 264 of 296

262SERVICING AND MAINTENANCE
WHEEL AND WHEEL TRIM CARE
All wheels and wheel trim, especially aluminum and
chrome plated wheels, should be cleaned regularly
using mild (neutral Ph) soap and water to maintain their
luster and to prevent corrosion. Wash wheels with the
same soap solution recommended for the body of the
vehicle and remember to always wash when the
surfaces are not hot to the touch.
Your wheels are susceptible to deterioration
caused by salt, sodium chloride, magnesium
chloride, calcium chloride, etc., and other road
chemicals used to melt ice or control dust on dirt
roads. Use a soft cloth or sponge and mild soap to
wipe away promptly. Do not use harsh chemicals or
a stiff brush. They can damage the wheel’s protective coating that helps keep them from
corroding and tarnishing.
When cleaning extremely dirty wheels including
excessive brake dust, care must be taken in the
selection of tire and wheel cleaning chemicals and
equipment to prevent damage to the wheels.
Mopar® Wheel Treatment or Mopar® Chrome
Cleaner or their equivalent is recommended or
select a non-abrasive, non-acidic cleaner for
aluminum or chrome wheels.
NOTE:If you intend parking or storing your vehicle for an
extended period after cleaning the wheels with
wheel cleaner, drive your vehicle and apply the
brakes to remove the water droplets from the
brake components. This activity will remove the
red rust on the brake rotors and prevent vehicle
vibration when braking.
Dark Vapor Chrome, Black Satin Chrome, or Low
Gloss Clear Coat WheelsWARNING!
Limited use spares are for emergency use only.
Installation of this limited use spare tire affects
vehicle handling. With this tire, do not drive more
than the speed listed on the limited use spare wheel.
Keep inflated to the cold tire inflation pressures
listed on your Tire And Loading Information Placard
located on the driver’s side B-pillar or the rear edge
of the driver’s side door. Replace (or repair) the
original equipment tire at the first opportunity and
reinstall it on your vehicle. Failure to do so could
result in loss of vehicle control.
CAUTION!
Avoid products or automatic car washes that use
acidic solutions or strong alkaline additives or
harsh brushes. Many aftermarket wheel
cleaners and automatic car washes may
damage the wheel's protective finish. Such
damage is not covered by the New Vehicle
Limited Warranty. Only car wash soap, Mopar®
Wheel Cleaner or equivalent is recommended.
CAUTION!
Do not use scouring pads, steel wool, a bristle
brush, metal polishes or oven cleaner. These
products may damage the wheel's protective
finish. Such damage is not covered by the New
Vehicle Limited Warranty. Only car wash soap,
Mopar® Wheel Cleaner or equivalent is
recommended.
CAUTION!
If your vehicle is equipped with these specialty
wheels, DO NOT USE wheel cleaners, abrasives, or
polishing compounds. They will permanently damage
this finish and such damage is not covered by the
New Vehicle Limited Warranty. HAND WASH ONLY
USING MILD SOAP AND WATER WITH A SOFT CLOTH.
Used on a regular basis; this is all that is required to
maintain this finish.
23_VF_OM_EN_USC_t.book Page 262
Page 271 of 296
269
TECHNICAL SPECIFICATIONS
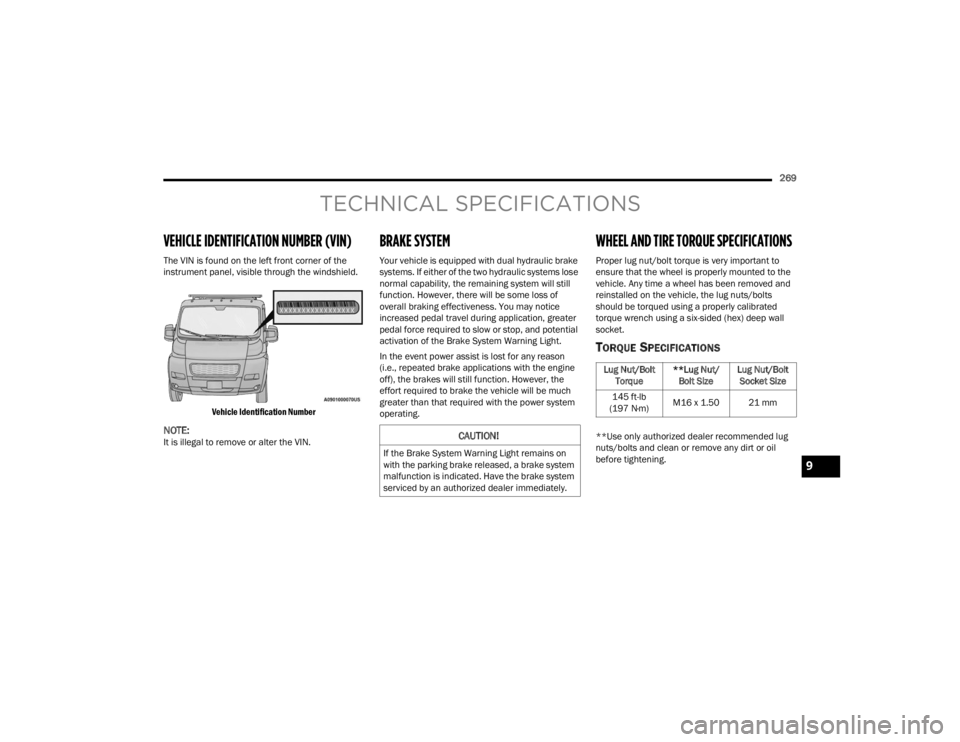
VEHICLE IDENTIFICATION NUMBER (VIN)
The VIN is found on the left front corner of the
instrument panel, visible through the windshield.
Vehicle Identification Number
NOTE:It is illegal to remove or alter the VIN.
BRAKE SYSTEM
Your vehicle is equipped with dual hydraulic brake
systems. If either of the two hydraulic systems lose
normal capability, the remaining system will still
function. However, there will be some loss of
overall braking effectiveness. You may notice
increased pedal travel during application, greater
pedal force required to slow or stop, and potential
activation of the Brake System Warning Light.
In the event power assist is lost for any reason
(i.e., repeated brake applications with the engine
off), the brakes will still function. However, the
effort required to brake the vehicle will be much
greater than that required with the power system
operating.
WHEEL AND TIRE TORQUE SPECIFICATIONS
Proper lug nut/bolt torque is very important to
ensure that the wheel is properly mounted to the
vehicle. Any time a wheel has been removed and
reinstalled on the vehicle, the lug nuts/bolts
should be torqued using a properly calibrated
torque wrench using a six-sided (hex) deep wall
socket.
TORQUE SPECIFICATIONS
**Use only authorized dealer recommended lug
nuts/bolts and clean or remove any dirt or oil
before tightening.CAUTION!
If the Brake System Warning Light remains on
with the parking brake released, a brake system
malfunction is indicated. Have the brake system
serviced by an authorized dealer immediately.
Lug Nut/Bolt Torque **Lug Nut/
Bolt Size Lug Nut/Bolt
Socket Size
145 ft-lb
(197 N·m) M16 x 1.50 21 mm
9
23_VF_OM_EN_USC_t.book Page 269
Page 285 of 296

283
INDEX
A
Active Driving Assist....................................... 100Active Speed Limiter........................................ 86Adaptive Cruise Control (ACC)
(Cruise Control)................................................ 87Adding Engine Coolant (Antifreeze)............... 233Adding Washing Fluid.................................... 226Additives, Fuel............................................... 271Air Bag........................................................... 179Air Bag Operation...................................... 180Air Bag Warning Light................................ 178Enhanced Accident Response...................220Event Data Recorder (EDR)....................... 220If Deployment Occurs................................ 183Maintaining Your Air Bag System.............. 184Maintenance............................................. 184Side Air Bags............................................. 180Transporting Pets...................................... 190Air Bag Light..................................65, 178, 190Air Cleaner, Engine (Engine Air
Cleaner Filter)...................................... 228, 229Air Conditioner Maintenance......................... 229Air Conditioner Refrigerant.................. 229, 230Air Conditioner System.................................. 229Air Conditioning Filter............................. 43, 230Air Conditioning, Operating Tips................ 43, 44
Air Filter........................................................ 228Air PressureTires......................................................... 256AlarmSecurity Alarm...................................... 20, 68Alarm SystemSecurity Alarm............................................. 20Alterations/ModificationsVehicle........................................................... 8Antifreeze (Engine Coolant)................. 233, 273Disposal................................................... 234Anti-Lock Brake System (ABS)...................... 152Anti-Lock Warning Light................................... 68Assist, Hill Start............................................. 155Audio Systems (Radio).................................. 133Auto Down Power Windows............................. 49Auto Up Power Windows.................................. 49Automatic Door Locks...................................... 23Automatic Headlights....................................... 34Automatic High Beams.................................... 34Automatic Transmission.........................81, 236Adding Fluid.............................................. 236Fluid And Filter Change............................ 236Fluid Change............................................ 236Fluid Level Check..................................... 236
Fluid Type........................................ 236, 274Special Additives...................................... 236AUX Cord..........................................................45Auxiliary Driving Systems.............................. 158
B
Base / Midline Instrument Cluster
S
............53Battery................................................... 66, 227Charging System Light.................................66Keyless Key Fob Replacement....................14Belts, Seat.................................................... 190Blind Spot Monitoring................................... 158Body Builders Guide........................................... 8Body Mechanism Lubrication........................ 231B-Pillar Location............................................ 253Brake Assist System..................................... 153Brake Control System, Electronic.................. 153Brake Fluid........................................... 235, 274Brake System....................................... 235, 269Anti-Lock (ABS)......................................... 152Fluid Check............................................... 235Master Cylinder........................................ 235Parking........................................................78Warning Light...............................................6611
23_VF_OM_EN_USC_t.book Page 283
Page 287 of 296

285
E
Electric Brake Control System
....................... 153Electric Parking Brake..................................... 78Electric Remote Mirrors................................... 32Electrical Power Outlets................................... 46Electronic Speed Control (Cruise Control)........ 88Electronic Stability Control (ESC)...................154Electronic Throttle Control Warning Light........ 67Emergency Braking........................................ 167Emergency, In Case Of Freeing Vehicle When Stuck...................... 218Jacking...................................................... 196Jump Starting............................................ 214Emission Control System Maintenance........... 74Engine........................................................... 225Air Cleaner................................................. 228Block Heater............................................... 77Break-In Recommendations........................ 78Checking Oil Level..................................... 226Compartment............................................ 225Compartment Identification...................... 225Coolant (Antifreeze)......................... 233, 273Cooling...................................................... 233Exhaust Gas Caution................................. 192Fails To Start............................................... 77Flooded, Starting......................................... 77Fuel Requirements.......................... 270, 273Jump Starting............................................ 214
Oil.................................................... 228, 273Oil Filler Cap............................................. 225Oil Filter.................................................... 228Oil Selection.................................... 228, 273Oil Synthetic............................................. 228Overheating.............................................. 216Starting........................................................ 76Enhanced Accident Response Feature......... 220Entry System, Illuminated................................ 38Ethanol......................................................... 271Exhaust Gas Cautions................................... 192Exhaust System................................... 192, 232Exterior Lights.........................................33, 191
F
FiltersAir Cleaner
................................................ 228Air Conditioning..................................43, 230Engine Oil................................................. 228Engine Oil Disposal................................... 228FlashersHazard Warning........................................ 193Turn Signals............................................. 191Flat Tire Changing................................ 249, 260Flat Tire Stowage................................. 249, 260Flooded Engine Starting................................... 77Fluid Capacities............................................ 273Fluid Leaks................................................... 191
Fluid Level ChecksAutomatic Transmission........................... 236Brake........................................................ 235Cooling System......................................... 233Engine Oil................................................. 226Fog Lights........................................................35Fold-Flat Seats.................................................23Forward Collision Warning............................ 164Four-Way Hazard Flasher.............................. 193Freeing A Stuck Vehicle................................. 218Fuel............................................................... 270Additives................................................... 271Clean Air................................................... 271Ethanol..................................................... 271Filler Cap (Gas Cap).................................. 122Gasoline................................................... 270Materials Added....................................... 271Methanol.................................................. 271Octane Rating.................................. 270, 273Requirements.................................. 270, 273Tank Capacity........................................... 273Fuses............................................................ 236
G
Gas Cap (Fuel Filler Cap)...................... 122, 123Gasoline, Clean Air........................................ 271Gasoline, Reformulated................................ 27111
23_VF_OM_EN_USC_t.book Page 285
Page 290 of 296

288 Operator Manual Owner's Manual
........................................ 279Outside Rearview Mirrors......................... 30, 31Overheating, Engine...................................... 216
P
Paint Care...................................................... 265Parking Brake.................................................. 78ParkSenseFront And Rear.......................................... 104ParkSense Active Park Assist........................ 112ParkSense System, Rear............................... 104Passing Light................................................... 34Passive Entry................................................... 22Pedestrian Warning System.......................... 167Personal Settings............................................ 59Pets............................................................... 190Placard, Tire And Loading Information........... 253PowerInverter........................................................ 47Mirrors......................................................... 32Outlet (Auxiliary Electrical Outlet)................ 46Steering....................................................... 85Windows...................................................... 49Pregnant Women And Seat Belts...................176Preparation For Jacking....................... 196, 197
R
Radial Ply Tires.............................................. 257Radiator Cap (Coolant Pressure Cap)............ 234
RadioSound Setting........................................... 147Radio Operation............................................ 151Rain Sensitive Wiper System........................... 39Rear Camera........................................ 119, 120Rear Cross Path............................................ 161Rear ParkSense System............................... 104Rearview Mirror............................................... 30Recreational Towing..................................... 130Reformulated Gasoline................................. 271Refrigerant.................................................... 230Release, Hood................................................. 50Reminder, Seat Belt...................................... 171Remote Keyless EntryProgramming Additional Key Fobs............... 15Remote StartingExit Remote Start Mode.............................. 19Remote Starting System.................................. 18Replacement Bulbs...................................... 244Replacement Keys........................................... 15Replacement Tires........................................ 259Reporting Safety Defects.............................. 278Restraints, Child........................................... 185Restraints, Head.............................................. 28Rotation, Tires.............................................. 264
S
Safety Checks Inside Vehicle........................ 190Safety Checks Outside Vehicle..................... 191Safety Defects, Reporting............................. 278
Safety Information, Tire................................. 249Safety Tips.................................................... 189Safety, Exhaust Gas...................................... 192Schedule, Maintenance................................ 221Seat Belts............................................ 171, 190Adjustable Shoulder Belt.......................... 175Adjustable Upper Shoulder Anchorage..... 175Adjustable Upper Shoulder Belt Anchorage............................................ 175Automatic Locking Retractor (ALR)........... 176Child Restraints........................................ 185Energy Management Feature................... 176Front Seat............................... 171, 172, 174Inspection................................................. 190Lap/Shoulder Belt Operation.................... 174Lap/Shoulder Belt Untwisting................... 174Lap/Shoulder Belts................................... 172Operating Instructions.............................. 174Pregnant Women...................................... 176Rear Seat.................................................. 172Reminder.................................................. 171Untwisting Procedure................................ 174Seat Belts Maintenance................................ 267Seats................................................................23Adjustment..................................................23Heated.........................................................26Rear Folding................................................23Tilting...........................................................23Security Alarm...........................................20, 68Selection Of Coolant (Antifreeze).................. 273
23_VF_OM_EN_USC_t.book Page 288