audio RAM PROMASTER 2023 Owners Manual
[x] Cancel search | Manufacturer: RAM, Model Year: 2023, Model line: PROMASTER, Model: RAM PROMASTER 2023Pages: 296, PDF Size: 12.31 MB
Page 47 of 296
GETTING TO KNOW YOUR VEHICLE45
USB CONTROL — IF EQUIPPED
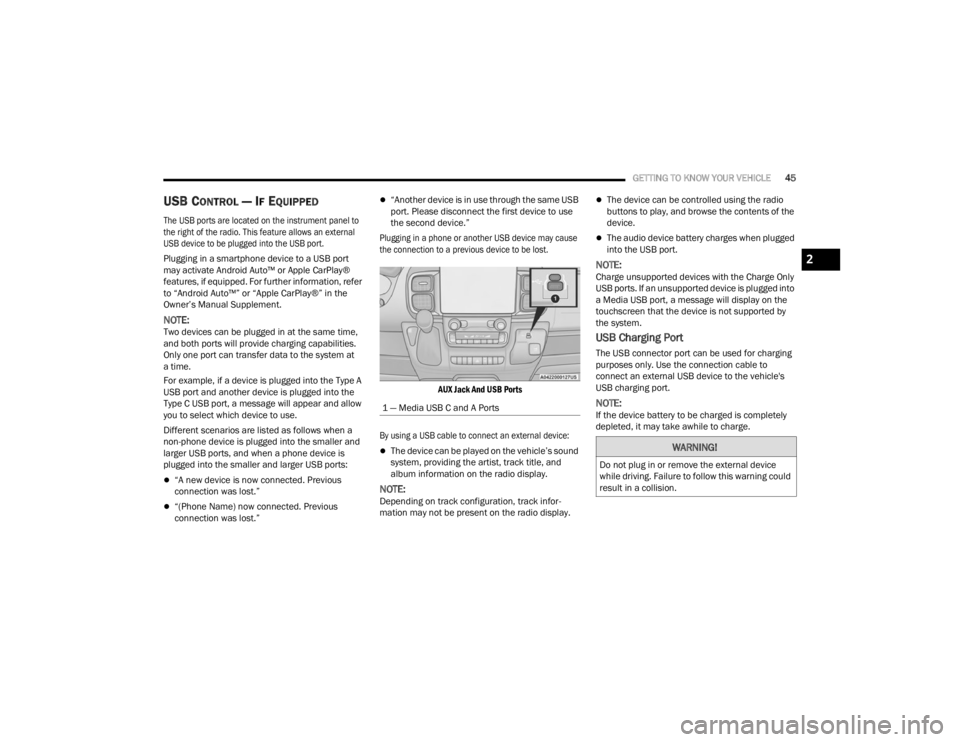
The USB ports are located on the instrument panel to
the right of the radio. This feature allows an external
USB device to be plugged into the USB port.
Plugging in a smartphone device to a USB port
may activate Android Auto™ or Apple CarPlay®
features, if equipped. For further information, refer
to “Android Auto™” or “Apple CarPlay®” in the
Owner’s Manual Supplement.
NOTE:Two devices can be plugged in at the same time,
and both ports will provide charging capabilities.
Only one port can transfer data to the system at
a time.
For example, if a device is plugged into the Type A
USB port and another device is plugged into the
Type C USB port, a message will appear and allow
you to select which device to use.
Different scenarios are listed as follows when a
non-phone device is plugged into the smaller and
larger USB ports, and when a phone device is
plugged into the smaller and larger USB ports:
“A new device is now connected. Previous
connection was lost.”
“(Phone Name) now connected. Previous
connection was lost.”
“Another device is in use through the same USB
port. Please disconnect the first device to use
the second device.”
Plugging in a phone or another USB device may cause
the connection to a previous device to be lost.
AUX Jack And USB Ports
By using a USB cable to connect an external device:
The device can be played on the vehicle’s sound
system, providing the artist, track title, and
album information on the radio display.
NOTE:Depending on track configuration, track infor -
mation may not be present on the radio display.
The device can be controlled using the radio
buttons to play, and browse the contents of the
device.
The audio device battery charges when plugged
into the USB port.
NOTE:Charge unsupported devices with the Charge Only
USB ports. If an unsupported device is plugged into
a Media USB port, a message will display on the
touchscreen that the device is not supported by
the system.
USB Charging Port
The USB connector port can be used for charging
purposes only. Use the connection cable to
connect an external USB device to the vehicle's
USB charging port.
NOTE:If the device battery to be charged is completely
depleted, it may take awhile to charge.
1 — Media USB C and A Ports
WARNING!
Do not plug in or remove the external device
while driving. Failure to follow this warning could
result in a collision.
2
23_VF_OM_EN_USC_t.book Page 45
Page 61 of 296
GETTING TO KNOW YOUR INSTRUMENT PANEL59
Audio
Push and release the up or down arrow
button until the Audio Menu icon/title is
highlighted in the instrument cluster display.
This menu will display the audio source
information, including the Song name, Artist name,
and audio source with an accompanying graphic.
Phone
This menu displays the current status of a phone
connected to the vehicle via Bluetooth®.
If no phone is connected, the menu will not
function when the OK button is pushed. Otherwise,
if a phone is connected, push the OK button to
enter the menu. The following items will display:
Recent calls: displays a list of the last 10 calls.
SMS reader: displays the last 10 text messages
and if they are read or unread.
Favorite numbers: displays a maximum of 10
favorite numbers.
Navigation
If activated, this menu item will display navigation
status and directions.
Messages
This menu item allows you to display the
information messages/malfunction stored.
The background color of the display varies
according to the priorities of the failure:
Failed Messages with low priority display in
yellow.
Failed Messages with high priority display in red.
SETTINGS
NOTE:Some items may be displayed and managed
through the Uconnect system. This may vary
according to your vehicle equipment. If equipped,
the following menu/submenu items are available
in the cluster display.
NOTE:If equipped, some customer programmable
features will display in the Uconnect system
Ú page 134.
3
23_VF_OM_EN_USC_t.book Page 59
Page 62 of 296

60GETTING TO KNOW YOUR INSTRUMENT PANEL
3.5 Inch Cluster Settings
*If Equipped
DisplayScreen Setup Top Left
Compass
Outside Temp
Date
Time
None
Center
Menu Title
Compass
Outside Temp
Date
Range To Empty
Average Economy
Current Economy
Odometer
Audio Info
None
Top Right
Compass
Outside Temp
Date
Time
None
23_VF_OM_EN_USC_t.book Page 60
Page 64 of 296

62GETTING TO KNOW YOUR INSTRUMENT PANEL
Safety & Assistance Warning Buzzer Volume
—Off, Low, Medium, High
Backup Alarm —On / Off
Forward Collision —Off, Audio, Audio Brake
Forward Collision Sensitivity —Near, Medium, Far
Side Distance Warning —On / Off
ParkSense —Sound, Sound + Display
Rear ParkSense Volume —Low, Medium, High
Front ParkSense Volume —Low, Medium, High
Lights Headlight Off Delay
—0, 30, 60, 90
Headlight Sensitivity —1, 2, 3
Greeting lights —0, 30, 60, 90
Cornering lights —On / Off
Headlights With Wipers —On / Off
Doors & Locks Auto Door Locks
—On / Off
Auto Unlock On Exit —On / Off
Sound Horn With Lock —Off - First Press
Off - Second Press
Flash Headlights With Lock —On / Off
Sound Horn With Remote Start —On / Off
Passive Entry —Off, All Doors, Approach Door,
or On / Off
*If Equipped
23_VF_OM_EN_USC_t.book Page 62
Page 66 of 296
64GETTING TO KNOW YOUR INSTRUMENT PANEL
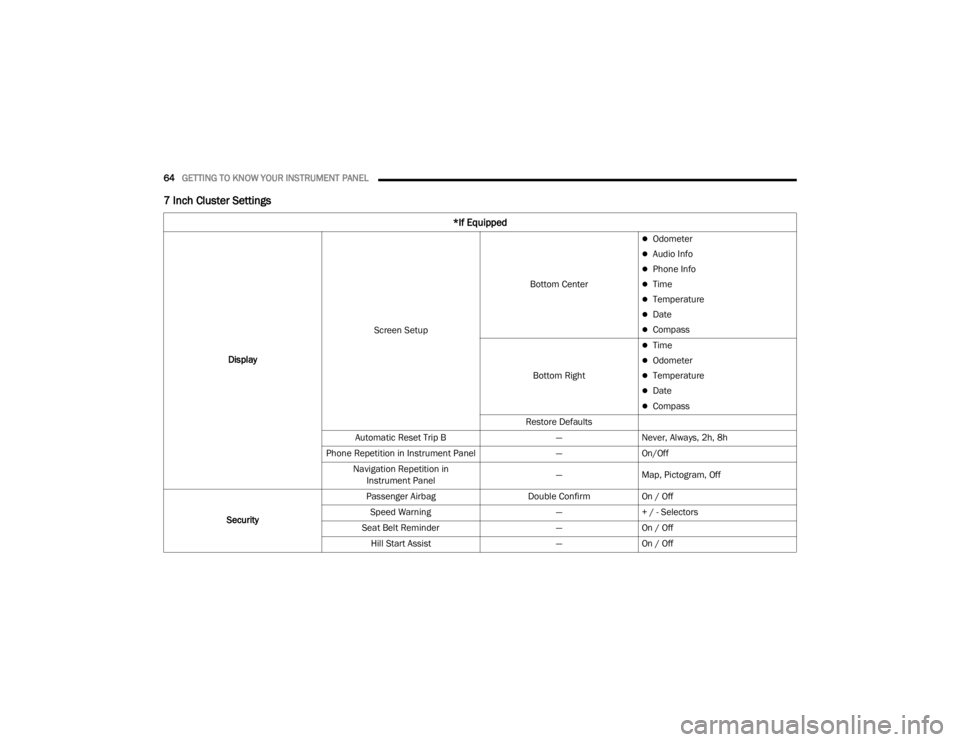
7 Inch Cluster Settings
*If Equipped
DisplayScreen Setup Bottom Center
Odometer
Audio Info
Phone Info
Time
Temperature
Date
Compass
Bottom Right
Time
Odometer
Temperature
Date
Compass
Restore Defaults
Automatic Reset Trip B —Never, Always, 2h, 8h
Phone Repetition in Instrument Panel —On/Off
Navigation Repetition in Instrument Panel —
Map, Pictogram, Off
Security Passenger Airbag
Double ConfirmOn / Off
Speed Warning —+ / - Selectors
Seat Belt Reminder —On / Off
Hill Start Assist —On / Off
23_VF_OM_EN_USC_t.book Page 64
Page 138 of 296
136MULTIMEDIA
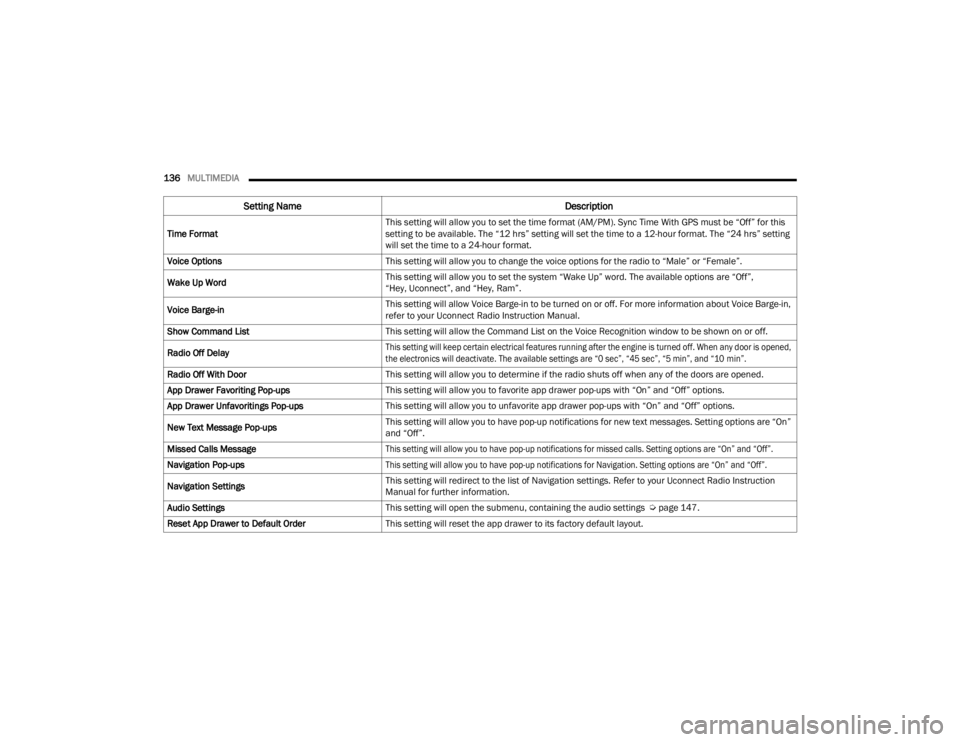
Time Format This setting will allow you to set the time format (AM/PM). Sync Time With GPS must be “Off” for this
setting to be available. The “12 hrs” setting will set the time to a 12-hour format. The “24 hrs” setting
will set the time to a 24-hour format.
Voice Options This setting will allow you to change the voice options for the radio to “Male” or “Female”.
Wake Up Word This setting will allow you to set the system “Wake Up” word. The available options are “Off”,
“Hey, Uconnect”, and “Hey, Ram”.
Voice Barge-in This setting will allow Voice Barge-in to be turned on or off. For more information about Voice Barge-in,
refer to your Uconnect Radio Instruction Manual.
Show Command List This setting will allow the Command List on the Voice Recognition window to be shown on or off.
Radio Off Delay
This setting will keep certain electrical features running after the engine is turned off. When any door is opened,
the electronics will deactivate. The available settings are “0 sec”, “45 sec”, “5 min”, and “10 min”.
Radio Off With Door This setting will allow you to determine if the radio shuts off when any of the doors are opened.
App Drawer Favoriting Pop-ups This setting will allow you to favorite app drawer pop-ups with “On” and “Off” options.
App Drawer Unfavoritings Pop-ups This setting will allow you to unfavorite app drawer pop-ups with “On” and “Off” options.
New Text Message Pop-ups This setting will allow you to have pop-up notifications for new text messages. Setting options are “On”
and “Off”.
Missed Calls Message
This setting will allow you to have pop-up notifications for missed calls. Setting options are “On” and “Off”.
Navigation Pop-ups
This setting will allow you to have pop-up notifications for Navigation. Setting options are “On” and “Off”.
Navigation Settings This setting will redirect to the list of Navigation settings. Refer to your Uconnect Radio Instruction
Manual for further information.
Audio Settings This setting will open the submenu, containing the audio settings Ú page 147.
Reset App Drawer to Default Order This setting will reset the app drawer to its factory default layout.
Setting Name Description
23_VF_OM_EN_USC_t.book Page 136
Page 143 of 296
MULTIMEDIA141
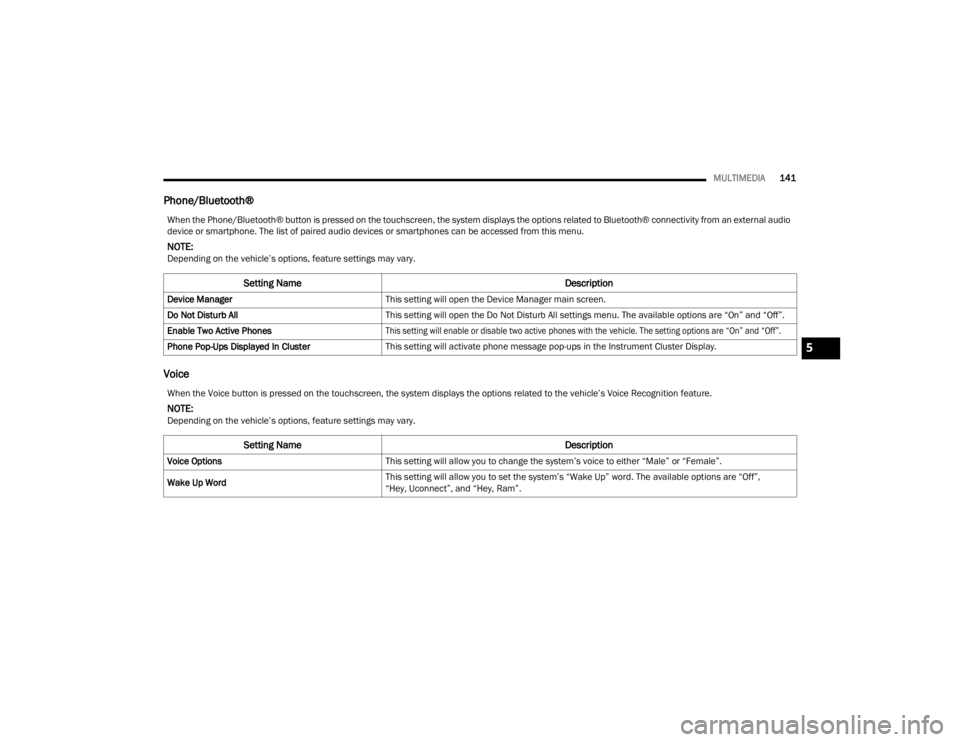
Phone/Bluetooth®
Voice
When the Phone/Bluetooth® button is pressed on the touchscreen, the system displays the options related to Bluetooth® connectivity from an external audio
device or smartphone. The list of paired audio devices or smartphones can be accessed from this menu.
NOTE:Depending on the vehicle’s options, feature settings may vary.
Setting Name Description
Device ManagerThis setting will open the Device Manager main screen.
Do Not Disturb All This setting will open the Do Not Disturb All settings menu. The available options are “On” and “Off”.
Enable Two Active Phones
This setting will enable or disable two active phones with the vehicle. The setting options are “On” and “Off”.
Phone Pop-Ups Displayed In Cluster This setting will activate phone message pop-ups in the Instrument Cluster Display.
When the Voice button is pressed on the touchscreen, the system displays the options related to the vehicle’s Voice Recognition feature.
NOTE:Depending on the vehicle’s options, feature settings may vary.
Setting Name Description
Voice OptionsThis setting will allow you to change the system’s voice to either “Male” or “Female”.
Wake Up Word This setting will allow you to set the system’s “Wake Up” word. The available options are “Off”,
“Hey, Uconnect”, and “Hey, Ram”.
5
23_VF_OM_EN_USC_t.book Page 141
Page 149 of 296
MULTIMEDIA147
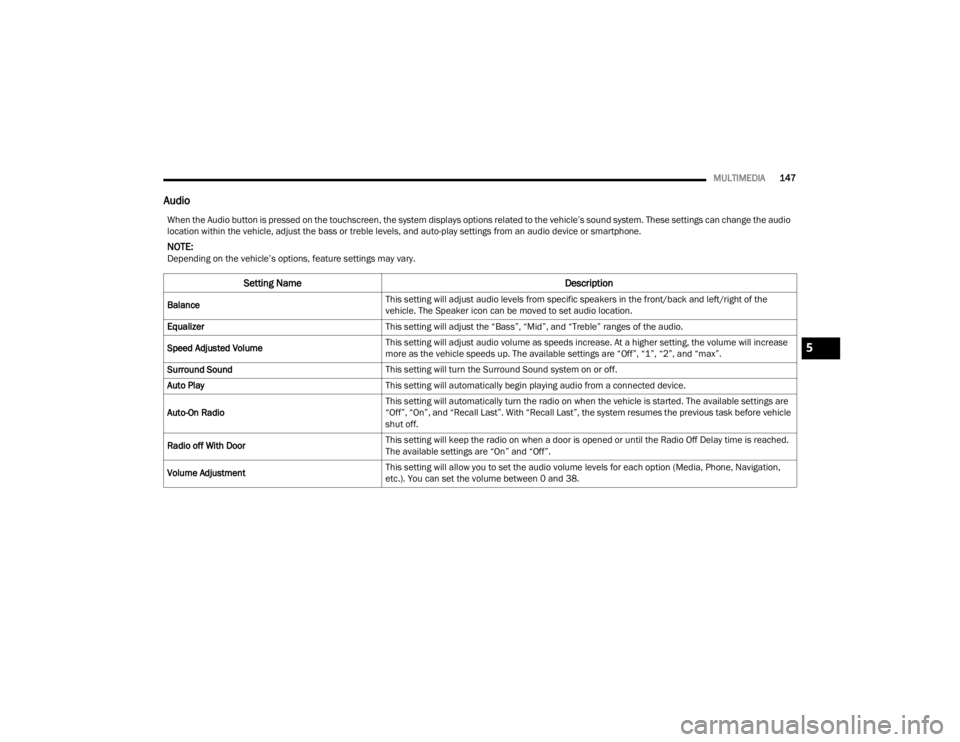
Audio
When the Audio button is pressed on the touchscreen, the system displays options related to the vehicle’s sound system. These settings can change the audio
location within the vehicle, adjust the bass or treble levels, and auto-play settings from an audio device or smartphone.
NOTE:Depending on the vehicle’s options, feature settings may vary.
Setting Name Description
BalanceThis setting will adjust audio levels from specific speakers in the front/back and left/right of the
vehicle. The Speaker icon can be moved to set audio location.
Equalizer This setting will adjust the “Bass”, “Mid”, and “Treble” ranges of the audio.
Speed Adjusted Volume This setting will adjust audio volume as speeds increase. At a higher setting, the volume will increase
more as the vehicle speeds up. The available settings are “Off”, “1”, “2”, and “max”.
Surround Sound This setting will turn the Surround Sound system on or off.
Auto Play This setting will automatically begin playing audio from a connected device.
Auto-On Radio This setting will automatically turn the radio on when the vehicle is started. The available settings are
“Off”, “On”, and “Recall Last”. With “Recall Last”, the system resumes the previous task before vehicle
shut off.
Radio off With Door This setting will keep the radio on when a door is opened or until the Radio Off Delay time is reached.
The available settings are “On” and “Off”.
Volume Adjustment This setting will allow you to set the audio volume levels for each option (Media, Phone, Navigation,
etc.). You can set the volume between 0 and 38.
5
23_VF_OM_EN_USC_t.book Page 147
Page 196 of 296
194IN CASE OF EMERGENCY
(Continued)
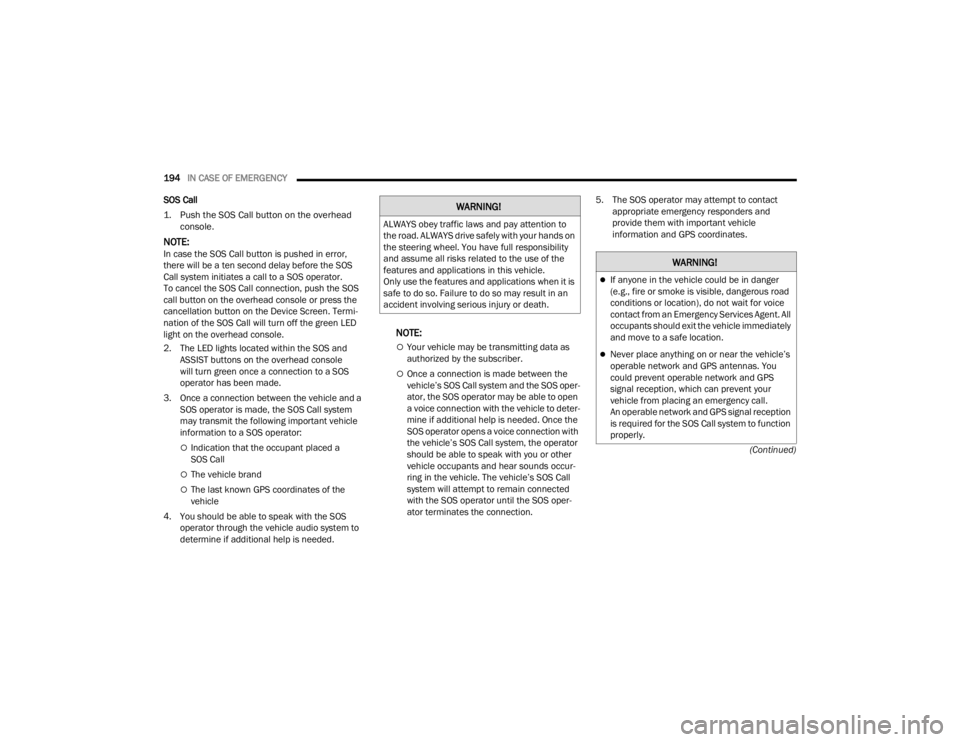
SOS Call
1. Push the SOS Call button on the overhead
console.
NOTE:In case the SOS Call button is pushed in error,
there will be a ten second delay before the SOS
Call system initiates a call to a SOS operator.
To cancel the SOS Call connection, push the SOS
call button on the overhead console or press the
cancellation button on the Device Screen. Termi -
nation of the SOS Call will turn off the green LED
light on the overhead console.
2. The LED lights located within the SOS and ASSIST buttons on the overhead console
will turn green once a connection to a SOS
operator has been made.
3. Once a connection between the vehicle and a SOS operator is made, the SOS Call system
may transmit the following important vehicle
information to a SOS operator:
Indication that the occupant placed a
SOS Call
The vehicle brand
The last known GPS coordinates of the
vehicle
4. You should be able to speak with the SOS operator through the vehicle audio system to
determine if additional help is needed.
NOTE:
Your vehicle may be transmitting data as
authorized by the subscriber.
Once a connection is made between the
vehicle’s SOS Call system and the SOS oper -
ator, the SOS operator may be able to open
a voice connection with the vehicle to deter -
mine if additional help is needed. Once the
SOS operator opens a voice connection with
the vehicle’s SOS Call system, the operator
should be able to speak with you or other
vehicle occupants and hear sounds occur -
ring in the vehicle. The vehicle’s SOS Call
system will attempt to remain connected
with the SOS operator until the SOS oper -
ator terminates the connection. 5. The SOS operator may attempt to contact
appropriate emergency responders and
provide them with important vehicle
information and GPS coordinates.
WARNING!
ALWAYS obey traffic laws and pay attention to
the road. ALWAYS drive safely with your hands on
the steering wheel. You have full responsibility
and assume all risks related to the use of the
features and applications in this vehicle.
Only use the features and applications when it is
safe to do so. Failure to do so may result in an
accident involving serious injury or death.
WARNING!
If anyone in the vehicle could be in danger
(e.g., fire or smoke is visible, dangerous road
conditions or location), do not wait for voice
contact from an Emergency Services Agent. All
occupants should exit the vehicle immediately
and move to a safe location.
Never place anything on or near the vehicle’s
operable network and GPS antennas. You
could prevent operable network and GPS
signal reception, which can prevent your
vehicle from placing an emergency call.
An operable network and GPS signal reception
is required for the SOS Call system to function
properly.
23_VF_OM_EN_USC_t.book Page 194
Page 197 of 296
IN CASE OF EMERGENCY195
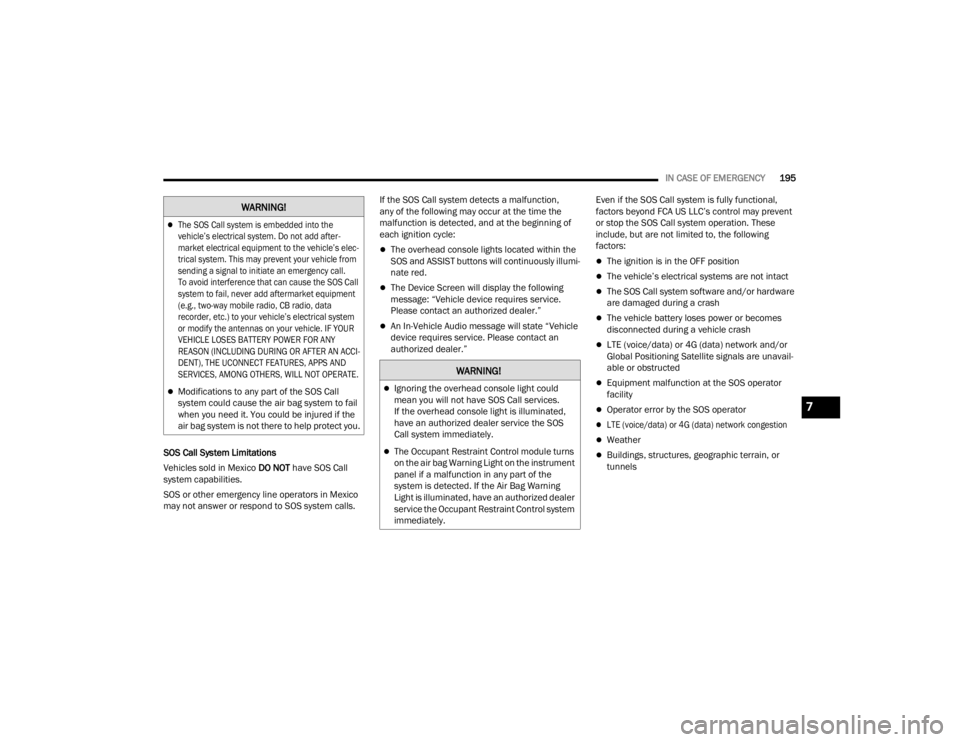
SOS Call System Limitations
Vehicles sold in Mexico DO NOT have SOS Call
system capabilities.
SOS or other emergency line operators in Mexico
may not answer or respond to SOS system calls. If the SOS Call system detects a malfunction,
any of the following may occur at the time the
malfunction is detected, and at the beginning of
each ignition cycle:
The overhead console lights located within the
SOS and ASSIST buttons will continuously illumi
-
nate red.
The Device Screen will display the following
message: “Vehicle device requires service.
Please contact an authorized dealer.”
An In-Vehicle Audio message will state “Vehicle
device requires service. Please contact an
authorized dealer.” Even if the SOS Call system is fully functional,
factors beyond FCA US LLC’s control may prevent
or stop the SOS Call system operation. These
include, but are not limited to, the following
factors:
The ignition is in the OFF position
The vehicle’s electrical systems are not intact
The SOS Call system software and/or hardware
are damaged during a crash
The vehicle battery loses power or becomes
disconnected during a vehicle crash
LTE (voice/data) or 4G (data) network and/or
Global Positioning Satellite signals are unavail
-
able or obstructed
Equipment malfunction at the SOS operator
facility
Operator error by the SOS operator
LTE (voice/data) or 4G (data) network congestion
Weather
Buildings, structures, geographic terrain, or
tunnels
The SOS Call system is embedded into the
vehicle’s electrical system. Do not add after -
market electrical equipment to the vehicle’s elec -
trical system. This may prevent your vehicle from
sending a signal to initiate an emergency call.
To avoid interference that can cause the SOS Call
system to fail, never add aftermarket equipment
(e.g., two-way mobile radio, CB radio, data
recorder, etc.) to your vehicle’s electrical system
or modify the antennas on your vehicle. IF YOUR
VEHICLE LOSES BATTERY POWER FOR ANY
REASON (INCLUDING DURING OR AFTER AN ACCI -
DENT), THE UCONNECT FEATURES, APPS AND
SERVICES, AMONG OTHERS, WILL NOT OPERATE.
Modifications to any part of the SOS Call
system could cause the air bag system to fail
when you need it. You could be injured if the
air bag system is not there to help protect you.
WARNING!
WARNING!
Ignoring the overhead console light could
mean you will not have SOS Call services.
If the overhead console light is illuminated,
have an authorized dealer service the SOS
Call system immediately.
The Occupant Restraint Control module turns
on the air bag Warning Light on the instrument
panel if a malfunction in any part of the
system is detected. If the Air Bag Warning
Light is illuminated, have an authorized dealer
service the Occupant Restraint Control system
immediately.
7
23_VF_OM_EN_USC_t.book Page 195