radio Ram ProMaster City 2018 Owner's Manual
[x] Cancel search | Manufacturer: RAM, Model Year: 2018, Model line: ProMaster City, Model: Ram ProMaster City 2018Pages: 180, PDF Size: 7.52 MB
Page 146 of 180
Clock Setting
1. To start the clock setting procedure, pushthe SETTINGS
button on the right
side of the display, then “Clock” button
on the touchscreen, and then “Set Time &
Format” button on the touchscreen. Se-
lect the up or down arrows as appropriate.
2. Press the up or down arrows to adjust the hours or minutes, next select the AM or
PM button on the touchscreen. You can
also select 12hr or 24hr format by press-
ing the desired button on the
touchscreen.
3. Once the time is set, press the “Done” or “back arrow” button on the touchscreen
to exit the time screen.
NOTE:
Once the time has been set on the radio, the
time will also appear in the instrument clus-
ter display.
Equalizer, Balance And Fade
1. Push the SETTINGSbutton on the
right side of the display.
2. Scroll down and press the “Audio” button on the touchscreen to open the Audio
menu.
3. The Audio Menu shows the following op- tions for you to customize your audio
settings.
Equalizer — If Equipped
• Press the “Equalizer” button on the touch- screen to adjust the Bass, Mid and Treble.
Use the “+” or “-” buttons on the touch-
screen to adjust the equalizer to your de-
sired settings.
Balance/Fade — If Equipped
• Press the “Balance/Fade” button on the touchscreen to adjust the sound from the
speakers. Use the “arrow” buttons on the
touchscreen to adjust the sound level from
the front and rear or right and left side
speakers. Press the Center “C” button on
the touchscreen to reset the balance and
fade to the factory setting. Speed Adjusted Volume — If Equipped
• Press the “Speed Adjusted Volume” button
on the touchscreen to select between OFF,
1, 2 or 3. This decreases the radio volume
relative to a decrease in vehicle speed.
AUX Volume Offset
• Press the “AUX Volume Offset” button on the touchscreen to activate the AUX Vol-
ume Offset screen.
• The AUX Volume Offset is adjusted by pressing of the “+” and “–” buttons. This
alters the AUX input audio volume. The
level value, which spans between plus or
minus three, is displayed above the adjust-
ment bar.
Auto Play
• Press the “Auto Play” button on the touch- screen to activate the Auto Play screen.
• The Auto Play feature begins playing music as soon as a USB Media device is con-
nected to one of the vehicle’s Media USB
ports, when it is turned on. Press “Off” to
turn the setting off.
MULTIMEDIA
144
Page 147 of 180
Loudness — If Equipped
• Press the “Loudness” button on the touch-screen to select the Loudness feature.
When this feature is activated, it improves
sound quality at lower volumes.
Auto-On Radio
• Press the “Auto-On Radio” button on the touchscreen, select On, Off, or Recall Last
followed by pressing “Done” or the “back
arrow” button on the touchscreen. When
this feature is activated, the radio auto-
matically turns on when the vehicle is in
run or recalls whether it was on or off at last
ignition off.
Radio Off Delay
• Press the “Radio Off Delay” button to keep the radio On for a preset amount of time
after the Ignition is switched OFF. Press the
“back arrow” button when completed.
145
Page 148 of 180
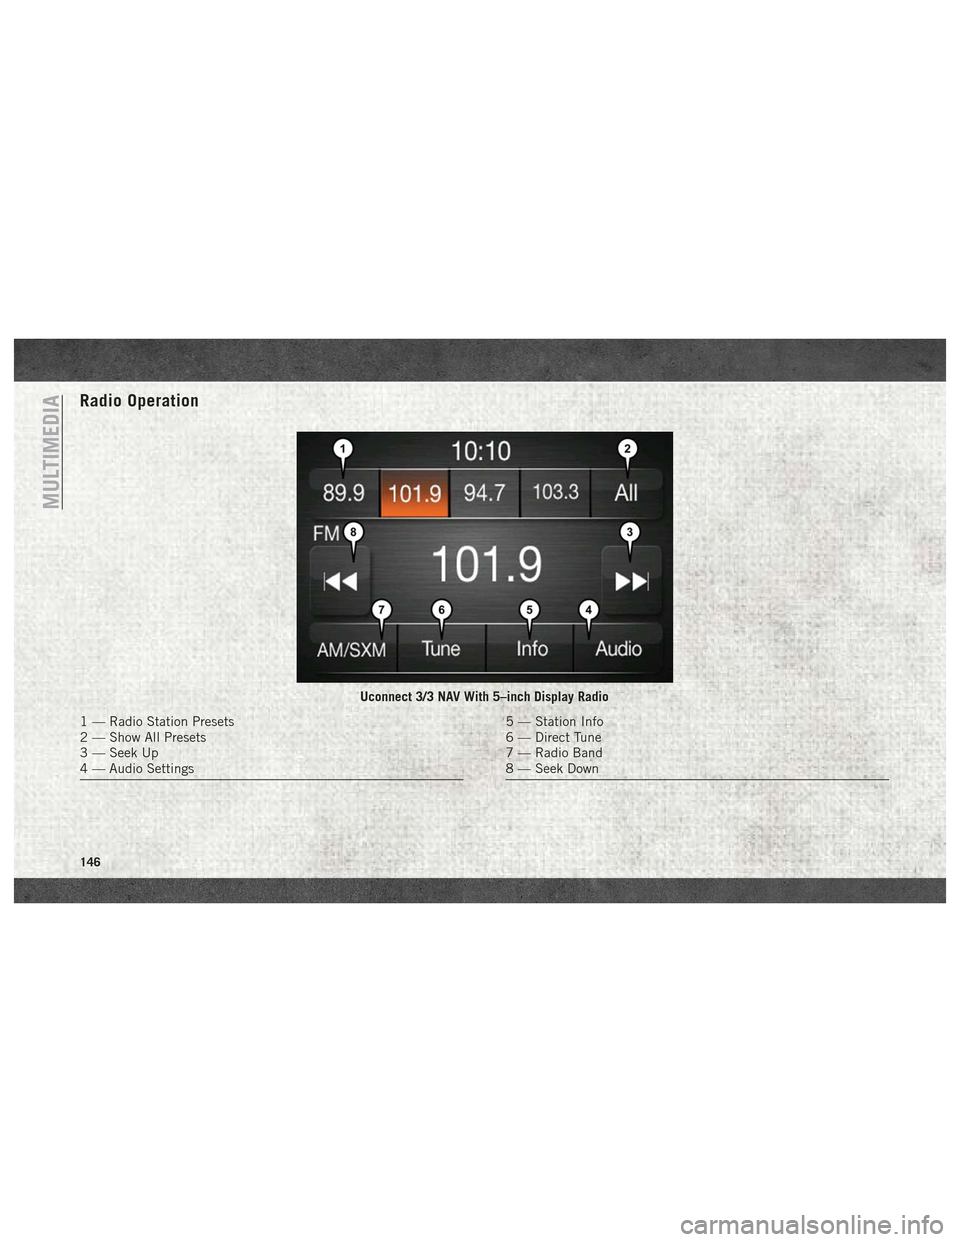
Radio Operation
Uconnect 3/3 NAV With 5–inch Display Radio
1 — Radio Station Presets
2 — Show All Presets
3 — Seek Up
4 — Audio Settings5 — Station Info
6 — Direct Tune
7 — Radio Band
8 — Seek Down
MULTIMEDIA
146
Page 149 of 180
Seek Up/Down Buttons
• Push the up or down button to seek throughradio stations in AM, FM or SXM bands.
• Hold either button to bypass stations with- out stopping.
Store Radio Presets Manually
The Radio stores up to 12 presets in each of
the Radio modes. There are four visible pre-
sets at the top of the radio screen. Pressing
the “All” button on the touchscreen will dis-
play all of the preset stations for that mode.
To store a radio preset manually, follow the
steps below:
1. Tune to the desired station.
2. Press and hold the desired numbered but- ton on the touchscreen for more than two
seconds, or until you hear a confirmation
beep.USB/Audio Jack (AUX)/Bluetooth
Operation
USB/iPod
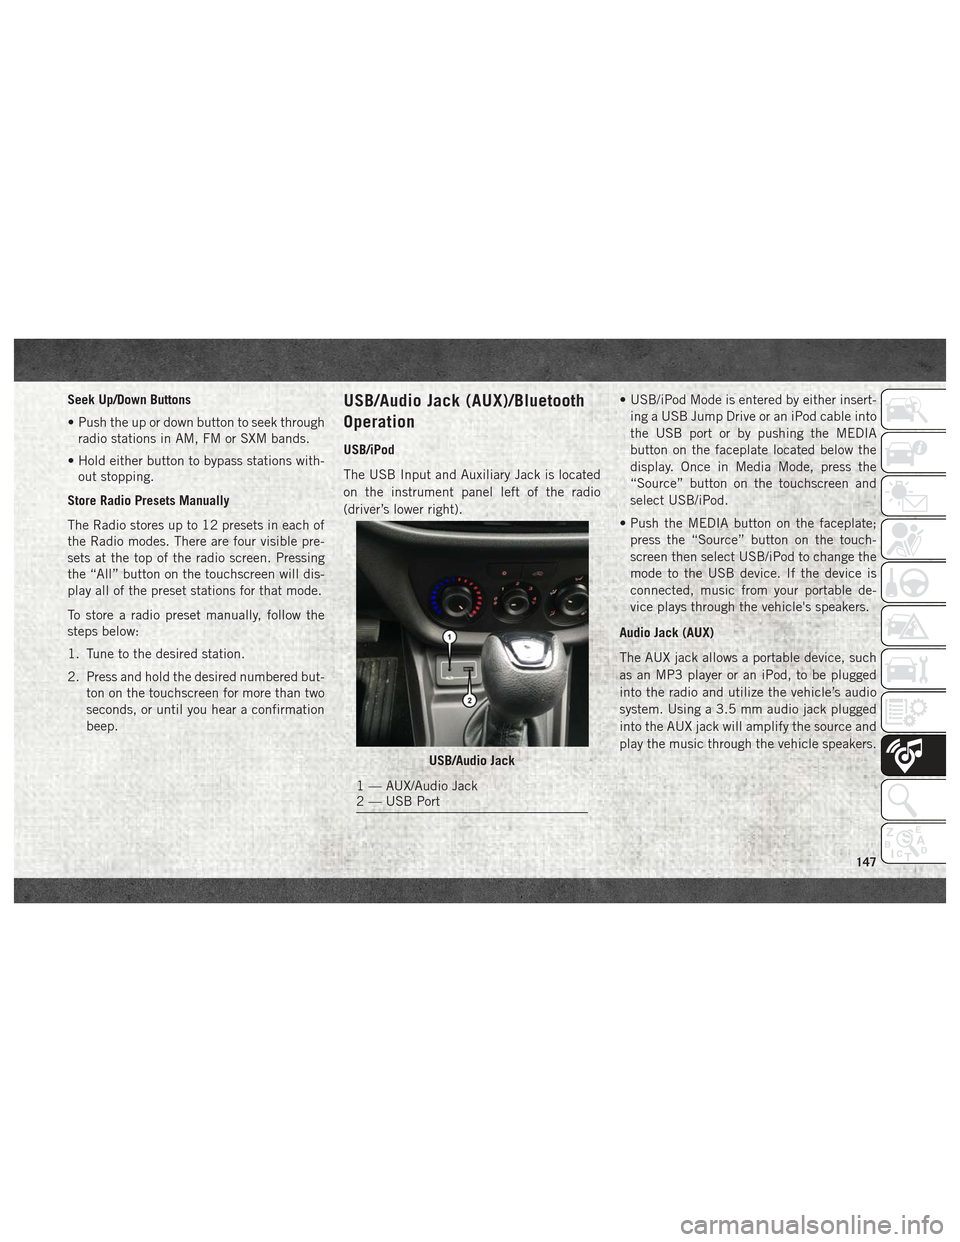
The USB Input and Auxiliary Jack is located
on the instrument panel left of the radio
(driver’s lower right). • USB/iPod Mode is entered by either insert-
ing a USB Jump Drive or an iPod cable into
the USB port or by pushing the MEDIA
button on the faceplate located below the
display. Once in Media Mode, press the
“Source” button on the touchscreen and
select USB/iPod.
• Push the MEDIA button on the faceplate; press the “Source” button on the touch-
screen then select USB/iPod to change the
mode to the USB device. If the device is
connected, music from your portable de-
vice plays through the vehicle's speakers.
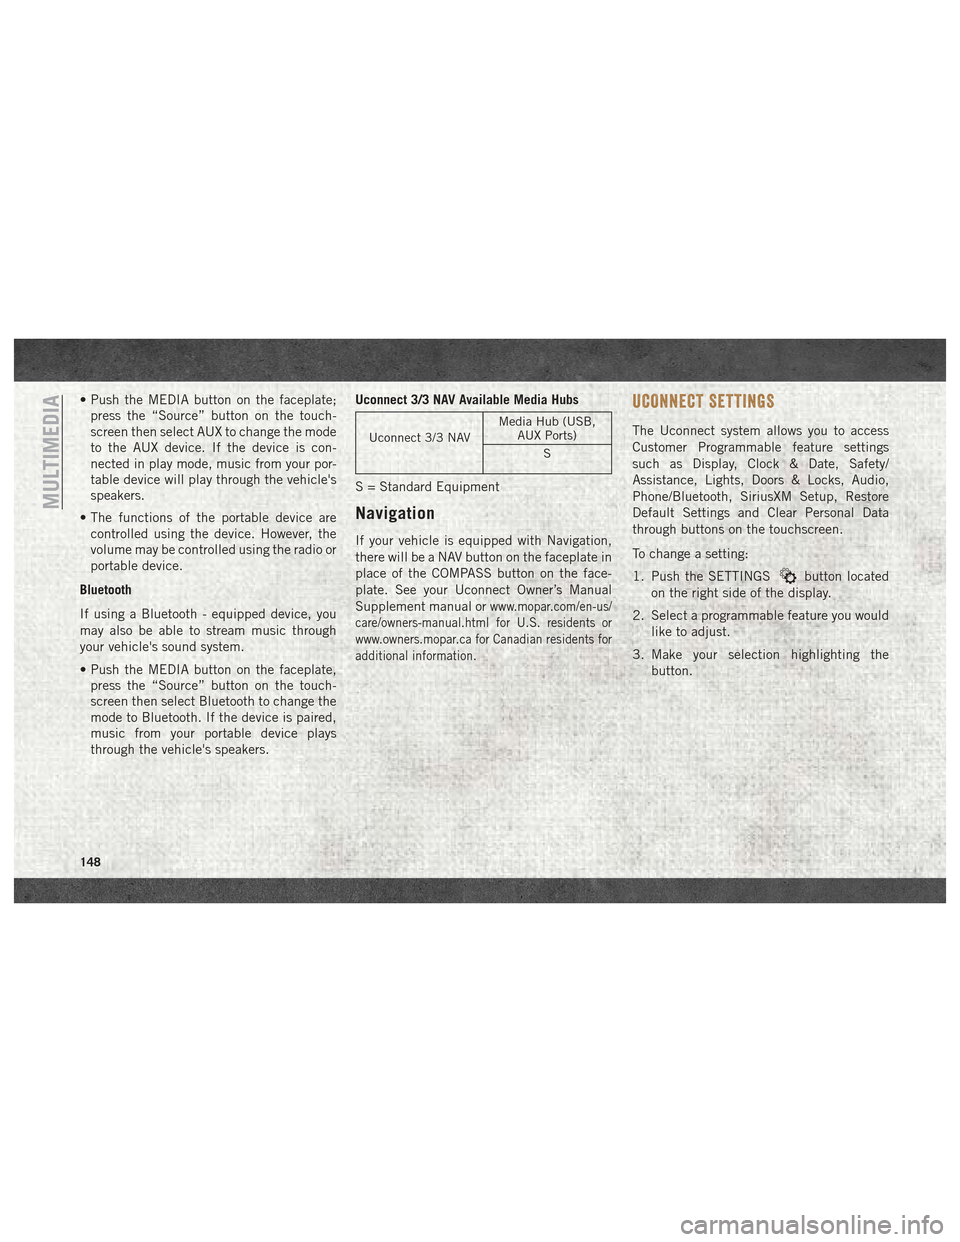
Audio Jack (AUX)
The AUX jack allows a portable device, such
as an MP3 player or an iPod, to be plugged
into the radio and utilize the vehicle’s audio
system. Using a 3.5 mm audio jack plugged
into the AUX jack will amplify the source and
play the music through the vehicle speakers.
USB/Audio Jack
1 — AUX/Audio Jack
2 — USB Port
147
Page 150 of 180
• Push the MEDIA button on the faceplate;press the “Source” button on the touch-
screen then select AUX to change the mode
to the AUX device. If the device is con-
nected in play mode, music from your por-
table device will play through the vehicle's
speakers.
• The functions of the portable device are controlled using the device. However, the
volume may be controlled using the radio or
portable device.
Bluetooth
If using a Bluetooth - equipped device, you
may also be able to stream music through
your vehicle's sound system.
• Push the MEDIA button on the faceplate, press the “Source” button on the touch-
screen then select Bluetooth to change the
mode to Bluetooth. If the device is paired,
music from your portable device plays
through the vehicle's speakers. Uconnect 3/3 NAV Available Media Hubs
Uconnect 3/3 NAV
Media Hub (USB,
AUX Ports)
S
S = Standard Equipment
Navigation
If your vehicle is equipped with Navigation,
there will be a NAV button on the faceplate in
place of the COMPASS button on the face-
plate. See your Uconnect Owner’s Manual
Supplement manual or
www.mopar.com/en-us/
care/owners-manual.html for U.S. residents or
www.owners.mopar.ca for Canadian residents for
additional information.
UCONNECT SETTINGS
The Uconnect system allows you to access
Customer Programmable feature settings
such as Display, Clock & Date, Safety/
Assistance, Lights, Doors & Locks, Audio,
Phone/Bluetooth, SiriusXM Setup, Restore
Default Settings and Clear Personal Data
through buttons on the touchscreen.
To change a setting:
1. Push the SETTINGS
button located
on the right side of the display.
2. Select a programmable feature you would like to adjust.
3. Make your selection highlighting the button.
MULTIMEDIA
148
Page 151 of 180
Depending on the vehicles options, the following feature settings are available:
• Language• Doors & Locks
• Display • Engine Options
• Units (If Equipped) • Audio
• Voice • Phone (If Equipped)
• Clock • SiriusXM Setup (If Equipped)
• Brakes • Radio Setup
• Safety & Driving Assistance (If Equipped) • Restore Settings
• Lights • Clear Personal Data
Refer to “Uconnect Settings” in “Multime-
dia” in your Owner’s Manual on
www.mopar.com/en-us/care/owners-manual.html
(U.S. Residents) or www.owners.mopar.ca
(Canadian Residents) for further information.
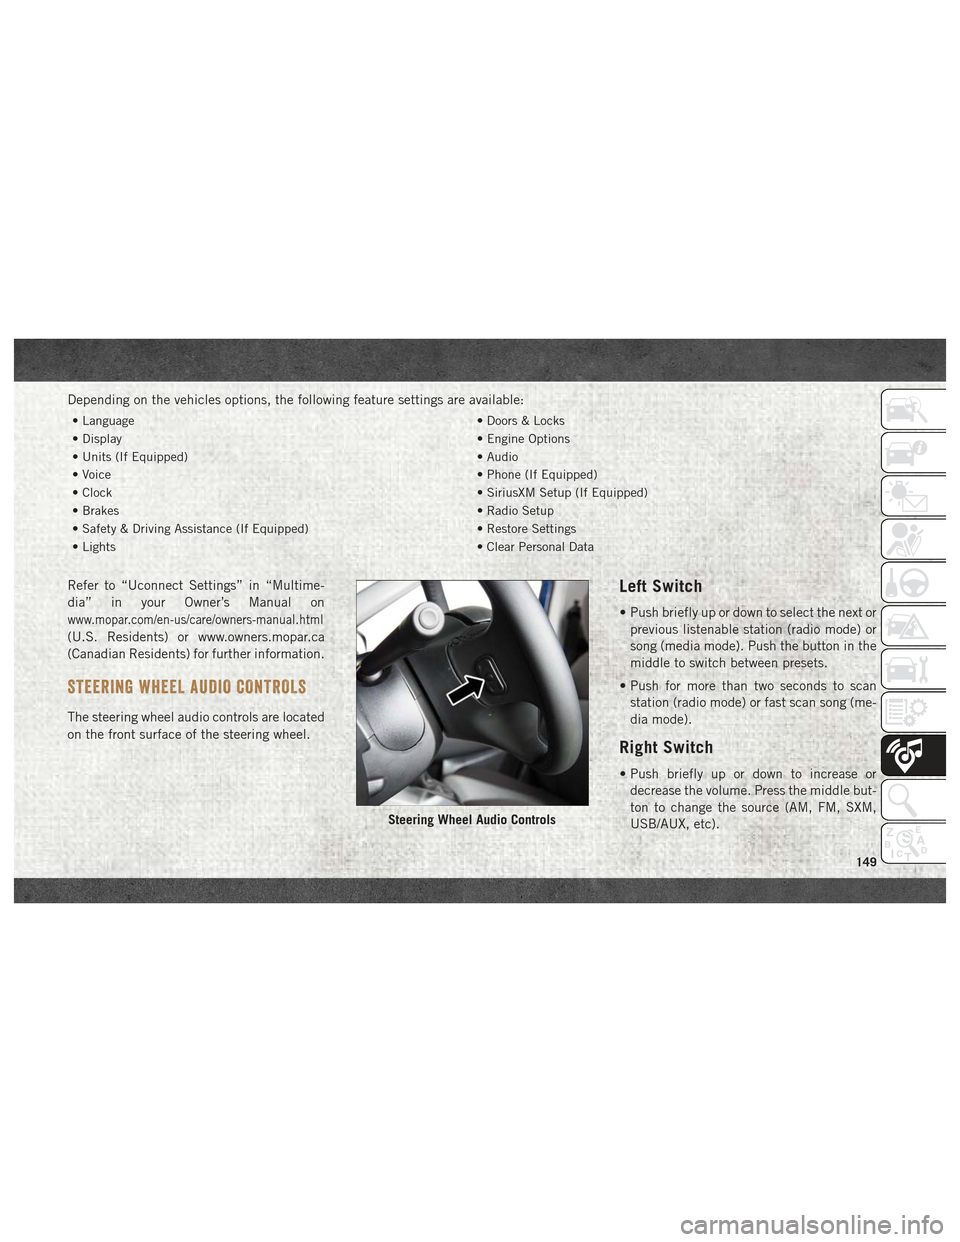
STEERING WHEEL AUDIO CONTROLS
The steering wheel audio controls are located
on the front surface of the steering wheel.
Left Switch
• Push briefly up or down to select the next or
previous listenable station (radio mode) or
song (media mode). Push the button in the
middle to switch between presets.
• Push for more than two seconds to scan station (radio mode) or fast scan song (me-
dia mode).
Right Switch
• Push briefly up or down to increase ordecrease the volume. Press the middle but-
ton to change the source (AM, FM, SXM,
USB/AUX, etc).
Steering Wheel Audio Controls
149
Page 153 of 180
The Uconnect Phone feature enables you to
place and receive hands-free mobile phone
calls. Drivers can also place mobile phone
calls using their voice or by using the buttons
on the touchscreen (see Voice Command sec-
tion).
The hands-free calling feature is made pos-
sible through Bluetooth technology — the
global standard that enables different elec-
tronic devices to connect to each other wire-
lessly.
If the Uconnect Phone Button
exists on
your steering wheel, you then have the
Uconnect Phone features.
Refer to the “Uconnect 3/3 NAV Voice Rec-
ognition Quick Tips” in “Multimedia” in the
Owner's Manual at
www.mopar.com/en-us/
care/owners-manual.html
(U.S. Residents) or
www.owners.mopar.ca (Canadian Residents)
for further information.
NOTE:
• The Uconnect Phone requires a mobile phone equipped with the Bluetooth Hands-
Free Profile, Version 1.0 or higher. • Most mobile phones/devices are compat-
ible with the Uconnect system, however
some mobile phones/devices may not be
equipped with all of the required features to
utilize all of the Uconnect system features.
• For Uconnect Customer Care:
• U.S. residents visit UconnectPhone.com or call 1-877-855-8400.
•
Canadian Residents visitUconnectPhone.com
or call, 1-800-465-2001 (English) or
1-800-387-9983 (French).
Pairing (Wirelessly Connecting)
Your Mobile Phone To The
Uconnect System
Mobile phone pairing is the process of estab-
lishing a wireless connection between a cel-
lular phone and the Uconnect system.
NOTE:
• To use the Uconnect Phone feature, you first must determine if your mobile phone
and software are compatible with the
Uconnect system. Please visit
UconnectPhone.com for complete mobile
phone compatibility information. • Mobile phone pairing is not available while
the vehicle is in motion.
• A maximum of ten mobile phones can be paired to the Uconnect system.
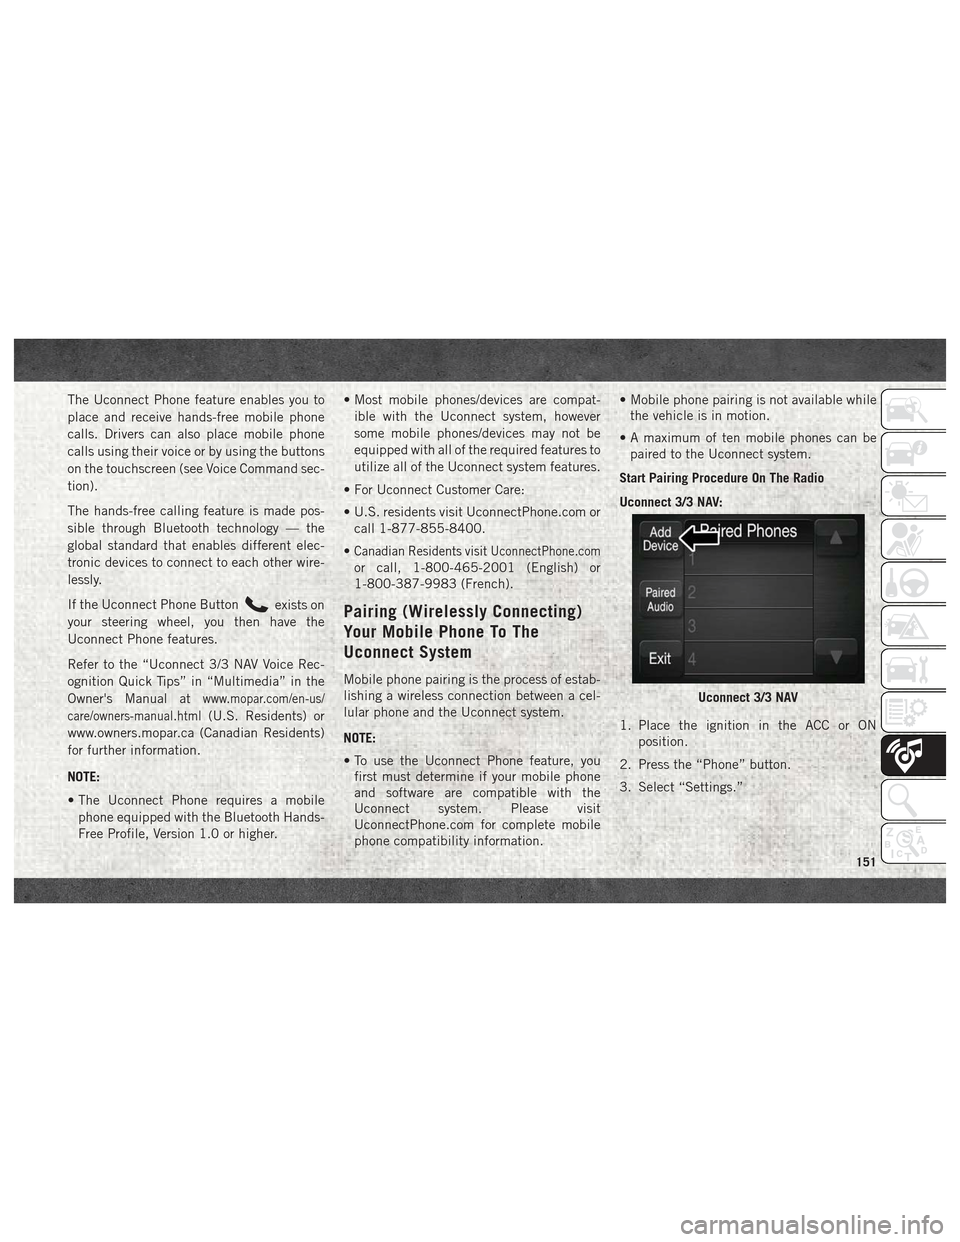
Start Pairing Procedure On The Radio
Uconnect 3/3 NAV:
1. Place the ignition in the ACC or ON position.
2. Press the “Phone” button.
3. Select “Settings.”
Uconnect 3/3 NAV
151
Page 157 of 180
Changing The Volume
• Start a dialogue by pushing the VR button
, then say a command. For example,
"Help".
• Use the radio VOLUME/MUTE rotary knob to adjust the volume to a comfortable level
while the Uconnect system is speaking.
NOTE:
The volume setting for Uconnect is different
than the audio system.
NOTE:
To access help, push the Uconnect VR button
(if active) on the steering wheel and say
"help." Push the Uconnect VR Pickup button
(if active) or the VR button(if
active) and say "cancel" to cancel the help
session.
Using Do Not Disturb
With Do Not Disturb, you can disable notifi-
cations from incoming calls and texts, allow-
ing you to keep your eyes on the road and
hands on the wheel. For your convenience,
there is a counter display to keep track of your
missed calls and text messages while you
were using Do Not Disturb.
Do Not Disturb can automatically reply with a
text message, a call or both, when declining
an incoming call and send it to voicemail.
Automatic reply messages can be:
• “I am driving right now, I will get back to you shortly.”
• Create a custom auto reply message up to 160 characters. While in Do Not Disturb, Conference Call can
be selected so you can still place a second
call without being interrupted by incoming
calls.
NOTE:
• Only the beginning of your custom message
will be seen on the touchscreen.
• Reply with text message is not compatible with iPhones.
• Auto reply with text message is only avail- able on phones that supporting Bluetooth
MAP.
155
Page 159 of 180
Helpful Tips And Common
Questions To Improve Bluetooth
Performance With Your Uconnect
System
Mobile Phone won’t reconnect to system after
pairing:
• Set mobile phone to auto-connect ortrusted device in mobile phone Bluetooth
settings (Blackberry devices).
• Perform a factory reset on your mobile phone. Refer to your mobile phone manu-
facturer or cellular provider for instruc-
tions.
• Many mobile phones do not automatically reconnect after being restarted (hard re-
boot). Your mobile phone can still be con-
nected manually. Close all applications that
may be operating (refer to mobile phone
manufacturer’s instructions), and follow
“Pairing (Wirelessly Connecting) Your Mo-
bile Phone To The Uconnect System”. Mobile Phone won’t pair to system:
• Perform a hard reset in the mobile phone by
removing the battery (if removable — see
your mobile phone’s owner manual).
• Delete pairing history in mobile phone and Uconnect system; usually found in phone’s
Bluetooth connection settings.
• Verify you are selecting “Uconnect” in the discovered Bluetooth devices on your mo-
bile phone.
• If your vehicle system generates a pin code the default is 0000.
Mobile Phonebook didn’t download:
• Check “Do not ask again,” then accept the “phonebook download” request on your
mobile phone.
Can’t make a conference call:
• CDMA (Code-Division Multiple Access) car- riers do not support conference calling.
Refer to your mobile phone user’s manual
for further information. Making calls while connected to AUX:
• Plugging in your mobile phone to AUX while
connected to Bluetooth will disable Hands-
Free Calling. Do not make calls while your
mobile phone is plugged into the AUX jack.Regulatory And Safety Information
USA/CANADA
Exposure to Radio Frequency Radiation
The radiated output power of the internal
wireless radio is far below the FCC and IC
radio frequency exposure limits. Neverthe-
less, the wireless radio will be used in such a
manner that the radio is 20 cm or further
from the human body.
The internal wireless radio operates within
guidelines found in radio frequency safety
standards and recommendations, which re-
flect the consensus of the scientific commu-
nity. The radio manufacturer believes the
internal wireless radio is safe for use by
consumers. The level of energy emitted is far
less than the electromagnetic energy emitted
by wireless devices such as mobile phones.
However, the use of wireless radios may be
restricted in some situations or environ-
157
Page 160 of 180
ments, such as aboard airplanes. If you are
unsure of restrictions, you are encouraged to
ask for authorization before turning on the
wireless radio.
This device complies with Part 15 of the FCC
Rules and with Industry Canada license-
exempt RSS standard(s). Operation is sub-
ject to the following two conditions:
1. This device may not cause harmfulinterference.
2. This device must accept any interference received, including interference that may
cause undesired operation.
NOTE:
Changes or modifications not expressly ap-
proved by the party responsible for compli-
ance could void the user’s authority to oper-
ate the equipment. NOTE:
• This equipment has been tested and found
to comply with the limits for a Class B
digital device, pursuant to Part 15 of the
FCC Rules. These limits are designed to
provide reasonable protection against
harmful interference in a residential instal-
lation. This equipment generates, uses and
can radiate radio frequency energy and, if
not installed and used in accordance with
the instructions, may cause harmful inter-
ference to radio communications. However,
there is no guarantee that interference will
not occur in a particular installation.
• If this equipment does cause harmful inter- ference to radio or television reception,
which can be determined by turning the
equipment off and on, the user is encour-
aged to try to correct the interference by
one or more of the following measures:
1. Increase the separation between the equipment and receiver.
2. Consult the dealer or an experienced radio technician for help.UCONNECT VOICE RECOGNITION
QUICK TIPS
Introducing Uconnect
Start using Uconnect Voice Recognition with
these helpful quick tips. It provides the key
Voice Commands and tips you need to know
to control your Uconnect system.
Key Features:
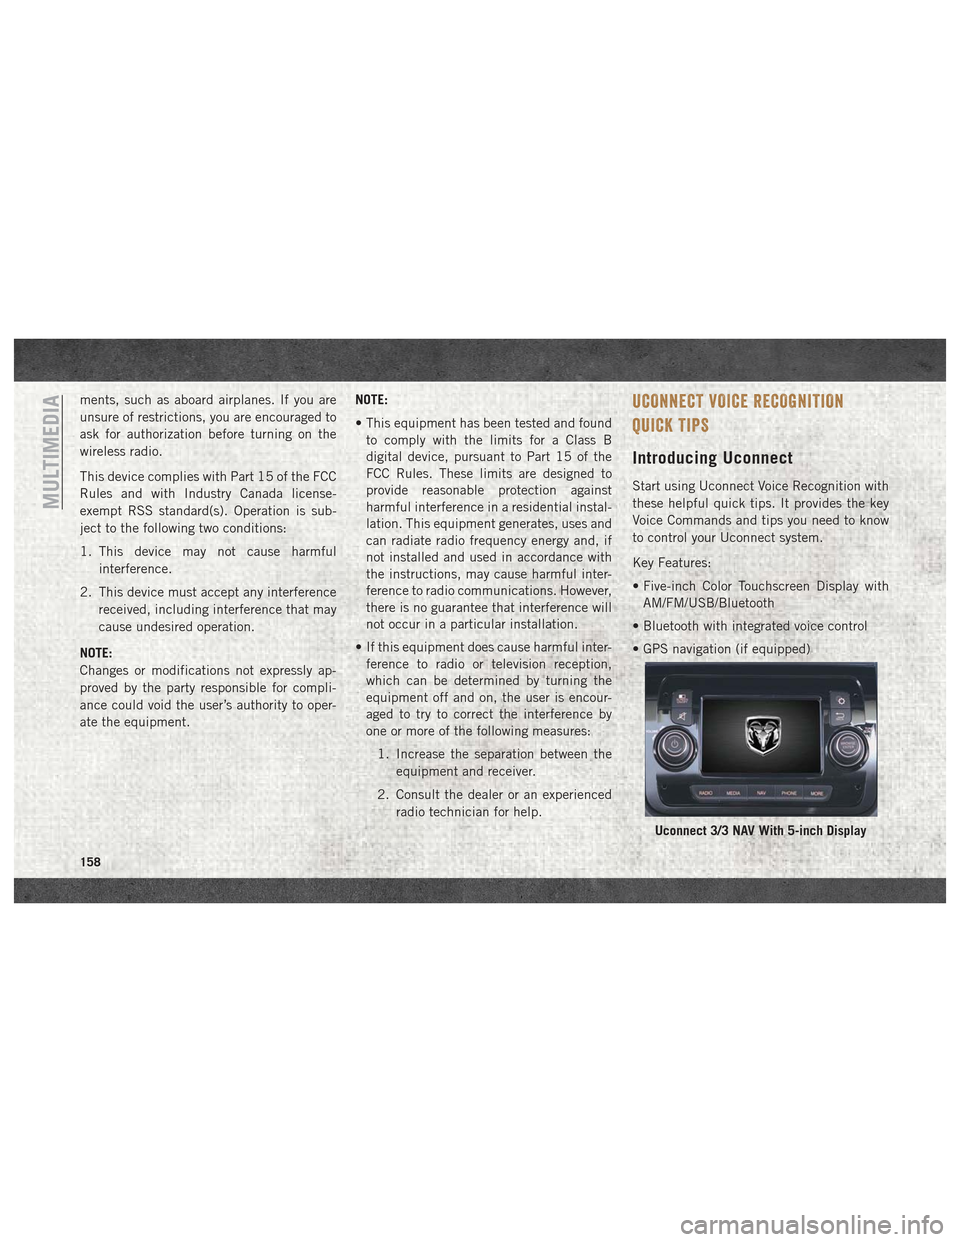
• Five-inch Color Touchscreen Display withAM/FM/USB/Bluetooth
• Bluetooth with integrated voice control
• GPS navigation (if equipped)
Uconnect 3/3 NAV With 5-inch Display
MULTIMEDIA
158