battery RAM PROMASTER CITY 2022 Owners Manual
[x] Cancel search | Manufacturer: RAM, Model Year: 2022, Model line: PROMASTER CITY, Model: RAM PROMASTER CITY 2022Pages: 260, PDF Size: 8.45 MB
Page 6 of 260
4
MULTIMEDIA
UCONNECT SYSTEMS ........................................... 78
CYBERSECURITY ................................................... 78
UCONNECT SETTINGS .......................................... 79 Uconnect 3/3 NAV Settings .............................79
UCONNECT INTRODUCTION.................................. 88
Identifying Your Radio ......................................88
Safety And General Information ......................90
UCONNECT MODES ............................................... 91
Radio Mode ......................................................91
Media Mode......................................................98
Phone Mode ................................................. 100
NAVIGATION MODE — IF EQUIPPED ..................110
Operating Navigation Mode —If Equipped ... 110
STEERING WHEEL AUDIO CONTROLS —
IF EQUIPPED ........................................................ 128
Radio Operation ............................................ 128
Media Mode................................................... 129
RAM TELEMATICS - IF EQUIPPED ...................... 129
Ram Telematics General Information .......... 129
RADIO OPERATION AND MOBILE PHONES ..... 130
Regulatory And Safety Information .............. 130
SAFETY
SAFETY FEATURES .............................................. 131Four-Wheel Anti-Lock Brake System (ABS).. 131
Electronic Brake Control (EBC) System ...... 132
AUXILIARY DRIVING SYSTEMS.......................... 135
Tire Pressure Monitoring System (TPMS) .... 135
OCCUPANT RESTRAINT SYSTEMS ................... 137
Occupant Restraint Systems ........................ 137
Important Safety Precautions ...................... 137Seat Belt Systems ........................................ 138Supplemental Restraint Systems (SRS) ...... 144Child Restraints ............................................. 152
SAFETY TIPS ....................................................... 168
Transporting Passengers .............................. 168Transporting Pets ......................................... 168
Safety Checks You Should Make Inside
The Vehicle ................................................... 168
Periodic Safety Checks You Should Make
Outside The Vehicle ...................................... 169
Exhaust Gas................................................... 170
Carbon Monoxide Warnings ........................ 170
IN CASE OF EMERGENCY
HAZARD WARNING FLASHERS......................... 171
JACKING AND TIRE CHANGING ......................... 171
Preparations For Jacking ............................. 171
Jack Location — If Equipped ......................... 172
Removing The Spare Tire —If Equipped....... 172 Jacking Instructions ...................................... 174
Vehicles With Alloy Wheels ........................... 177
Vehicles Equipped With Wheel Covers ........ 178
TIRE SERVICE KIT — IF EQUIPPED .................... 179
Tire Service Kit Storage ................................ 179Tire Service Kit Usage ................................... 179
JUMP STARTING .................................................. 181
Preparations For Jump Starting ................... 181Jump Starting Procedure .............................. 182
IF YOUR ENGINE OVERHEATS ........................... 183
IGNITION KEY REMOVAL OVERRIDE ................. 184
GEAR SELECTOR OVERRIDE .............................. 184
FREEING A STUCK VEHICLE .............................. 185
TOWING A DISABLED VEHICLE .......................... 187
ENHANCED ACCIDENT RESPONSE SYSTEM
(EARS) .................................................................. 188
EVENT DATA RECORDER (EDR) ......................... 188
SERVICING AND MAINTENANCE
SCHEDULED SERVICING .................................... 189
Maintenance Plan ......................................... 190
ENGINE COMPARTMENT .................................... 193
Engine Compartment — 2.4L ....................... 193
Checking Oil Level ........................................ 194
Adding Washer Fluid .................................... 194
Maintenance-Free Battery ........................... 194
Pressure Washing ......................................... 195
22_VM_OM_EN_USC_t.book Page 4
Page 10 of 260
8
SYMBOL GLOSSARY
Some car components have colored labels with symbols indicating
precautions to be observed when using this component. It is important to
follow all warnings when operating your vehicle. See below for the definition of
each symbol Úpage 44.
NOTE:Warning and Indicator lights are different based upon equipment options and
current vehicle status. Some telltales are optional and may not appear.
Red Warning Lights
Air Bag Warning Light
Úpage 44
Brake Warning Light Úpage 45
Battery Charge Warning Light Úpage 45
Door Open Warning Light Úpage 45
Electronic Throttle Control (ETC) Warning Light Úpage 46
Engine Coolant Temperature Warning Light
Úpage 46
Oil Pressure Warning Light Úpage 46
Transmission Temperature Warning Light Úpage 46
Seat Belt Reminder Warning Light Úpage 46
Transmission Fault Warning Light Úpage 47
Engine Oil Level Warning Light Úpage 47
Red Warning Lights
22_VM_OM_EN_USC_t.book Page 8
Page 12 of 260
10
GETTING TO KNOW YOUR VEHICLE
KEYS
KEY FOB
Your vehicle uses a key start ignition system which
supports Remote Keyless Entry (RKE). The key fob
allows you to lock or unlock the doors from
distances up to approximately 66 ft (20 m). The
key fob does not need to be pointed at the vehicle
to activate the system. The key fob also contains
an integrated mechanical key, which can be
accessed by pushing the mechanical key release
button.
NOTE:The key fob may not be able to be detected by the
vehicle if it is located next to a mobile phone,
laptop or other electronic device; these devices
may block the key fob’s wireless signal
Úpage 245.
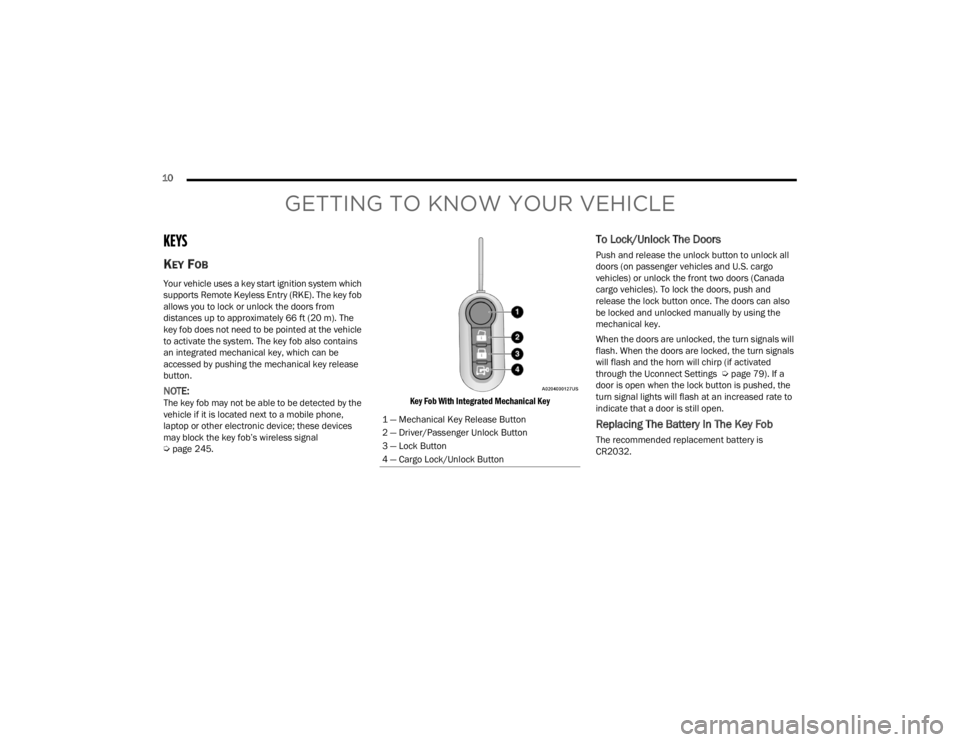
Key Fob With Integrated Mechanical Key
To Lock/Unlock The Doors
Push and release the unlock button to unlock all
doors (on passenger vehicles and U.S. cargo
vehicles) or unlock the front two doors (Canada
cargo vehicles). To lock the doors, push and
release the lock button once. The doors can also
be locked and unlocked manually by using the
mechanical key.
When the doors are unlocked, the turn signals will
flash. When the doors are locked, the turn signals
will flash and the horn will chirp (if activated
through the Uconnect Settings Ú
page 79). If a
door is open when the lock button is pushed, the
turn signal lights will flash at an increased rate to
indicate that a door is still open.
Replacing The Battery In The Key Fob
The recommended replacement battery is
CR2032.
1 — Mechanical Key Release Button
2 — Driver/Passenger Unlock Button
3 — Lock Button
4 — Cargo Lock/Unlock Button
22_VM_OM_EN_USC_t.book Page 10
Page 13 of 260
GETTING TO KNOW YOUR VEHICLE11
NOTE:
Customers are recommended to use a battery
obtained from Mopar®. Aftermarket coin
battery dimensions may not meet the original
OEM coin battery dimensions.
Perchlorate Material – special handling may
apply. See www.dtsc.ca.gov/hazard-
ouswaste/perchlorate.
1. Push the mechanical key release button and release the mechanical key to access the
battery case screw located on the side of the
key fob.
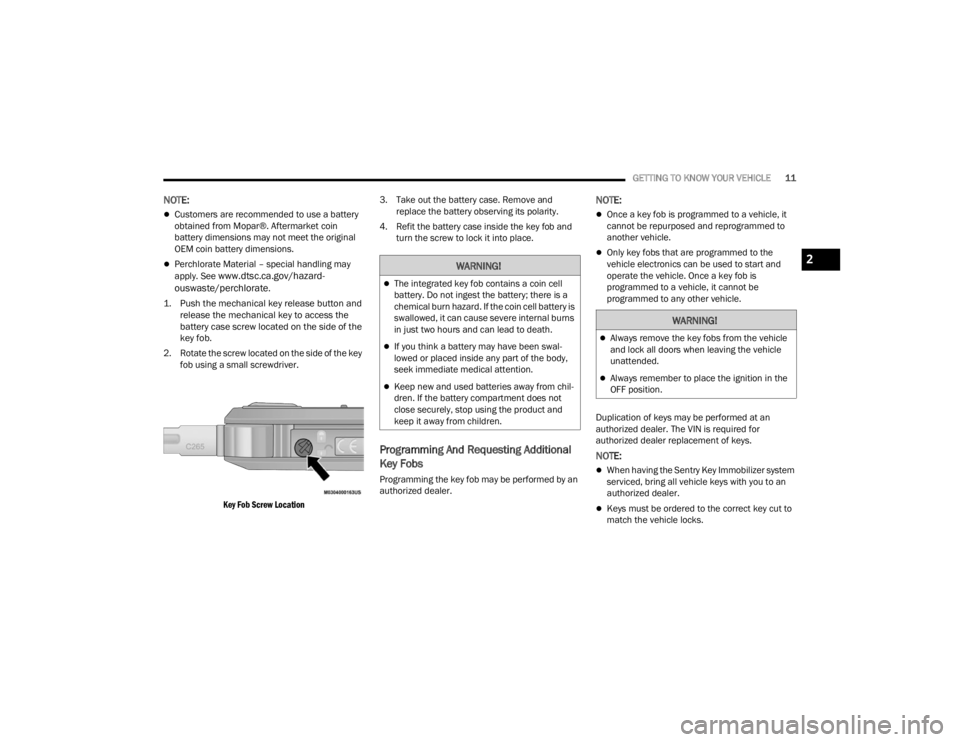
2. Rotate the screw located on the side of the key fob using a small screwdriver.
Key Fob Screw Location
3. Take out the battery case. Remove and
replace the battery observing its polarity.
4. Refit the battery case inside the key fob and turn the screw to lock it into place.
Programming And Requesting Additional
Key Fobs
Programming the key fob may be performed by an
authorized dealer.
NOTE:
Once a key fob is programmed to a vehicle, it
cannot be repurposed and reprogrammed to
another vehicle.
Only key fobs that are programmed to the
vehicle electronics can be used to start and
operate the vehicle. Once a key fob is
programmed to a vehicle, it cannot be
programmed to any other vehicle.
Duplication of keys may be performed at an
authorized dealer. The VIN is required for
authorized dealer replacement of keys.
NOTE:
When having the Sentry Key Immobilizer system
serviced, bring all vehicle keys with you to an
authorized dealer.
Keys must be ordered to the correct key cut to
match the vehicle locks.
WARNING!
The integrated key fob contains a coin cell
battery. Do not ingest the battery; there is a
chemical burn hazard. If the coin cell battery is
swallowed, it can cause severe internal burns
in just two hours and can lead to death.
If you think a battery may have been swal-
lowed or placed inside any part of the body,
seek immediate medical attention.
Keep new and used batteries away from chil -
dren. If the battery compartment does not
close securely, stop using the product and
keep it away from children.
WARNING!
Always remove the key fobs from the vehicle
and lock all doors when leaving the vehicle
unattended.
Always remember to place the ignition in the
OFF position.
2
22_VM_OM_EN_USC_t.book Page 11
Page 34 of 260
32GETTING TO KNOW YOUR VEHICLE
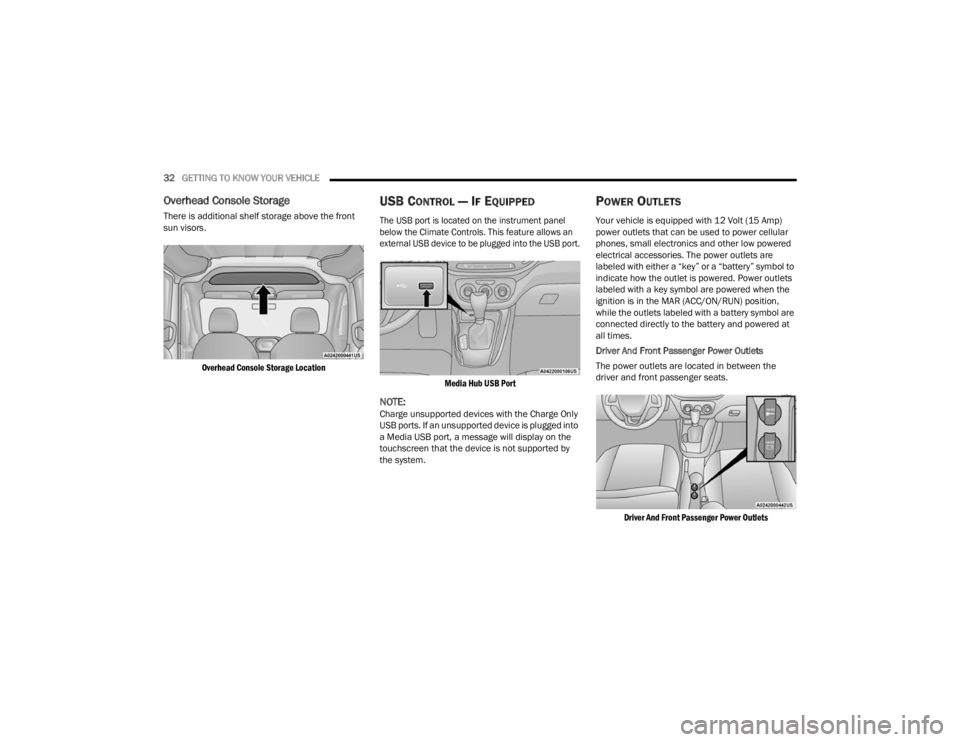
Overhead Console Storage
There is additional shelf storage above the front
sun visors.
Overhead Console Storage Location
USB CONTROL — IF EQUIPPED
The USB port is located on the instrument panel
below the Climate Controls. This feature allows an
external USB device to be plugged into the USB port.
Media Hub USB Port
NOTE:Charge unsupported devices with the Charge Only
USB ports. If an unsupported device is plugged into
a Media USB port, a message will display on the
touchscreen that the device is not supported by
the system.
POWER OUTLETS
Your vehicle is equipped with 12 Volt (15 Amp)
power outlets that can be used to power cellular
phones, small electronics and other low powered
electrical accessories. The power outlets are
labeled with either a “key” or a “battery” symbol to
indicate how the outlet is powered. Power outlets
labeled with a key symbol are powered when the
ignition is in the MAR (ACC/ON/RUN) position,
while the outlets labeled with a battery symbol are
connected directly to the battery and powered at
all times.
Driver And Front Passenger Power Outlets
The power outlets are located in between the
driver and front passenger seats.
Driver And Front Passenger Power Outlets
22_VM_OM_EN_USC_t.book Page 32
Page 35 of 260
GETTING TO KNOW YOUR VEHICLE33
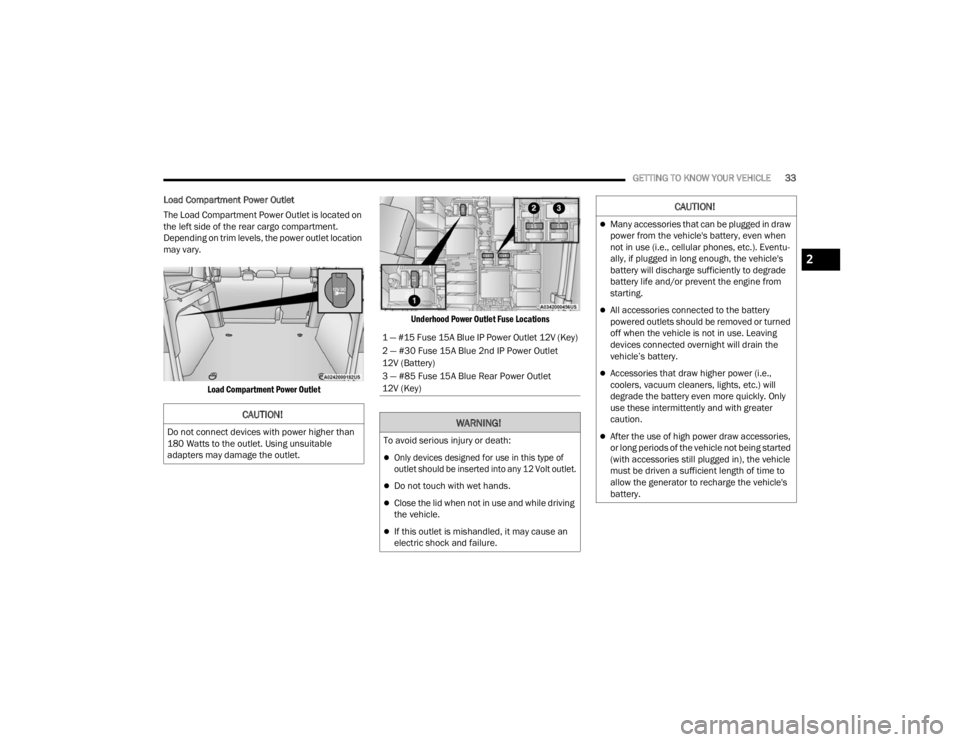
Load Compartment Power Outlet
The Load Compartment Power Outlet is located on
the left side of the rear cargo compartment.
Depending on trim levels, the power outlet location
may vary.
Load Compartment Power Outlet Underhood Power Outlet Fuse Locations
CAUTION!
Do not connect devices with power higher than
180 Watts to the outlet. Using unsuitable
adapters may damage the outlet.
1 — #15 Fuse 15A Blue IP Power Outlet 12V (Key)
2 — #30 Fuse 15A Blue 2nd IP Power Outlet
12V (Battery)
3 — #85 Fuse 15A Blue Rear Power Outlet
12V (Key)
WARNING!
To avoid serious injury or death:
Only devices designed for use in this type of
outlet should be inserted into any 12 Volt outlet.
Do not touch with wet hands.
Close the lid when not in use and while driving
the vehicle.
If this outlet is mishandled, it may cause an
electric shock and failure.
CAUTION!
Many accessories that can be plugged in draw
power from the vehicle's battery, even when
not in use (i.e., cellular phones, etc.). Eventu
-
ally, if plugged in long enough, the vehicle's
battery will discharge sufficiently to degrade
battery life and/or prevent the engine from
starting.
All accessories connected to the battery
powered outlets should be removed or turned
off when the vehicle is not in use. Leaving
devices connected overnight will drain the
vehicle’s battery.
Accessories that draw higher power (i.e.,
coolers, vacuum cleaners, lights, etc.) will
degrade the battery even more quickly. Only
use these intermittently and with greater
caution.
After the use of high power draw accessories,
or long periods of the vehicle not being started
(with accessories still plugged in), the vehicle
must be driven a sufficient length of time to
allow the generator to recharge the vehicle's
battery.
2
22_VM_OM_EN_USC_t.book Page 33
Page 37 of 260
GETTING TO KNOW YOUR VEHICLE35
Power Windows System Initialization
The power windows may be reset if any of the
following occurs:
On the front doors:
Fuse or battery are disconnected when the
window is moving
50 window movements without ever closing
the window
On the rear doors (in addition to the conditions
for the front doors):
Fuse or battery are disconnected when the
window is moving
The auto-reverse system is activated while
the window is moving and the door is
opening
50 window movements without ever closing
the window
One door opening with the window moving,
without ever closing the door
Three doors opening with the window in
motion. During these maneuvers, the upper
stop position is never reached Proceed as follows for initialization:
1. Completely close the driver's door window,
keeping the window switch pushed for at
least five seconds after the (upper) end of
travel position.
2. Proceed in the same way on the passenger's window switches.
Rear Window Lockout Switch — If Equipped
The window lockout switch on the driver's door trim
panel allows you to disable the window controls on
the rear passenger doors. To disable the window
controls, push and release the window lockout
button (the indicator light on the button will turn
on). To enable the window controls, push and
release the window lockout button again (the
indicator light on the button will turn off).
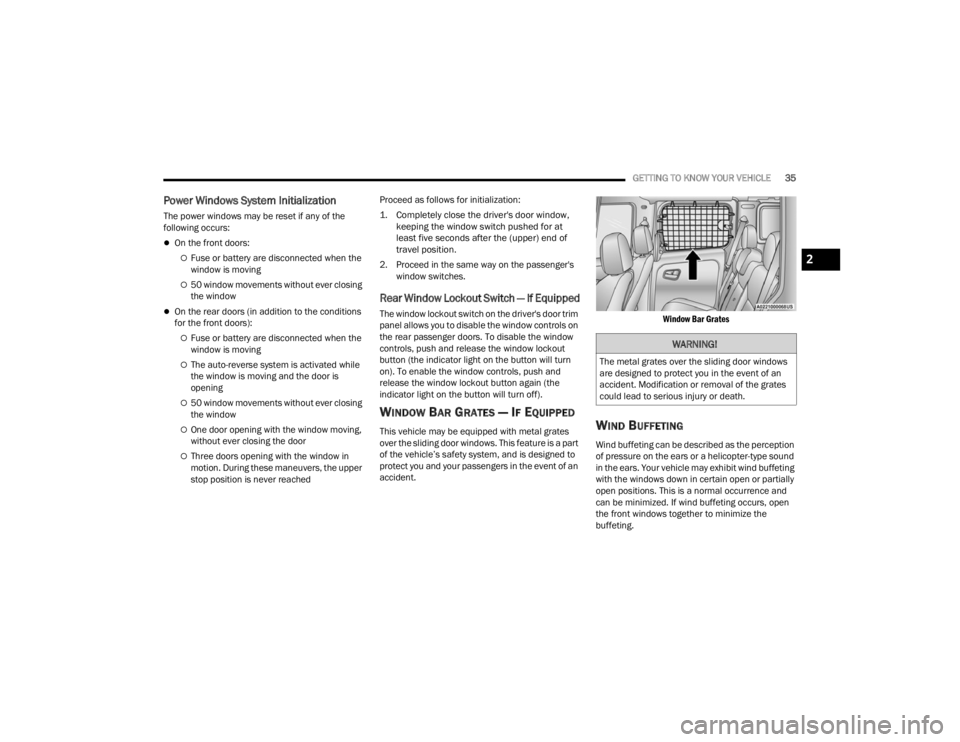
WINDOW BAR GRATES — IF EQUIPPED
This vehicle may be equipped with metal grates
over the sliding door windows. This feature is a part
of the vehicle’s safety system, and is designed to
protect you and your passengers in the event of an
accident.
Window Bar Grates
WIND BUFFETING
Wind buffeting can be described as the perception
of pressure on the ears or a helicopter-type sound
in the ears. Your vehicle may exhibit wind buffeting
with the windows down in certain open or partially
open positions. This is a normal occurrence and
can be minimized. If wind buffeting occurs, open
the front windows together to minimize the
buffeting.
WARNING!
The metal grates over the sliding door windows
are designed to protect you in the event of an
accident. Modification or removal of the grates
could lead to serious injury or death.
2
22_VM_OM_EN_USC_t.book Page 35
Page 45 of 260
GETTING TO KNOW YOUR INSTRUMENT PANEL43
Exit Menu
This is the last function that closes the cycle of
settings listed in the menu screen.
1. Pushing the
MENU
button briefly will return
the display to the standard screen without
storing.
2. Push the down arrow button to return to the
first menu item on the display.
TRIP COMPUTER
The Trip Computer is located in the instrument
cluster. It features a driver interactive display
(displays information such as trip information,
range, fuel consumption, average speed, and
travel time).
NOTE:The Uconnect System also has a Trip Computer
display and menus to customize the information
displayed in the cluster Ú page 79.
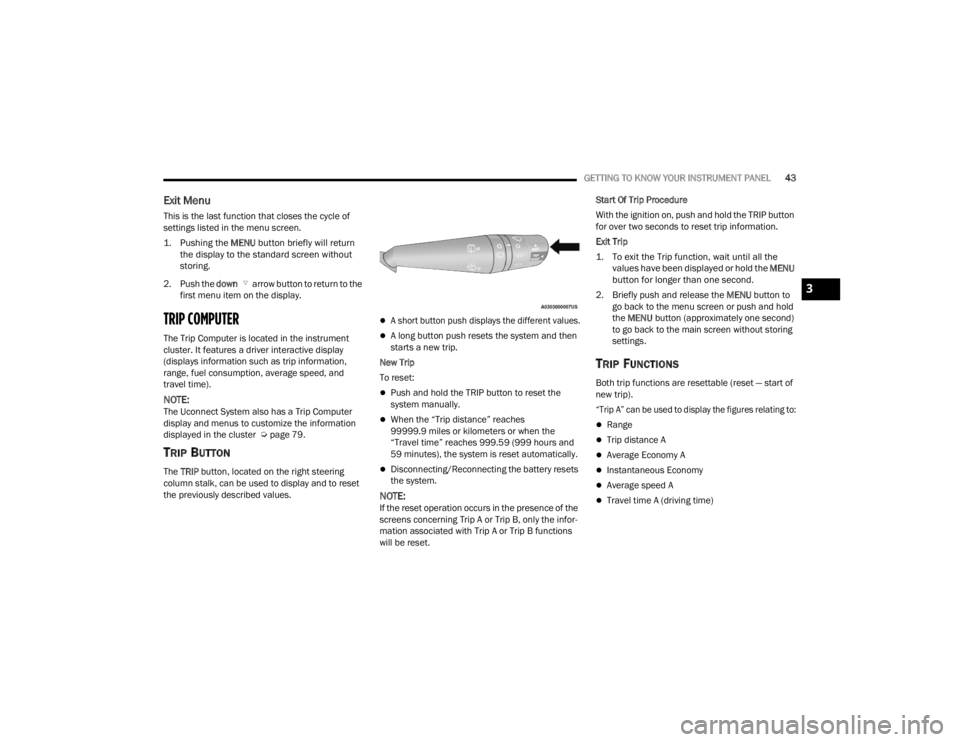
TRIP BUTTON
The TRIP button, located on the right steering
column stalk, can be used to display and to reset
the previously described values.
A short button push displays the different values.
A long button push resets the system and then
starts a new trip.
New Trip
To reset:
Push and hold the TRIP button to reset the
system manually.
When the “Trip distance” reaches
99999.9 miles or kilometers or when the
“Travel time” reaches 999.59 (999 hours and
59 minutes), the system is reset automatically.
Disconnecting/Reconnecting the battery resets
the system.
NOTE:If the reset operation occurs in the presence of the
screens concerning Trip A or Trip B, only the infor -
mation associated with Trip A or Trip B functions
will be reset. Start Of Trip Procedure
With the ignition on, push and hold the TRIP button
for over two seconds to reset trip information.
Exit Trip
1. To exit the Trip function, wait until all the
values have been displayed or hold the
MENU
button for longer than one second.
2. Briefly push and release the MENU button to
go back to the menu screen or push and hold
the MENU button (approximately one second)
to go back to the main screen without storing
settings.
TRIP FUNCTIONS
Both trip functions are resettable (reset — start of
new trip).
“Trip A” can be used to display the figures relating to:
Range
Trip distance A
Average Economy A
Instantaneous Economy
Average speed A
Travel time A (driving time)
3
22_VM_OM_EN_USC_t.book Page 43
Page 47 of 260
GETTING TO KNOW YOUR INSTRUMENT PANEL45
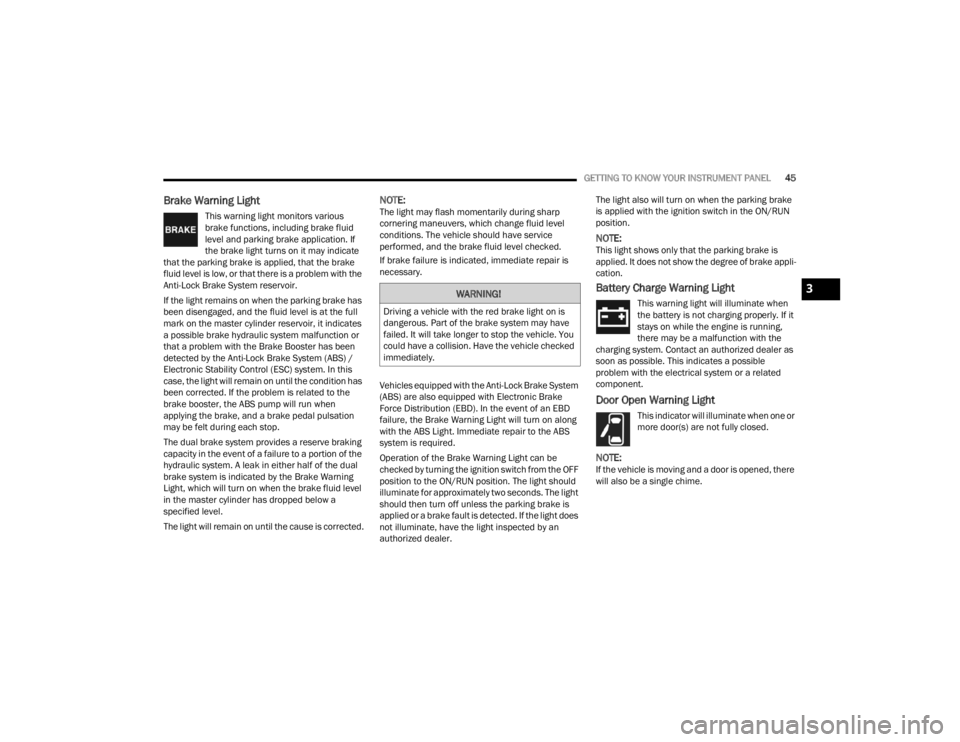
Brake Warning Light
This warning light monitors various
brake functions, including brake fluid
level and parking brake application. If
the brake light turns on it may indicate
that the parking brake is applied, that the brake
fluid level is low, or that there is a problem with the
Anti-Lock Brake System reservoir.
If the light remains on when the parking brake has
been disengaged, and the fluid level is at the full
mark on the master cylinder reservoir, it indicates
a possible brake hydraulic system malfunction or
that a problem with the Brake Booster has been
detected by the Anti-Lock Brake System (ABS) /
Electronic Stability Control (ESC) system. In this
case, the light will remain on until the condition has
been corrected. If the problem is related to the
brake booster, the ABS pump will run when
applying the brake, and a brake pedal pulsation
may be felt during each stop.
The dual brake system provides a reserve braking
capacity in the event of a failure to a portion of the
hydraulic system. A leak in either half of the dual
brake system is indicated by the Brake Warning
Light, which will turn on when the brake fluid level
in the master cylinder has dropped below a
specified level.
The light will remain on until the cause is corrected.
NOTE:The light may flash momentarily during sharp
cornering maneuvers, which change fluid level
conditions. The vehicle should have service
performed, and the brake fluid level checked.
If brake failure is indicated, immediate repair is
necessary.
Vehicles equipped with the Anti-Lock Brake System
(ABS) are also equipped with Electronic Brake
Force Distribution (EBD). In the event of an EBD
failure, the Brake Warning Light will turn on along
with the ABS Light. Immediate repair to the ABS
system is required.
Operation of the Brake Warning Light can be
checked by turning the ignition switch from the OFF
position to the ON/RUN position. The light should
illuminate for approximately two seconds. The light
should then turn off unless the parking brake is
applied or a brake fault is detected. If the light does
not illuminate, have the light inspected by an
authorized dealer. The light also will turn on when the parking brake
is applied with the ignition switch in the ON/RUN
position.
NOTE:This light shows only that the parking brake is
applied. It does not show the degree of brake appli
-
cation.
Battery Charge Warning Light
This warning light will illuminate when
the battery is not charging properly. If it
stays on while the engine is running,
there may be a malfunction with the
charging system. Contact an authorized dealer as
soon as possible. This indicates a possible
problem with the electrical system or a related
component.
Door Open Warning Light
This indicator will illuminate when one or
more door(s) are not fully closed.
NOTE:If the vehicle is moving and a door is opened, there
will also be a single chime.
WARNING!
Driving a vehicle with the red brake light on is
dangerous. Part of the brake system may have
failed. It will take longer to stop the vehicle. You
could have a collision. Have the vehicle checked
immediately.
3
22_VM_OM_EN_USC_t.book Page 45
Page 53 of 260
GETTING TO KNOW YOUR INSTRUMENT PANEL51
ONBOARD DIAGNOSTIC SYSTEM
(OBD II) CYBERSECURITY
Your vehicle is required to have an OBD II and a
connection port to allow access to information
related to the performance of your emissions
controls. Authorized service technicians may need
to access this information to assist with the
diagnosis and service of your vehicle and
emissions system Úpage 78.
EMISSIONS INSPECTION AND
MAINTENANCE PROGRAMS
In some localities, it may be a legal requirement to
pass an inspection of your vehicle's emissions
control system. Failure to pass could prevent
vehicle registration.
For states that require an Inspection
and Maintenance (I/M), this check
verifies the Malfunction Indicator Light
(MIL) is functioning and is not on when
the engine is running, and that the OBD II system
is ready for testing.
The OBD ll may not be ready if your vehicle was
recently serviced, recently had a depleted battery
or a battery replacement. If the OBD ll system
should be determined not ready for the I/M test,
your vehicle may fail the test.
Your vehicle has a simple ignition actuated test,
which you can use prior to going to the test station.
To check if your vehicle's OBD II system is ready,
you must do the following:
1. Cycle the ignition switch to the ON position, but do not crank or start the engine.
NOTE:If you crank or start the engine, you will have to
start this test over. 2. As soon as you cycle the ignition switch to the
ON position, you will see the MIL symbol come
on as part of a normal bulb check.
3. Approximately 15 seconds later, one of two things will happen:
The MIL will flash for about 10 seconds and
then return to being fully illuminated until you
turn OFF the ignition or start the engine. This
means that your vehicle's OBD II system is not
ready and you should not proceed to the I/M
station.
The MIL will not flash at all and will remain fully
illuminated until you place the ignition in the off
position or start the engine. This means that
your vehicle's OBD II system is ready and you
can proceed to the I/M station.
If your OBD II system is not ready, you should see
an authorized dealer or repair facility. If your
vehicle was recently serviced or had a battery
failure or replacement, you may need to do nothing
more than drive your vehicle as you normally would
in order for your OBD II system to update. A
recheck with the above test routine may then
indicate that the system is now ready.
WARNING!
ONLY an authorized service technician should
connect equipment to the OBD II connection
port in order to read the VIN, diagnose, or
service your vehicle.
If unauthorized equipment is connected to the
OBD II connection port, such as a
driver-behavior tracking device, it may:
Be possible that vehicle systems,
including safety related systems, could be
impaired or a loss of vehicle control could
occur that may result in an accident
involving serious injury or death.
Access, or allow others to access, infor -
mation stored in your vehicle systems,
including personal information.
3
22_VM_OM_EN_USC_t.book Page 51