transmission RAM PROMASTER CITY 2022 Owners Manual
[x] Cancel search | Manufacturer: RAM, Model Year: 2022, Model line: PROMASTER CITY, Model: RAM PROMASTER CITY 2022Pages: 260, PDF Size: 8.45 MB
Page 5 of 260

3
TRIP COMPUTER .................................................... 43 Trip Button ........................................................43
Trip Functions ..................................................43
Values Displayed ..............................................44
WARNING LIGHTS AND MESSAGES ................... 44
Red Warning Lights ..........................................44
Yellow Warning Lights ......................................47
Green Indicator Lights......................................49
Blue Indicator Lights ........................................50
White Indicator Lights ......................................50
ONBOARD DIAGNOSTIC SYSTEM — OBD II ....... 50
Onboard Diagnostic System
(OBD II) Cybersecurity ......................................51
EMISSIONS INSPECTION AND MAINTENANCE
PROGRAMS ............................................................ 51
STARTING AND OPERATING
STARTING THE ENGINE ........................................ 52
Automatic Transmission ..................................52
Normal Starting ................................................52
Cold Weather Operation .................................52
Extended Park Starting ....................................52
If Engine Fails To Start .....................................53
After Starting.....................................................53
ENGINE BLOCK HEATER — IF EQUIPPED ............ 53
ENGINE BREAK-IN RECOMMENDATIONS .......... 54
PARKING BRAKE .................................................. 54 AUTOMATIC TRANSMISSION ...............................55
Key Ignition Park Interlock...............................56
Brake/Transmission Shift Interlock (BTSI)
System .............................................................56
9-Speed Automatic Transmission ..................56
POWER STEERING ................................................60
Power Steering Fluid Check ............................60
CRUISE CONTROL — IF EQUIPPED .......................60
To Activate ........................................................61
To Set A Desired Speed ...................................61
To Vary The Speed Setting...............................61
To Accelerate For Passing ...............................61
To Resume Speed ............................................62
To Deactivate ...................................................62
PARKSENSE REAR PARK ASSIST —
IF EQUIPPED ...........................................................62
ParkSense Rear Park Assist Sensors .............62
ParkSense Rear Park Assist Alerts .................63
ParkSense Rear Park Assist Failure
Indications ........................................................64
Cleaning The ParkSense Rear Park Assist
System ..............................................................64
ParkSense Rear Park Assist System Usage
Precautions.......................................................64
PARKVIEW REAR BACK UP CAMERA .................65
REFUELING THE VEHICLE .....................................66 VEHICLE LOADING ................................................. 67
Vehicle Certification Label............................... 67
Gross Vehicle Weight Rating (GVWR) ............. 67
Gross Axle Weight Rating (GAWR) .................. 67
Tire Size ............................................................ 67
Rim Size ............................................................ 67
Inflation Pressure ............................................. 67
Curb Weight ...................................................... 67
Overloading ...................................................... 68
Loading ............................................................ 68
TRAILER TOWING .................................................. 68
Common Towing Definitions............................ 68
Trailer Hitch Classification............................... 70
Trailer Towing Weights (Maximum Trailer
Weight Ratings) ............................................... 71
Trailer And Tongue Weight .............................71
Towing Requirements ..................................... 71
Towing Tips ...................................................... 74
RECREATIONAL TOWING
(BEHIND MOTORHOME) ....................................... 75
Towing This Vehicle Behind Another Vehicle .... 75
Recreational Towing — Automatic Transmission .. 76
DRIVING TIPS ......................................................... 76
Driving On Slippery Surfaces .......................... 76
Driving Through Water ....................................76
22_VM_OM_EN_USC_t.book Page 3
Page 7 of 260

5
VEHICLE MAINTENANCE ..................................... 195 Engine Oil ....................................................... 195
Engine Oil Filter ............................................. 196
Engine Air Cleaner Filter .............................. 196Air Conditioner Maintenance ....................... 196
Body Lubrication............................................ 197
Windshield Wiper Blades .............................. 197Exhaust System ............................................ 198
Cooling System ............................................. 199
Brake System ............................................... 202
Automatic Transmission .............................. 203Upfitter Connectors — If Equipped ............... 204
Fuses.............................................................. 207
Bulb Replacement ......................................... 213
TIRES ..................................................................... 217
Tire Safety Information ................................ 217
Tires — General Information ........................ 225
Tire Types ....................................................... 228
Spare Tires — If Equipped ............................. 229
Wheel And Wheel Trim Care ........................ 231
Tire Chains and Traction Devices ................ 232
Tire Rotation Recommendations ................. 232
DEPARTMENT OF TRANSPORTATION UNIFORM
TIRE QUALITY GRADES ...................................... 232
Treadwear ...................................................... 232Traction Grades ............................................. 233
Temperature Grades ..................................... 233
STORING THE VEHICLE ...................................... 233 BODYWORK ......................................................... 233
Protection From Atmospheric Agents .......... 233
Body And Underbody Maintenance.............. 234Preserving The Bodywork ............................. 234
INTERIORS .......................................................... 235
Seats And Fabric Parts ................................. 235
Plastic And Coated Parts .............................. 235Leather Surfaces ........................................... 235Glass Surfaces ............................................. 235
TECHNICAL SPECIFICATIONS
VEHICLE IDENTIFICATION NUMBER (VIN) ........ 236
BRAKE SYSTEM ................................................... 236
WHEEL AND TIRE TORQUE SPECIFICATIONS .. 236
Torque Specifications ................................... 236
FUEL REQUIREMENTS ........................................ 237
2.4L Engine ................................................... 237
Reformulated Gasoline ................................ 238Gasoline/Oxygenate Blends ........................ 238
E-85 Usage In Non-Flex Fuel Vehicles ......... 238CNG And LP Fuel System Modifications ...... 238MMT In Gasoline ........................................... 238Materials Added To Fuel ............................... 239
Fuel System Cautions ................................... 239
FLUID CAPACITIES ............................................. 240
ENGINE FLUIDS AND LUBRICANTS................... 240
CHASSIS FLUIDS AND LUBRICANTS ................ 241
CUSTOMER ASSISTANCE
SUGGESTIONS FOR OBTAINING SERVICE FOR
YOUR VEHICLE .................................................... 242
Prepare For The Appointment ...................... 242
Prepare A List ................................................ 242
Be Reasonable With Requests..................... 242
IF YOU NEED ASSISTANCE ................................ 242
FCA US LLC Customer Center....................... 242
FCA Canada Inc. Customer Center .............. 242
Mexico............................................................ 243
Puerto Rico And US Virgin Islands ............... 243
Customer Assistance For The Hearing
Or Speech Impaired (TDD/TTY) .................... 243
Service Contract ........................................... 243
WARRANTY INFORMATION ................................ 244
MOPAR® PARTS ................................................. 244
REPORTING SAFETY DEFECTS .......................... 244
In The 50 United States And
Washington, D.C............................................ 244
In Canada ...................................................... 244
PUBLICATION ORDER FORMS .......................... 245
GENERAL INFORMATION.................................... 245
22_VM_OM_EN_USC_t.book Page 5
Page 8 of 260
6
INTRODUCTION
Dear Customer,
Congratulations on selecting your new Ram. Be assured that it represents precision workmanship, distinctive styling, and high quality. This Owner’s Manual has
been prepared with the assistance of service and engineering specialists to acquaint you with the operation and maintenance of your vehicle. It is supplemented
by customer-oriented documents. Within this information, you will find a description of the services that FCA US LLC offers to its customers as well as the details
of the terms and conditions for maintaining its validity. Please take the time to read all of these publications carefully before driving your vehicle for the first time.
Following the instructions, recommendations, tips, and important warnings in this manual will help ensure safe and enjoyable operation of your vehicle. Be sure
you are familiar with all vehicle controls, particularly those used for braking, steering, transmission, and transfer case shifting (if equipped). Learn how your
vehicle handles on different road surfaces. Your driving skills will improve with experience.
This Owner’s Manual describes all versions of this vehicle. Options and equipment dedicated to specific markets or versions are not expressly indicated in
the text. Therefore, you should only consider the information that is related to the trim level, engine, and version that you have purchased. Any content
introduced throughout the Owner’s Information, which may or may not be applicable to your vehicle, will be identified with the wording “If Equipped”. All data
contained in this publication are intended to help you use your vehicle in the best possible way. FCA US LLC aims at a constant improvement of the vehicles
produced. For this reason, it reserves the right to make changes to the model described for technical and/or commercial reasons. For further information,
contact an authorized dealer.
When it comes to service, remember that authorized dealers know your Ram best, have factory-trained technicians and genuine Mopar® parts, and care about
your satisfaction.
22_VM_OM_EN_USC_t.book Page 6
Page 10 of 260
8
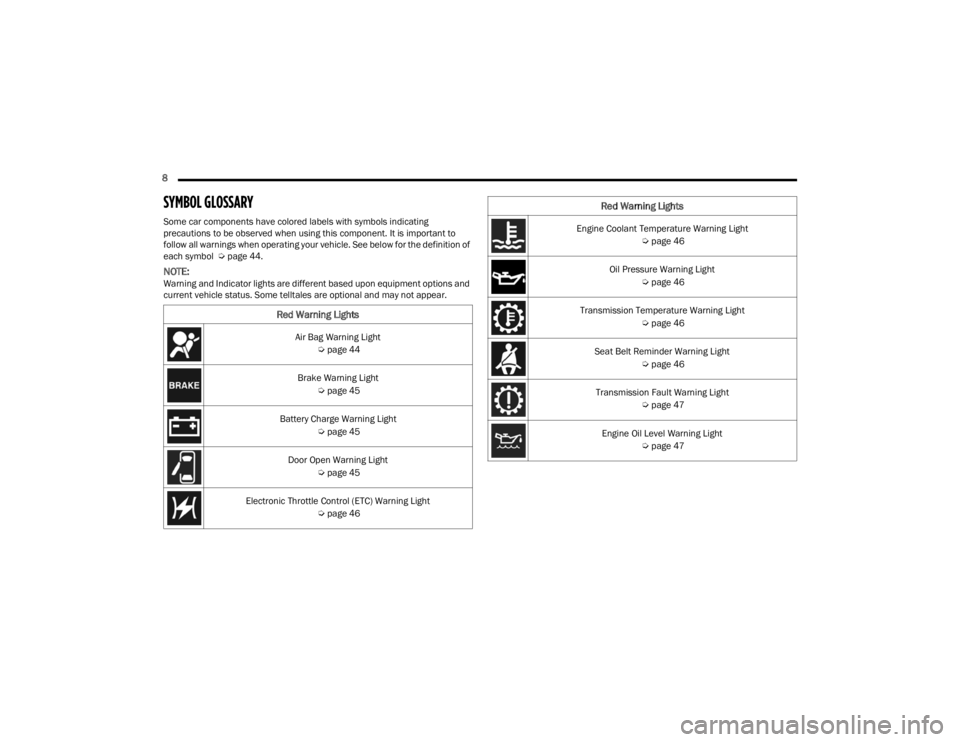
SYMBOL GLOSSARY
Some car components have colored labels with symbols indicating
precautions to be observed when using this component. It is important to
follow all warnings when operating your vehicle. See below for the definition of
each symbol Úpage 44.
NOTE:Warning and Indicator lights are different based upon equipment options and
current vehicle status. Some telltales are optional and may not appear.
Red Warning Lights
Air Bag Warning Light
Úpage 44
Brake Warning Light Úpage 45
Battery Charge Warning Light Úpage 45
Door Open Warning Light Úpage 45
Electronic Throttle Control (ETC) Warning Light Úpage 46
Engine Coolant Temperature Warning Light
Úpage 46
Oil Pressure Warning Light Úpage 46
Transmission Temperature Warning Light Úpage 46
Seat Belt Reminder Warning Light Úpage 46
Transmission Fault Warning Light Úpage 47
Engine Oil Level Warning Light Úpage 47
Red Warning Lights
22_VM_OM_EN_USC_t.book Page 8
Page 14 of 260
12GETTING TO KNOW YOUR VEHICLE
SENTRY KEY
The Sentry Key Immobilizer system prevents
unauthorized vehicle operation by disabling the
engine. The system does not need to be armed or
activated. Operation is automatic, regardless of
whether the vehicle is locked or unlocked.
The system uses ignition keys which have an
embedded electronic chip (transponder) to
prevent unauthorized vehicle operation. Therefore,
only keys that are programmed to the vehicle can
be used to start and operate the vehicle.
If the Vehicle Security Light is on after the key is
placed in the MAR (ACC/ON/RUN) position, it
indicates that there is a problem with the
electronics.
All of the keys provided with your new vehicle have
been programmed to the vehicle electronics.
NOTE:A key which has not been programmed is also
considered an invalid key, even if it is cut to fit the
ignition switch lock cylinder for that vehicle
Úpage 245.
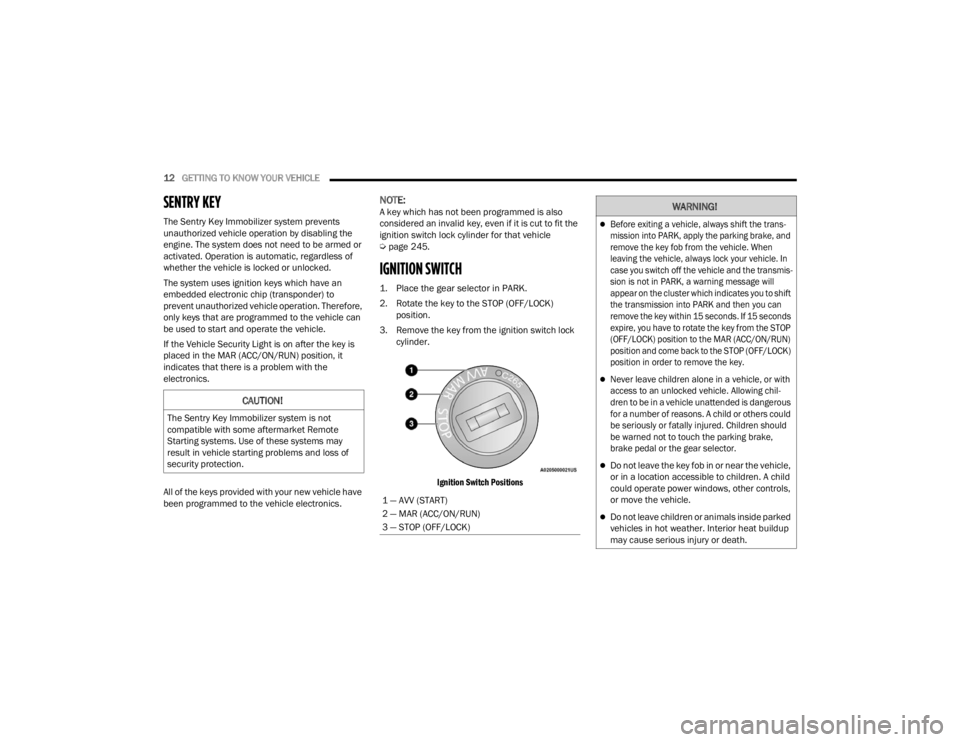
IGNITION SWITCH
1. Place the gear selector in PARK.
2. Rotate the key to the STOP (OFF/LOCK)
position.
3. Remove the key from the ignition switch lock cylinder.
Ignition Switch Positions
CAUTION!
The Sentry Key Immobilizer system is not
compatible with some aftermarket Remote
Starting systems. Use of these systems may
result in vehicle starting problems and loss of
security protection.
1 — AVV (START)
2 — MAR (ACC/ON/RUN)
3 — STOP (OFF/LOCK)
WARNING!
Before exiting a vehicle, always shift the trans -
mission into PARK, apply the parking brake, and
remove the key fob from the vehicle. When
leaving the vehicle, always lock your vehicle. In
case you switch off the vehicle and the transmis -
sion is not in PARK, a warning message will
appear on the cluster which indicates you to shift
the transmission into PARK and then you can
remove the key within 15 seconds. If 15 seconds
expire, you have to rotate the key from the STOP
(OFF/LOCK) position to the MAR (ACC/ON/RUN)
position and come back to the STOP (OFF/LOCK)
position in order to remove the key.
Never leave children alone in a vehicle, or with
access to an unlocked vehicle. Allowing chil -
dren to be in a vehicle unattended is dangerous
for a number of reasons. A child or others could
be seriously or fatally injured. Children should
be warned not to touch the parking brake,
brake pedal or the gear selector.
Do not leave the key fob in or near the vehicle,
or in a location accessible to children. A child
could operate power windows, other controls,
or move the vehicle.
Do not leave children or animals inside parked
vehicles in hot weather. Interior heat buildup
may cause serious injury or death.
22_VM_OM_EN_USC_t.book Page 12
Page 48 of 260
46GETTING TO KNOW YOUR INSTRUMENT PANEL
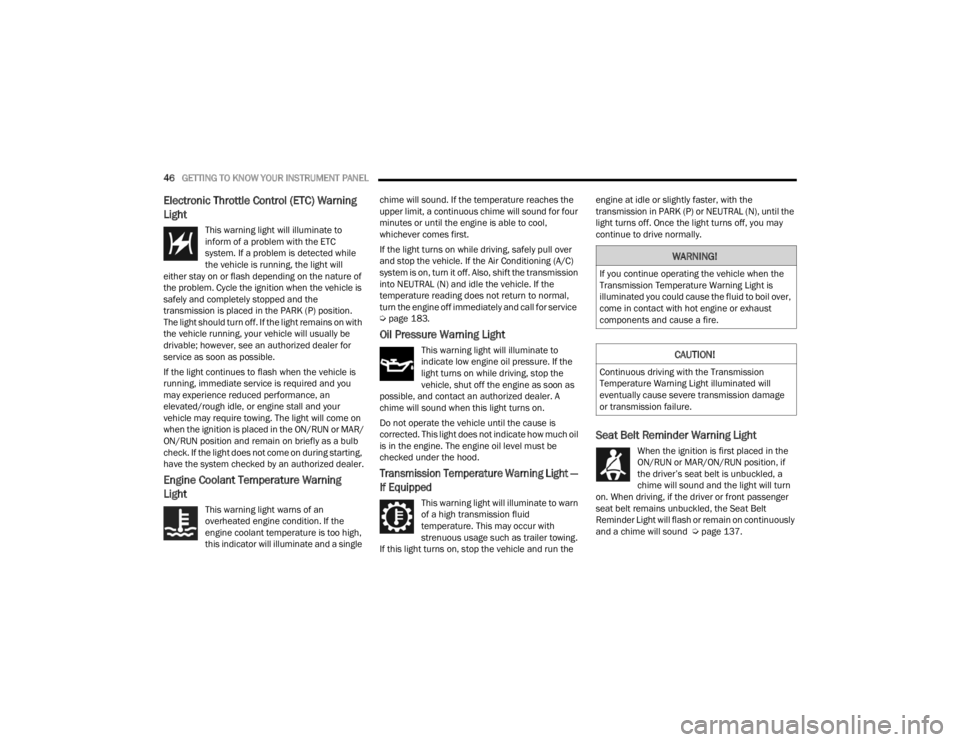
Electronic Throttle Control (ETC) Warning
Light
This warning light will illuminate to
inform of a problem with the ETC
system. If a problem is detected while
the vehicle is running, the light will
either stay on or flash depending on the nature of
the problem. Cycle the ignition when the vehicle is
safely and completely stopped and the
transmission is placed in the PARK (P) position.
The light should turn off. If the light remains on with
the vehicle running, your vehicle will usually be
drivable; however, see an authorized dealer for
service as soon as possible.
If the light continues to flash when the vehicle is
running, immediate service is required and you
may experience reduced performance, an
elevated/rough idle, or engine stall and your
vehicle may require towing. The light will come on
when the ignition is placed in the ON/RUN or MAR/
ON/RUN position and remain on briefly as a bulb
check. If the light does not come on during starting,
have the system checked by an authorized dealer.
Engine Coolant Temperature Warning
Light
This warning light warns of an
overheated engine condition. If the
engine coolant temperature is too high,
this indicator will illuminate and a single chime will sound. If the temperature reaches the
upper limit, a continuous chime will sound for four
minutes or until the engine is able to cool,
whichever comes first.
If the light turns on while driving, safely pull over
and stop the vehicle. If the Air Conditioning (A/C)
system is on, turn it off. Also, shift the transmission
into NEUTRAL (N) and idle the vehicle. If the
temperature reading does not return to normal,
turn the engine off immediately and call for service
Ú
page 183.
Oil Pressure Warning Light
This warning light will illuminate to
indicate low engine oil pressure. If the
light turns on while driving, stop the
vehicle, shut off the engine as soon as
possible, and contact an authorized dealer. A
chime will sound when this light turns on.
Do not operate the vehicle until the cause is
corrected. This light does not indicate how much oil
is in the engine. The engine oil level must be
checked under the hood.
Transmission Temperature Warning Light —
If Equipped
This warning light will illuminate to warn
of a high transmission fluid
temperature. This may occur with
strenuous usage such as trailer towing.
If this light turns on, stop the vehicle and run the engine at idle or slightly faster, with the
transmission in PARK (P) or NEUTRAL (N), until the
light turns off. Once the light turns off, you may
continue to drive normally.
Seat Belt Reminder Warning Light
When the ignition is first placed in the
ON/RUN or MAR/ON/RUN position, if
the driver’s seat belt is unbuckled, a
chime will sound and the light will turn
on. When driving, if the driver or front passenger
seat belt remains unbuckled, the Seat Belt
Reminder Light will flash or remain on continuously
and a chime will sound Ú page 137.
WARNING!
If you continue operating the vehicle when the
Transmission Temperature Warning Light is
illuminated you could cause the fluid to boil over,
come in contact with hot engine or exhaust
components and cause a fire.
CAUTION!
Continuous driving with the Transmission
Temperature Warning Light illuminated will
eventually cause severe transmission damage
or transmission failure.
22_VM_OM_EN_USC_t.book Page 46
Page 49 of 260

GETTING TO KNOW YOUR INSTRUMENT PANEL47
Transmission Fault Warning Light
This light will illuminate (together with a
message in the instrument cluster
display and a buzzer) to indicate a
transmission fault. Contact an
authorized dealer if the message remains after
restarting the engine.
Engine Oil Level Warning Light
This warning light appears on the panel
when the engine oil level falls below the
minimum recommended value. Restore
the correct engine oil level or contact an
authorized dealer for service.
YELLOW WARNING LIGHTS
Anti-Lock Brake System (ABS) Warning
Light
This light monitors the ABS. The light will
turn on when the ignition is placed in the
ON/RUN or MAR/ON/RUN position and
may stay on for as long as four seconds.
If the ABS light remains on or turns on while
driving, then the Anti-Lock portion of the brake
system is not functioning and service is required.
However, the conventional brake system will
continue to operate normally if the brake warning
light is not on. If the ABS light is on, the brake system should be
serviced as soon as possible to restore the
benefits of Anti-Lock Brakes. If the ABS light does
not turn on when the ignition is placed in the ON/
RUN or MAR/ON/RUN position, have the light
inspected by an authorized dealer.
Low Fuel Warning Light
When the fuel level reaches
approximately 2–3 gal (9–11 L) this
light will turn on, and remain on until
fuel is added.
Generic Warning Light
The Generic Warning Light will
illuminate if any of the following
conditions occur: Engine Oil Pressure
Sensor Failure, External Light Failure,
Parking Sensor Failure, Fuel Cut-Off Fail/
Intervention, Generic Failure on Trailer, or Air Bag
telltale recovery.
The telltale will blink in case of an Air Bag Warning
Light Failure. Contact an authorized dealer
immediately for service.
Tire Pressure Monitoring System (TPMS)
Warning Light
The warning light switches on and a
message is displayed to indicate that
the tire pressure is lower than the
recommended value and/or that slow
pressure loss is occurring. In these cases, optimal
tire duration and fuel consumption may not be
guaranteed.
Should one or more tires be in the condition
mentioned above, the display will show the
indications corresponding to each tire.
Each tire, including the spare (if provided), should be
checked monthly when cold and inflated to the
inflation pressure recommended by the vehicle
manufacturer on the vehicle placard or tire inflation
pressure label. If your vehicle has tires of a different
size than the size indicated on the vehicle placard or
tire inflation pressure label, you should determine the
proper tire inflation pressure for those tires.
CAUTION!
Do not continue driving with one or more flat
tires as handling may be compromised. Stop the
vehicle, avoiding sharp braking and steering. If a
tire puncture occurs, repair immediately using
the dedicated tire repair kit and contact an
authorized dealer as soon as possible.
3
22_VM_OM_EN_USC_t.book Page 47
Page 50 of 260

48GETTING TO KNOW YOUR INSTRUMENT PANEL
As an added safety feature, your vehicle has been
equipped with a TPMS that illuminates a low tire
pressure telltale when one or more of your tires is
significantly underinflated. Accordingly, when the low
tire pressure telltale illuminates, you should stop and
check your tires as soon as possible, and inflate them
to the proper pressure. Driving on a significantly
underinflated tire causes the tire to overheat and can
lead to tire failure. Underinflation also reduces fuel
efficiency and tire tread life, and may affect the
vehicle’s handling and stopping ability.
Please note that the TPMS is not a substitute for
proper tire maintenance, and it is the driver’s
responsibility to maintain correct tire pressure, even
if underinflation has not reached the level to trigger
illumination of the TPMS low tire pressure telltale.
Your vehicle has also been equipped with a TPMS
malfunction indicator to indicate when the system
is not operating properly. The TPMS malfunction
indicator is combined with the low tire pressure
telltale. When the system detects a malfunction,
the telltale will flash for approximately one minute
and then remain continuously illuminated. This
sequence will continue upon subsequent vehicle
start-ups as long as the malfunction exists. When
the malfunction indicator is illuminated, the
system may not be able to detect or signal low tire
pressure as intended. TPMS malfunctions may
occur for a variety of reasons, including the
installation of replacement or alternate tires or wheels on the vehicle that prevent the TPMS from
functioning properly. Always check the TPMS
malfunction telltale after replacing one or more
tires or wheels on your vehicle to ensure that the
replacement or alternate tires and wheels allow
the TPMS to continue to function properly.
Vehicle Security Warning Light
This warning light will illuminate when
the vehicle security system has
detected an attempt to break into the
vehicle.
Engine Check/Malfunction Indicator
Warning Light (MIL)
The Engine Check/Malfunction Indicator
Light (MIL) is a part of an Onboard
Diagnostic System called OBD II that
monitors engine and automatic
transmission control systems. This warning light will
illuminate when the ignition is in the ON/RUN position
before engine start. After placing the ignition to the
ON/RUN position, if there is a problem with the Sentry
Key System, the Vehicle Security Light will turn on.
This condition will result in the engine being shut off
after two seconds. If the bulb does not come on when
turning the ignition switch from OFF to ON/RUN, have
the condition checked promptly.
NOTE:This warning light will illuminate when the vehicle
security system has detected an attempt to break
into the vehicle.
Certain conditions, such as a loose or missing gas
cap, poor quality fuel, etc., may illuminate the light
after engine start. The vehicle should be serviced if
the light stays on through several typical driving
styles. In most situations, the vehicle will drive
normally and will not require towing.
When the engine is running, the MIL may flash to alert
serious conditions that could lead to immediate loss
of power or severe catalytic converter damage. The
vehicle should be serviced by an authorized dealer as
soon as possible if this occurs.
CAUTION!
The TPMS has been optimized for the original
equipment tires and wheels. TPMS pressures
and warning have been established for the tire
size equipped on your vehicle. Undesirable
system operation or sensor damage may result
when using replacement equipment that is not
of the same size, type, and/or style. Aftermarket
wheels can cause sensor damage. Using
aftermarket tire sealants may cause the Tire
Pressure Monitoring System (TPMS) sensor to
become inoperable. After using an aftermarket
tire sealant it is recommended that you take
your vehicle to an authorized dealer to have your
sensor function checked.
22_VM_OM_EN_USC_t.book Page 48
Page 52 of 260
50GETTING TO KNOW YOUR INSTRUMENT PANEL
Cruise Control Indicator Light —
If Equipped
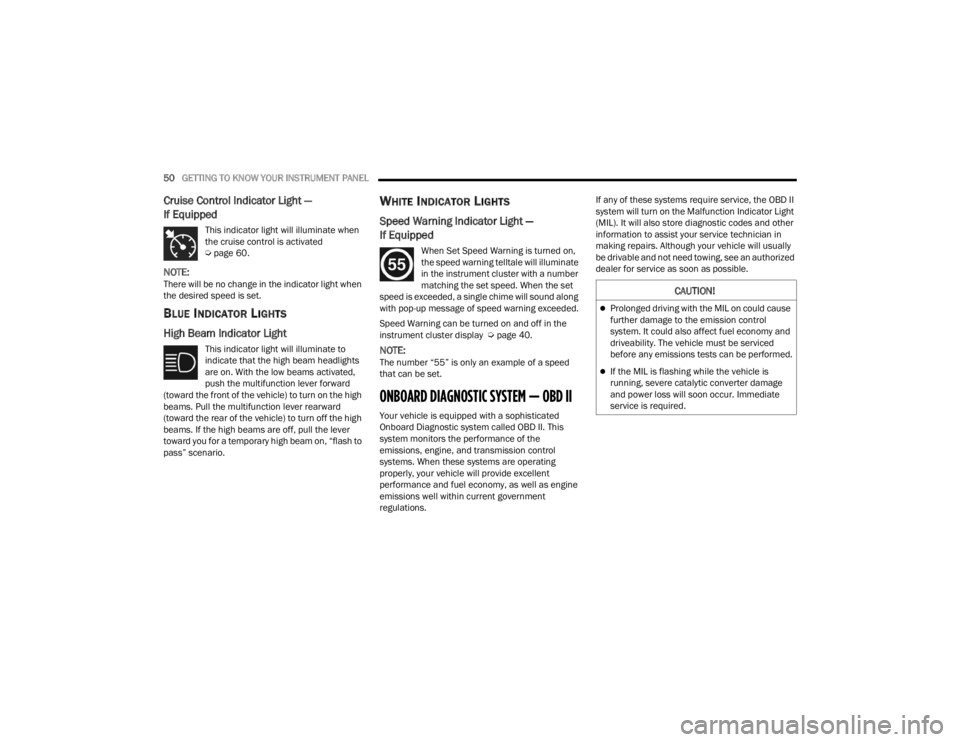
This indicator light will illuminate when
the cruise control is activated
Úpage 60.
NOTE:There will be no change in the indicator light when
the desired speed is set.
BLUE INDICATOR LIGHTS
High Beam Indicator Light
This indicator light will illuminate to
indicate that the high beam headlights
are on. With the low beams activated,
push the multifunction lever forward
(toward the front of the vehicle) to turn on the high
beams. Pull the multifunction lever rearward
(toward the rear of the vehicle) to turn off the high
beams. If the high beams are off, pull the lever
toward you for a temporary high beam on, “flash to
pass” scenario.
WHITE INDICATOR LIGHTS
Speed Warning Indicator Light —
If Equipped
When Set Speed Warning is turned on,
the speed warning telltale will illuminate
in the instrument cluster with a number
matching the set speed. When the set
speed is exceeded, a single chime will sound along
with pop-up message of speed warning exceeded.
Speed Warning can be turned on and off in the
instrument cluster display Ú page 40.
NOTE:The number “55” is only an example of a speed
that can be set.
ONBOARD DIAGNOSTIC SYSTEM — OBD II
Your vehicle is equipped with a sophisticated
Onboard Diagnostic system called OBD II. This
system monitors the performance of the
emissions, engine, and transmission control
systems. When these systems are operating
properly, your vehicle will provide excellent
performance and fuel economy, as well as engine
emissions well within current government
regulations. If any of these systems require service, the OBD II
system will turn on the Malfunction Indicator Light
(MIL). It will also store diagnostic codes and other
information to assist your service technician in
making repairs. Although your vehicle will usually
be drivable and not need towing, see an authorized
dealer for service as soon as possible.
CAUTION!
Prolonged driving with the MIL on could cause
further damage to the emission control
system. It could also affect fuel economy and
driveability. The vehicle must be serviced
before any emissions tests can be performed.
If the MIL is flashing while the vehicle is
running, severe catalytic converter damage
and power loss will soon occur. Immediate
service is required.
22_VM_OM_EN_USC_t.book Page 50
Page 54 of 260
52
STARTING AND OPERATING
STARTING THE ENGINE
Before starting your vehicle, adjust your seat,
adjust both inside and outside mirrors, and fasten
your seat belts.
AUTOMATIC TRANSMISSION
The gear selector must be in the PARK (P) or
NEUTRAL (N) position before you can start the
engine. Press the brake pedal before shifting to
any driving gear.
NOTE:You must press the brake pedal before shifting out
of PARK.
NORMAL STARTING
Turn the ignition switch to the AVV (START) position
and release it when the engine starts. If the engine
fails to start within 10 seconds, turn the ignition
switch to the STOP (OFF/LOCK) position, wait 10 to
15 seconds, then repeat this procedure.
COLD WEATHER OPERATION
To ensure reliable starting at low temperatures,
use of an externally powered electric engine block
heater (available from an authorized dealer) is
recommended.
To prevent possible engine damage while starting
at low temperatures, this vehicle will inhibit engine
cranking when the ambient temperature is less
than -31°F (-35° C) and the oil temperature
sensor reading indicates an engine block heater
has not been used. The message “Plug In Engine
Heater” will be displayed in the instrument cluster
when the ambient temperature is below -25°F
(-32° C) at the time the engine is shut off as a
reminder.
EXTENDED PARK STARTING
NOTE:Extended Park condition occurs when the vehicle
has not been started or driven for at least 30 days.
1. Install a battery charger or jumper cables to the battery to ensure a full battery charge
during the crank cycle.
2. Place the ignition in the AVV (START) position and release it when the engine starts.
3. If the engine fails to start within ten seconds, place the ignition in the STOP (OFF/LOCK)
position, wait 10 to 15 seconds to allow the
starter to cool, then repeat the Extended Park
Starting procedure.
4. If the engine fails to start after eight attempts, allow the starter to cool for at least
10 minutes, then repeat the procedure.
WARNING!
Never leave children alone in a vehicle, or with
access to an unlocked vehicle.
Allowing children to be in a vehicle unattended
is dangerous for a number of reasons. A child
or others could be seriously or fatally injured.
Children should be warned not to touch the
parking brake, brake pedal or the transmis -
sion gear selector.
Do not leave the key fob in or near the vehicle
(or in a location accessible to children). A child
could operate power windows, other controls,
or move the vehicle.
CAUTION!
To prevent damage to the starter, do not crank
continuously for more than 10 seconds at a
time. Wait 10 to 15 seconds before trying again.
22_VM_OM_EN_USC_t.book Page 52