check engine light RENAULT CLIO 1999 X65 / 2.G Air Bag And Seat Belts User Guide
[x] Cancel search | Manufacturer: RENAULT, Model Year: 1999, Model line: CLIO, Model: RENAULT CLIO 1999 X65 / 2.GPages: 90, PDF Size: 0.54 MB
Page 28 of 90

Downloaded from www.Manualslib.com manuals search engine WIRING
Air bags and seat belt pretensioners
88
Removal - Refitting
Any operation involving removal and refitting of
the seat trim of a seat back fitted with a side air
bag, must not be carried out for the time being.
In case of a fault on the air bag cushion or follo-
wing its inflation, the whole seat must be repla-
ced following the specific Parts Department or-
der procedure .
REMINDER: the computer in these vehicles can wi-
thstand several triggerings. Therefore, it does not
have to be replaced after every triggering of the
air bag(s) or pretensioners (see "Computer" sec-
tion).
On the other hand, in the event of a triggering
being caused, the side impact sensor must be re-
placed (certain components lose their nominal
specifications after the triggering energy has pas-
sed through them).
IMPORTANT :
• Before removing a seat, lock the computer
using the fault finding tool.
When this operation is activated, all the trig-
gering lines are inhibited and the air bag war-
ning light on the instrument panel is illumina-
ted.
• When refitting, after replacing the seat and
reconnecting the connectors, carry out a check
using the fault finding tool. Unlock the
computer if everything is correct, otherwise
see the"Fault Finding" section.
IMPORTANT : before scrapping an untriggered air
bag module, it
MUST be destroyed in accordance
with the method described in the "Destruction
Procedure" section
96832R
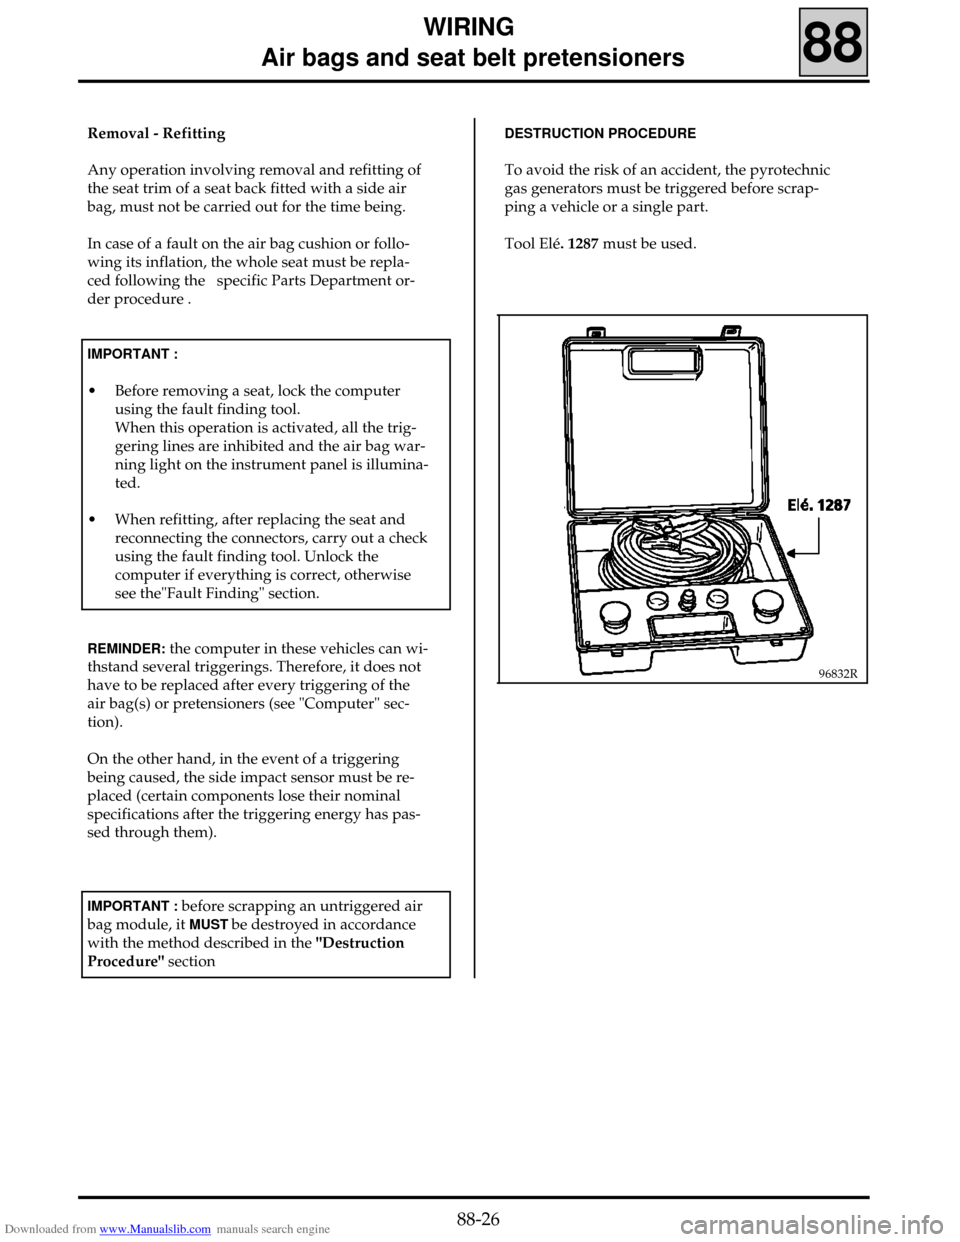
DESTRUCTION PROCEDURE
To avoid the risk of an accident, the pyrotechnic
gas generators must be triggered before scrap-
ping a vehicle or a single part.
Tool Elé. 1287 must be used.
88-26
Page 31 of 90

Downloaded from www.Manualslib.com manuals search engine 1AB8651.0
This fault finding section comprises two parts :
- For systems only with front air bags marked "Front".
- For systems with front and side air bags marked "Side".
CONDITIONS FOR APPLYING THE CHECKS DEFINED IN THIS FAULT FINDING
In this fault finding, each fault is interpreted for a type of special memory (fault present, fault memorised,
fault present or memorised).
The checks defined for the processing of each fault are therefore only applied to a vehicle if the fault is
interpreted for the type of fault declared by the fault finding tool.
If a fault is only interpreted in this fault finding if it is declared "present", applying the fault finding when
the fault is only "memorised" does not enable the origin of memorising this fault to be located. In this
case, only a check of the wiring and the connections for the part at fault needs to be carried out (it is
possible to test the wiring concerned in fault finding mode in order to try to see the change from
memorised fault to fault present).
If a fault is interpreted when it is declared"memorised", the conditions for confirming the actual presence
of the fault (and the need to apply fault finding) appear in the "Notes" section or at the beginning of the
fault interpretation.
Note : the ignition must be switched off before operating the fault finding tool.
TOOLING REQUIRED FOR OPERATIONS ON THE AIR BAG AND SEAT BELT PRETENSIONER SYSTEMS :
- fault finding tool (except XR25).
- XRBAG update N° 4 for front air bags (with the 30 track B40 adaptor with yellow computer base).
- XRBAG update N° 5 for side air bags ( with the new 50 track B50 adapter with orange computer base).
REMINDERS :
When carrying out an operation on the air bag / seat belt pretensioner systems, the computer must be
locked using the fault finding tool to prevent any risk of incorrect triggering (all trigger lines will be
inhibited).This "locked" mode is indicated by illumination of the warning light on the instrument panel.
If the operation follows an impact during which the pretensioners and/or air bags
were triggered, locking will only be possible following a computer unlocking command.
Following an impact during which the pretensioners and/or air bags were triggered, erasing the
memorised faults will only be possible following a computer unlocking command.
Never take measurements on the air bag and pretensioner triggering lines with an apparatus other than
the XRBAG.
Before using a dummy ignition module, ensure that its resistance is between 1.8 and 2.5 ohms.
During an operation ensure that the computer supply voltage does not fall below 10 volts (#01).
FAULT FINDING - INTRODUCTION
WIRING
Air bags and seat belt pretensioners
88
88-29
Page 39 of 90

Downloaded from www.Manualslib.com manuals search engine 1AB8651.0
AFTER REPAIR
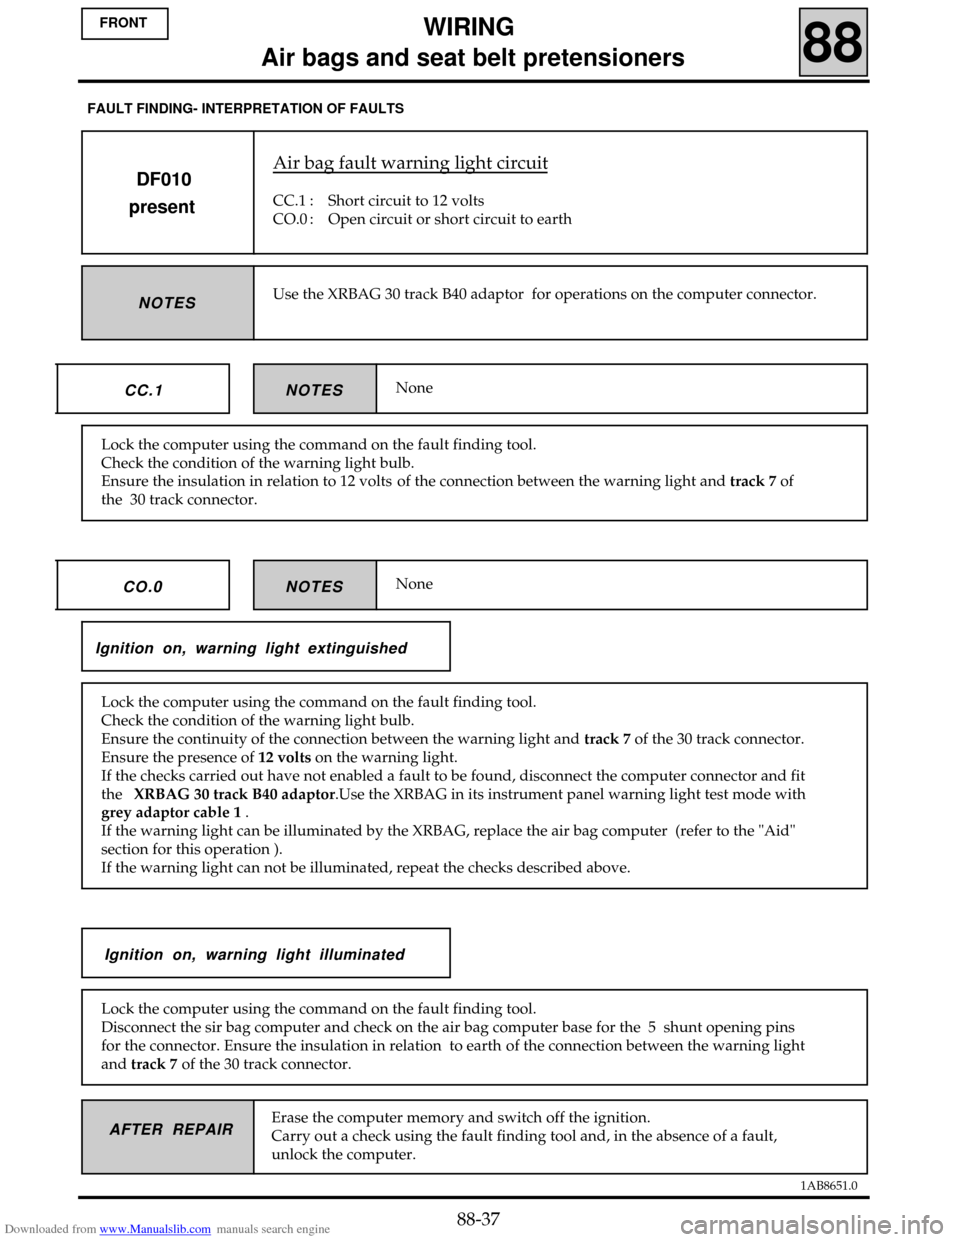
Air bag fault warning light circuit
CC.1 : Short circuit to 12 volts
CO.0 : Open circuit or short circuit to earth
DF010
present
NOTESUse the XRBAG 30 track B40 adaptor for operations on the computer connector.
NoneNOTES CC.1
Ignition on, warning light extinguished
Lock the computer using the command on the fault finding tool.
Check the condition of the warning light bulb.
Ensure the insulation in relation to 12 volts of the connection between the warning light and track 7 of
the 30 track connector.
NoneNOTES CO.0
Lock the computer using the command on the fault finding tool.
Check the condition of the warning light bulb.
Ensure the continuity of the connection between the warning light and track 7 of the 30 track connector.
Ensure the presence of 12 volts on the warning light.
If the checks carried out have not enabled a fault to be found, disconnect the computer connector and fit
the XRBAG 30 track B40 adaptor.Use the XRBAG in its instrument panel warning light test mode with
grey adaptor cable 1 .
If the warning light can be illuminated by the XRBAG, replace the air bag computer (refer to the "Aid"
section for this operation ).
If the warning light can not be illuminated, repeat the checks described above.
Ignition on, warning light illuminated
Lock the computer using the command on the fault finding tool.
Disconnect the sir bag computer and check on the air bag computer base for the 5 shunt opening pins
for the connector. Ensure the insulation in relation to earth of the connection between the warning light
and track 7 of the 30 track connector.
Erase the computer memory and switch off the ignition.
Carry out a check using the fault finding tool and, in the absence of a fault,
unlock the computer.
FAULT FINDING- INTERPRETATION OF FAULTS
WIRING
Air bags and seat belt pretensioners
88
FRONT
88-37
Page 50 of 90

Downloaded from www.Manualslib.com manuals search engine 1AB8651.0
Only carry out this conformity check after a complete check using the fault finding
tool.NOTES
Order FunctionParameter / status checked or
actionDisplay/notes Diag
1 Computer conformity
PR002
VEHICLE TYPE
Clio II : 06
Replace computer if not
suitable None
2Computer
configurationDriver’s pretensioner
Passenger’s pretensioner
Driver’s front air bag
Passenger’s front air bagEnsure that the computer
configuration corresponds to
the vehicle equipment.None
3Operation of warning
light
Check computer
initialisationIgnition onIllumination of the warning
light for 3 seconds when the
ignition is switched on None
FAULT FINDING- CHECKING CONFORMITY
WIRING
Air bags and seat belt pretensioners
88
FRONT
88-48
Page 51 of 90

Downloaded from www.Manualslib.com manuals search engine 1AB8651.0
CHANGING THE AIR BAG COMPUTER
Air bag computers are sold locked to prevent any risk of incorrect triggering (all trigger lines are
inhibited). This "locked" mode is indicated by illumination of the warning light on the instrument panel.
When changing an air bag computer, follow the instructions below:
- Ensure that the ignition is switched off.
- Change the computer.
- Carry out a check using the fault finding tool.
- If necessary change the computer configuration using the "computer configuration" command
- Unlock the computer, only in the absence of a fault declared by the fault finding tool.
FAULT FINDING- AID
WIRING
Air bags and seat belt pretensioners
88
FRONT
88-49
Page 64 of 90

Downloaded from www.Manualslib.com manuals search engine 1AB8651.0
AFTER REPAIR
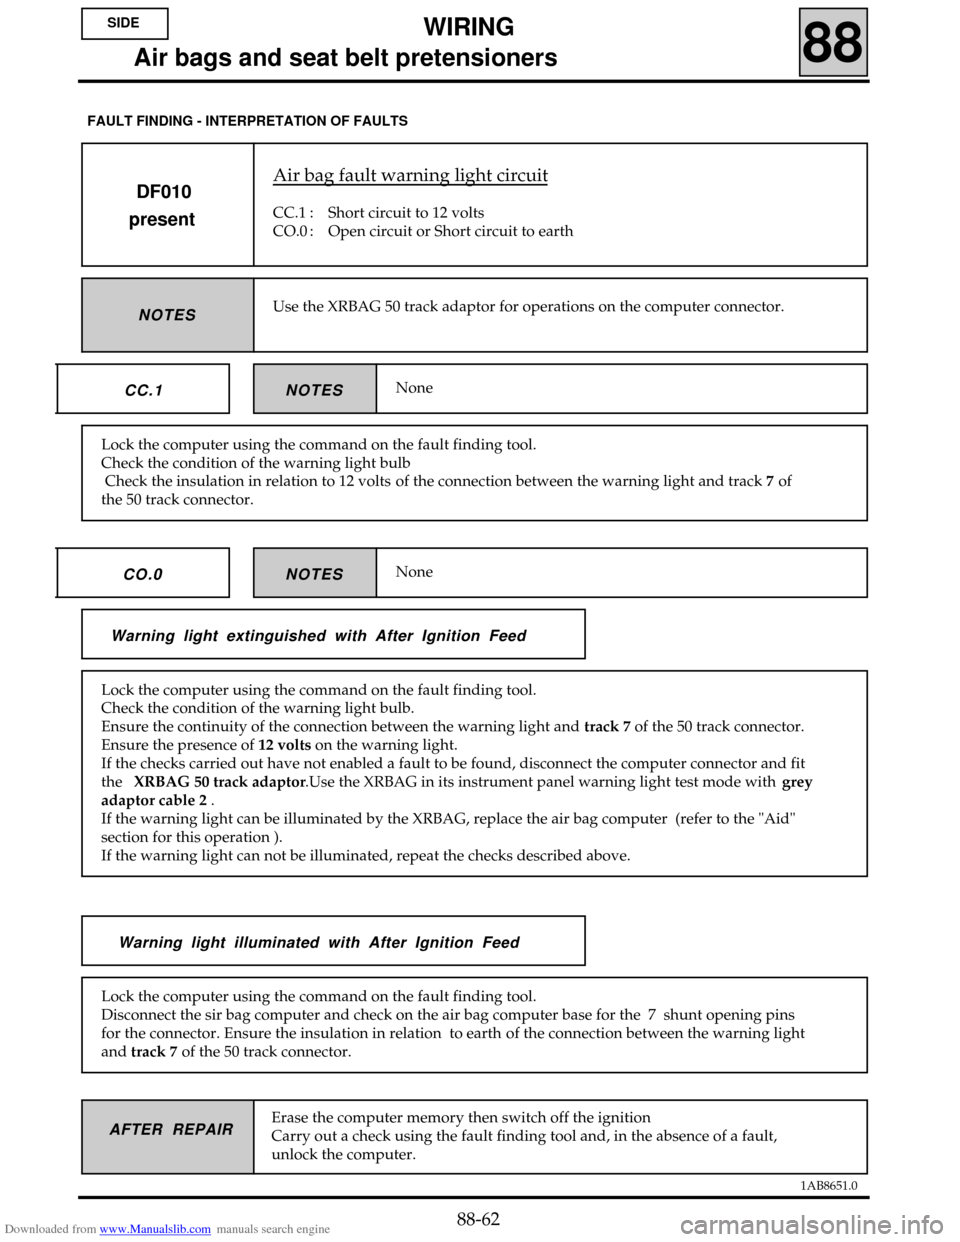
Air bag fault warning light circuit
CC.1 : Short circuit to 12 volts
CO.0 : Open circuit or Short circuit to earth
DF010
present
NOTESUse the XRBAG 50 track adaptor for operations on the computer connector.
NoneNOTES CC.1
Warning light extinguished with After Ignition Feed
Lock the computer using the command on the fault finding tool.
Check the condition of the warning light bulb
Check the insulation in relation to 12 volts of the connection between the warning light and track 7 of
the 50 track connector.
NoneNOTES CO.0
Lock the computer using the command on the fault finding tool.
Check the condition of the warning light bulb.
Ensure the continuity of the connection between the warning light and track 7 of the 50 track connector.
Ensure the presence of 12 volts on the warning light.
If the checks carried out have not enabled a fault to be found, disconnect the computer connector and fit
the XRBAG 50 track adaptor.Use the XRBAG in its instrument panel warning light test mode withgrey
adaptor cable 2 .
If the warning light can be illuminated by the XRBAG, replace the air bag computer (refer to the "Aid"
section for this operation ).
If the warning light can not be illuminated, repeat the checks described above.
Warning light illuminated with After Ignition Feed
Lock the computer using the command on the fault finding tool.
Disconnect the sir bag computer and check on the air bag computer base for the 7 shunt opening pins
for the connector. Ensure the insulation in relation to earth of the connection between the warning light
and track 7 of the 50 track connector.
Erase the computer memory then switch off the ignition
Carry out a check using the fault finding tool and, in the absence of a fault,
unlock the computer.
FAULT FINDING - INTERPRETATION OF FAULTS
WIRING
Air bags and seat belt pretensionersSIDE
88
88-62
Page 88 of 90

Downloaded from www.Manualslib.com manuals search engine 1AB8651.0
Only carry out this conformity check after a complete check using the fault finding
tool.NOTES
Order FunctionParameter / status checked or
actionDisplay /notes Diag
1
Computer conformityPR002
VEHICLE TYPE
Clio II : 06
Replace computer if not
suitable None
2
Computer
configurationDriver’s pretensioner
Passenger’s pretensioner
Driver’s front air bag
Passenger’s front air bag
Driver’s side air bag
Passenger’s side air bag
Driver’s side sensor
Passenger’s side sensorEnsure that the computer
configuration corresponds to
the vehicle equipment.None
3Operation of warning
light
Check computer
initialisationIgnition onIllumination of the warning
light for 3 seconds when the
ignition is switched on None
FAULT FINDING - CHECKING CONFORMITY
WIRING
Air bags and seat belt pretensionersSIDE
88
88-86
Page 89 of 90

Downloaded from www.Manualslib.com manuals search engine 1AB8651.0
CHANGING THE AIR BAG COMPUTER
Air bag computers are sold locked to prevent any risk of incorrect triggering (all trigger lines are
inhibited). This "locked" mode is indicated by illumination of the warning light on the instrument panel.
When changing an air bag computer, follow the instructions below:
- Ensure that the ignition is switched off.
- Change the computer.
- Carry out a check using the fault finding tool.
- If necessary, change the computer configuration using the "computer configuration"command .
- Unlock the computer, only when no fault is declared by the fault finding tool.
FAULT FINDING - AID
WIRING
Air bags and seat belt pretensionersSIDE
88
88-87