instrument panel RENAULT DUSTER 2016 Owners Manual
[x] Cancel search | Manufacturer: RENAULT, Model Year: 2016, Model line: DUSTER, Model: RENAULT DUSTER 2016Pages: 256, PDF Size: 6.49 MB
Page 7 of 256
1.1
Section 1: Getting to know your vehicle
Keys, radio frequency remote control: general information . . . . . . . . . . . . . . . . . . . . . . . . . . . . . . . . 1.2
Locking/unlocking the doors . . . . . . . . . . . . . . . . . . . . . . . . . . . . . . . . . . . .\
. . . . . . . . . . . . . . . . . . . 1.5
Automatic locking when driving . . . . . . . . . . . . . . . . . . . . . . . . . . . . . . . . . . . . \
. . . . . . . . . . . . . . . . . 1.7
Opening and closing the doors . . . . . . . . . . . . . . . . . . . . . . . . . . . . . . . . . . . .\
. . . . . . . . . . . . . . . . . 1.8
Front headrests . . . . . . . . . . . . . . . . . . . . . . . . . . . . . . . . . . . . \
. . . . . . . . . . . . . . . . . . . . . . . . . . . . . 1.10
Front seats. . . . . . . . . . . . . . . . . . . . . . . . . . . . . . .\
. . . . . . . . . . . . . . . . . . . . . . . . . . . . . . . . . . . . . . 1.11
Seat belts. . . . . . . . . . . . . . . . . . . . . . . . . . . . . . . \
. . . . . . . . . . . . . . . . . . . . . . . . . . . . . . . . . . . . . . . 1.13
Methods of restraint in addition to the front seat belts . . . . . . . . . . . . . . . . . . . . . . . . . . . . . . . . . . . . 1.17
Side protection devices . . . . . . . . . . . . . . . . . . . . . . . . . . . . . . . . . . . . \
. . . . . . . . . . . . . . . . . . . . . . . 1.20
Additional methods of restraint . . . . . . . . . . . . . . . . . . . . . . . . . . . . . . . . . . . .\
. . . . . . . . . . . . . . . . . 1.21
Child safety: General information . . . . . . . . . . . . . . . . . . . . . . . . . . . . . . . . . . . .\
. . . . . . . . . . . . . . . 1.22 child seat mounting . . . . . . . . . . . . . . . . . . . . . . . . . . . . . . . . . . . .\
. . . . . . . . . . . . . . . . . . . . 1.25
fitting a child seat . . . . . . . . . . . . . . . . . . . . . . . . . . . . . . . . . . . . \
. . . . . . . . . . . . . . . . . . . . . . 1.27
Deactivating/activating the front passenger air bag . . . . . . . . . . . . . . . . . . . . . . . . . . . . . . . . 1.33
Rear view mirrors . . . . . . . . . . . . . . . . . . . . . . . . . . . . . . . . . . . .\
. . . . . . . . . . . . . . . . . . . . . . . . . . . 1.36
Driving position . . . . . . . . . . . . . . . . . . . . . . . . . . . . . . . . . . . .\
. . . . . . . . . . . . . . . . . . . . . . . . . . . . . 1.37
Instrument panel: warning lights . . . . . . . . . . . . . . . . . . . . . . . . . . . . . . . . . . . .\
. . . . . . . . . . . . . . . . 1.41
Display and indicators . . . . . . . . . . . . . . . . . . . . . . . . . . . . . . . . . . . . \
. . . . . . . . . . . . . . . . . . . . . . . . 1.48
Trip computer and warning system . . . . . . . . . . . . . . . . . . . . . . . . . . . . . . . . . . . . \
. . . . . . . . . . . . . . 1.50
Steering wheel, Power-assisted steering . . . . . . . . . . . . . . . . . . . . . . . . . . . . . . . . . . . .\
. . . . . . . . . 1.56
Clock . . . . . . . . . . . . . . . . . . . . . . . . . . . . . . . . . \
. . . . . . . . . . . . . . . . . . . . . . . . . . . . . . . . . . . . . . . . 1.57
Audible and visual signals . . . . . . . . . . . . . . . . . . . . . . . . . . . . . . . . . . . . \
. . . . . . . . . . . . . . . . . . . . . 1.58
Exterior lighting and signals. . . . . . . . . . . . . . . . . . . . . .\
. . . . . . . . . . . . . . . . . . . . . . . . . . . . . . . . . . 1.59
Adjusting the headlight beam height . . . . . . . . . . . . . . . . . . . . . . . . . . . . . . . . . . . . \
. . . . . . . . . . . . . 1.61
Screen washer/wiper . . . . . . . . . . . . . . . . . . . . . . . . . . . . . . . . . . . . \
. . . . . . . . . . . . . . . . . . . . . . . . . 1.63
Fuel tank (filling with fuel) . . . . . . . . . . . . . . . . . . . . . . . . . . . . . . . . . . . .\
. . . . . . . . . . . . . . . . . . . . . 1.65
Page 27 of 256
1.21
The airbag is designed to complement the action of the seat belt. Both t\
he
airbags and seat belts are integral parts of the same protection system.\
It is therefore essential to wear the seat belt at all times. If seat be\
lts are
not worn, the occupants are exposed to the risk of serious injury in the\
event of an accident. It may also increase the risk of minor superficial\
injuries
occurring when the airbag is deployed, although such minor injuries are \
always
possible with airbags.
If the vehicle should overturn or suffer a rear impact, however severe, the pre-
tensioners and air bags are not always triggered. Impacts to the undersi\
de of the
vehicle, e.g. from pavements, potholes or stones, can all trigger these \
systems.
– No work or modification whatsoever may be carried out on any part of the
driver or passenger air bag system (air bag, electronic unit, wiring, e\
tc.), except
by qualified personnel from our Network.
– To ensure that the system is in good working order and to avoid accidenta\
l trig- gering of the system which could cause injury, only qualified personnel from
our Network may work on the air bag system.
– As a safety precaution, have the air bag system checked if your vehicle \
has been involved in an accident, or is stolen or broken into.
– When selling or lending the vehicle, inform the user of these points and\
hand over this driver’s handbook with the vehicle.
– When scrapping your vehicle, contact your approved Dealer for disposal o\
f the gas generator(s).
All of the warnings below are given so that the air bag is not obstructe\
d in any way when it is inflated and also to prevent
the risk of serious injuries caused by items which may be dislodged when\
the air bag inflates.
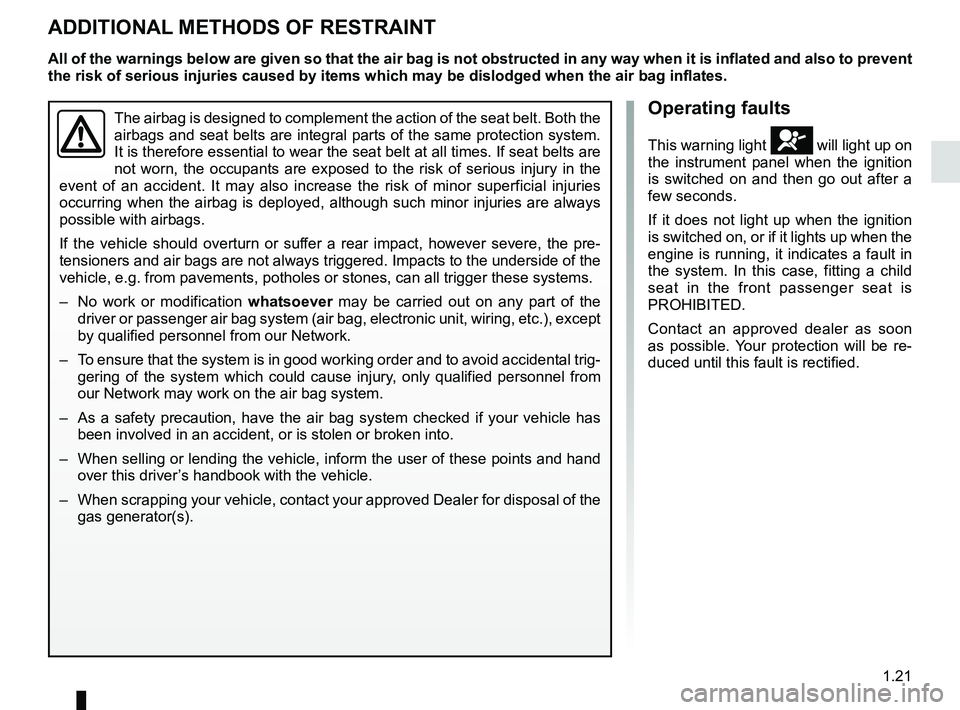
ADDITIONAL METHODS OF RESTRAINT
Operating faults
This warning light å will light up on
the instrument panel when the ignition
is switched on and then go out after a
few seconds.
If it does not light up when the ignition
is switched on, or if it lights up when the
engine is running, it indicates a fault in
the system. In this case, fitting a child
seat in the front passenger seat is
PROHIBITED.
Contact an approved dealer as soon
as possible. Your protection will be re-
duced until this fault is rectified.
Page 39 of 256
![RENAULT DUSTER 2016 Owners Manual 1.33
To deactivate the passenger airbag,
with the ignition off, press and turn
button 1 to the OFF position.
With the ignition switched back on, it is
essential to check that warning light 2,
], i RENAULT DUSTER 2016 Owners Manual 1.33
To deactivate the passenger airbag,
with the ignition off, press and turn
button 1 to the OFF position.
With the ignition switched back on, it is
essential to check that warning light 2,
], i](/img/7/58396/w960_58396-38.png)
1.33
To deactivate the passenger airbag,
with the ignition off, press and turn
button 1 to the OFF position.
With the ignition switched back on, it is
essential to check that warning light 2,
], is lit up on the instrument panel.
This warning light remains conti-
nuously lit to let you know that you
can fit a child seat.
Deactivating the front
passenger air bag
(depending on vehicle)
To fit a rear-facing child seat on the
front passenger seat, you must deacti-
vate the front passenger air bag if your
vehicle is fitted with air bag deactiva-
tion.
CHILD SAFETY: deactivating/activating the front passenger air bag (1/3)
The passenger air bag must
be activated or deactivated
with the ignition off .
If handled when the igni-
tion is on, the warning light
å
comes on.
Switch the ignition off then on again
to reset the air bag in accordance
with the lock position.
2
1
Page 44 of 256
1.38
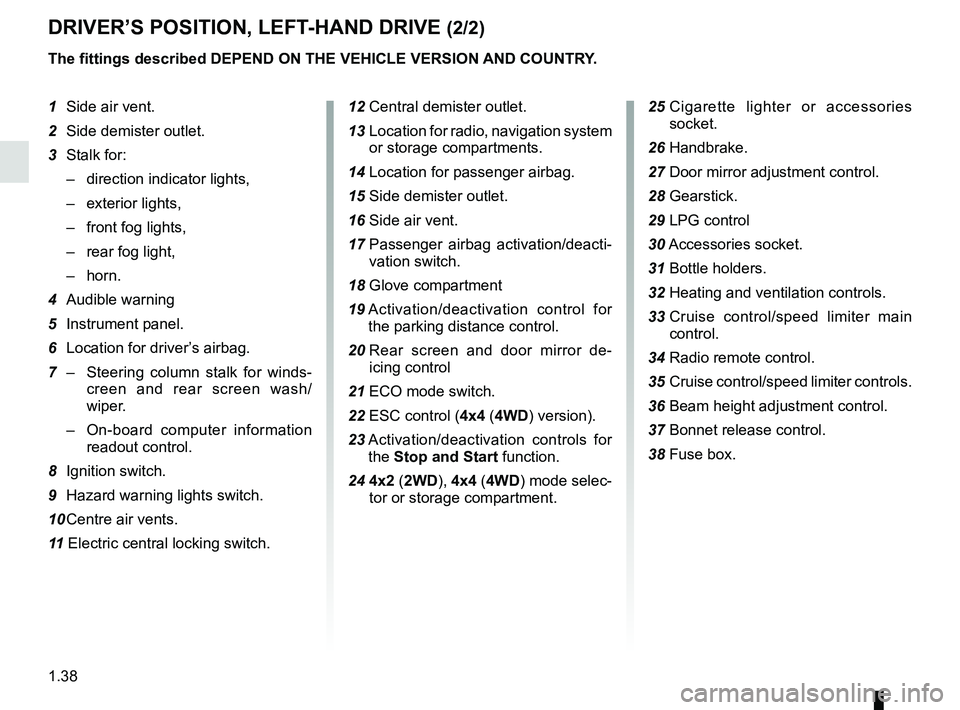
DRIVER’S POSITION, LEFT-HAND DRIVE (2/2)
The fittings described DEPEND ON THE VEHICLE VERSION AND COUNTRY.
1 Side air vent.
2 Side demister outlet.
3 Stalk for:
– direction indicator lights,
– exterior lights,
– front fog lights,
– rear fog light,
– horn.
4 Audible warning
5 Instrument panel.
6 Location for driver’s airbag.
7 – Steering column stalk for winds-
creen and rear screen wash/
wiper.
– On-board computer information
readout control.
8 Ignition switch.
9 Hazard warning lights switch.
10 Centre air vents.
11 Electric central locking switch. 12 Central demister outlet.
13 Location for radio, navigation system
or storage compartments.
14 Location for passenger airbag.
15 Side demister outlet.
16 Side air vent.
17 Passenger airbag activation/deacti-
vation switch.
18 Glove compartment
19 Activation/deactivation control for
the parking distance control.
20 Rear screen and door mirror de-
icing control
21 ECO mode switch.
22 ESC control (4x4 (4WD) version).
23 Activation/deactivation controls for
the Stop and Start function.
24 4x2 ( 2WD), 4x4 (4WD) mode selec-
tor or storage compartment. 25
Cigarette lighter or accessories
socket.
26 Handbrake.
27 Door mirror adjustment control.
28 Gearstick. 29 LPG control
30 Accessories socket.
31 Bottle holders.
32 Heating and ventilation controls.
33 Cruise control/speed limiter main
control.
34
Radio remote control.
35 Cruise control/speed limiter controls.
36 Beam height adjustment control.
37 Bonnet release control.
38 Fuse box.
Page 46 of 256
1.40
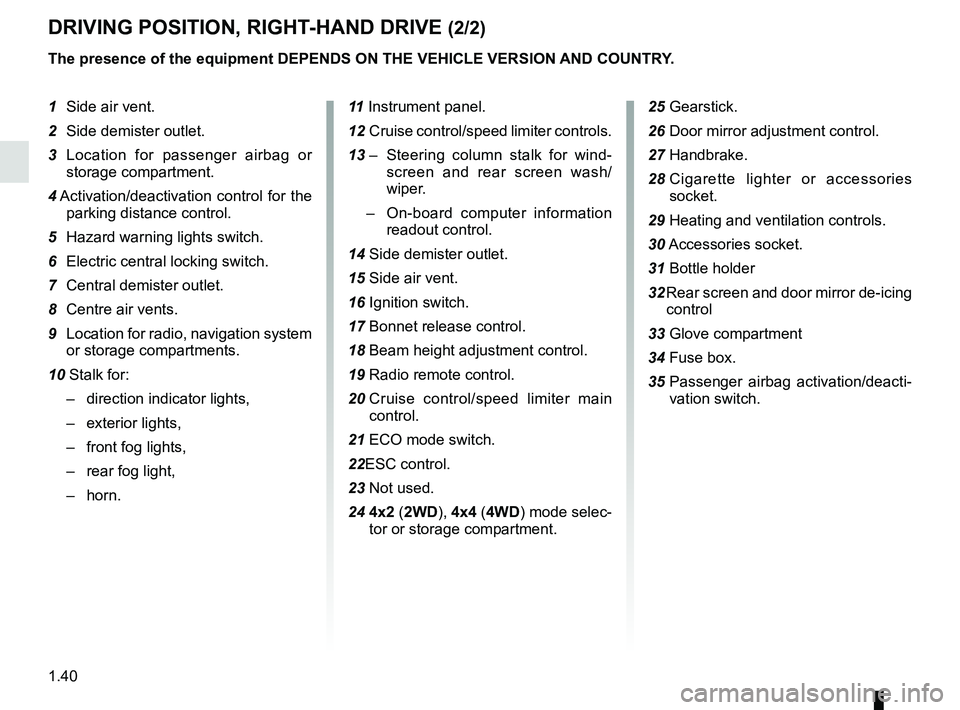
DRIVING POSITION, RIGHT-HAND DRIVE (2/2)
The presence of the equipment DEPENDS ON THE VEHICLE VERSION AND COUNTRY.
1 Side air vent.
2 Side demister outlet.
3 Location for passenger airbag or storage compartment.
4 Activation/deactivation control for the
parking distance control.
5 Hazard warning lights switch.
6 Electric central locking switch.
7 Central demister outlet.
8 Centre air vents.
9 Location for radio, navigation system or storage compartments.
10 Stalk for: – direction indicator lights,
– exterior lights,
– front fog lights,
– rear fog light,
– horn. 11
Instrument panel.
12 Cruise control/speed limiter controls.
13 – Steering column stalk for wind-
screen and rear screen wash/
wiper.
– On-board computer information
readout control.
14 Side demister outlet.
15 Side air vent.
16 Ignition switch.
17 Bonnet release control.
18 Beam height adjustment control.
19 Radio remote control.
20 Cruise control/speed limiter main
control.
21 ECO mode switch.
22ESC control.
23 Not used.
24 4x2 ( 2WD), 4x4 (4WD) mode selec-
tor or storage compartment.
25 Gearstick.
26 Door mirror adjustment control.
27 Handbrake.
28 Cigarette lighter or accessories
socket.
29 Heating and ventilation controls.
30 Accessories socket.
31 Bottle holder
32 Rear screen and door mirror de-icing control
33 Glove compartment
34 Fuse box.
35 Passenger airbag activation/deacti-
vation switch.
Page 47 of 256
1.41
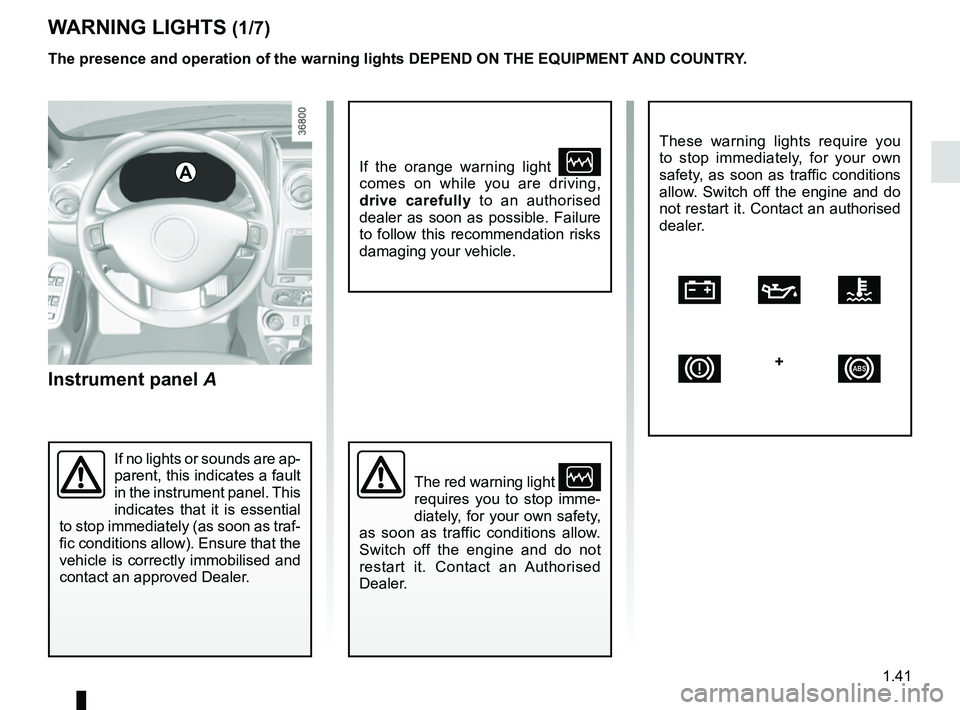
Instrument panel A
WARNING LIGHTS (1/7)
A
If no lights or sounds are ap-
parent, this indicates a fault
in the instrument panel. This
indicates that it is essential
to stop immediately (as soon as traf-
fic conditions allow). Ensure that the
vehicle is correctly immobilised and
contact an approved Dealer.
If the orange warning light Ò
comes on while you are driving,
drive carefully to an authorised
dealer as soon as possible. Failure
to follow this recommendation risks
damaging your vehicle.
The red warning light Ò
requires you to stop imme-
diately, for your own safety,
as soon as traffic conditions allow.
Switch off the engine and do not
restart it. Contact an Authorised
Dealer.
The presence and operation of the warning lights DEPEND ON THE EQUIPMENT\
AND COUNTRY.
These warning lights require you
to stop immediately, for your own
safety, as soon as traffic conditions
allow. Switch off the engine and do
not restart it. Contact an authorised
dealer.
ÚÀÔ
D
+x
Page 48 of 256
1.42
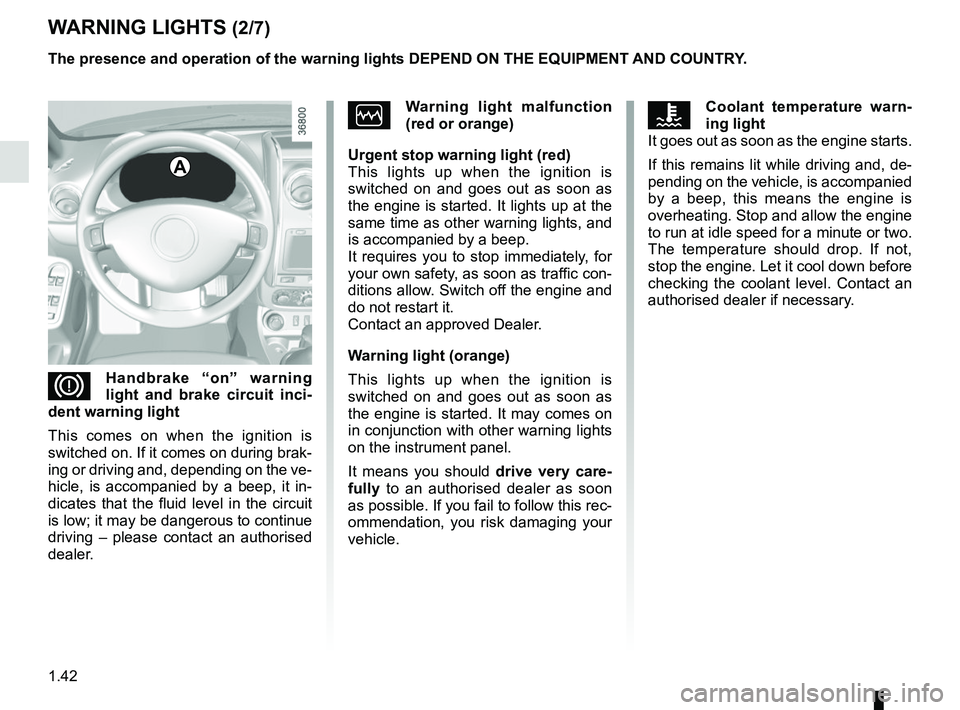
WARNING LIGHTS (2/7)
A
DHandbrake “on” warning
light and brake circuit inci-
dent warning light
This comes on when the ignition is
switched on. If it comes on during brak-
ing or driving and, depending on the ve-
hicle, is accompanied by a beep, it in-
dicates that the fluid level in the circuit
is low; it may be dangerous to continue
driving – please contact an authorised
dealer.
ÒWarning light malfunction
(red or orange)
Urgent stop warning light (red)
This lights up when the ignition is
switched on and goes out as soon as
the engine is started. It lights up at the
same time as other warning lights, and
is accompanied by a beep.
It requires you to stop immediately, for
your own safety, as soon as traffic con-
ditions allow. Switch off the engine and
do not restart it.
Contact an approved Dealer.
Warning light (orange)
This lights up when the ignition is
switched on and goes out as soon as
the engine is started. It may comes on
in conjunction with other warning lights
on the instrument panel.
It means you should drive very care-
fully to an authorised dealer as soon
as possible. If you fail to follow this rec-
ommendation, you risk damaging your
vehicle.ÔCoolant temperature warn-
ing light
It goes out as soon as the engine starts.
If this remains lit while driving and, de-
pending on the vehicle, is accompanied
by a beep, this means the engine is
overheating. Stop and allow the engine
to run at idle speed for a minute or two.
The temperature should drop. If not,
stop the engine. Let it cool down before
checking the coolant level. Contact an
authorised dealer if necessary.
The presence and operation of the warning lights DEPEND ON THE EQUIPMENT\
AND COUNTRY.
Page 51 of 256
1.45
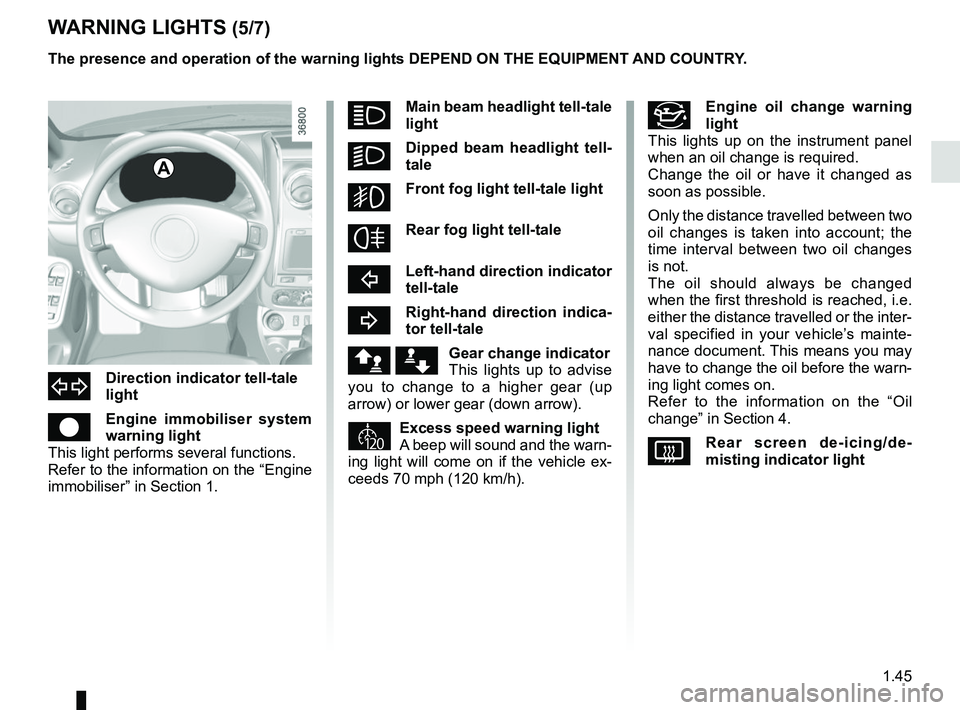
áMain beam headlight tell-tale
light
kDipped beam headlight tell-
tale
gFront fog light tell-tale light
fRear fog light tell-tale
cLeft-hand direction indicator
tell-tale
bRight-hand direction indica-
tor tell-tale
ä æGear change indicator
This lights up to advise
you to change to a higher gear (up
arrow) or lower gear (down arrow).
Excess speed warning light
A beep will sound and the warn-
ing light will come on if the vehicle ex-
ceeds 70 mph (120 km/h).
The presence and operation of the warning lights DEPEND ON THE EQUIPMENT\
AND COUNTRY.
A
#Engine oil change warning
light
This lights up on the instrument panel
when an oil change is required.
Change the oil or have it changed as
soon as possible.
Only the distance travelled between two
oil changes is taken into account; the
time interval between two oil changes
is not.
The oil should always be changed
when the first threshold is reached, i.e.
either the distance travelled or the inter-
val specified in your vehicle’s mainte-
nance document. This means you may
have to change the oil before the warn-
ing light comes on.
Refer to the information on the “Oil
change” in Section 4.
VRear screen de-icing/de-
misting indicator light
dDirection indicator tell-tale
light
êEngine immobiliser system
warning light
This light performs several functions.
Refer to the information on the “Engine
immobiliser” in Section 1.
WARNING LIGHTS (5/7)
Page 60 of 256
1.54
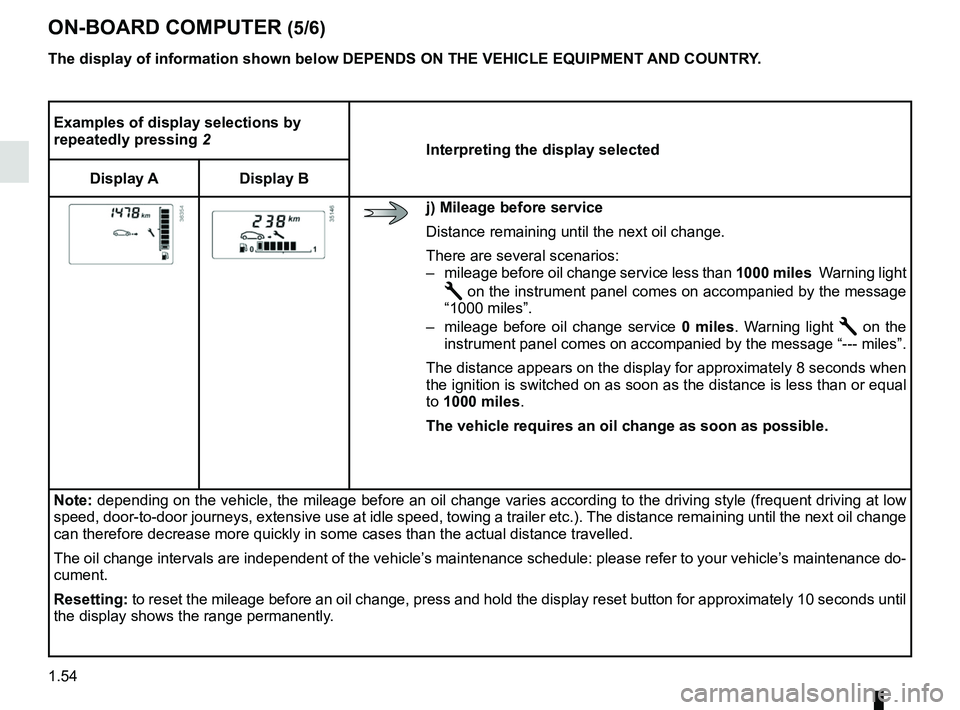
ON-BOARD COMPUTER (5/6)
Examples of display selections by
repeatedly pressing 2Interpreting the display selected
Display A Display B
j) Mileage before service
Distance remaining until the next oil change.
There are several scenarios:
– mileage before oil change service less than 1000 miles Warning light
Ê on the instrument panel comes on accompanied by the message
“1000 miles”.
– mileage before oil change service 0 miles. Warning light
Ê on the
instrument panel comes on accompanied by the message “--- miles”.
The distance appears on the display for approximately 8 seconds when
the ignition is switched on as soon as the distance is less than or equa\
l
to 1000 miles. The vehicle requires an oil change as soon as possible.
Note: depending on the vehicle, the mileage before an oil change varies accor\
ding to the driving style (frequent driving at low
speed, door-to-door journeys, extensive use at idle speed, towing a trai\
ler etc.). The distance remaining until the next oil ch ange
can therefore decrease more quickly in some cases than the actual distan\
ce travelled.
The oil change intervals are independent of the vehicle’s maintenance schedule: please refer to your vehicle’s maintenance do-
cument.
Resetting: to reset the mileage before an oil change, press and hold the display r\
eset button for approximately 10 seconds until
the display shows the range permanently.
The display of information shown below DEPENDS ON THE VEHICLE EQUIPMENT \
AND COUNTRY.
Page 65 of 256
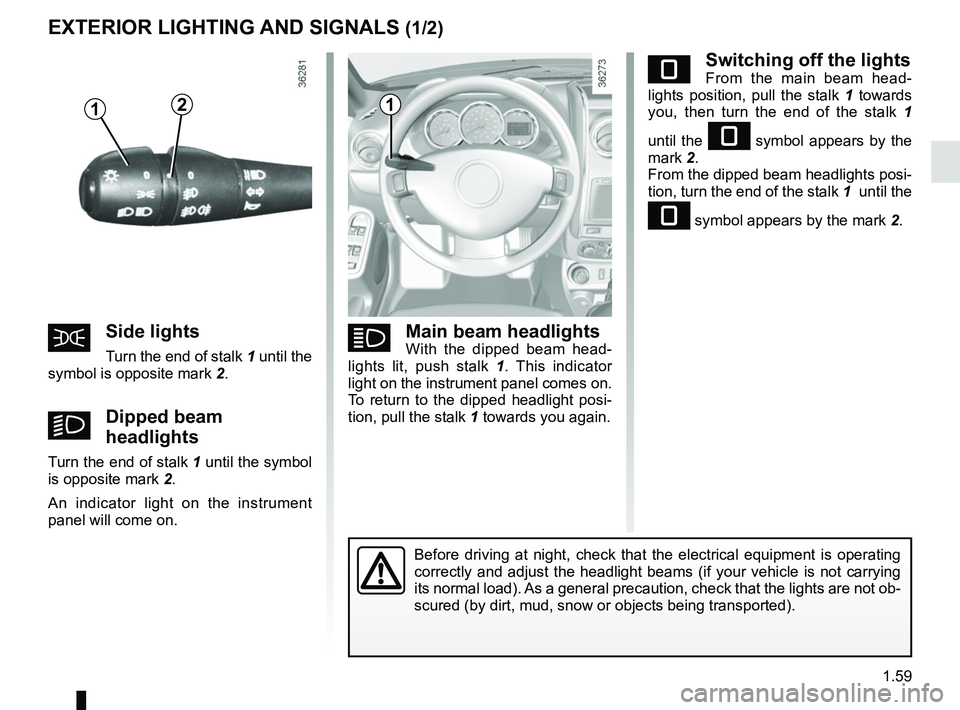
1.59
eSwitching off the lightsFrom the main beam head-
lights position, pull the stalk 1 towards
you, then turn the end of the stalk 1
until the
e symbol appears by the
mark 2.
From the dipped beam headlights posi-
tion, turn the end of the stalk 1 until the
e symbol appears by the mark 2.
EXTERIOR LIGHTING AND SIGNALS (1/2)
šSide lights
Turn the end of stalk 1 until the
symbol is opposite mark 2.
kDipped beam
headlights
Turn the end of stalk 1 until the symbol
is opposite mark 2.
An indicator light on the instrument
panel will come on.
áMain beam headlightsWith the dipped beam head-
lights lit, push stalk 1 . This indicator
light on the instrument panel comes on.
To return to the dipped headlight posi-
tion, pull the stalk 1 towards you again.
Before driving at night, check that the electrical equipment is operatin\
g
correctly and adjust the headlight beams (if your vehicle is not carryi\
ng
its normal load). As a general precaution, check that the lights are not ob-
scured (by dirt, mud, snow or objects being transported).
112