lights RENAULT FLUENCE Z.E. 2012 Owner's Manual
[x] Cancel search | Manufacturer: RENAULT, Model Year: 2012, Model line: FLUENCE Z.E., Model: RENAULT FLUENCE Z.E. 2012Pages: 195, PDF Size: 5.23 MB
Page 77 of 195
lights:main beam headlights ...................................... (current page)
warning buzzer ...................................................... (current page)
see-me-home lighting ............................................ (current page)
1.72
ENG_UD20073_2
Éclairages et signalisations extérieurs (L38 - X38 - Renault)
ENG_NU_914-4_L38e_Renault_1
Jaune NoirNoir texte
eXteriOr lightiNg AND SigNAlS (2/3)
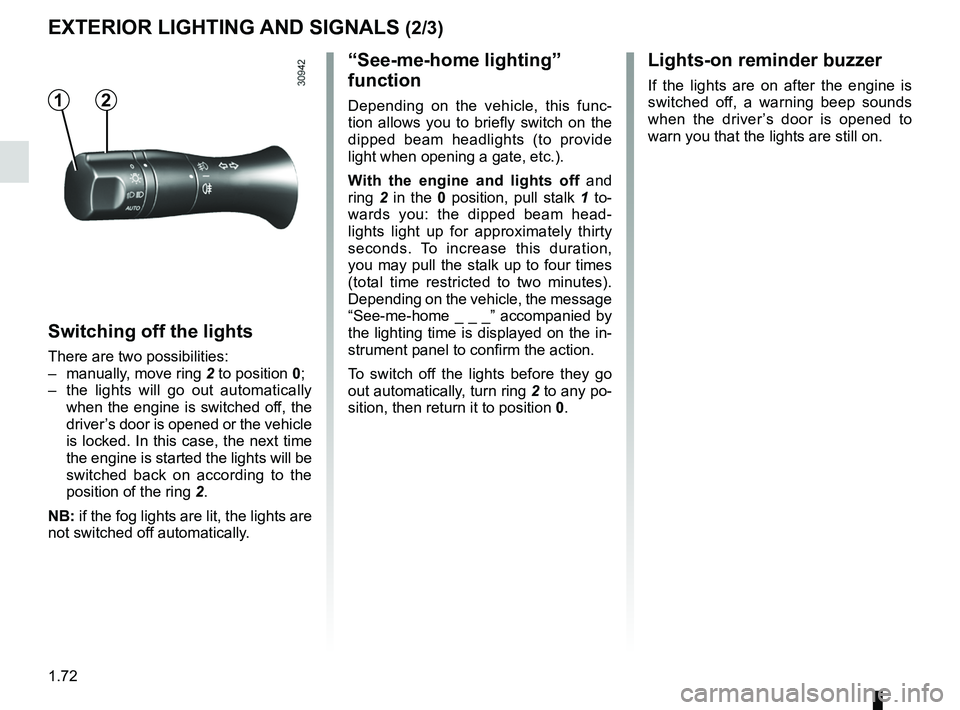
Switching off the lights
There are two possibilities:
– manually, move ring 2 to position 0;
– the lights will go out automatically
when the engine is switched off, the
driver’s door is opened or the vehicle
is locked. In this case, the next time
the engine is started the lights will be
switched back on according to the
position of the ring 2.
NB: if the fog lights are lit, the lights are
not switched off automatically.
“See-me-home lighting”
function
Depending on the vehicle, this func -
tion allows you to briefly switch on the
dipped beam headlights (to provide
light when opening a gate, etc.).
With the engine and lights off and
ring 2 in the 0 position, pull stalk 1 to-
wards you: the dipped beam head -
lights light up for approximately thirty
seconds. To increase this duration,
you may pull the stalk up to four times
(total time restricted to two minutes).
Depending on the vehicle, the message
“See-me-home _ _ _” accompanied by
the lighting time is displayed on the in-
strument panel to confirm the action.
To switch off the lights before they go
out automatically, turn ring 2 to any po-
sition, then return it to position 0.
lights-on reminder buzzer
If the lights are on after the engine is
switched off, a warning beep sounds
when the driver ’s door is opened to
warn you that the lights are still on.12
Page 78 of 195
lights:fog lights .......................................................... (current page)
JauneNoirNoir texte
1.73
ENG_UD20073_2
Éclairages et signalisations extérieurs (L38 - X38 - Renault)
ENG_NU_914-4_L38e_Renault_1
eXteriOr lightiNg AND SigNAlS (3/3)
When driving in fog or snow, or
when transporting objects which are
higher than the roof, the headlights
do not come on automatically.
The driver remains in full control of
switching on the fog lights: the indi-
cator lights on the instrument panel
inform you whether the fog lights
are lit (indicator light on) or not (indi-
cator light off).
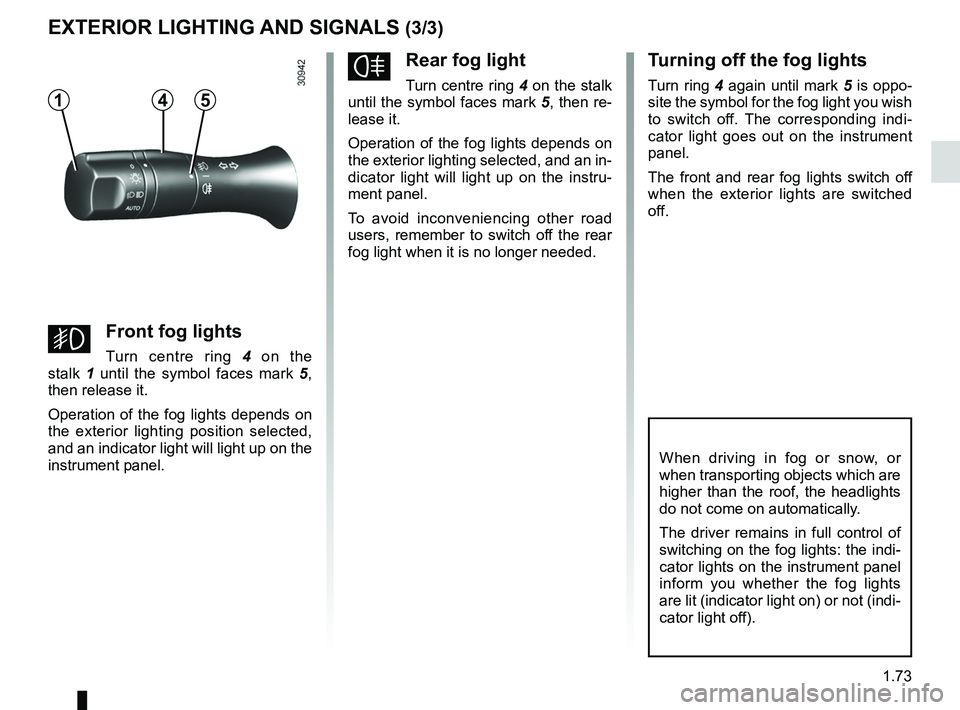
frear fog light
Turn centre ring 4 on the stalk
until the symbol faces mark 5, then re-
lease it.
Operation of the fog lights depends on
the exterior lighting selected, and an in-
dicator light will light up on the instru -
ment panel.
To avoid inconveniencing other road
users, remember to switch off the rear
fog light when it is no longer needed.
t urning off the fog lights
Turn ring 4 again until mark 5 is oppo-
site the symbol for the fog light you wish
to switch off. The corresponding indi -
cator light goes out on the instrument
panel.
The front and rear fog lights switch off
when the exterior lights are switched
off.145
gFront fog lights
Turn centre ring 4 on the
stalk 1 until the symbol faces mark 5 ,
then release it.
Operation of the fog lights depends on
the exterior lighting position selected,
and an indicator light will light up on the
instrument panel.
Page 79 of 195
electric beam height adjustment ........... (up to the end of the DU)
see-me-home lighting ........................... (up to the end of the DU)
lights: adjusting ......................................... (up to the end of the DU)
lights adjustment ...................................... (up to the end of the DU)
signals and lights .................................. (up to the end of the DU)
headlight beam adjustment .................. (up to the end of the DU)
1.74
ENG_UD20074_2
Réglage électrique de la hauteur des faisceaux (L38 - X38 - Renau\
lt)ENG_NU_914-4_L38e_Renault_1
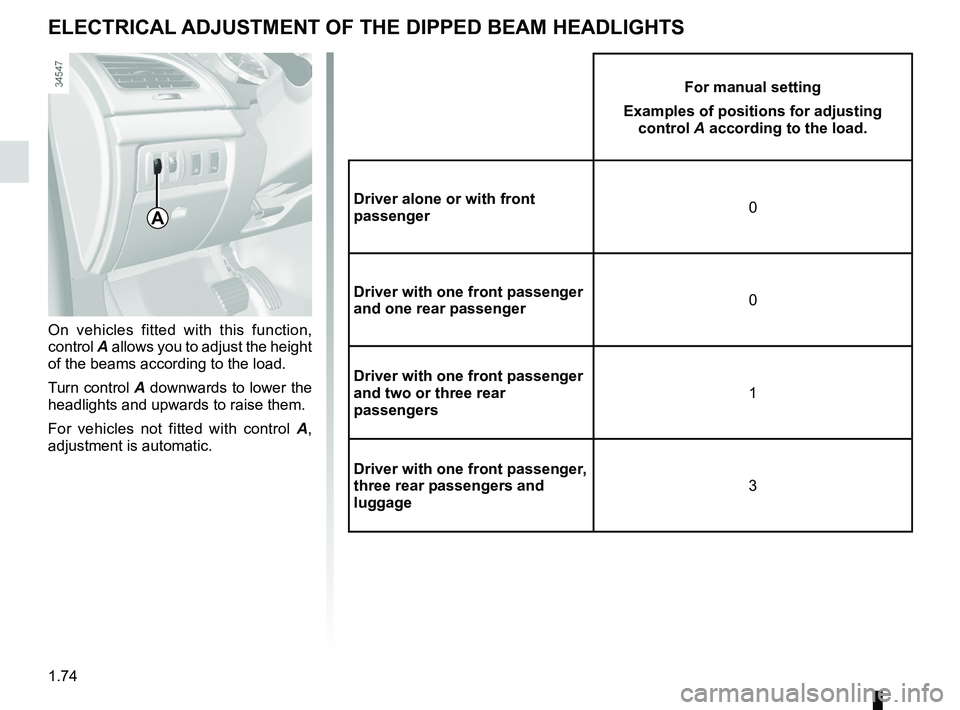
Adjusting the headlight beam height
On vehicles fitted with this function,
control A allows you to adjust the height
of the beams according to the load.
Turn control A downwards to lower the
headlights and upwards to raise them.
For vehicles not fitted with control A ,
adjustment is automatic.
electricAl ADJUStmeNt OF the DiPPeD BeAm heADlightS
A
For manual setting
examples of positions for adjusting control A according to the load.
Driver alone or with front
passenger 0
Driver with one front passenger
and one rear passenger 0
Driver with one front passenger
and two or three rear
passengers 1
Driver with one front passenger,
three rear passengers and
luggage 3
Page 84 of 195

changing gear ....................................... (up to the end of the DU)
driving ................................................... (up to the end of the DU)
reverse gear selecting .......................................... (up to the end of the DU)
speed control ........................................ (up to the end of the DU)
gear lever .............................................. (up to the end of the DU)
2.3
ENG_UD23027_2
Boîte de vitesse (L38 électrique - Renault)
ENG_NU_914-4_L38e_Renault_2
Driving
Put lever 1 in position D.
The vehicle moves forward once you
release the brake pedal (without press-
ing on the accelerator pedal).
While driving, press the accelerator
pedal to achieve the desired speed.
reverse
Put lever 1 in position r.
The reversing lights will come on as
soon as reverse gear is selected (with
the ignition on).
Gear control
geAr cOntrOl (1/2)
3
2
1
4
5
6
7
8
Operates similar to an automatic gear-
box.
Selector lever 1
The display 3 on the instrument panel
indicates the gear lever position.
4: P: park
5: r: reverse gear
6 : n : neutral
7 : D : forward
8 : display of gear lever position
Operation
With your foot on the brake pedal, the
selection lever 1 in P, switch on the ig-
nition.
Start the motor.
To move out of position P, you must de-
press the brake pedal before pressing
unlocking button 2.
With the foot on the brake pedal (warn-
ing light
c on the display 3 goes out),
move the lever out of position P.
Only engage D or r when the vehi -
cle is stopped, with your foot on the
brake and the accelerator pedal re -
leased.
The vehicle can only start of the
gear selector is in position P.
The vehicle can only be started if
the charging cord is unplugged from
the vehicle.
Page 92 of 195
JauneNoirNoir texte
2.11
ENG_UD23689_2
Dispositifs de correction de conduite (L38 - X38 - Renault)
ENG_NU_914-4_L38e_Renault_2
The traction control ASR offers addi -
tional safety, it is recommended that
you do not drive with the function disa-
bled. Correct this as soon as possible
by pressing switch 1 again.
nb : the function is reactivated auto -
matically when the ignition is switched
on or when a speed of approximately
24 mph (40 km/h) is exceeded.
emergency brake assist
This system supplements the ABS
and helps reduce vehicle stopping dis-
tances.
Operating principle
The system is for detecting an emer -
gency braking situation. In this case,
the braking assistance immediately de-
velops maximum power and may trig -
ger ABS regulation.
ABS braking is maintained as long as
the brake pedal is applied.
hazard warning lights switching on
These may light up in the event of rapid
deceleration.
Operating faults
When the system detects an operat -
ing fault the message “ Check brak-
ing system” appears on the instrument
panel along with the
© warning
light.
Consult an approved dealer.
braking anticipation
Depending on the vehicle, when you
rapidly release the accelerator, the
system anticipates the braking ma -
noeuvre in order to reduce stopping
distances.
Special cases
When using the cruise control:
– if you use the accelerator, when you
release it, the system may be trig -
gered;
– if you do not use the accelerator, the
system will not be triggered.
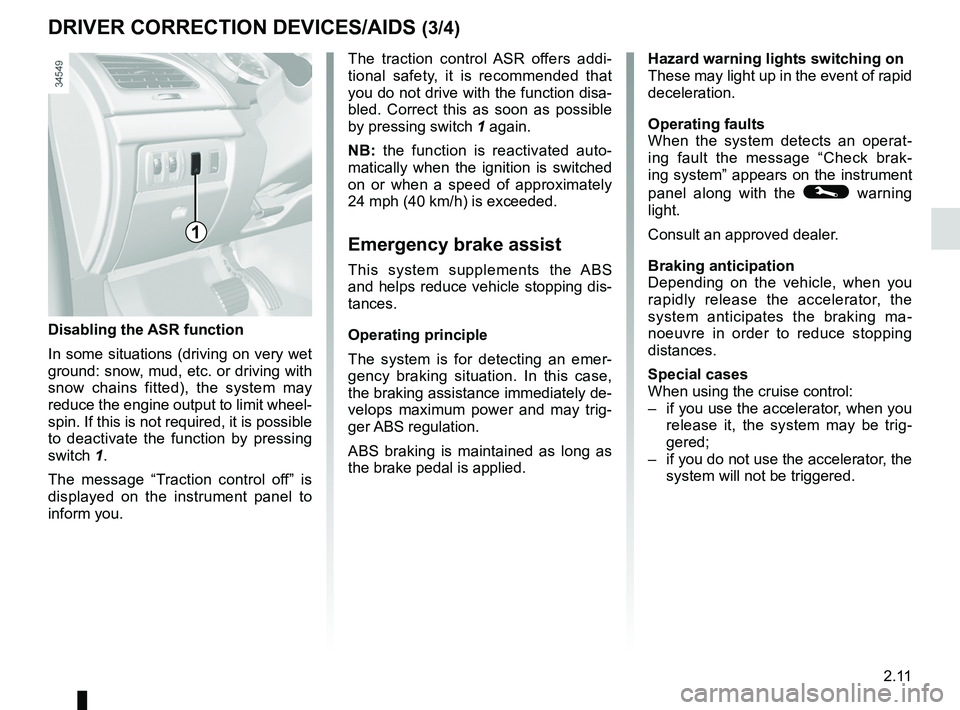
Disabling the ASr function
In some situations (driving on very wet
ground: snow, mud, etc. or driving with
snow chains fitted), the system may
reduce the engine output to limit wheel
-
spin. If this is not required, it is possible
to deactivate the function by pressing
switch 1.
The message “ Traction control off ” is
displayed on the instrument panel to
inform you.
1
DriVer cOrrectiOn DeViceS/AiDS (3/4)
Page 100 of 195

JauneNoirNoir texte
2.19
ENG_UD25307_3
Régulateur-limiteur de vitesse : fonction régulateur (L38 - X38 -\
Renault)
ENG_NU_914-4_L38e_Renault_2
crUiSe cOntrOl, SPeeD liMiter: cruise control function (4/4)
When the cruise control function is
put on standby, pressing switch 2
(+) reactivates the cruise control
function without taking into account
the stored speed: it is the speed at
which the vehicle is moving that is
taken into account.Putting the cruise control
on standby or switching it
off does not cause a rapid
reduction in speed: you
must brake by depressing the brake
pedal.
Putting the function on
standby
The function is set to standby if you:
– use the switch 4 (O);
– the brake pedal;
– move to neutral position.
In all three cases, the cruising speed
remains stored and the message
“Memorised ” appears on the instrument
panel.
Standby is confirmed when indicator
light
goes out. returning to the cruising speed
If a speed is stored, it can be recalled,
once you are sure that the road con
-
ditions are suitable (traffic, road sur -
face, weather conditions, etc.). Press
switch 5 (R) if the vehicle speed is
above 20 mph (30 km/h).
When the stored speed is recalled, acti-
vation of the cruise control is confirmed
by the illumination of the
warning
light.
nb : if the speed previously stored is
much higher than the current speed,
the vehicle will accelerate more rapidly
to reach this threshold.
Switching off the function
The cruise control function is deacti -
vated if you press switch 1: in this case
a speed is no longer stored. The two in-
strument panel warning lights
and
go out to confirm that the function is
deactivated.
2354
1
Page 115 of 195

electric windows ................................... (up to the end of the DU)
child safety ............................................................. (current page)
children (safety) ..................................................... (current page)
3.12
ENG_UD28762_3
Lève-vitres électriques (L38 - X38 - Renault)
ENG_NU_914-4_L38e_Renault_3
Jaune NoirNoir texte
These systems operate with the igni -
tion on or off, until one of the front doors
is opened (limited to about 3 minutes).
From the driver’s seat, use switch:
1 for the driver’s side;
2 for the front passenger side;
3 and 5 for the rear passengers.
From the passenger seats, use
switch 6.
Front window features: If the window
detects resistance when closing (e.g.
fingers, etc.) it stops and then lowers
again by a few centimetres.
Electric windows
ElEcTRIc wINDowS (1/2)
Electric windows
Press the window switch down or pull it
up to lower or raise the window to the
desired height: the rear windows do not
open fully.
one-touch mode
This mode works in addition to the
operation of the electric windows de -
scribed previously. It either operates on
the front windows only, or on all the win-
dows.
Briefly press or pull the window switch
fully: the window is fully lowered or
raised. Pressing the switch again stops
the window moving.
1
2
34
5
6
Safety of rear occupants
The driver can disable op -
eration of the electric win -
dows and, depending on
the vehicle, the rear doors, by
pressing switch 4. The indicator light
integrated in the switch lights up to
confirm that the locks have been ac-
tivated.
Driver’s responsibility
Never leave your vehicle with the
key inside and never leave a child
(or a pet) unsupervised, even for a
short while. They may pose a risk
to themselves or to others by start-
ing the engine, activating equipment
such as the electric windows or by
locking the doors. If a body part
gets trapped, reverse the direction
of travel of the window as soon as
possible by pressing the relevant
switch.
Risk of serious injury.
Avoid resting any objects against
a half-open window: there is a risk
that the electric window could be
damaged.
Page 117 of 195

lighting:interior ............................................. (up to the end of the DU)
courtesy light ........................................ (up to the end of the DU)
map reading lights ................................ (up to the end of the DU)
3.14
ENG_UD20075_2
Eclairage intérieur (L38 - X38 - Renault)
ENG_NU_914-4_L38e_Renault_3
Jaune NoirNoir texte
Interior lighting
INTERIoR lIghTINg (1/2)
When the doors or luggage com -
partment are unlocked and opened
the courtesy and footwell lights
come on temporarily.
123
courtesy light
Tilt switch 2 to move it to the position
for:
– permanent lighting;
– lighting controlled by opening one
of the doors. This switches off after
a time delay, once the doors con -
cerned have been closed correctly;
– immediate switching off.
map reading lights
Move switches 1 or 3.
Front door lights
Light 4 comes on when the door is
opened.
4
glove box light
Light 5 comes on when the cover is
opened.
5
Page 135 of 195
4.10
ENG_UD26559_3
Entretien de la carosserie (X61 - X38 - X61 électrique - L38 élec\
trique - X10 - Renault)
ENG_NU_914-4_L38e_Renault_4
Using a roller type car wash
Return the windscreen wiper stalk to
the Park position (refer to the informa-
tion on the “Windscreen washer, wiper”
in Section 1). Check the mounting of
external accessories, additional lights
and mirrors, and ensure that the wiper
blades are secured with adhesive tape.
Remove the radio aerial mast if your
vehicle is fitted with this equipment.
Remember to remove the tape and refit
the antenna after washing.
Observe the vehicle stopping distances
when driving on gravelled surfaces to
prevent paint damage.
Repair, or have repaired quickly, areas
where the paint has been damaged, to
prevent corrosion spreading.
Remember to visit the body shop pe
-
riodically in order to maintain your
anti-corrosion warranty. Refer to the
Maintenance Document.
Respect local regulations about wash -
ing vehicles (e.g. do not wash your ve-
hicle on a public highway).
If it is necessary to clean mechani -
cal components, hinges, etc., spray
them with products approved by our
Technical Department to protect them
after they have been cleaned.
BODyWORk MaIntenanCe (2/2)
Cleaning the headlights
As the headlights are made of plastic
“glass”, use a soft cloth or cotton wool
to clean them. If this does not clean
them properly, moisten the cloth with
soapy water, then wipe clean with a soft
damp cloth or cotton wool.
Finally, carefully dry off with a soft dry
cloth.
Cleaning products containing alco -
hol must not be used.
vehicles with a matte paint
finish
This type of paint requires certain pre-
cautions.
Do not do the following
– use wax-based products (polishing);
– rub too hard;
– wash the vehicle in a roller-type car
wash;
– wash the vehicle using a high-pres-
sure device;
– attach stickers to the paintwork (risk
of leaving marks).
y ou should do the following
Wash the vehicle by hand using plenty
of water, using a soft cloth or a gentle
sponge.
We have selected special products
to care for your vehicle and you can
obtain these from the manufactur -
er’s accessory outlets.
Washing the vehicle
Never wash the engine
compartment, the charging
connection or the traction
battery with a high-pressure jet.
This risks damaging the electric cir-
cuit.
Never wash the vehicle while it is
charging.
Risk of electric shock and a risk to
life.
Page 138 of 195
5.1
ENG_UD29440_4
Sommaire 5 (L38 - X38 - Renault)
ENG_NU_914-4_L38e_Renault_5
Section 5: Practical advice
Tool kit . . . . . . . . . . . . . . . . . . . . . . . . . . . . . . . . . . . . . . . . . . . . . . . . . . . . . . . . . . . . . . . . . . . . . . . . 5.2
Wheel trim . . . . . . . . . . . . . . . . . . . . . . . . . . . . . . . . . . . . . . . . . . . . . . . . . . . . . . . . . . . . . . . . . . . . . 5.3
Tyre inflation kit . . . . . . . . . . . . . . . . . . . . . . . . . . . . . . . . . . . . . . . . . . . . . . . . . . . . . . . . . . . . . . . . . 5.4
Changing a wheel . . . . . . . . . . . . . . . . . . . . . . . . . . . . . . . . . . . . . . . . . . . . . . . . . . . . . . . . . . . . . . . 5.9
Tyres (tyre and wheel safety, use in winter) . . . . . . . . . . . . . . . . . . . . . . . . . . . . . . . . . . . . . . . . . . . 5.11
Headlights (changing bulbs) . . . . . . . . . . . . . . . . . . . . . . . . . . . . . . . . . . . . . . . . . . . . . . . . . . . . . . . 5.14
Rear lights (changing bulbs) . . . . . . . . . . . . . . . . . . . . . . . . . . . . . . . . . . . . . . . . . . . . . . . . . . . . . . . 5.17
Indicator lights (changing bulbs) . . . . . . . . . . . . . . . . . . . . . . . . . . . . . . . . . . . . . . . . . . . . . . . . . . . . 5.18
Interior lights (changing bulbs) . . . . . . . . . . . . . . . . . . . . . . . . . . . . . . . . . . . . . . . . . . . . . . . . . . . . . 5.19
Fuses . . . . . . . . . . . . . . . . . . . . . . . . . . . . . . . . . . . . . . . . . . . . . . . . . . . . . . . . . . . . . . . . . . . . . . . . . 5.21
12 volt battery: breakdowns . . . . . . . . . . . . . . . . . . . . . . . . . . . . . . . . . . . . \
. . . . . . . . . . . . . . . . . . . . 5.23
Radio frequency remote control unit: battery . . . . . . . . . . . . . . . . . . . . . . . . . . . . . . . . . . . . \
. . . . . . . 5.25
Accessories . . . . . . . . . . . . . . . . . . . . . . . . . . . . . . . . . . . . . . . . . . . . . . . . . . . . . . . . . . . . . . . . . . . . 5.26
Wipers (replacing blades) . . . . . . . . . . . . . . . . . . . . . . . . . . . . . . . . . . . . . . . . . . . . . . . . . . . . . . . . . 5.27
Towing/breakdown . . . . . . . . . . . . . . . . . . . . . . . . . . . . . . . . . . . . . . . . . . . . . . . . . . . . . . . . . . . . . . . 5.28
Operating faults . . . . . . . . . . . . . . . . . . . . . . . . . . . . . . . . . . . . . . . . . . . . . . . . . . . . . . . . . . . . . . . . . 5.31