RENAULT KADJAR 2015 1.G Manual PDF
Manufacturer: RENAULT, Model Year: 2015, Model line: KADJAR, Model: RENAULT KADJAR 2015 1.GPages: 298, PDF Size: 6.69 MB
Page 71 of 298
1.65
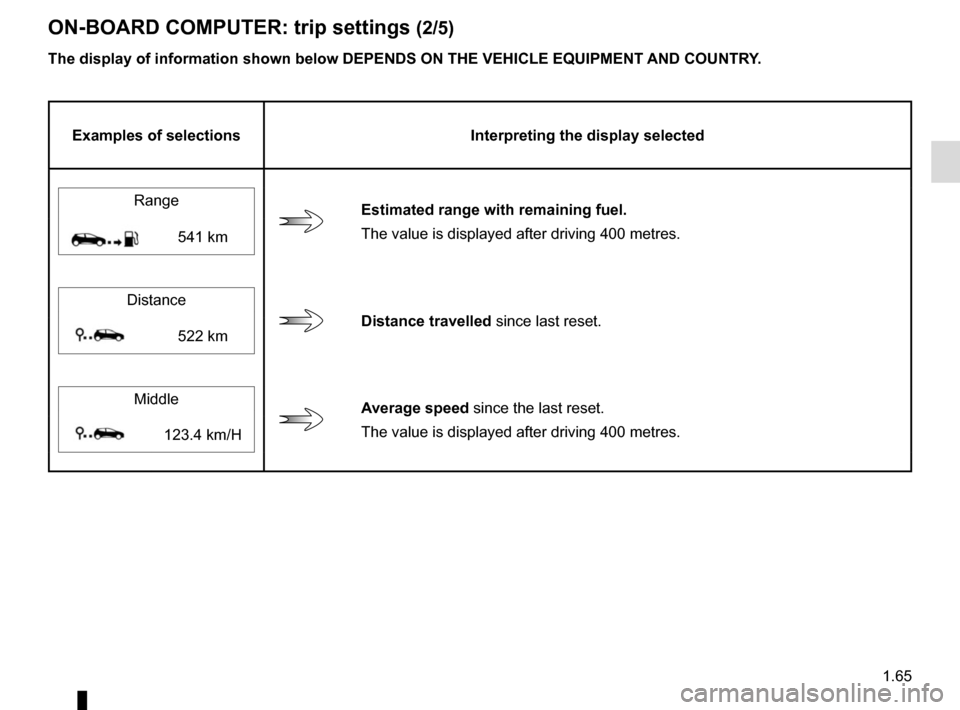
ON-BOARD COMPUTER: trip settings (2/5)
The display of information shown below DEPENDS ON THE VEHICLE EQUIPMENT \
AND COUNTRY.
Examples of selectionsInterpreting the display selected
Range
Estimated range with remaining fuel. The value is displayed after driving 400 metres.
541 km
Distance
Distance travelled since last reset.522 km
Middle
Average speed since the last reset. The value is displayed after driving 400 metres.
123.4 km/H
Page 72 of 298
1.66
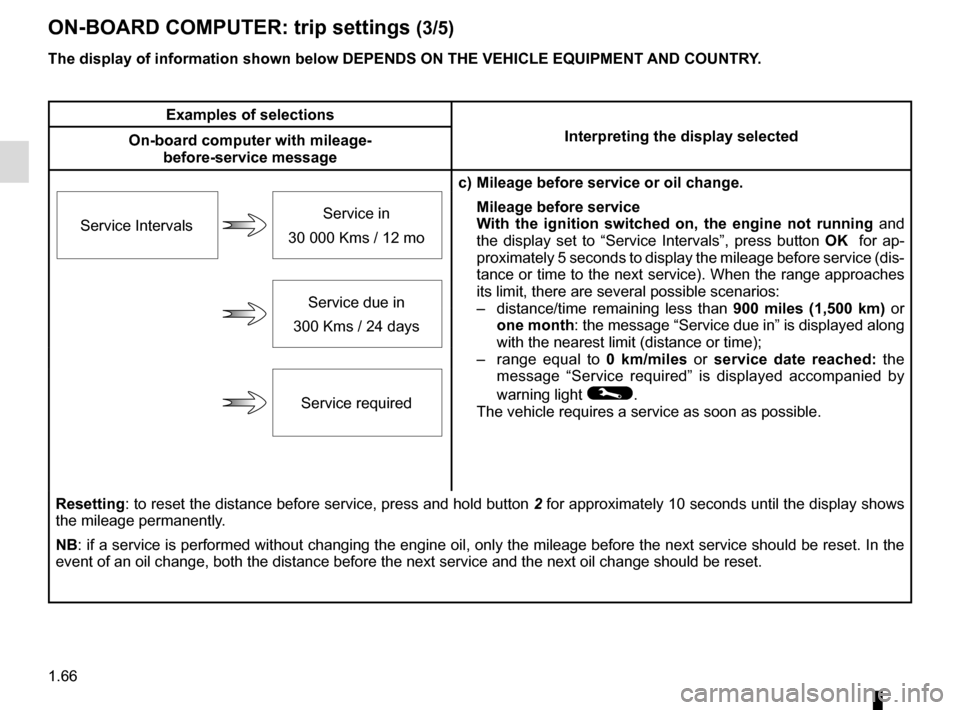
ON-BOARD COMPUTER: trip settings (3/5)
The display of information shown below DEPENDS ON THE VEHICLE EQUIPMENT \
AND COUNTRY.
Examples of selectionsInterpreting the display selected
On-board computer with mileage-
before-service message
c) Mileage before service or oil change.Mileage before service
With the ignition switched on, the engine not running and
the display set to “Service Intervals”, press button OK for ap-
proximately 5 seconds to display the mileage before service (dis-
tance or time to the next service). When the range approaches
its limit, there are several possible scenarios:
– distance/time remaining less than 900 miles (1,500 km) or
one month : the message “Service due in” is displayed along
with the nearest limit (distance or time);
– range equal to 0 km/miles or service date reached: the
message “Service required” is displayed accompanied by
warning light
©.
The vehicle requires a service as soon as possible.
Service Intervals
Service in
30 000 Kms / 12 mo
Service due in
300 Kms / 24 days
Service required
Resetting: to reset the distance before service, press and hold button 2 for approximately 10 seconds until the display shows
the mileage permanently.
NB: if a service is performed without changing the engine oil, only the mi\
leage before the next service should be reset. In the
event of an oil change, both the distance before the next service and th\
e next oil change should be reset.
Page 73 of 298
1.67
The display of information shown below DEPENDS ON THE VEHICLE EQUIPMENT \
AND COUNTRY.
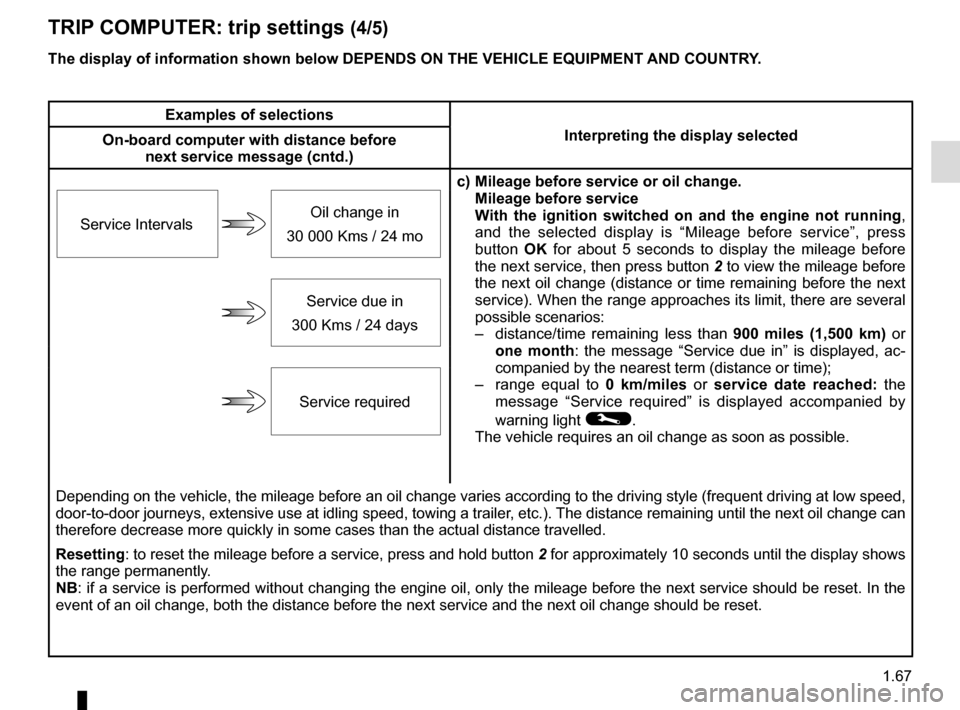
TRIP COMPUTER: trip settings (4/5)
Examples of selectionsInterpreting the display selected
On-board computer with distance before
next service message (cntd.)
c) Mileage before service or oil change.Mileage before service
With the ignition switched on and the engine not running ,
and the selected display is “Mileage before service”, press
button OK for about 5 seconds to display the mileage before
the next service, then press button 2 to view the mileage before
the next oil change (distance or time remaining before the next
service). When the range approaches its limit, there are several
possible scenarios:
– distance/time remaining less than 900 miles (1,500 km) or
one month : the message “Service due in” is displayed, ac-
companied by the nearest term (distance or time);
– range equal to 0 km/miles or service date reached: the
message “Service required” is displayed accompanied by
warning light
©.
The vehicle requires an oil change as soon as possible.
Service Intervals
Oil change in
30 000 Kms / 24 mo
Service due in
300 Kms / 24 days
Service required
Depending on the vehicle, the mileage before an oil change varies accord\
ing to the driving style (frequent driving at low speed ,
door-to-door journeys, extensive use at idling speed, towing a trailer, etc.). The distance remaining until the next oil change can
therefore decrease more quickly in some cases than the actual distance t\
ravelled.
Resetting: to reset the mileage before a service, press and hold button 2 for approximately 10 seconds until the display shows
the range permanently.
NB: if a service is performed without changing the engine oil, only the mi\
leage before the next service should be reset. In the
event of an oil change, both the distance before the next service and th\
e next oil change should be reset.
Page 74 of 298
1.68
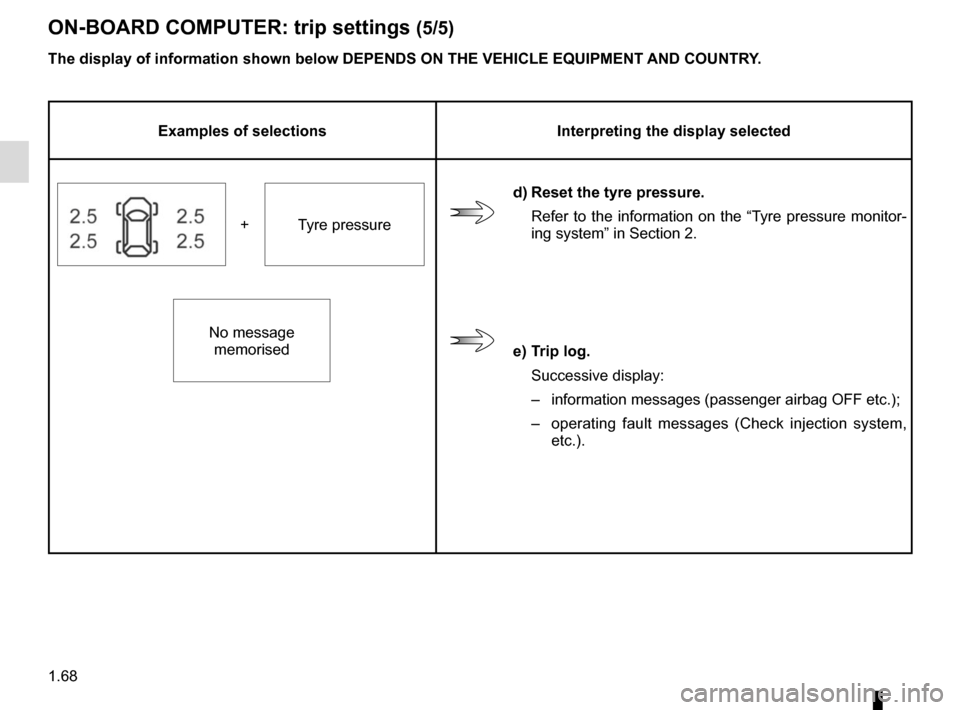
ON-BOARD COMPUTER: trip settings (5/5)
The display of information shown below DEPENDS ON THE VEHICLE EQUIPMENT \
AND COUNTRY.
Examples of selectionsInterpreting the display selected
d) Reset the tyre pressure.
Refer to the information on the “Tyre pressure monitor-
ing system” in Section 2.
+ Tyre pressure
No message memorised
e) Trip log.
Successive display:
– information messages (passenger airbag OFF etc.);
– operating fault messages (Check injection system,
etc.).
Page 75 of 298
1.69
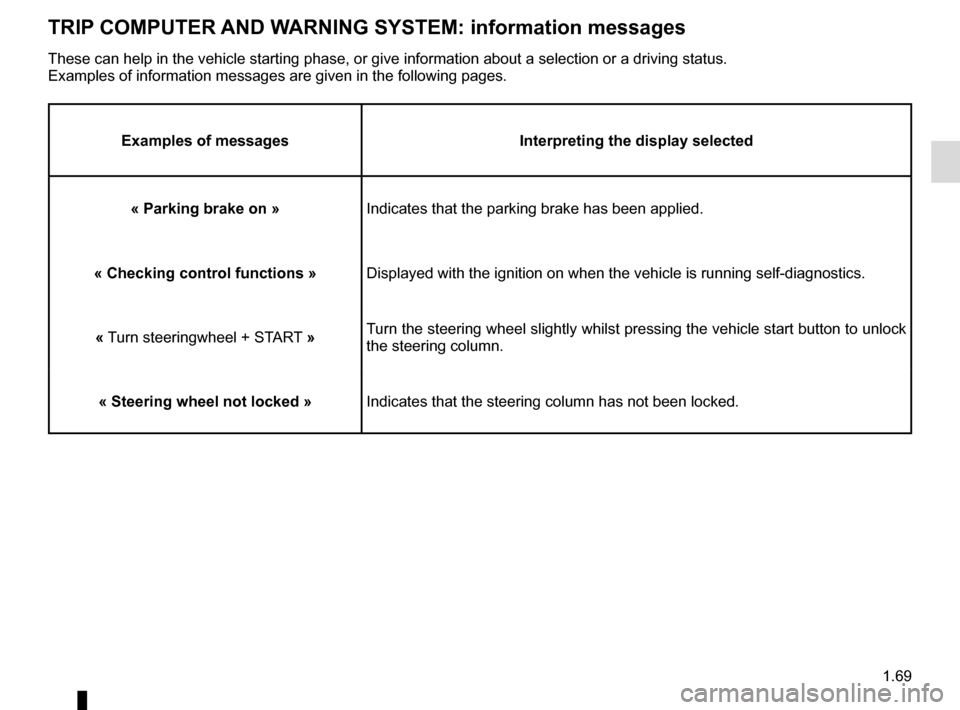
TRIP COMPUTER AND WARNING SYSTEM: information messages
Examples of messagesInterpreting the display selected
« Parking brake on » Indicates that the parking brake has been applied.
« Checking control functions » Displayed with the ignition on when the vehicle is running self-diagnost\
ics.
« Turn steeringwheel + START »Turn the steering wheel slightly whilst pressing the vehicle start button\
to unlock
the steering column.
« Steering wheel not locked » Indicates that the steering column has not been locked.
These can help in the vehicle starting phase, or give information about \
a selection or a driving status.
Examples of information messages are given in the following pages.
Page 76 of 298
1.70
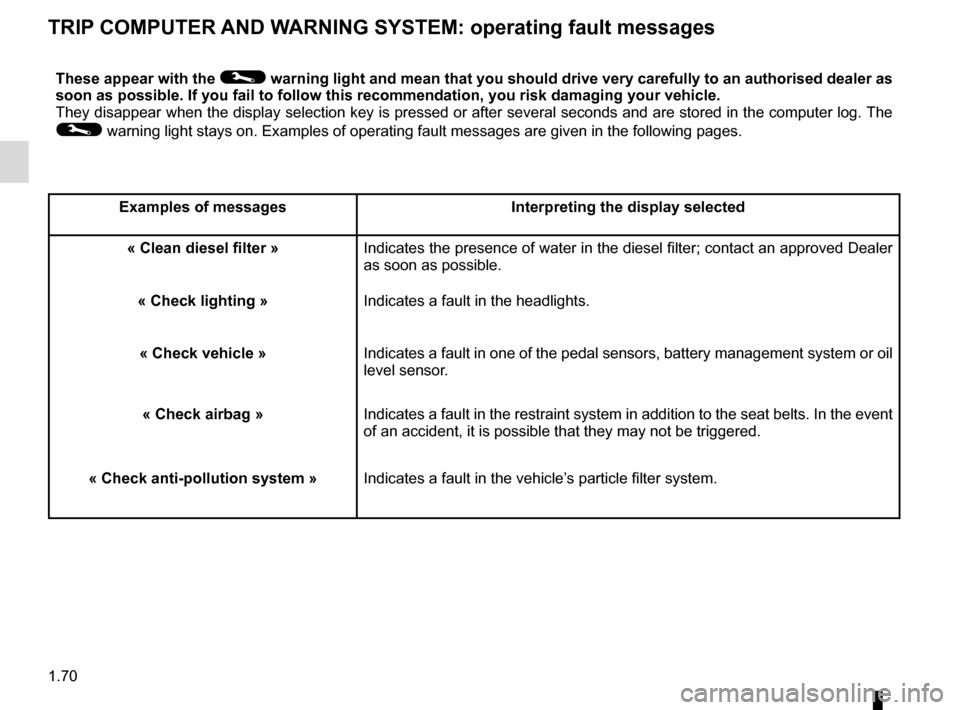
TRIP COMPUTER AND WARNING SYSTEM: operating fault messages
These appear with the © warning light and mean that you should drive very carefully to an author\
ised dealer as
soon as possible. If you fail to follow this recommendation, you risk da\
maging your vehicle.
They disappear when the display selection key is pressed or after severa\
l seconds and are stored in the computer log. The
© warning light stays on. Examples of operating fault messages are given \
in the following pages.
Examples of messages Interpreting the display selected« Clean diesel filter » Indicates the presence of water in the diesel filter; contact an approve\
d Dealer
as soon as possible.
« Check lighting » Indicates a fault in the headlights.
« Check vehicle » Indicates a fault in one of the pedal sensors, battery management system\
or oil
level sensor.
« Check airbag » Indicates a fault in the restraint system in addition to the seat belts.\
In the event
of an accident, it is possible that they may not be triggered.
« Check anti-pollution system » Indicates a fault in the vehicle’s particle filter system.
Page 77 of 298
1.71
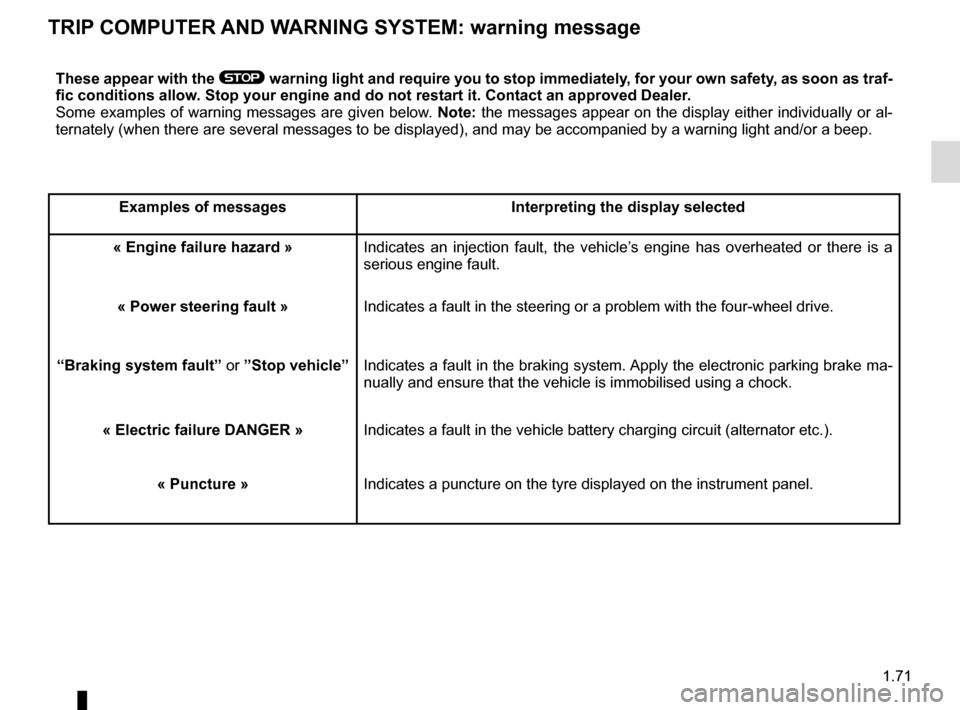
TRIP COMPUTER AND WARNING SYSTEM: warning message
These appear with the ® warning light and require you to stop immediately, for your own safety, as soon as traf-
fic conditions allow. Stop your engine and do not restart it. Contact an approved Dealer.
Some examples of warning messages are given below. Note: the messages appear on the display either individually or al-
ternately (when there are several messages to be displayed), and may b\
e accompanied by a warning light and/or a beep.
Examples of messages Interpreting the display selected
« Engine failure hazard » Indicates an injection fault, the vehicle’s engine has overheated or there is a
serious engine fault.
« Power steering fault » Indicates a fault in the steering or a problem with the four-wheel drive\
.
“Braking system fault” or ”Stop vehicle” Indicates a fault in the braking system. Apply the electronic parking brake ma-
nually and ensure that the vehicle is immobilised using a chock.
« Electric failure DANGER » Indicates a fault in the vehicle battery charging circuit (alternator e\
tc.).
« Puncture » Indicates a puncture on the tyre displayed on the instrument panel.
Page 78 of 298

1.72
VEHICLE SETTINGS CUSTOMISATION MENU (1/2)
Adjusting the settings
Select the function to modify:
a) unlocking the driver’s door;
b) automatic locking of the doors while driving;
c) hands-free function;
d) indicator audio volume;
e) internal welcome sound;
f) external welcome;
g) reading lamp in automatic mode;
h) rear windscreen wiping in reverse gear;
i) configuration of the driving style indi- cator;
j) Active noise control.
Select “ON” or “OFF” to activate or de-
activate the function.
For the “Light brightness intensity”
function, select the intensity by press-
ing “+” or “-”.
Depending on the vehicle equipment,
this function allows you to activate/de-
activate and adjust some of the vehi-
cle’s functions.
Vehicles fitted with a
navigation system
Accessing the settings menu
With the vehicle at a standstill, using
the multifunction screen
1, select menu
“Vehicle”, “User settings” to access the
various settings.
1
For safety reasons, carry
out any adjustments when
the vehicle is stationary.
Page 79 of 298

1.73
VEHICLE SETTINGS CUSTOMISATION MENU (2/2)
34
If you select either “PARKING ASSIST
VOLUME” or “LANGUAGE”, you will
have to make a further selection (sound
volume of the parking distance control
or instrument panel language). In this
case, make your selection and con-
firm it by holding the switch 3 OK – the
selected value is shown by a
~ in
front of the line.
To exit the menu, press the control 4
upwards or downwards. It may be nec-
essary to carry out this operation sev-
eral times.
Vehicles not fitted with a
navigation system
Accessing the settings menu on
display 2
With the vehicle at a standstill, press
and hold the switch 3 OK to access the
settings menu.
Adjusting the settings
Browse using the control 4 to select the
function to adjust:
a) Lock doorswhen in motion;
b) Unlock driver door only;
c) Auto rear wipe with reverse gear;
d) PARKING ASSIST;
e) Automaticmain beam lights;
f) Lane depart warn volume;
g) Lane depart warn sensitivity;
h) PARKING ASSIST;
i) PARKING ASSIST Volume;
j) Language.
= function activated
< function deactivated
Once a line has been selected, press
the switch 3 OK to adjust the function.
The vehicle settings personalisation
menu cannot be used when driv-
ing. At speed exceeding 12 mph
(20 km/h), the instrumental panel
display switches automatically back
to trip computer and warning system
mode.
2
Page 80 of 298
1.74
Power-assisted steering
Variable power-assisted steering
The variable power assisted steering
system is equipped with an electronic
control system which alters the level of
assistance to suit the vehicle speed.
Steering is made easier during parking
manoeuvres (for added comfort) while
the force needed to steer increases
progressively as the speed rises (for
enhanced safety at high speeds).
STEERING WHEEL/POWER-ASSISTED STEERING
For safety reasons, only
adjust the steering wheel
when the vehicle is station-
ary.
Never leave the steering wheel at
full lock while stationary.
Do not switch off the engine
when driving downhill and,
as a general rule, when
driving (the power-assisted
steering and brake cannot operate
normally).
With the engine switched off, or if
there is a system fault, it is still pos-
sible to turn the steering wheel. The
force required will be greater.
1
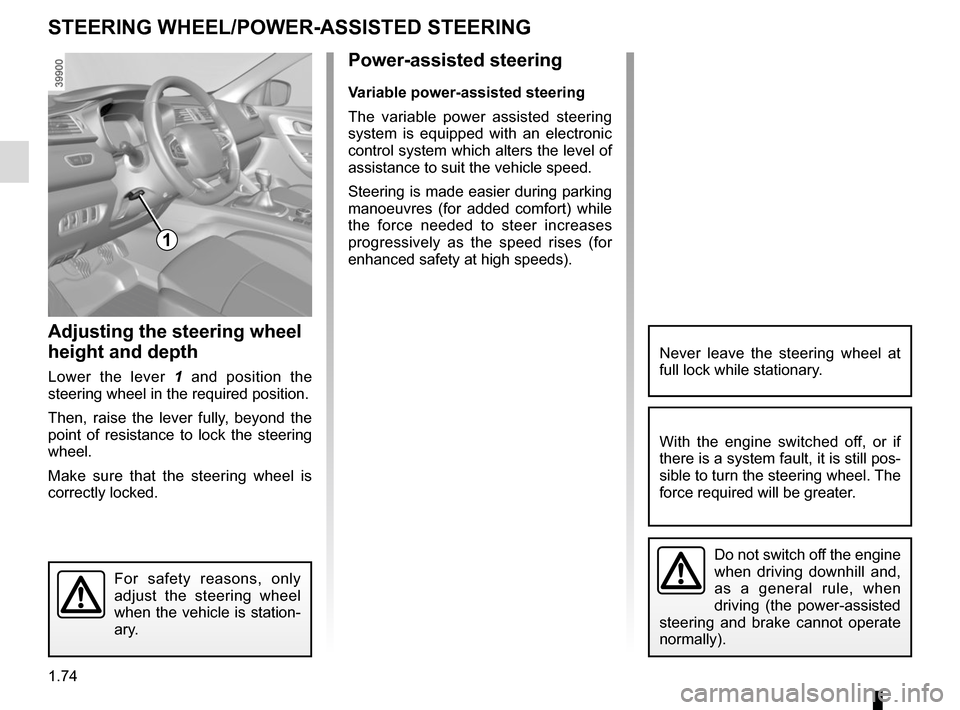
Adjusting the steering wheel
height and depth
Lower the lever 1 and position the
steering wheel in the required position.
Then, raise the lever fully, beyond the
point of resistance to lock the steering
wheel.
Make sure that the steering wheel is
correctly locked.