RENAULT KADJAR 2016 1.G Owners Manual
Manufacturer: RENAULT, Model Year: 2016, Model line: KADJAR, Model: RENAULT KADJAR 2016 1.GPages: 300, PDF Size: 3.29 MB
Page 91 of 300
1.85
HEADLIGHT BEAM ADJUSTMENT (1/2)
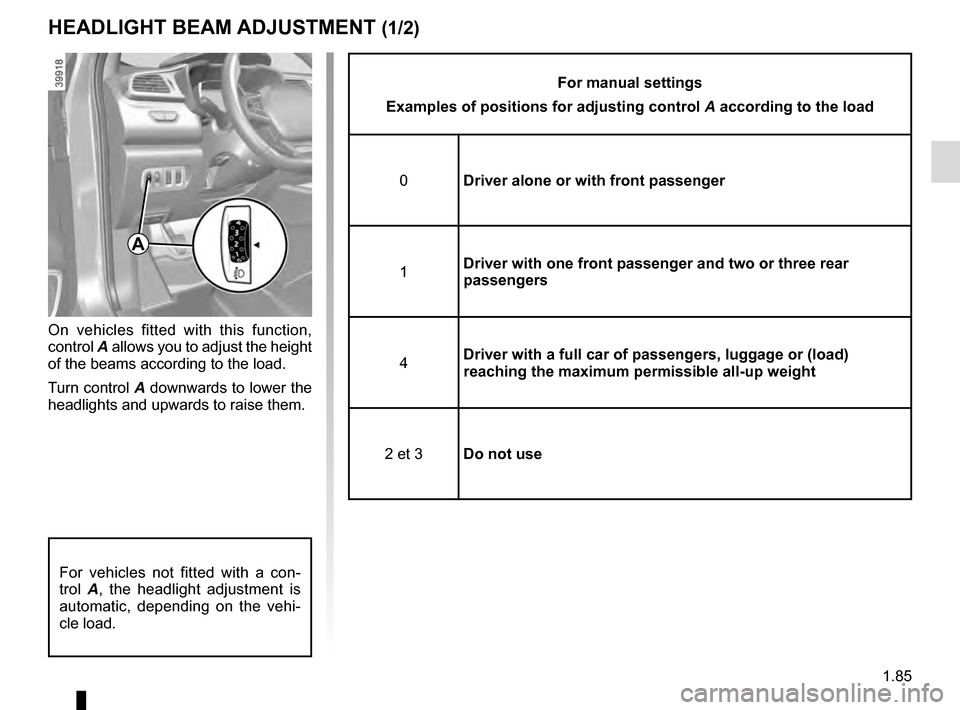
On vehicles fitted with this function,
control A allows you to adjust the height
of the beams according to the load.
Turn control A downwards to lower the
headlights and upwards to raise them.
For manual settings
Examples of positions for adjusting control A according to the load
0 Driver alone or with front passenger
1 Driver with one front passenger and two or three rear
passengers
4 Driver with a full car of passengers, luggage or (load)
reaching the maximum permissible all-up weight
2 et 3 Do not use
A
For vehicles not fitted with a con-
trol A, the headlight adjustment is
automatic, depending on the vehi-
cle load.
Page 92 of 300
1.86
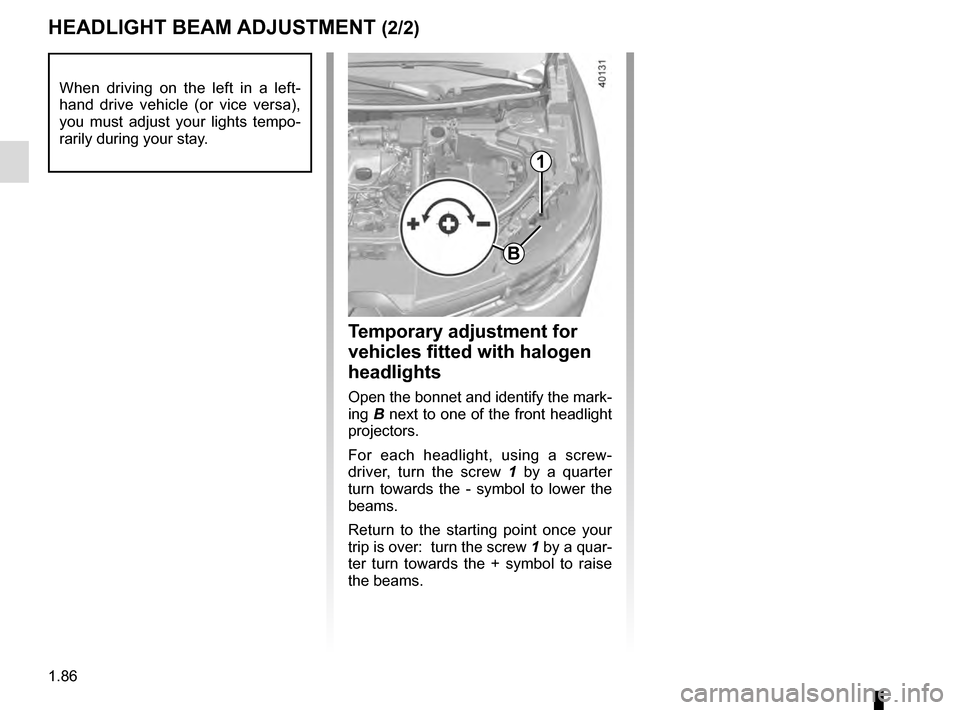
HEADLIGHT BEAM ADJUSTMENT (2/2)
Temporary adjustment for
vehicles fitted with halogen
headlights
Open the bonnet and identify the mark-
ing B next to one of the front headlight
projectors.
For each headlight, using a screw-
driver, turn the screw 1 by a quarter
turn towards the - symbol to lower the
beams.
Return to the starting point once your
trip is over: turn the screw 1 by a quar-
ter turn towards the + symbol to raise
the beams.
When driving on the left in a left-
hand drive vehicle (or vice versa),
you must adjust your lights tempo-
rarily during your stay.
1
B
Page 93 of 300
1.87
Special note
When driving the vehicle, the wiping
speed slows down whenever the ve-
hicle stops. For example, fast wiping
speed will slow to normal wiping speed.
As soon as the vehicle moves off,
wiping will return to the speed originally
selected.
If stalk 1 is operated, it overrides and
cancels the automatic function.Vehicle fitted with intermittent
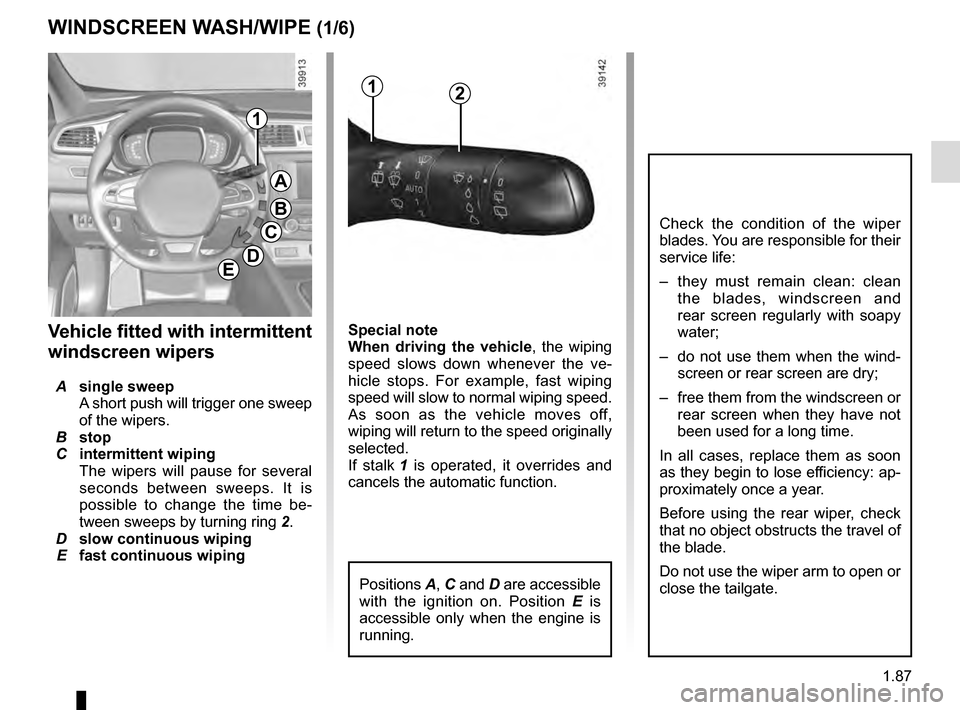
windscreen wipers
A single sweep
A short push will trigger one sweep
of the wipers.
B stop
C intermittent wiping
The wipers will pause for several
seconds between sweeps. It is
possible to change the time be-
tween sweeps by turning ring 2.
D slow continuous wiping
E fast continuous wiping
Positions A, C and D are accessible
with the ignition on. Position E is
accessible only when the engine is
running.
1
A
B
C
D
WINDSCREEN WASH/WIPE (1/6)
E
Check the condition of the wiper
blades. You are responsible for their
service life:
– they must remain clean: clean the blades, windscreen and
rear screen regularly with soapy
water;
– do not use them when the wind- screen or rear screen are dry;
– free them from the windscreen or rear screen when they have not
been used for a long time.
In all cases, replace them as soon
as they begin to lose efficiency: ap-
proximately once a year.
Before using the rear wiper, check
that no object obstructs the travel of
the blade.
Do not use the wiper arm to open or
close the tailgate.
12
Page 94 of 300
1.88
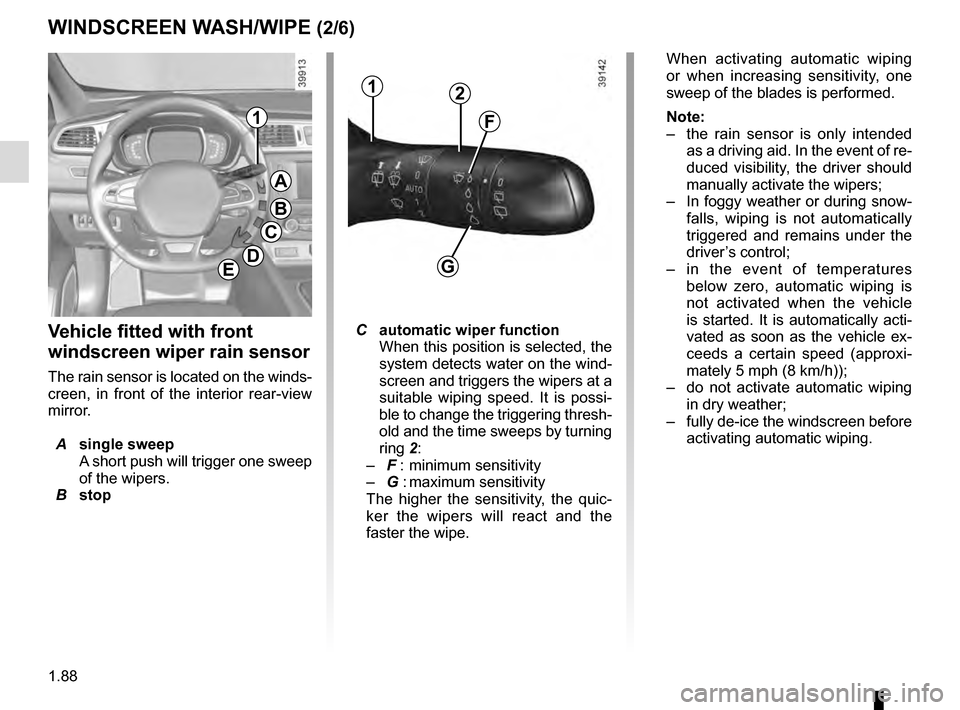
Vehicle fitted with front
windscreen wiper rain sensor
The rain sensor is located on the winds-
creen, in front of the interior rear-view
mirror.
A single sweep
A short push will trigger one sweep
of the wipers.
B stop
When activating automatic wiping
or when increasing sensitivity, one
sweep of the blades is performed.
Note:
– the rain sensor is only intended
as a driving aid. In the event of re-
duced visibility, the driver should
manually activate the wipers;
– In foggy weather or during snow-
falls, wiping is not automatically
triggered and remains under the
driver’s control;
– in the event of temperatures
below zero, automatic wiping is
not activated when the vehicle
is started. It is automatically acti-
vated as soon as the vehicle ex-
ceeds a certain speed (approxi-
mately 5 mph (8 km/h));
– do not activate automatic wiping
in dry weather;
– fully de-ice the windscreen before
activating automatic wiping.
1
A
B
C
DG
F
1
E
WINDSCREEN WASH/WIPE (2/6)
C automatic wiper function
When this position is selected, the
system detects water on the wind-
screen and triggers the wipers at a
suitable wiping speed. It is possi-
ble to change the triggering thresh-
old and the time sweeps by turning
ring 2:
– F : minimum sensitivity
– G : maximum sensitivity
The higher the sensitivity, the quic-
ker the wipers will react and the
faster the wipe.
2
Page 95 of 300
1.89
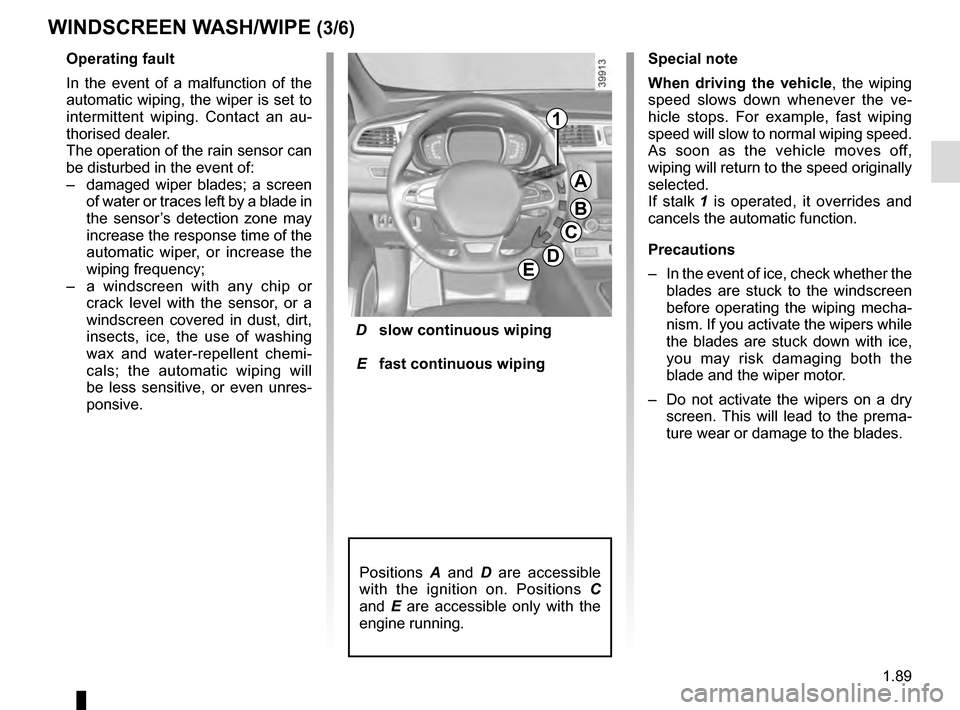
D slow continuous wiping
E fast continuous wiping
Positions A and D are accessible
with the ignition on. Positions C
and E are accessible only with the
engine running.
Operating fault
In the event of a malfunction of the
automatic wiping, the wiper is set to
intermittent wiping. Contact an au-
thorised dealer.
The operation of the rain sensor can
be disturbed in the event of:
– damaged wiper blades; a screen
of water or traces left by a blade in
the sensor’s detection zone may
increase the response time of the
automatic wiper, or increase the
wiping frequency;
– a windscreen with any chip or
crack level with the sensor, or a
windscreen covered in dust, dirt,
insects, ice, the use of washing
wax and water-repellent chemi-
cals; the automatic wiping will
be less sensitive, or even unres-
ponsive.
1
A
B
C
DE
WINDSCREEN WASH/WIPE (3/6)
Special note
When driving the vehicle, the wiping
speed slows down whenever the ve-
hicle stops. For example, fast wiping
speed will slow to normal wiping speed.
As soon as the vehicle moves off,
wiping will return to the speed originally
selected.
If stalk 1 is operated, it overrides and
cancels the automatic function.
Precautions
– In the event of ice, check whether the
blades are stuck to the windscreen
before operating the wiping mecha-
nism. If you activate the wipers while
the blades are stuck down with ice,
you may risk damaging both the
blade and the wiper motor.
– Do not activate the wipers on a dry
screen. This will lead to the prema-
ture wear or damage to the blades.
Page 96 of 300
1.90
Before any action involving
the windscreen (washing
the vehicle, de-icing,
cleaning the windscreen,
etc.) return stalk 1 to position B
(stop).
Risk of injury and/or damage.
In the event of obstacles present
on the windscreen (dirt, snow, ice,
etc.), clean the windscreen (inclu-
ding the central area located behind
the interior rear-view mirror) and
the rear screen before starting the
wipers (risk of motor overheating).
If an object is preventing a blade
from moving, it may stop functio-
ning. Remove the obstacle and
reactivate the wiper using the wiper
stalk.
WINDSCREEN WASH/WIPE (4/6)
Note:
Once the wipers have been switched
off, at least 1 minute after locking the
vehicle, it is possible to manually move
the blades. Do not force the blade arms
to move. This may risk damage to the
wiper motor, the arms and the blades.
After your intervention, to reposition the
blades correctly, make sure the blades
are resting on the windscreen, switch
on the ignition and activate the wiper
control.
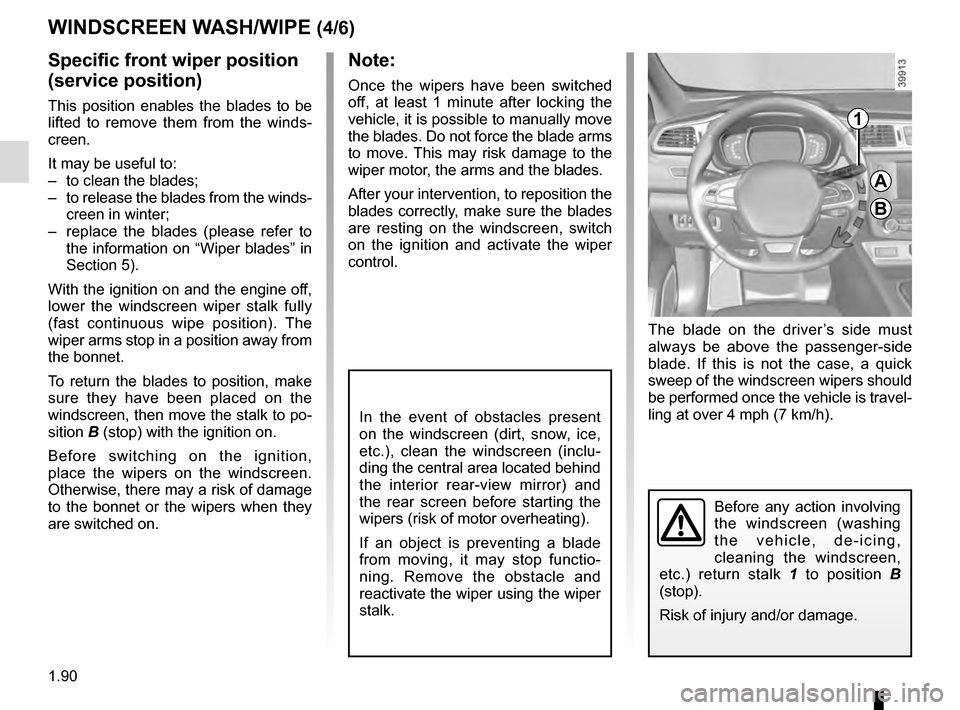
Specific front wiper position
(service position)
This position enables the blades to be
lifted to remove them from the winds-
creen.
It may be useful to:
– to clean the blades;
– to release the blades from the winds-creen in winter;
– replace the blades (please refer to the information on “Wiper blades” in
Section 5).
With the ignition on and the engine off,
lower the windscreen wiper stalk fully
(fast continuous wipe position). The
wiper arms stop in a position away from
the bonnet.
To return the blades to position, make
sure they have been placed on the
windscreen, then move the stalk to po-
sition B (stop) with the ignition on.
Before switching on the ignition,
place the wipers on the windscreen.
Otherwise, there may a risk of damage
to the bonnet or the wipers when they
are switched on. The blade on the driver’s side must
always be above the passenger-side
blade. If this is not the case, a quick
sweep of the windscreen wipers should
be performed once the vehicle is travel-
ling at over 4 mph (7 km/h).1
A
B
Page 97 of 300
1.91
Note:
In temperatures below zero, the washer
liquid risks freezing to the windscreen,
thereby reducing visibility. Heat the
windscreen using the demister control
before cleaning.
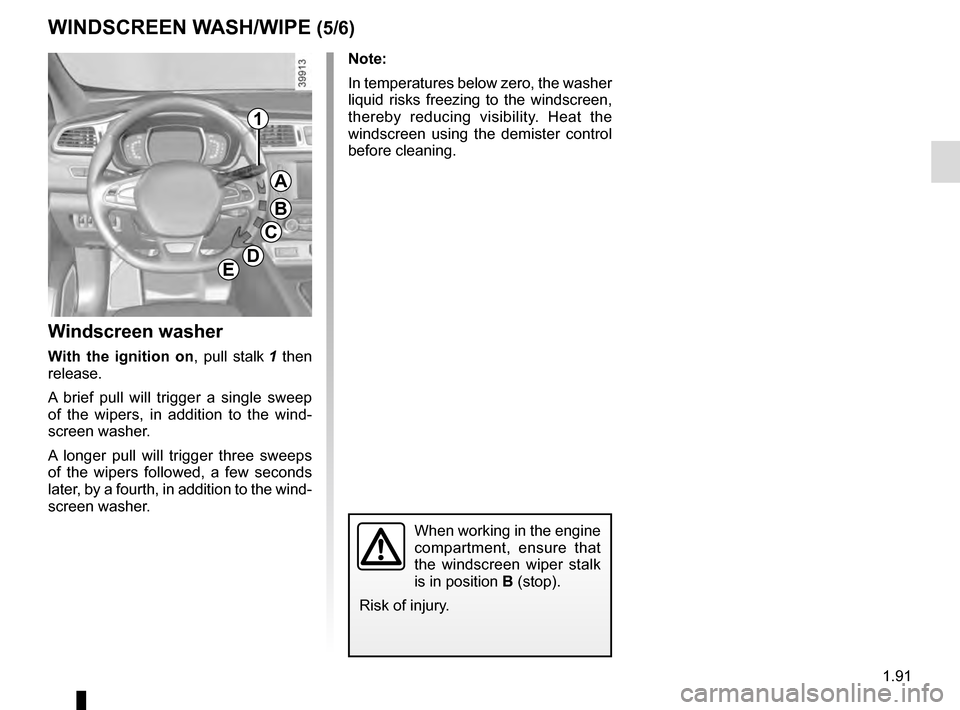
Windscreen washer
With the ignition on, pull stalk 1 then
release.
A brief pull will trigger a single sweep
of the wipers, in addition to the wind-
screen washer.
A longer pull will trigger three sweeps
of the wipers followed, a few seconds
later, by a fourth, in addition to the wind-
screen washer.
When working in the engine
compartment, ensure that
the windscreen wiper stalk
is in position B (stop).
Risk of injury.
WINDSCREEN WASH/WIPE (5/6)
1
A
B
C
DE
Page 98 of 300

1.92
Note:
To ensure the headlight washers op-
erate correctly in winter, remove snow
from the jet trims and de-ice the jet
trims using an aerosol de-icer.
You are recommended to regularly
remove dirt encrusted on the headlight
glass.
When the minimum windscreen washer
fluid level is reached, the headlight
washer system may be deprimed.
Fill the windscreen washer fluid and
then activate the windscreen washer,
with the engine running, to reprime
the system.
1
A
B
C
DE
WINDSCREEN WASH/WIPE (6/6)
Headlight washers
Headlights on
On equipped vehicles, hold stalk 1
pulled towards you for about 2 seconds
- the headlight washers and winds-
creen washers will be activated at the
same time.
The headlight washers are also activa-
ted after three prolonged movements
on the front windscreen washer control.
When working in the engine
compartment, ensure that
the windscreen wiper stalk
is in position B (stop).
Risk of injury.
Page 99 of 300
1.93
REAR SCREEN WASH/WIPE (1/2)
1
3
Check the condition of the wiper
blades. You are responsible for their
service life:
– they must remain clean: clean the blades, windscreen and
rear screen regularly with soapy
water;
– do not use them when the wind- screen or rear screen are dry;
– free them from the windscreen or rear screen when they have not
been used for a long time.
In all cases, replace them as soon
as they begin to lose efficiency: ap-
proximately once a year.
Before using the rear wiper, check
that no object obstructs the travel of
the blade.
Do not use the wiper arm to open or
close the tailgate.
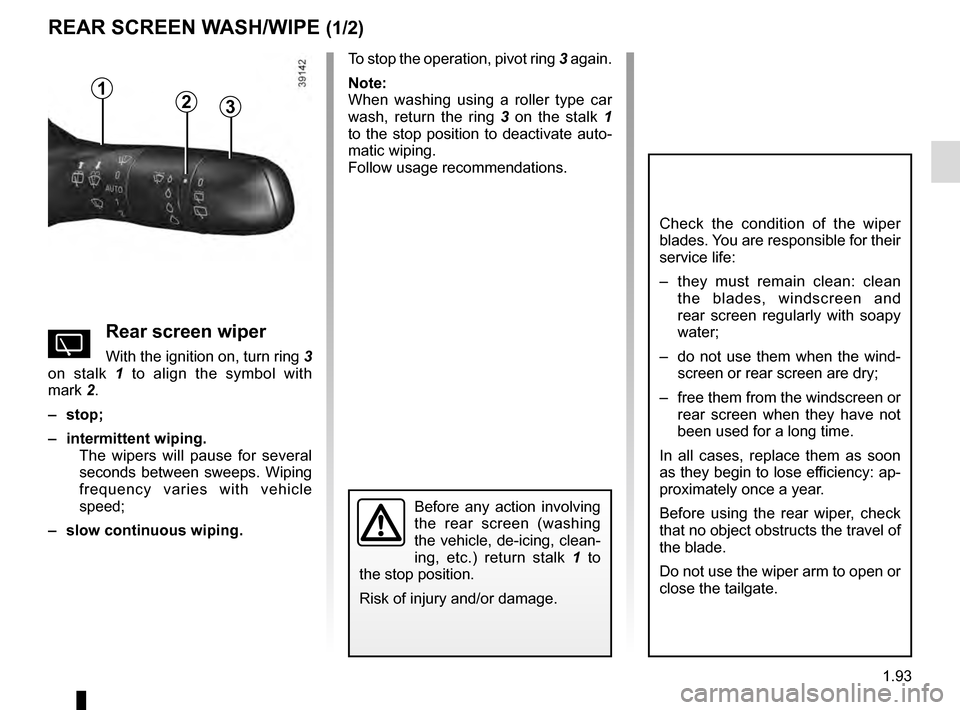
YRear screen wiper
With the ignition on, turn ring 3
on stalk 1 to align the symbol with
mark 2.
– stop;
– intermittent wiping. The wipers will pause for several
seconds between sweeps. Wiping
frequency varies with vehicle
speed;
– slow continuous wiping. To stop the operation, pivot ring
3 again.
Note:
When washing using a roller type car
wash, return the ring 3 on the stalk 1
to the stop position to deactivate auto-
matic wiping.
Follow usage recommendations.
Before any action involving
the rear screen (washing
the vehicle, de-icing, clean-
ing, etc.) return stalk 1 to
the stop position.
Risk of injury and/or damage.
2
Page 100 of 300
1.94
Activation/deactivation of the rear
screen wiper
(depending on the vehicle)
Engaging reverse gear triggers inter-
mittent wiping (if the front wipers are in
operation). If your vehicle is fitted with
a vehicle settings customisation menu,
you can opt to activate or deactivate
this function. To do this, refer to the in-
formation on the “Vehicle settings cus-
tomisation menu” in Section 1; “Rear
wiping in reverse gear”.
REAR SCREEN WASH/WIPE (2/2)
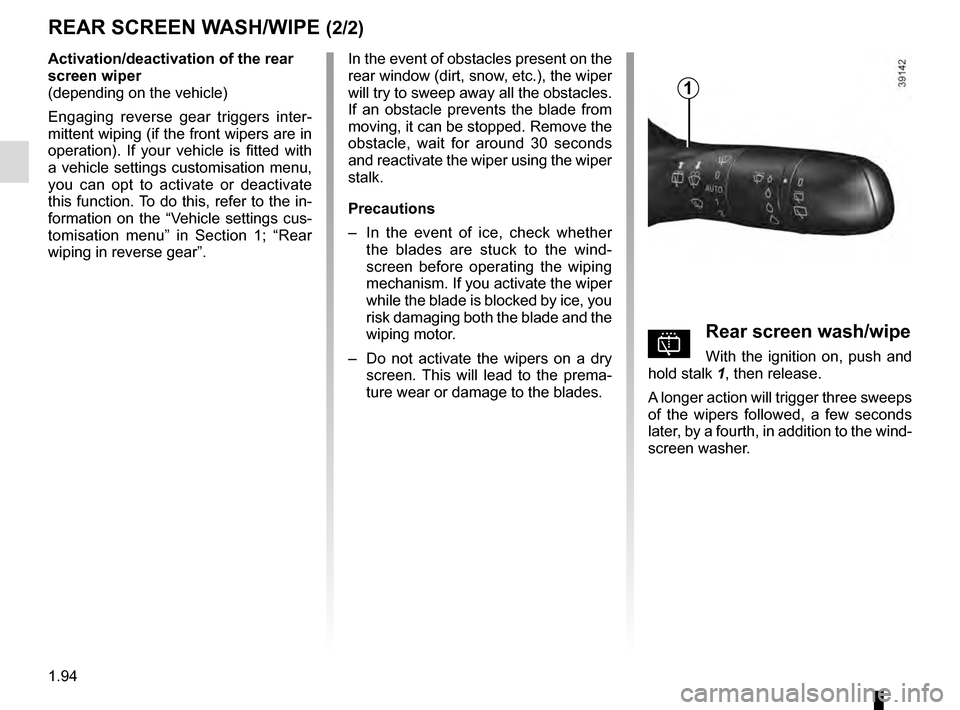
pRear screen wash/wipe
With the ignition on, push and
hold stalk 1, then release.
A longer action will trigger three sweeps
of the wipers followed, a few seconds
later, by a fourth, in addition to the wind-
screen washer.
In the event of obstacles present on the
rear window (dirt, snow, etc.), the wiper
will try to sweep away all the obstacles.
If an obstacle prevents the blade from
moving, it can be stopped. Remove the
obstacle, wait for around 30 seconds
and reactivate the wiper using the wiper
stalk.
Precautions
–
In the event of ice, check whether
the blades are stuck to the wind-
screen before operating the wiping
mechanism. If you activate the wiper
while the blade is blocked by ice, you
risk damaging both the blade and the
wiping motor.
– Do not activate the wipers on a dry
screen. This will lead to the prema-
ture wear or damage to the blades.
1