door lock RENAULT KADJAR 2018 Owner's Manual
[x] Cancel search | Manufacturer: RENAULT, Model Year: 2018, Model line: KADJAR, Model: RENAULT KADJAR 2018Pages: 310, PDF Size: 8.35 MB
Page 46 of 310
1.40
Fit the child seat in a rear
seat wherever possible.
In the rear side seat
A carrycot can be installed across the
vehicle and will take up at least two
seats.
Position the child with their feet nearest
the door.
Move the front seat as far forward as
possible to install a rear-facing child
seat, then move back the seat in front
as far as it will go, although without al-
lowing it to come into contact with the
child seat.
For the safety of a child facing forwards,
move the seat in front of the child as
far forward as possible, remember-
ing to move the seatback forwards to
avoid contact between the seat and the
child’s legs.
In all situations, remove the rear head-
rests (refer to the information on the
“Rear headrests” in Section 3). This
must be done before fitting the child
seat.
Check that the forward-facing child seat
is resting against the back of the vehi-
cle seat.
CHILD SAFETY: fitting a child seat, general information (2/2)
Ensure that the child seat
or the child’s feet do not
prevent the front seat from
locking correctly. Refer to
the information on the “Front seat”
in Section 1.
When fitting a child seat
(Group 2 or 3 booster seat),
check that the seat belts op-
erate (wind) correctly: refer
to Section 1 “Rear seat belts”. If
necessary, adjust the position of the
vehicle seat.
Page 57 of 310
1.51
DRIVING POSITION: LEFT-HAND DRIVE (2/2)
The equipment fitted, described below, DEPENDS ON THE VERSION AND COUNTRY. 19 Assisted parking or handbrake
control.
20 Gear lever.
21 Ignition switch (vehicles with key).
22 Control for adjusting steering
wheel height and reach.
23 Unlocking controls:
– bonnet;
– fuel filler flap.
24 Controls for:
– headlight beam height remote ad-
justment;
– lighting rheostat for control instru-
ments;
– Lane departure warning;
– ESP and Traction Control system.
25 Controls for:
– ECO mode;
– activation/deactivation of the Stop
and Start function.
1 Air vent.
2 Demister outlet.
3 Stalk for:
– direction indicator lights;
– exterior lights;
– fog lights.
4 Cruise control/speed limiter con-
trols.
5 Instrument panel.
6 Driver Airbag and horn location.
7 Controls for:
– on-board computer information
read-out and vehicle settings cus-
tomisation menu;
– remote radio and navigation
system.
8 Steering column stalk for wind-
screen and rear screen wash/
wiper.
9 Engine start/stop button (vehicle
with RENAULT card).
10 Controls for:
– access the main menu;
– access the Driving assistance
menu or, depending on the vehi-
cle, the user preferences menu;
– assisted parking.
11 Hazard warning light switch, cen-
tral door locking warning light.
12 Multimedia screen.
13 Heating or air conditioning con-
trols.
14 Passenger Airbag location.
15 Glovebox.
16 Accessories and multimedia
socket.
17 Two and four-wheel drive mode
selector or, depending on the vehi-
cle, traction control.
18 Cruise control/speed limiter main
control.
Page 59 of 310
1.53
DRIVING POSITION: RIGHT-HAND DRIVE (2/2)
The equipment fitted, described below, DEPENDS ON THE VERSION AND COUNTRY.
16 Unlocking controls:
– bonnet,
– fuel filler flap.
17 Ignition switch (vehicles with key).
18 Control for adjusting steering
wheel height and reach.
19 Engine start/stop button (vehicle
with RENAULT card).
20 Accessories and multimedia
socket.
21 Two and four-wheel drive mode
selector or, depending on the vehi-
cle, traction control.
22 Cruise control/speed limiter main
control.
23 Assisted parking or handbrake
control.
24 Gear lever.
25 Glovebox.
1 Air vent.
2 Demister outlet.
3 Passenger Airbag location.
4 Heating or air conditioning con-
trols.
5 Multimedia screen.
6 Controls for:
– access the main menu,
– access the Driving assistance
menu or, depending on the vehi-
cle, the user preferences menu,
– assisted parking.
7 Hazard warning light switch, cen-
tral door locking warning light.
8 Stalk for:
– direction indicator lights;
– exterior lights;
– fog lights.
9 Cruise control/speed limiter con-
trols.
10 Instrument panel.
11 Driver Airbag and horn location.
12 Controls for:
– on-board computer information
read-out and vehicle settings cus-
tomisation menu,
– remote radio and navigation
system.
13 Steering column stalk for wind-
screen and rear screen wash/
wiper.
14 Controls for:
– ECO mode,
– activation/deactivation of the Stop
and Start function.
15 Controls for:
– electric headlight beam adjust-
ment;
– lighting dimmer for control instru-
ments;
– Lane departure warning;
– ESP and
Traction Control system.
Page 78 of 310
1.72
VEHICLE SETTINGS CUSTOMISATION MENU (1/2)
Adjusting the settings
Select the function to modify:
a) unlocking the driver’s door;
b) automatic locking of the doors while driving;
c) hands-free function;
d) indicator audio volume;
e) internal welcome sound;
f) external welcome;
g) reading lamp in automatic mode;
h) rear windscreen wiping in reverse gear;
i) configuration of the driving style indi- cator;
j) Active noise control.
Select “ON” or “OFF” to activate or de-
activate the function.
For the “Light brightness intensity”
function, select the intensity by press-
ing “+” or “-”.
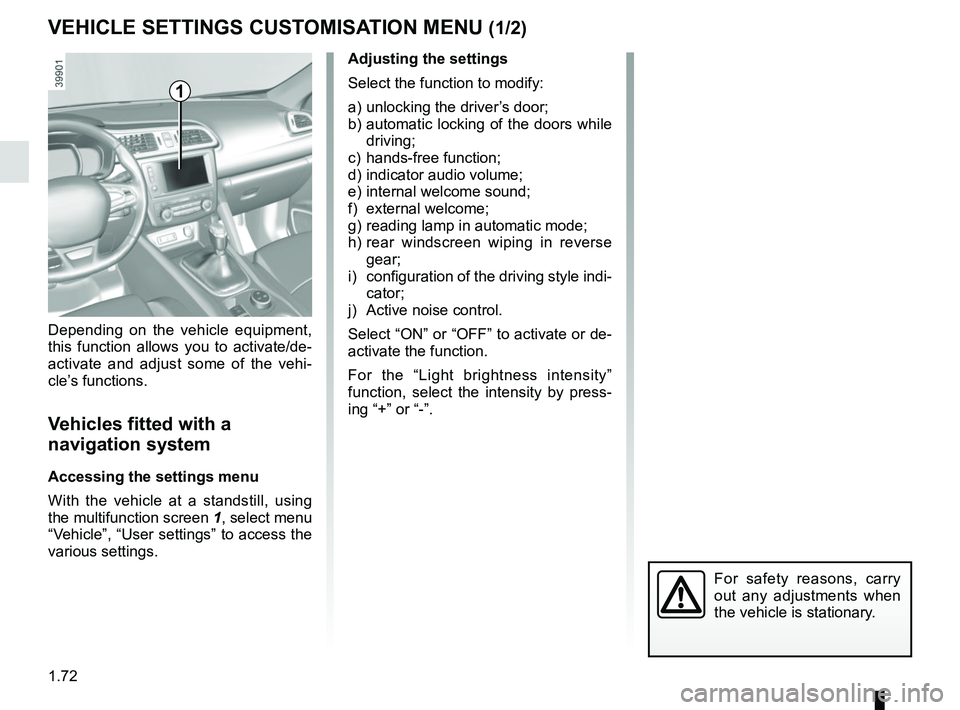
Depending on the vehicle equipment,
this function allows you to activate/de-
activate and adjust some of the vehi-
cle’s functions.
Vehicles fitted with a
navigation system
Accessing the settings menu
With the vehicle at a standstill, using
the multifunction screen
1, select menu
“Vehicle”, “User settings” to access the
various settings.
1
For safety reasons, carry
out any adjustments when
the vehicle is stationary.
Page 79 of 310
1.73
VEHICLE SETTINGS CUSTOMISATION MENU (2/2)
34
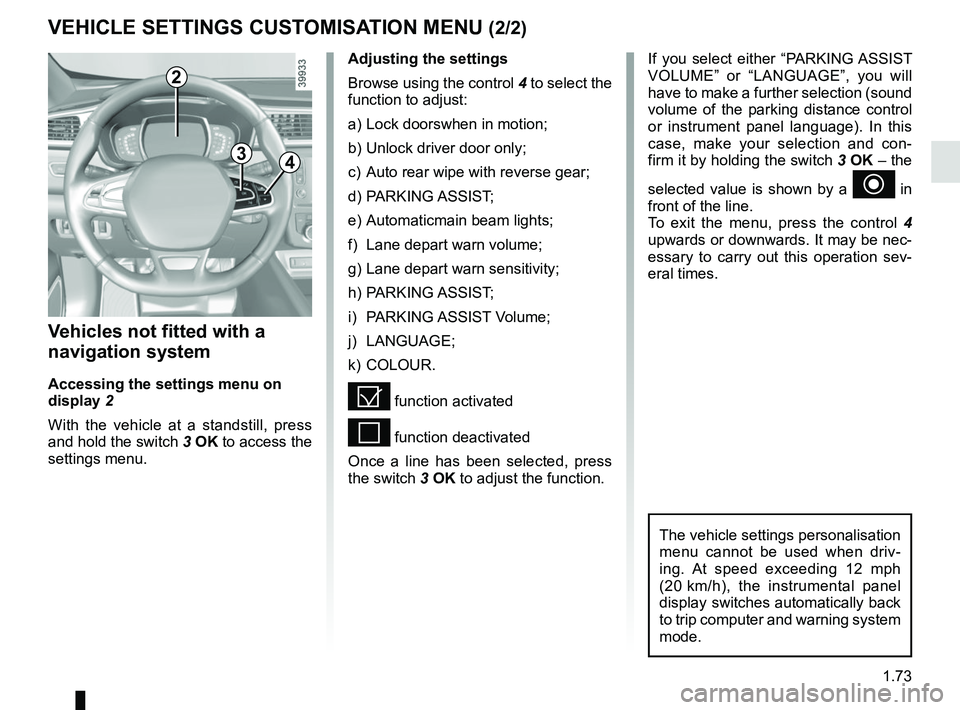
If you select either “PARKING ASSIST
VOLUME” or “LANGUAGE”, you will
have to make a further selection (sound
volume of the parking distance control
or instrument panel language). In this
case, make your selection and con-
firm it by holding the switch 3 OK – the
selected value is shown by a
~ in
front of the line.
To exit the menu, press the control 4
upwards or downwards. It may be nec-
essary to carry out this operation sev-
eral times.
Vehicles not fitted with a
navigation system
Accessing the settings menu on
display 2
With the vehicle at a standstill, press
and hold the switch 3 OK to access the
settings menu.
Adjusting the settings
Browse using the control 4 to select the
function to adjust:
a) Lock doorswhen in motion;
b) Unlock driver door only;
c) Auto rear wipe with reverse gear;
d) PARKING ASSIST;
e) Automaticmain beam lights;
f) Lane depart warn volume;
g) Lane depart warn sensitivity;
h) PARKING ASSIST;
i) PARKING ASSIST Volume;
j) LANGUAGE;
k) COLOUR.
= function activated
< function deactivated
Once a line has been selected, press
the switch 3 OK to adjust the function.
The vehicle settings personalisation
menu cannot be used when driv-
ing. At speed exceeding 12 mph
(20 km/h), the instrumental panel
display switches automatically back
to trip computer and warning system
mode.
2
Page 82 of 310
1.76
REAR VIEW MIRRORS (1/2)Folding rear view mirrors
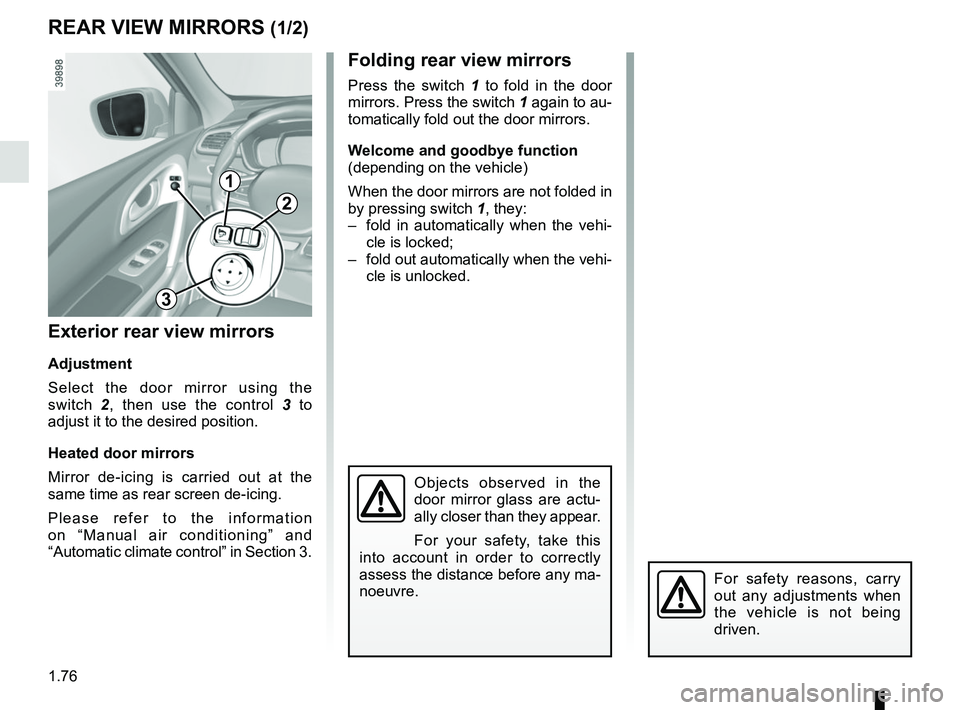
Press the switch 1 to fold in the door
mirrors. Press the switch 1 again to au-
tomatically fold out the door mirrors.
Welcome and goodbye function
(depending on the vehicle)
When the door mirrors are not folded in
by pressing switch 1, they:
– fold in automatically when the vehi- cle is locked;
– fold out automatically when the vehi- cle is unlocked.
Exterior rear view mirrors
Adjustment
Select the door mirror using the
switch 2, then use the control 3 to
adjust it to the desired position.
Heated door mirrors
Mirror de-icing is carried out at the
same time as rear screen de-icing.
Please refer to the information
on “Manual air conditioning” and
“Automatic climate control” in Section 3.
Objects observed in the
door mirror glass are actu-
ally closer than they appear.
For your safety, take this
into account in order to correctly
assess the distance before any ma-
noeuvre.
For safety reasons, carry
out any adjustments when
the vehicle is not being
driven.
1
2
3
Page 83 of 310
1.77
REAR VIEW MIRRORS (2/2)
5
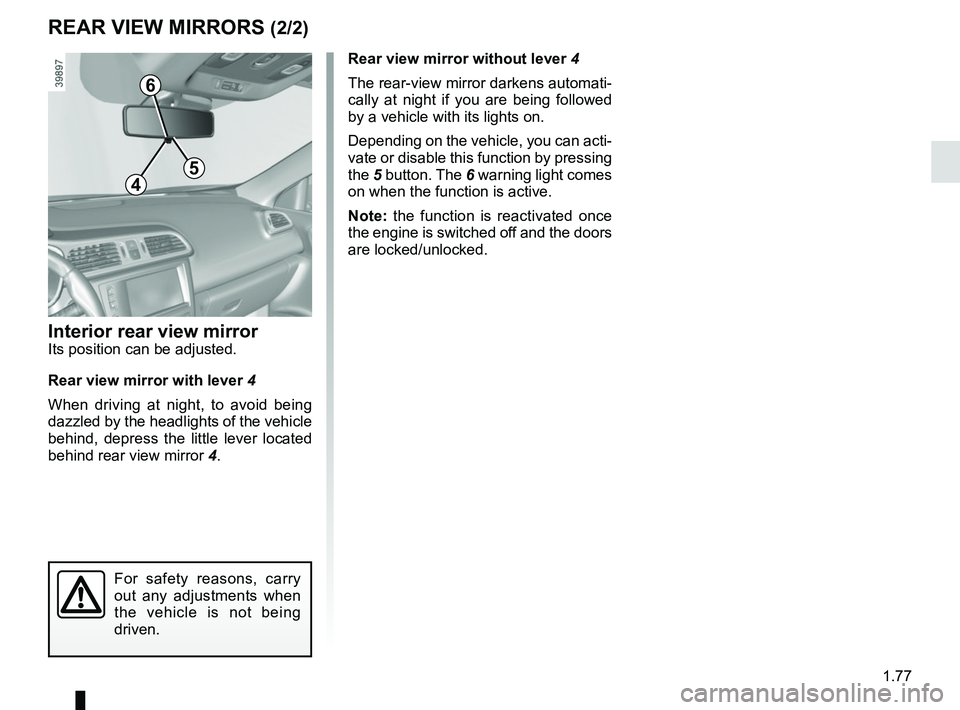
Interior rear view mirrorIts position can be adjusted.
Rear view mirror with lever 4
When driving at night, to avoid being
dazzled by the headlights of the vehicle
behind, depress the little lever located
behind rear view mirror 4.Rear view mirror without lever 4
The rear-view mirror darkens automati-
cally at night if you are being followed
by a vehicle with its lights on.
Depending on the vehicle, you can acti-
vate or disable this function by pressing
the
5 button. The 6 warning light comes
on when the function is active.
Note: the function is reactivated once
the engine is switched off and the doors
are locked/unlocked.
For safety reasons, carry
out any adjustments when
the vehicle is not being
driven.
4
6
Page 87 of 310
1.81
Operating faults
When the message “Check auto li-
ghting” appears on the instrument
panel, the system is deactivated.
Consult an approved dealer.
EXTERIOR LIGHTING AND SIGNALS (4/6)
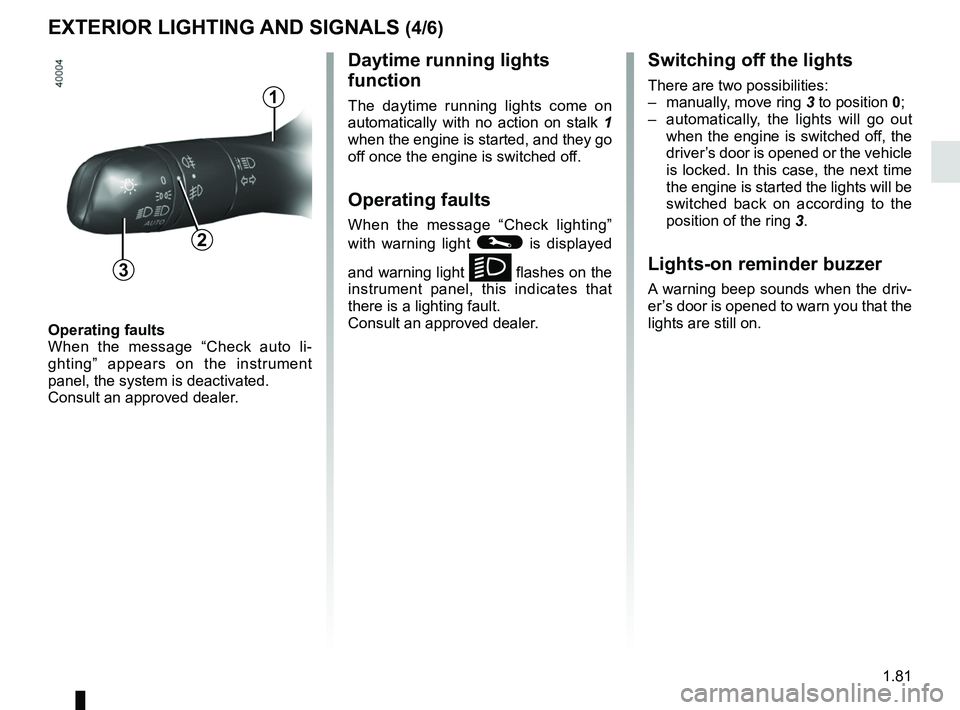
Switching off the lights
There are two possibilities:
– manually, move ring 3 to position 0;
– automatically, the lights will go out when the engine is switched off, the
driver’s door is opened or the vehicle
is locked. In this case, the next time
the engine is started the lights will be
switched back on according to the
position of the ring 3.
Lights-on reminder buzzer
A warning beep sounds when the driv-
er’s door is opened to warn you that the
lights are still on.
Daytime running lights
function
The daytime running lights come on
automatically with no action on stalk 1
when the engine is started, and they go
off once the engine is switched off.
Operating faults
When the message “Check lighting”
with warning light
© is displayed
and warning light
k flashes on the
instrument panel, this indicates that
there is a lighting fault.
Consult an approved dealer.3
2
1
Page 112 of 310
2.4
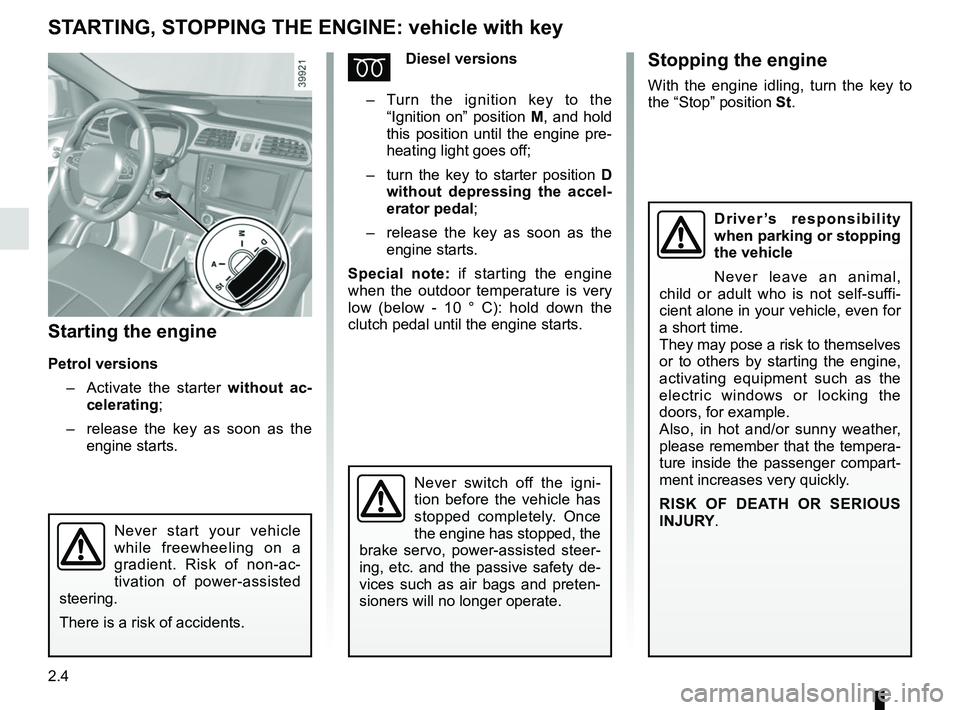
STARTING, STOPPING THE ENGINE: vehicle with key
Starting the engine
Petrol versions– Activate the starter without ac-
celerating;
– release the key as soon as the
engine starts.
ÉDiesel versions
– Turn the ignition key to the
“Ignition on” position M, and hold
this position until the engine pre-
heating light goes off;
– turn the key to starter position D
without depressing the accel-
erator pedal;
– release the key as soon as the
engine starts.
Special note: if starting the engine
when the outdoor temperature is very
low (below - 10 ° C): hold down the
clutch pedal until the engine starts.
Never start your vehicle
while freewheeling on a
gradient. Risk of non-ac-
tivation of power-assisted
steering.
There is a risk of accidents.
Never switch off the igni-
tion before the vehicle has
stopped completely. Once
the engine has stopped, the
brake servo, power-assisted steer-
ing, etc. and the passive safety de-
vices such as air bags and preten-
sioners will no longer operate.
Driver’s responsibility
when parking or stopping
the vehicle
Never leave an animal,
child or adult who is not self-suffi-
cient alone in your vehicle, even for
a short time.
They may pose a risk to themselves
or to others by starting the engine,
activating equipment such as the
electric windows or locking the
doors, for example.
Also, in hot and/or sunny weather,
please remember that the tempera-
ture inside the passenger compart-
ment increases very quickly.
RISK OF DEATH OR SERIOUS
INJURY.
Stopping the engine
With the engine idling, turn the key to
the “Stop” position St.
Page 113 of 310
2.5
STARTING, STOPPING THE ENGINE: vehicle with RENAULT CARD (1/3)
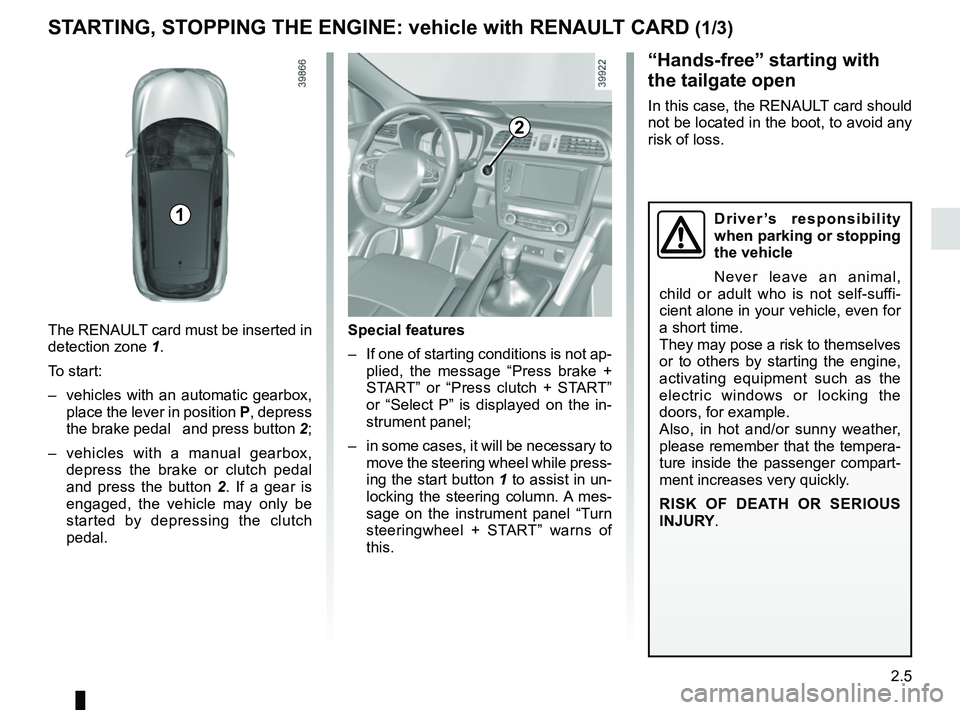
The RENAULT card must be inserted in
detection zone 1.
To start:
– vehicles with an automatic gearbox, place the lever in position P, depress
the brake pedal and press button 2;
– vehicles with a manual gearbox, depress the brake or clutch pedal
and press the button 2 . If a gear is
engaged, the vehicle may only be
started by depressing the clutch
pedal.
“Hands-free” starting with
the tailgate open
In this case, the RENAULT card should
not be located in the boot, to avoid any
risk of loss.
2
1
Special features
– If one of starting conditions is not ap- plied, the message “Press brake +
START” or “Press clutch + START”
or “Select P” is displayed on the in-
strument panel;
– in some cases, it will be necessary to move the steering wheel while press-
ing the start button 1 to assist in un-
locking the steering column. A mes-
sage on the instrument panel “Turn
steeringwheel + START” warns of
this.
Driver’s responsibility
when parking or stopping
the vehicle
Never leave an animal,
child or adult who is not self-suffi-
cient alone in your vehicle, even for
a short time.
They may pose a risk to themselves
or to others by starting the engine,
activating equipment such as the
electric windows or locking the
doors, for example.
Also, in hot and/or sunny weather,
please remember that the tempera-
ture inside the passenger compart-
ment increases very quickly.
RISK OF DEATH OR SERIOUS
INJURY.