Button RENAULT MEGANE 2017 4.G Owner's Guide
[x] Cancel search | Manufacturer: RENAULT, Model Year: 2017, Model line: MEGANE, Model: RENAULT MEGANE 2017 4.GPages: 346, PDF Size: 7.04 MB
Page 139 of 346
2.27
TYRE PRESSURE MONITORING SYSTEM (1/3)
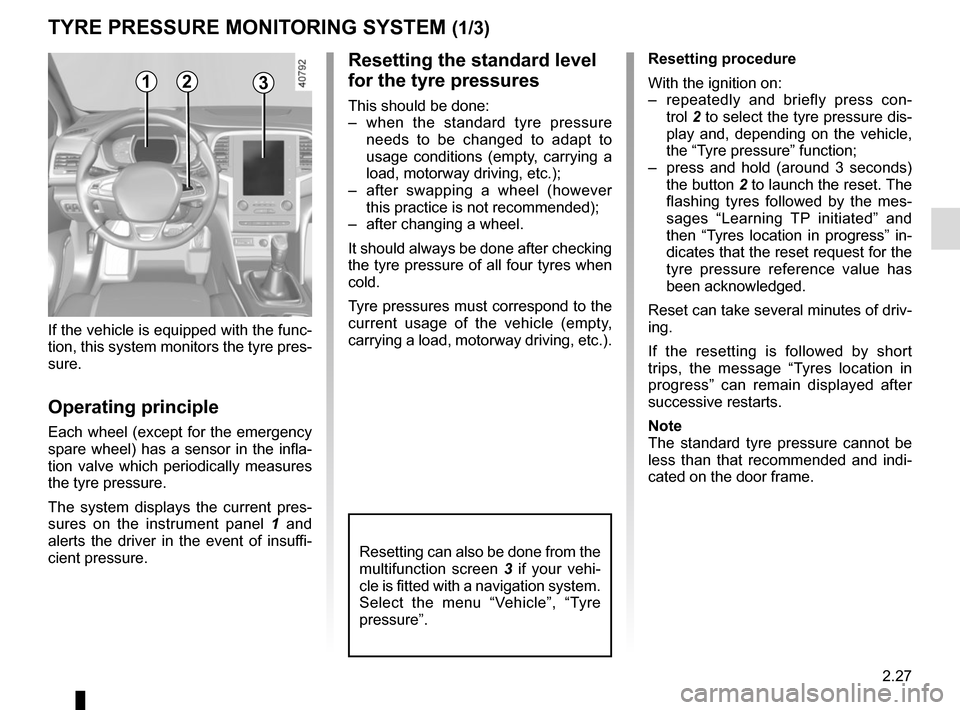
If the vehicle is equipped with the func-
tion, this system monitors the tyre pres-
sure.
Operating principle
Each wheel (except for the emergency
spare wheel) has a sensor in the infla-
tion valve which periodically measures
the tyre pressure.
The system displays the current pres-
sures on the instrument panel 1 and
alerts the driver in the event of insuffi-
cient pressure.
Resetting the standard level
for the tyre pressures
This should be done:
– when the standard tyre pressure needs to be changed to adapt to
usage conditions (empty, carrying a
load, motorway driving, etc.);
– after swapping a wheel (however this practice is not recommended);
– after changing a wheel.
It should always be done after checking
the tyre pressure of all four tyres when
cold.
Tyre pressures must correspond to the
current usage of the vehicle (empty,
carrying a load, motorway driving, etc.).
21
Resetting procedure
With the ignition on:
– repeatedly and briefly press con- trol 2 to select the tyre pressure dis-
play and, depending on the vehicle,
the “Tyre pressure” function;
– press and hold (around 3 seconds) the button 2 to launch the reset. The
flashing tyres followed by the mes-
sages “Learning TP initiated” and
then “Tyres location in progress” in-
dicates that the reset request for the
tyre pressure reference value has
been acknowledged.
Reset can take several minutes of driv-
ing.
If the resetting is followed by short
trips, the message “Tyres location in
progress” can remain displayed after
successive restarts.
Note
The standard tyre pressure cannot be
less than that recommended and indi-
cated on the door frame.
3
Resetting can also be done from the
multifunction screen 3 if your vehi-
cle is fitted with a navigation system.
Select the menu “Vehicle”, “Tyre
pressure”.
Page 147 of 346
2.35
DRIVER CORRECTION DEVICES AND AIDS (6/10)
Activating or deactivating the
system
For vehicles fitted with a navigation
system
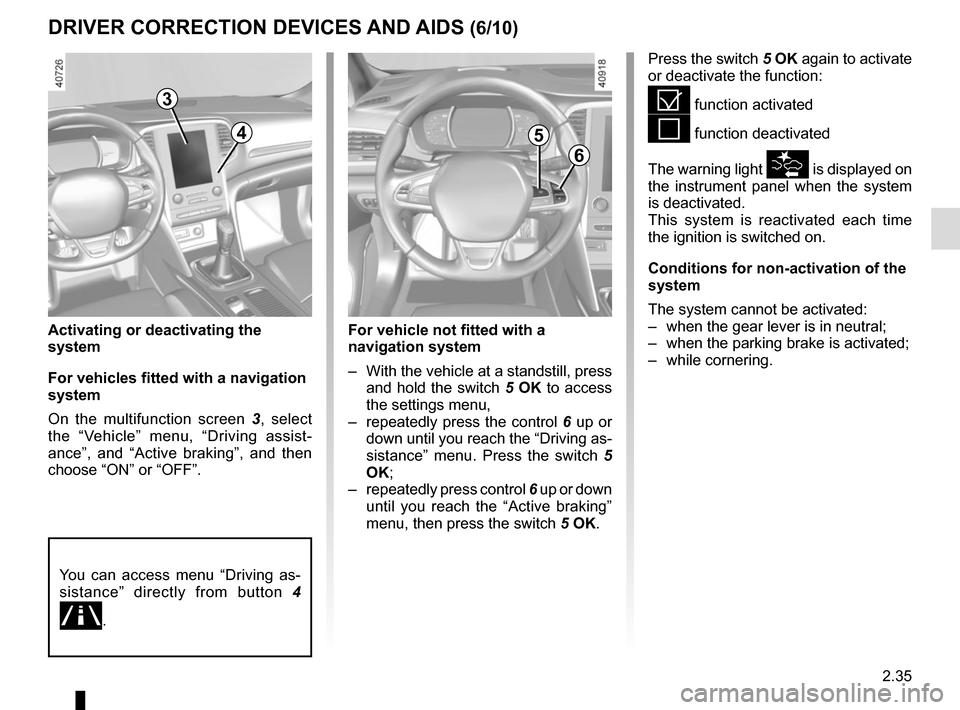
On the multifunction screen 3, select
the “Vehicle” menu, “Driving assist-
ance”, and “Active braking”, and then
choose “ON” or “OFF”.
Press the switch 5 OK again to activate
or deactivate the function:
= function activated
< function deactivated
The warning light
is displayed on
the instrument panel when the system
is deactivated.
This system is reactivated each time
the ignition is switched on.
Conditions for non-activation of the
system
The system cannot be activated:
– when the gear lever is in neutral;
– when the parking brake is activated;
– while cornering.
3
6
5
For vehicle not fitted with a
navigation system
– With the vehicle at a standstill, press and hold the switch 5 OK to access
the settings menu,
– repeatedly press the control 6 up or
down until you reach the “Driving as-
sistance” menu. Press the switch 5
OK;
– repeatedly press control 6 up or down
until you reach the “Active braking”
menu, then press the switch 5 OK.
You can access menu “Driving as-
sistance” directly from button 4
\b.
4
Page 153 of 346
2.41
LANE DEPARTURE WARNING (2/3)
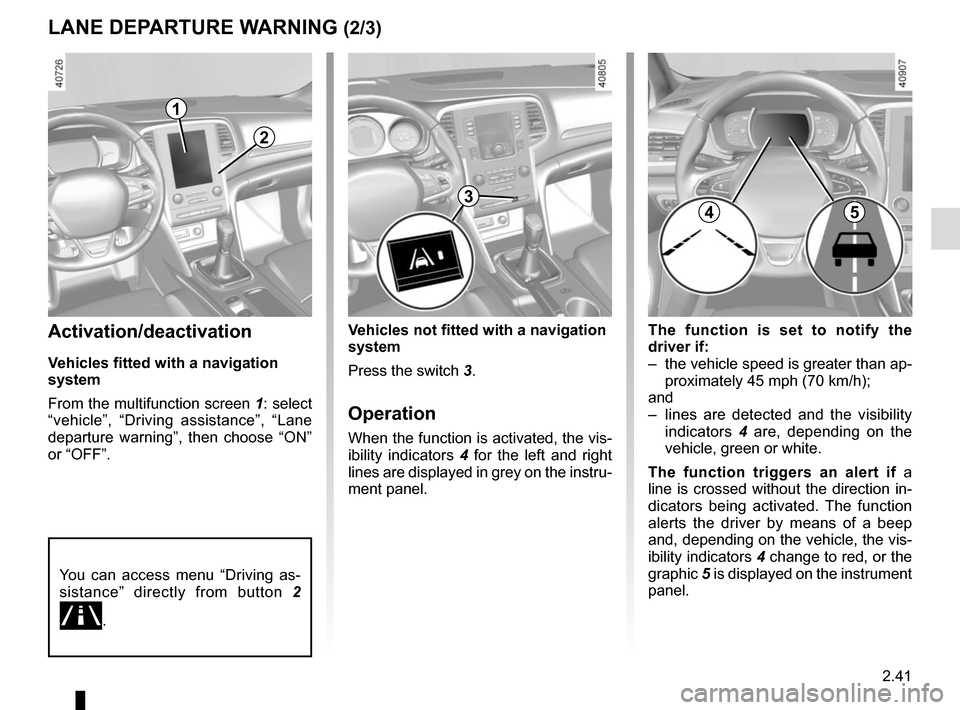
The function is set to notify the
driver if:
– the vehicle speed is greater than ap-proximately 45 mph (70 km/h);
and
– lines are detected and the visibility indicators 4 are, depending on the
vehicle, green or white.
The function triggers an alert if a
line is crossed without the direction in-
dicators being activated. The function
alerts the driver by means of a beep
and, depending on the vehicle, the vis-
ibility indicators 4 change to red, or the
graphic 5 is displayed on the instrument
panel.Activation/deactivation
Vehicles fitted with a navigation
system
From the multifunction screen 1: select
“vehicle”, “Driving assistance”, “Lane
departure warning”, then choose “ON”
or “OFF”.
Vehicles not fitted with a navigation
system
Press the switch 3.
Operation
When the function is activated, the vis-
ibility indicators 4 for the left and right
lines are displayed in grey on the instru-
ment panel.
You can access menu “Driving as-
sistance” directly from button 2
\b.
2
3
1
45
Page 156 of 346
2.44
Activation/deactivation
Vehicles fitted with a navigation
system
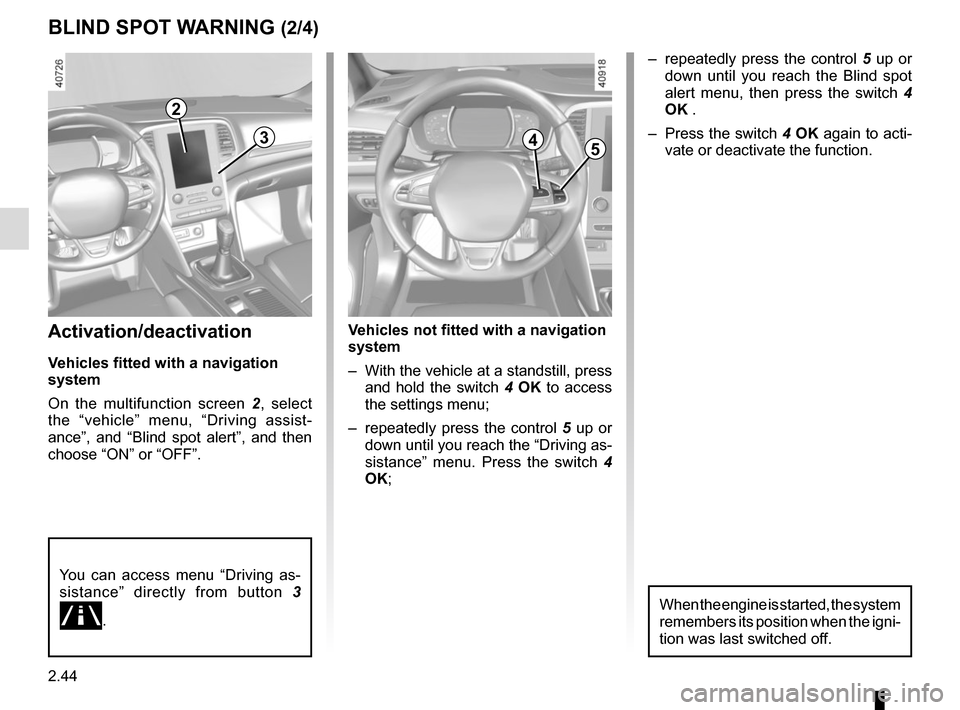
On the multifunction screen 2, select
the “vehicle” menu, “Driving assist-
ance”, and “Blind spot alert”, and then
choose “ON” or “OFF”.
You can access menu “Driving as-
sistance” directly from button 3
\b.
Vehicles not fitted with a navigation
system
– With the vehicle at a standstill, press
and hold the switch 4 OK to access
the settings menu;
– repeatedly press the control 5 up or
down until you reach the “Driving as-
sistance” menu. Press the switch 4
OK;
BLIND SPOT WARNING (2/4)
– repeatedly press the control 5 up or
down until you reach the Blind spot
alert menu, then press the switch 4
OK .
– Press the switch 4 OK again to acti-
vate or deactivate the function.
45
When the engine is started, the system
remembers its position when the igni-
tion was last switched off.
3
2
Page 159 of 346
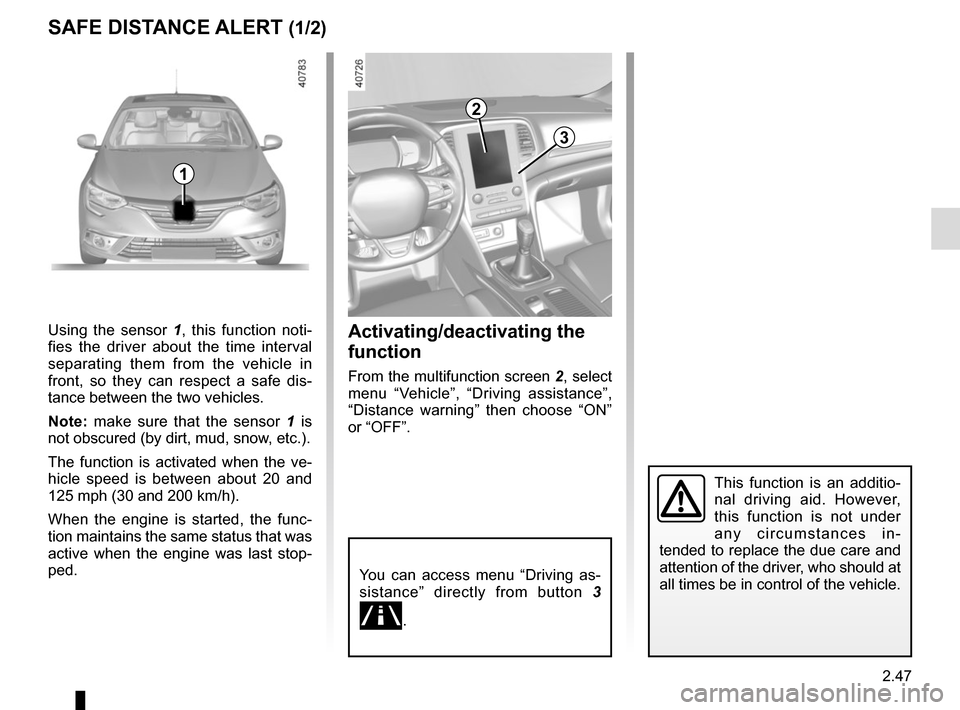
2.47
SAFE DISTANCE ALERT (1/2)
Activating/deactivating the
function
From the multifunction screen 2, select
menu “Vehicle”, “Driving assistance”,
“Distance warning” then choose “ON”
or “OFF”.
1
Using the sensor 1 , this function noti-
fies the driver about the time interval
separating them from the vehicle in
front, so they can respect a safe dis-
tance between the two vehicles.
Note: make sure that the sensor 1 is
not obscured (by dirt, mud, snow, etc.).
The function is activated when the ve-
hicle speed is between about 20 and
125 mph (30 and 200 km/h).
When the engine is started, the func-
tion maintains the same status that was
active when the engine was last stop-
ped.
You can access menu “Driving as-
sistance” directly from button 3
\b.
This function is an additio-
nal driving aid. However,
this function is not under
any circumstances in-
tended to replace the due care and
attention of the driver, who should at
all times be in control of the vehicle.
3
2
Page 161 of 346
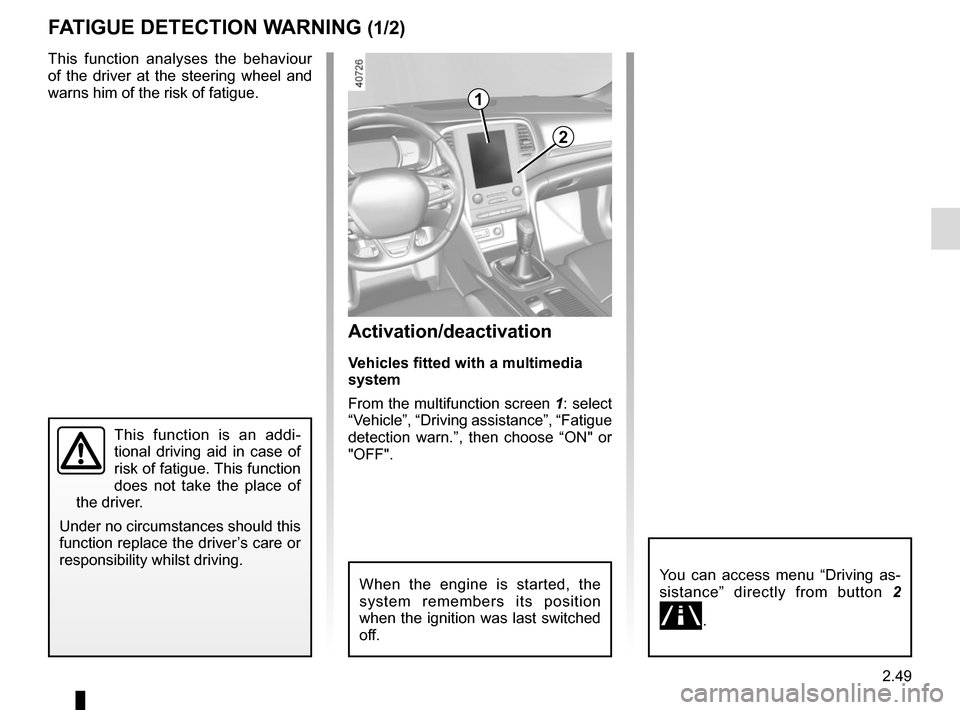
2.49
FATIGUE DETECTION WARNING (1/2)
This function analyses the behaviour
of the driver at the steering wheel and
warns him of the risk of fatigue.
This function is an addi-
tional driving aid in case of
risk of fatigue. This function
does not take the place of
the driver.
Under no circumstances should this
function replace the driver’s care or
responsibility whilst driving.
Activation/deactivation
Vehicles fitted with a multimedia
system
From the multifunction screen 1: select
“Vehicle”, “Driving assistance”, “Fatigue
detection warn.”, then choose “ON" or
"OFF".
You can access menu “Driving as-
sistance” directly from button 2
\b.
2
1
When the engine is started, the
system remembers its position
when the ignition was last switched
off.
Page 167 of 346
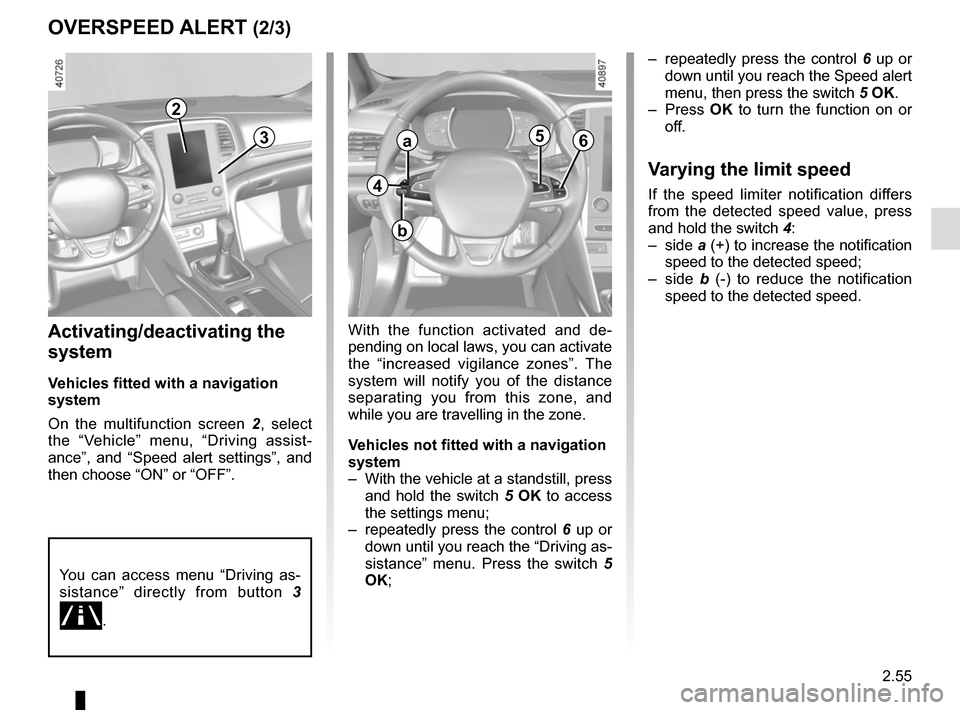
2.55
OVERSPEED ALERT (2/3)
Activating/deactivating the
system
Vehicles fitted with a navigation
system
On the multifunction screen 2, select
the “Vehicle” menu, “Driving assist-
ance”, and “Speed alert settings”, and
then choose “ON” or “OFF”.
With the function activated and de-
pending on local laws, you can activate
the “increased vigilance zones”. The
system will notify you of the distance
separating you from this zone, and
while you are travelling in the zone.
Vehicles not fitted with a navigation
system
– With the vehicle at a standstill, press and hold the switch 5 OK to access
the settings menu;
– repeatedly press the control 6 up or
down until you reach the “Driving as-
sistance” menu. Press the switch 5
OK; – repeatedly press the control
6 up or
down until you reach the Speed alert
menu, then press the switch 5 OK.
– Press OK to turn the function on or
off.
Varying the limit speed
If the speed limiter notification differs
from the detected speed value, press
and hold the switch 4:
– side a (+) to increase the notification
speed to the detected speed;
– side b (-) to reduce the notification
speed to the detected speed.
You can access menu “Driving as-
sistance” directly from button 3
\b.
4
a
b
563
2
Page 191 of 346
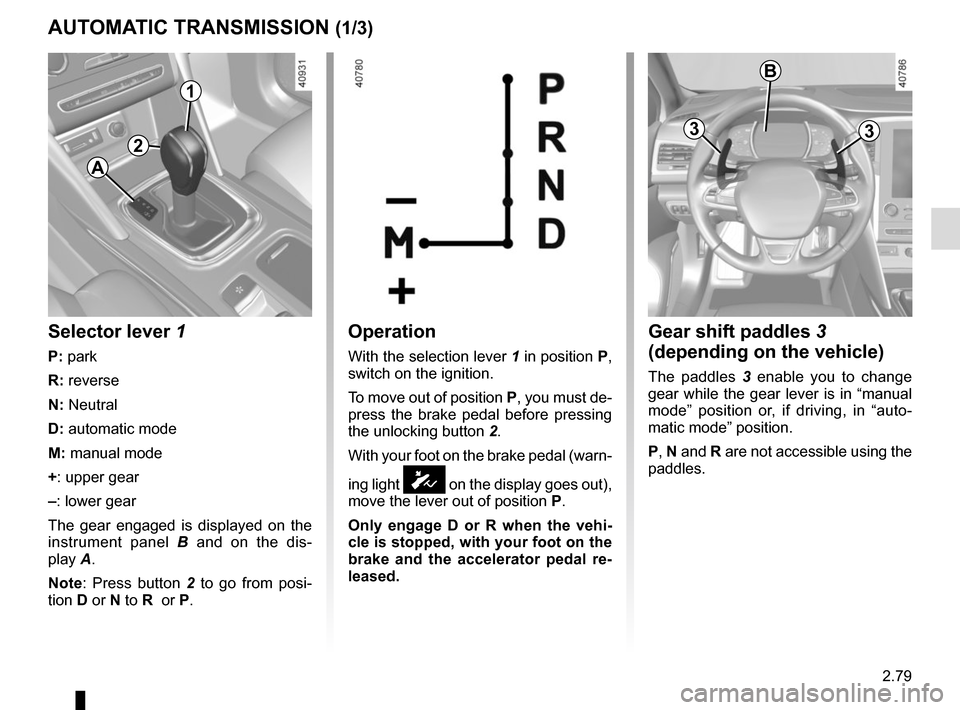
2.79
Operation
With the selection lever 1 in position P,
switch on the ignition.
To move out of position P, you must de-
press the brake pedal before pressing
the unlocking button 2.
With your foot on the brake pedal (warn-
ing light
Ó on the display goes out),
move the lever out of position P.
Only engage D or R when the vehi-
cle is stopped, with your foot on the
brake and the accelerator pedal re-
leased.
Selector lever 1
P: park
R: reverse
N: Neutral
D: automatic mode
M: manual mode
+: upper gear
–: lower gear
The gear engaged is displayed on the
instrument panel B and on the dis-
play A.
Note: Press button 2 to go from posi-
tion D or N to R or P.
AUTOMATIC TRANSMISSION (1/3)
A
Gear shift paddles 3
(depending on the vehicle)
The paddles 3 enable you to change
gear while the gear lever is in “manual
mode” position or, if driving, in “auto-
matic mode” position.
P, N and R are not accessible using the
paddles.
33
1
2
B
Page 193 of 346
2.81
AUTOMATIC TRANSMISSION (3/3)
Parking the vehicle
When the vehicle is stopped, move the
lever to position P while keeping your
foot on the brake pedal: the gearbox is
in neutral and the drive wheels are me-
chanically locked by the driveshaft.
Apply the handbrake or, depending
on the vehicle, ensure that the elec-
tronic parking brake is applied.
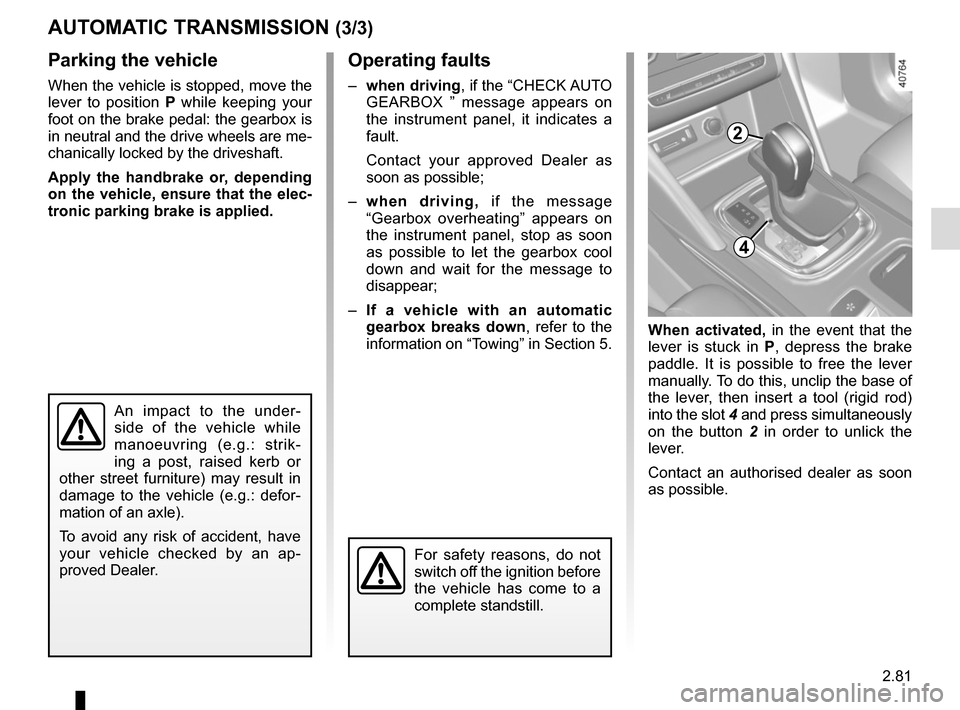
When activated, in the event that the
lever is stuck in P, depress the brake
paddle. It is possible to free the lever
manually. To do this, unclip the base of
the lever, then insert a tool (rigid rod)
into the slot 4 and press simultaneously
on the button 2 in order to unlick the
lever.
Contact an authorised dealer as soon
as possible.
Operating faults
– when driving , if the “CHECK AUTO
GEARBOX ” message appears on
the instrument panel, it indicates a
fault.
Contact your approved Dealer as
soon as possible;
– when driving, if the message
“Gearbox overheating” appears on
the instrument panel, stop as soon
as possible to let the gearbox cool
down and wait for the message to
disappear;
– If a vehicle with an automatic
gearbox breaks down, refer to the
information on “Towing” in Section 5.
For safety reasons, do not
switch off the ignition before
the vehicle has come to a
complete standstill.
An impact to the under-
side of the vehicle while
manoeuvring (e.g.: strik-
ing a post, raised kerb or
other street furniture) may result in
damage to the vehicle (e.g.: defor-
mation of an axle).
To avoid any risk of accident, have
your vehicle checked by an ap-
proved Dealer.
4
2
Page 197 of 346
3.3
MULTI-SENSE (2/2)Accessing the menu
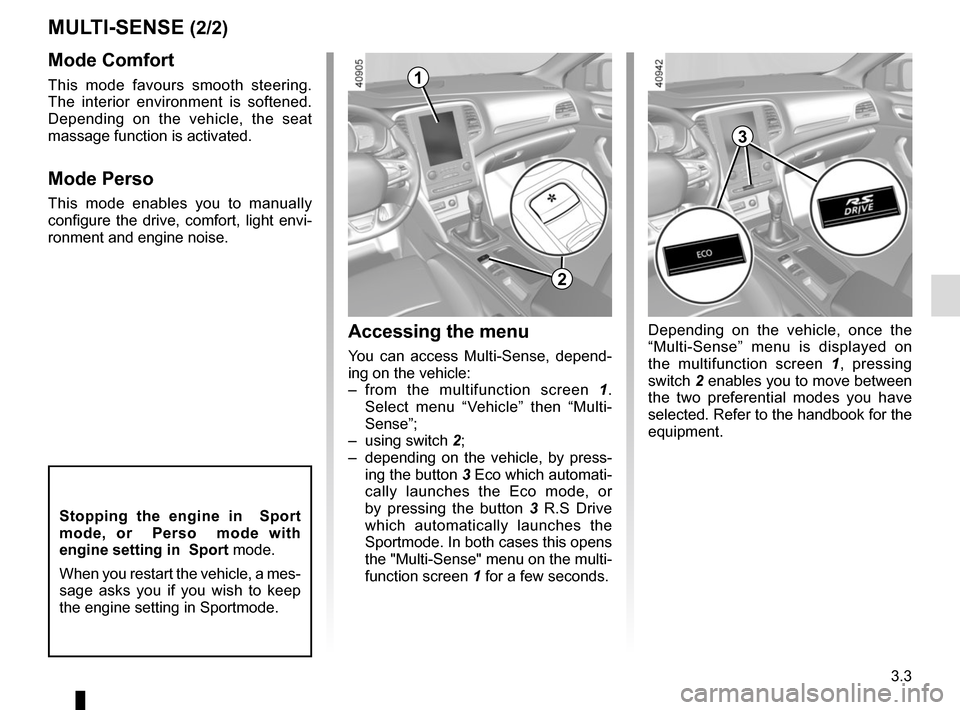
You can access Multi-Sense, depend-
ing on the vehicle:
– from the multifunction screen 1.
Select menu “Vehicle” then “Multi-
Sense”;
– using switch 2;
– depending on the vehicle, by press- ing the button 3 Eco which automati-
cally launches the Eco mode, or
by pressing the button 3 R.S Drive
which automatically launches the
Sportmode. In both cases this opens
the "Multi-Sense" menu on the multi-
function screen 1 for a few seconds.
Mode Comfort
This mode favours smooth steering.
The interior environment is softened.
Depending on the vehicle, the seat
massage function is activated.
Mode Perso
This mode enables you to manually
configure the drive, comfort, light envi-
ronment and engine noise.
1
2
3
Depending on the vehicle, once the
“Multi-Sense” menu is displayed on
the multifunction screen 1 , pressing
switch 2 enables you to move between
the two preferential modes you have
selected. Refer to the handbook for the
equipment.
Stopping the engine in Sport
mode, or Perso mode with
engine setting in Sport mode.
When you restart the vehicle, a mes-
sage asks you if you wish to keep
the engine setting in Sportmode.